
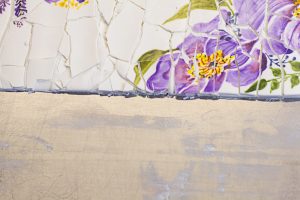
Create this modern-mosaic design inspired by this year’s Pantone Color of the Year: Ultra Violet. “I was inspired by a beautiful floral-mosaic design and thought that it would translate beautifully onto cake,” notes Rachel. Follow the steps in this easy step-by-step tutorial to create your own edible mosaic!
Painted Mosaic Fondant Tutorial
by Rachel Grady
Components:
- Prepared cake covered with white fondant
- White gum paste
- 4″ PVC pipe cut in half lengthwise and cut into shorter sections
- Gel paste food colors: purple, green, lavender, pink, orange, and yellow
- Clean paintbrushes (I used size 2 and size 0 round brushes)
- Water
- Paint palette (a disposable plate works just fine)
- Vegetable shortening
- Rolling pin
- Bench scraper
- Scissors
- Razor blade
Preparing the Gum Paste for the Mosaic
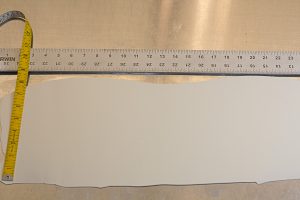
To Prepare: Measure the height of the cake as well as the circumference to determine the size panel needed.
Rachel notes: Due to the dry time of the panel, you might want to measure a cake dummy or pan and calculate height instead.
Step 1: Roll out a gum–paste panel to at least the dimensions measured previously. The thickness of the panel will affect how deeply the tiles crack as well as the final look.
Rachel notes: I rolled the panel to approximately 1/8 inch to create slightly larger/thicker tiles. Fondant can be used as well, but I chose gum paste for the faster drying time.
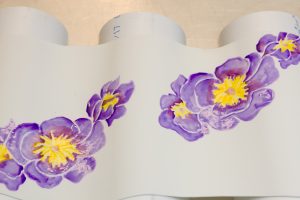
Step 2: Drape the gum paste over the clean PVC pipe on a large cookie sheet and allow to dry. The cookie sheet allows the panel to be moved out of the way during drying time.
Rachel notes: Drying the panel curved makes it easier to crack later.

Painting the Watercolor Florals
Step 1: Prepare a paint palette by placing any gel paste colors you want to use onto the palette. Using the gel pastes diluted with water, paint the chosen design onto the gum paste. Don’t be afraid to add water to the painting in order to blend. Just keep in mind that gravity will affect where the water wants to go on the curved surface.
Step 2: Add in some painted leaves and buds and some filler items. Don’t agonize over the perfection since the entire panel will be shattered. Allow the painting to dry completely.


Creating the Mosaic
Step 1: Once the panel is completely dry, roll out a fresh piece of fondant to the original dimensions. In other words, it needs to be big enough to wrap around the cake.

Step 2: Rub shortening all over this panel and then transfer your painted piece onto the fresh fondant.

Step 3: Start cracking! First, press down with your hands to break the areas that curved upward from where they dried.
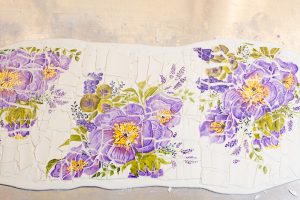
Step 4: Use a rolling pin to roll the pieces into the fresh fondant. This will cause more cracking, creating even more mosaic tiles.
Rachel notes: If there are still some areas where the pieces are too big, feel free to go back in and break some areas by hand until you are happy with the cracking pattern.
Applying the Mosaic
Step 1: Before transferring the mosaic to the cake, you need a straight edge to line up with the bottom edge of the cake. With the dried gum–paste tiles, you can’t exactly just cut it with a knife. So, grab a bench scraper and press the edge straight down to crack through your tiles and cut the fondant behind them at the same time. Keep working across in sections until you have a straight edge all the way down.
Rachel notes: The edge won’t be completely perfect with this method, but it lends itself well to the overall mosaic look.
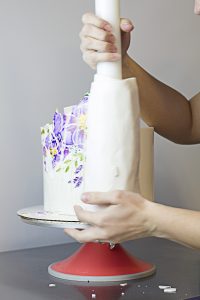
Step 2: Rub shortening all over the sides of your fondant-covered cake then roll the mosaic panel around a rolling pin. Move the rolled piece over to the cake and gently unroll the gum–paste panel around the cake, pressing gently to adhere it to the surface of the cake as you go.
Rachel notes: This is a large piece to transfer so I strongly encourage working in smaller sections if this makes you nervous. Just cut between tiles to create smaller pieces and match up the edges as you apply to the cake.

Step 3: You can reapply any fallen tile pieces by hand, so don’t panic if pieces fall off during the application process. It all adds to the rustic presentation of the mosaic.
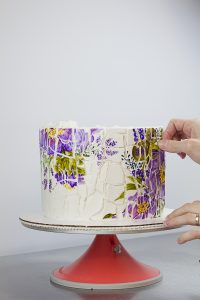
Cleaning Up the Top Edge
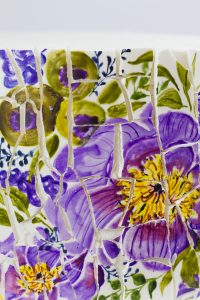
Step 1: Once the mosaic panel is applied, the top edge will look rather messy. The easiest way I found to straighten it out is with scissors. Grab some clean scissors and simply cut through the tiles along the top edge.

Step 2: To make the top edge look as neat as possible, go back with a razor blade and cut right along the top edge of the cake to trim the fondant panel that the tiles are adhered to.


