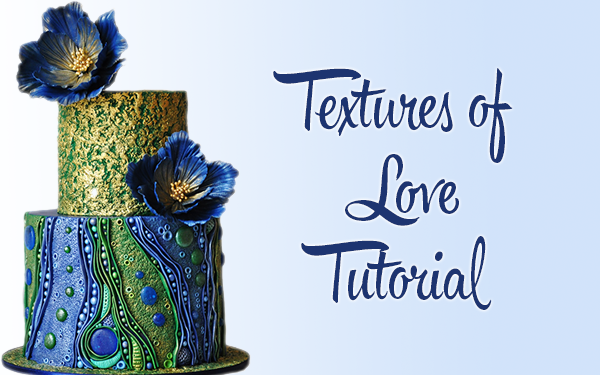
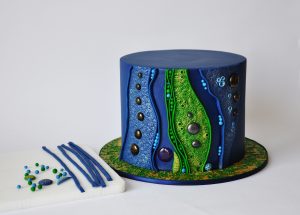
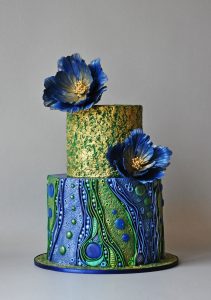
Sometimes the most simple techniques can yield the most impressive results. Mariela Ivanova embodies that statement in this Textures of Love cake tutorial, putting everyday, household items to good use, with this bold, modern, textural design.
Textures of Love
by Mariela Ivanova
Components:
7″; round x 6″; cake
5″; round x 4.5″; cake
Dark blue and green fondant
Navy blue, royal blue, leaf green food color gel
Edible gold liquid food paint
White and gold edible luster dust
Edible glue
100g isomalt
Plastic cleaning brush
Detail knife/X-Acto
Ball modeling tool
Sharp modeling tool
Flat and round paintbrushes
Rolling pin
Ruler
Aluminum foil
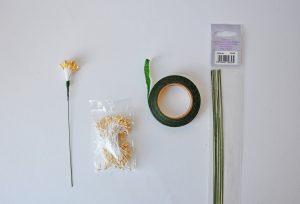
24-gauge floral wires
Peony cutters and peony silicone veiners
Green floral tape
Stamens
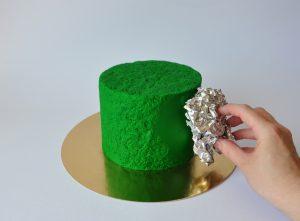
1. Prepare the cakes by covering the 5" tier with green fondant. To texturize the fondant, press a crumpled piece of aluminum foil all over the surface; this will create the wrinkled texture.
Mariela notes: The more pressure you apply, the more defined the texture will be, so make sure that the fondant layer is at least 5mm thick.
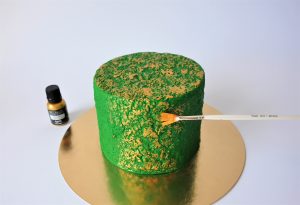
2. Using a flat, food-safe paintbrush, apply gold liquid food color onto the cake. Brush very lightly so that only the convex parts are covered with paint.
Mariela notes: This will highlight the raised areas of the texture and make them more defined.
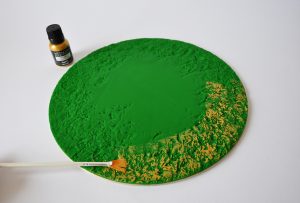
3. Use the same techniques from steps 1 and 2 on the cake board, and allow it to dry.
Mariela notes: You can speed up the drying time by placing the covered board in a slightly warm oven at 170 degrees Fahrenheit, for 10 minutes, and then allowing it to cool completely.
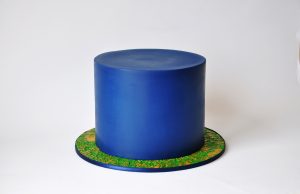
4. Cover the 7" cake with dark blue fondant and place it on the cake board. Secure the cake with a little bit of melted chocolate.
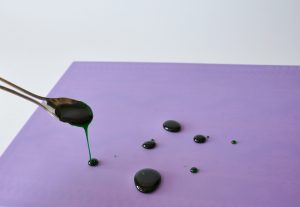
5. Melt the isomalt as directed by the instructions, and color half of the isomalt blue and the other half green. Using a spoon, drop beads of the isomalt onto a non-stick silicone mat to create different-size gems. Allow the gems to cool before removing.
Mariela notes: Please take caution when using isomalt, wearing a couple of layers of food-safe gloves will prevent any serious burns.
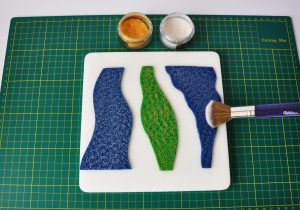
6. Roll out thin layers of blue and green fondant, then, press the cleaning brush over them to create a grain texture. Cut irregular shapes out of the blue and green textured layers. Make sure the height of these shapes doesn’t exceed the height of your cake tier. Next, use a large dusting brush to apply white and gold edible luster dust over them before allowing the pieces to dry for about an hour.
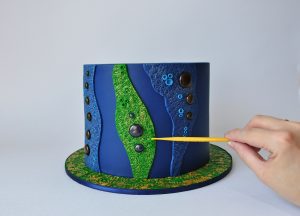
7. Glue the textured pieces onto the cake leaving some space between each piece. Next, use edible glue or piping gel to secure the isomalt gems onto the textured pieces. Roll out a few small fondant balls and secure to the cake. Using a small ball tool, make indentations.
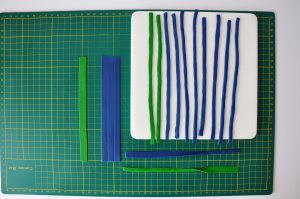
9. Roll out pieces of blue and green fondant to about 1mm thick. Cut even strips about ½" wide using a ruler and a detail knife. Fold the strips in half.
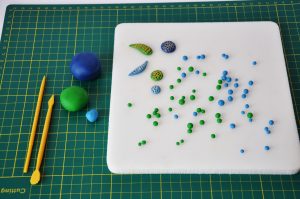
10. Roll blue and green fondant into small balls of various sizes. Make different kinds of organic or stone-like shapes, then, use a sharp tool, cutting tool, and a ball tool to add texture as shown.
11. Start filling the spaces between the textured appliqué pieces on the 7" cake with the folded strips, fondant balls, and the rest of the decorations you prepared.
Mariela notes: There is no specific pattern, just try to achieve a fluid, organic look.
Fantasy Peonies
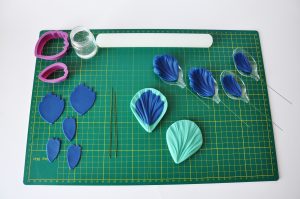
1. Add a small amount of tylose powder to a piece of blue fondant and roll it out to a thickness of 1–2mm using a groove board. Use the smallest and the second largest peony cutters to cut out 10 petals of each size and set aside. Next, cut the 24-gauge wires into three equal lengths, and push a length of the wire into the groove of each petal. Use a silicone peony veiner to add texture. Lay each petal onto a spoon and gently bend the edges of the petals back over the sides of the spoon. Allow the petals to dry completely.
2. Take a 24-gauge wire and bend the top into a hook. Place the hook in the middle of a group of stamens and wrap the wire around the stems to fix in place. Bend both ends of the stamens toward each other and fix in place with some green floral tape.
3. Paint the stamens with gold liquid food color. Brush the petals very lightly with white and gold luster dust to highlight their texture. Then, use floral tape to assemble the petals together starting with the stamens and the smaller petals, followed by the larger petals. Each flower should be comprised of 5 small petals and 5 larger petals.
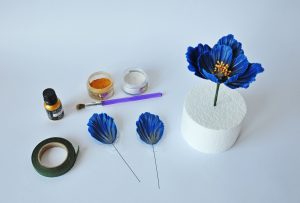
4. Place the 5″ cake on top of the bottom tier. Carefully brush every detail of the bottom tier with white and gold luster dust to add a finishing touch. Arrange the flowers on the cake using floral picks or straws.


