
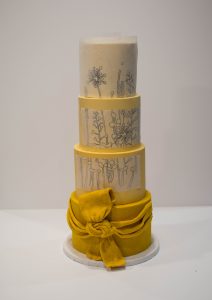
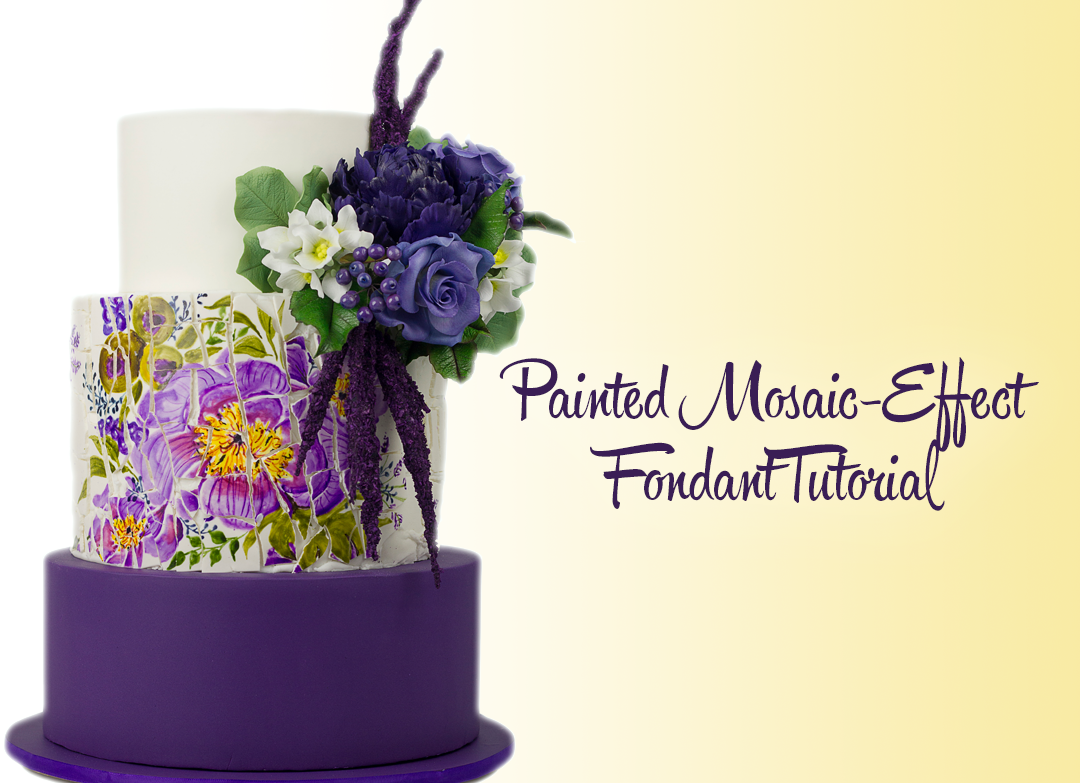
Inspired by Mid-Century Modern design, our May/June issue showcase contributor, Lisa Herrera created a beautiful painted wedding cake. Lisa shares a simple step-by-step tutorial for creating the delicately painted flowers. To see more gorgeous wedding cakes, and to access over 12 premium tutorials, pick up a copy of our Wedding Trends issue, out now!
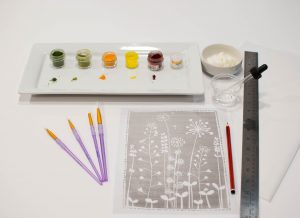
Components:
*Non-toxic graphite pencil
* Parchment paper
* Vegetable shortening
* Ruler
* Vodka or lemon extract
* Scissors
* Variety of paint brushes
* Variety of petal dust
* Paint palette or plate
* Dropper
* Print of image
* Scissors
Step 01:
First, you will need to figure out how big you want your design to be. You can use a ruler or measuring tape to measure the surface area of where you’d like the design to begin and end. Have your cake fully covered in fondant and ready to design.

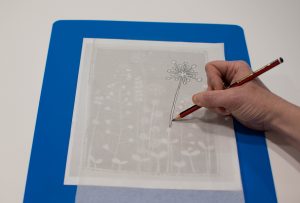
Step 02:
Once you know how large you want your section, you will need to print out the image you want to transfer and size it to the dimensions you need. Also cut a piece of parchment to fit your image. Place your image under a piece of parchment paper, you can secure it with a little tape to prevent shifting. Taking the non-toxic graphite pencil, trace the image onto the parchment paper with a decent amount of pressure to transfer the marking.
Lisa notes: Keep in mind how you would like your image to be on your cake. You may need to flip the image over to get a mirror image. The parchment is thin enough for you to still see to trace.
Step 04:
Now that you have the image traced onto your parchment paper, we need to get the cake ready by applying a thin layer of vegetable shortening. This allows the pencil markings to be left behind as a guideline.
Lisa notes: Be sure to wipe off any excess shortening. You want a very thin layer.
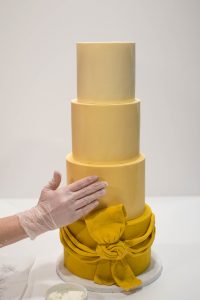
Step 05:
The image is now ready to be transferred onto the cake. Place it carefully onto the cake and mark where the image needs to be trimmed at the tier boundaries. Trim the parchment to size and then apply. Gently rub the image to smooth it to the cake and transfer the image to the cake beneath.
Step 06:
Carefully remove the parchment paper and you’ll see the image transferred onto the cake. All of it may not have transferred over, and that’s OK. You can fill it in as you paint. The transfer will give you a great place to start.
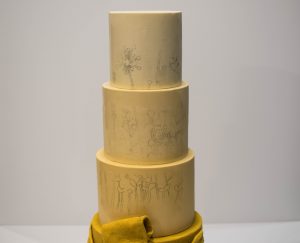
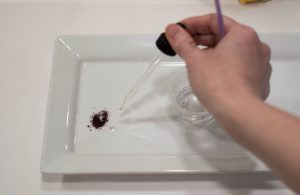
Step 07:
Now Let’s do the fun stuff, Paint! I used petal dust mixed with clear alcohol or you could use lemon extract to make a paint. Put a little bit of dust on your palate (you can have all your paint together, so you can mix colors if you want), and add vodka a little at a time till you get the consistency of nail polish.
Lisa notes: You can use a dropper to add the vodka. This allows you to add a little at a time.
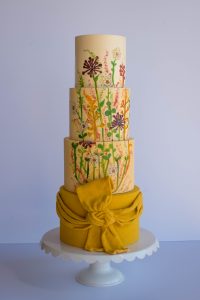
Step 8:
Paint away!! You can really use this as a creative way to express yourself. You can stay within the lines or add your own flare. Having the stencil helps to give you a head start. Painting can be scary, but so fun!
Lisa notes: If you make a mistake, you can use a q-tip and a little vodka!


