
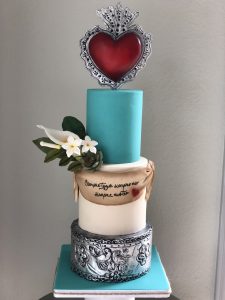
Satin Ice Artist of Excellence, Mary Carmen shares a fabulous mini-tutorial to create the gorgeous 3-d fondant effect from her “My Heart is Yours” wedding cake featured in our May issue.
Components:
- Parchment paper and pencil
- Satin Ice Fondant (Black)
- Rolling pin
- X-acto Knife
- Fondant Smoothers
- Pouch with cornstarch
- Vegetable Shortening
- Pins
- Dresden Tool
- Turntable
- Non-stick Cooking spray
- Gum Paste
- Sugar Shapers
- Crimper of your choice
- Stitching tool
- Brushes, different sizes and shapes, DRY
- Silver Highlighter
- Luster dust: Yellow and different shades of brown for the banner, brown and red for heart
- Edible Marker
- Sugar glue
- Skewers
- Confectioners Glaze Spray
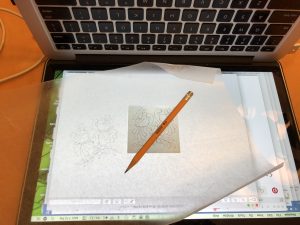
To Create the bas-relief effect bottom tier, we first need to choose a design to replicate. You can find a design online or by searching stock images. Either print the design or if you have a large tablet, place a piece of parchment directly over and trace the design as shown.
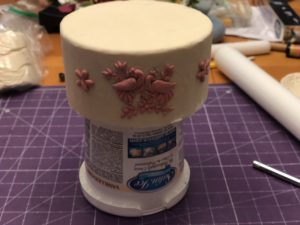
As I used dummy cakes, I covered the base with a very thin layer of fondant so the pattern I choose would be easier to adhere to the cake. If you are using a real cake, use ganache or Swiss meringue buttercream (something that sets firm) you can skip that step. Using the parchment as a template. Begin by filling in the design using small pieces of gum paste. Once complete, transfer the design to the cake.

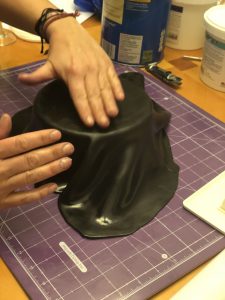
Knead some black Satin Ice fondant with shortening to condition it and roll it out to about ¼ of an inch. Cover the cake making sure to smooth all of the air out from under the fondant. Keep working on it until you have a perfect fondant covered cake. I love working with Satin Ice because it always gives me such a flawless satin finish!
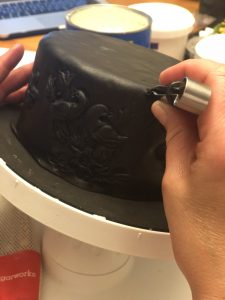
13. Using some sugar shapers, or soft-tipped modeling tools, start going over the design, pressing the fondant around the relief to bring out the pattern below. Don’t worry if you miss something, remember this is a work of an artist and nobody will notice 😉
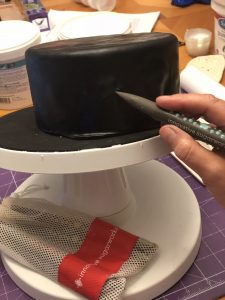
To finish the design, use your favorite crimper around the top and bottom edge of the cake.
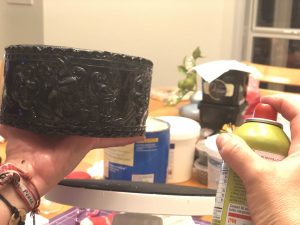
When you are all done, spray a little of non-stick cooking spray, and remove the excess with a clean brush.
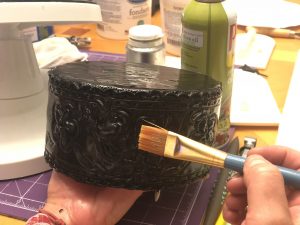
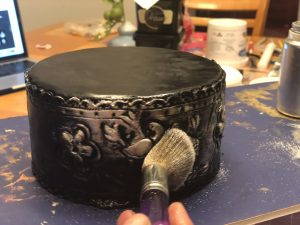
19. To really bring out the beauty of the design, brush a little silver highlighter or edible silver luster onto the design.
