
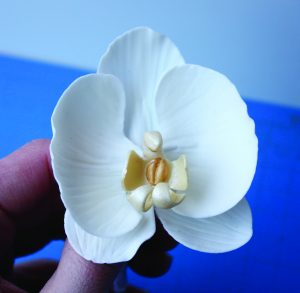
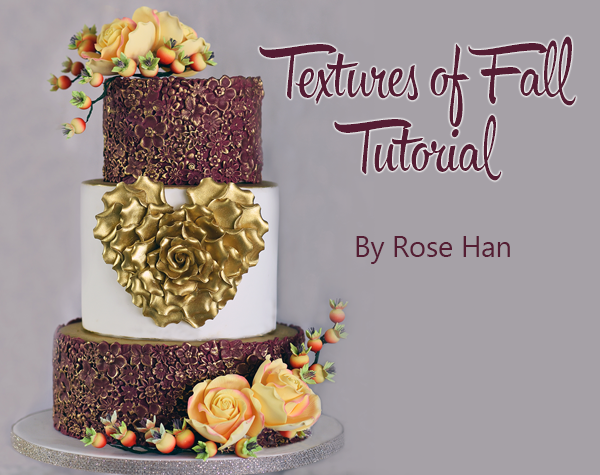
Orchids epitomize luxury and opulence; these colorful, exotic blooms add a touch of couture-elegance to any cake design. Veronique de Groot notes, “These couture orchids are unique because they are entirely handmade, eliminating the need for expensive cutters.” Learn to create these stunning florals with this step-by-step tutorial.
Components
- Sugar glue
- Gum paste (white and light yellow)
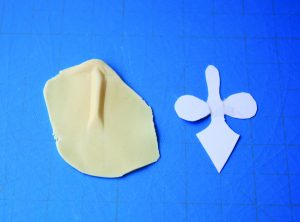
- Handmade petal, sepal and lip templates
- Scissors
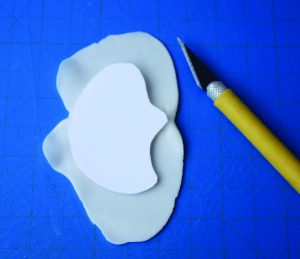
- X-Acto knife
- Small rolling pin
- 24g white floral wire (cut into 3″ lengths)
- Floral veiner (optional)
- Ball tool
- CelPad
- CelBoard
- Apple tray (or something curved to dry petals on)
- Plastic egg carton
- Super pearl luster dust
- Gold luster dust
- Palette knife
- White floral tape
- Paintbrush
- Vodka
To Prepare: Cut out orchid petal, sepal, and lip templates. (See template design)
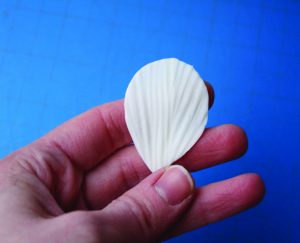
Left and Right Petals
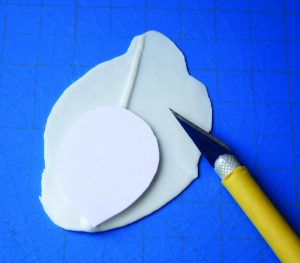
1. Roll out a small piece of white gum paste on a CelBoard.
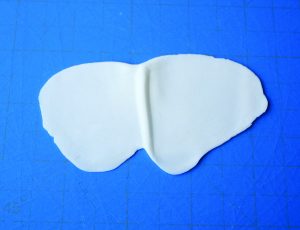
2. Using the petal template, cut out the left orchid petal.
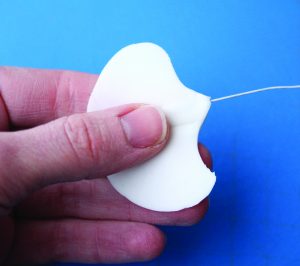
3. Next, dip a floral wire into sugar glue and insert it into the center of the petal.
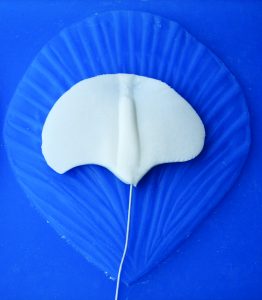
4. Press the petal into a veiner of your choice. Be sure to place the veins in the proper direction (horizontal, fanning outward from the center/wire).
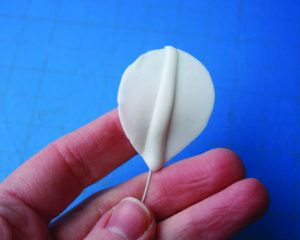
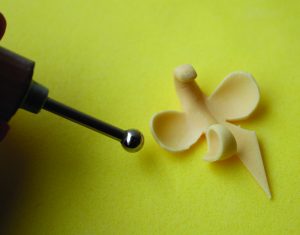
5. Place the petal on a CelPad or foam pad and lightly thin out the petal edges with a ball tool.
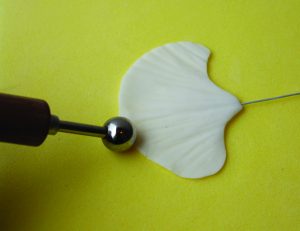
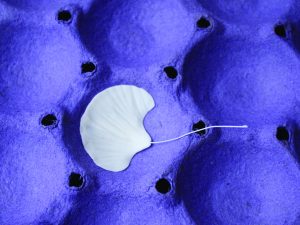
6. Place the petal to dry (face side upward) into an apple tray or something that is slightly curved.
Veronique notes: Repeat these steps to make the right side petal by flipping the template over.
Sepals
1. Roll out a small piece of white gum paste onto the CelBoard, then cut the top sepal using the top sepal template.
2. Next, dip a floral wire into the sugar glue and then insert it into the center of the top sepal.
3. Vein the sepal and thin out the edges with a ball tool on a CelPad. Allow the petal to dry on the apple tray, face side up.

4. Repeat steps 9-12 to create the bottom and right sepals except this time using the bottom sepal template.

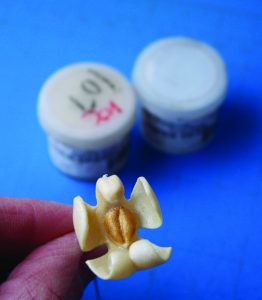
Orchid Center (Lip)
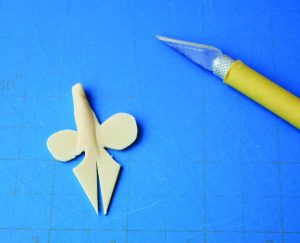
1. Roll a small amount of yellow gum paste onto the CelBoard.
2. Cut the orchid lip (center) with the template
Veronique Notes: Make sure to align the top part of the lip with the thicker stem created by the CelBoard.
3. Using the ball tool on the CelPad, roll the left and right wings inward by pushing pressure toward the center.
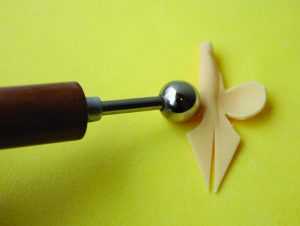
4. Repeat the last step to curl the bottom tendrils inward toward the center (cut them in two sections first).
5. Curve the top down toward the center and place a small ball of yellow gum paste in the center of the lip to make the heart of the orchid. Use a palette knife to draw a line down the heart’s center. Then insert a wire through the top of the center.
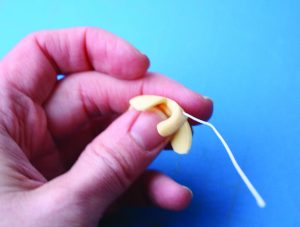
6. Place the orchid lip to dry in a plastic egg compartment.
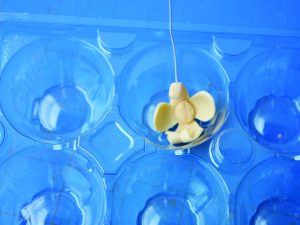
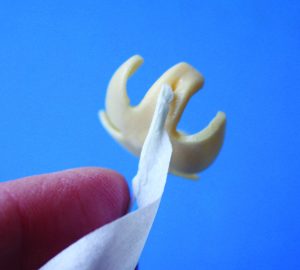
7. Once the center is dry (approx. 24 hours), paint the entire surface with super pearl luster dust (mixed with vodka) and then paint the center heart with gold luster dust. Allow the center to dry completely.
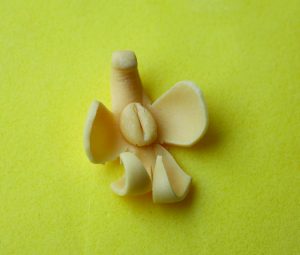
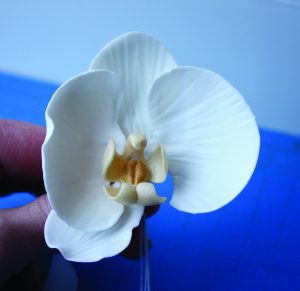
Constructing the Orchid
1. Wrap the wire of the orchid lip with white floral tape.
2. Add the left petal followed by the right pedal.
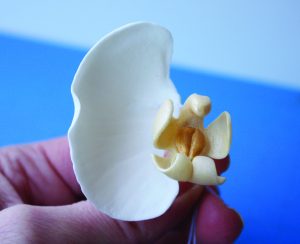
3. Add the top sepal, then bottom left sepal and last, the bottom right sepal. You will be left with a beautiful couture orchid.

