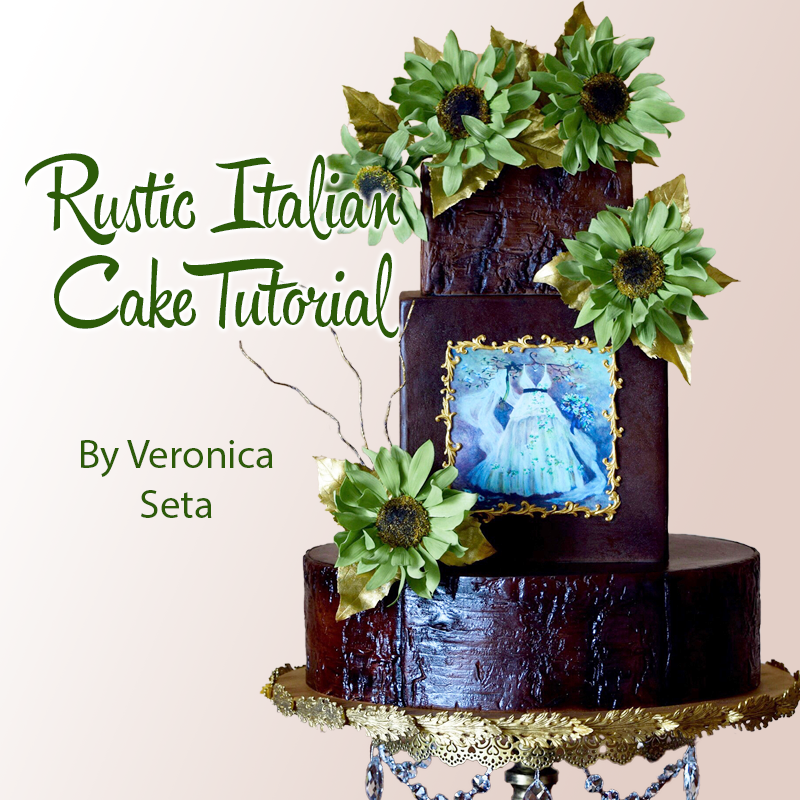
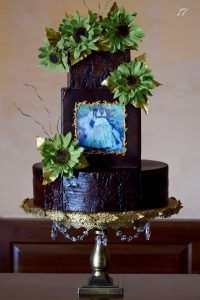
Award-winning sugar artist, Veronica Seta shares a wonderful tutorial for a rustic Italian-style cake. “I imagined this rustic wedding cake as a creation based on my love for dark romantic colors. The design is simple but features glorious fantasy flowers and precious gold. A perfect mixture for a very special day,” notes Veronica.
Components:
- 3 kg white Satin Ice fondant
- Dusting colors: brown, black, foliage green, autumn gold
- Airbrush colors: yellow, green, brown and black
- 200 g 100% edible porcelain (Cake & Cake) or gum paste (Satin Ice).
- Edible glaze
- Edible glue
- Gold spray or airbrush color
- Printed sugar sheet, 13 x13cm (I used a wedding dress design)
- Shredded coconut
- CelPad
- Sunflower cutter, mold, and veiner
- Paint brushes
- Cake Tools: Ball tool, rolling pin, etc.
- 22-,30-, 26-gauge floral wires
- Pale green and brown floral tape
- Tinfoil
- Decorative Filigree Molds
- Tree Bark Mold (Karen Davies)
Creating the Decorative Cake Board
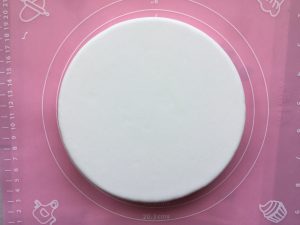
1. Roll out white fondant and cover a 16-inch cake board. Spray the fondant gold and leave to dry overnight.
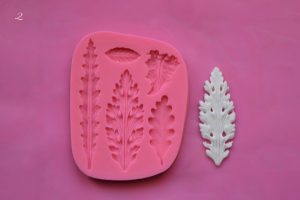
2. To create the decorative leaves, condition a small amount of white gum paste by kneading it with a tiny amount of vegetable shortening until pliable. Press the gum paste into a leaf mold, or similar mold. Trim away any excess and turn out. Create multiple leaves using the same technique.
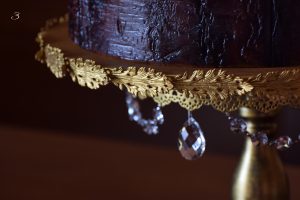
3 Attach the decorative leaves to the edges of your cake board using edible glue. Spray or airbrush the leaves gold and set it aside to dry. Once dry to the touch, add a little airbrushed black to give an antique effect.
Creating the Bark Effect
4. Condition thick strips of rolled out white fondant paste by kneading between the fingers with a little vegetable shortening and then press into a birch mold. Turn out the mold and set the mold aside. Repeat the previous step until you have enough molded pieces to cover the exterior of your bottom cake-tier.
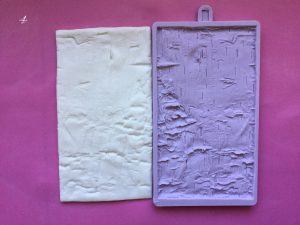
5. To prepare the cake, roll out white fondant to 1/8-inch thickness and cover your chilled and iced cake, smoothing and trimming as necessary. Cover the exterior of your cake with the molded pieces prepared in step 4.
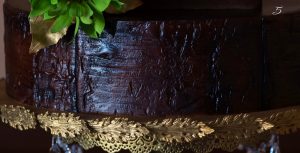
Veronica notes: Once the pieces have been positioned, airbrush them with dark brown and black. Place the cake onto the decorated drum.
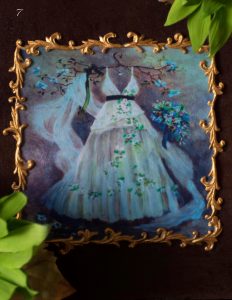
Creating the Decorative Plaque
6. Condition a small ball of modeling paste by kneading between the fingers with a little vegetable shortening and then press into a decorative mold. Turn out the mold and set the mold aside. Repeat the previous step until you have enough molded pieces to frame your edible-printing.

7. Roll out white fondant and cover an 8-inch square dummy. Airbrush the covered dummy with dark brown and black. With a bit of edible glue, stick the edible print on the front of your dummy and frame it with the molded pieces prepared in step 6.
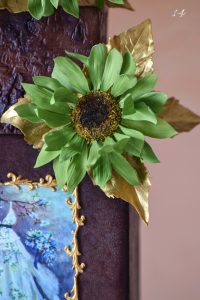
Creating the Decorative Sunflowers
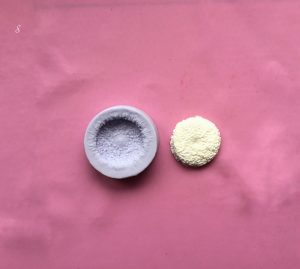
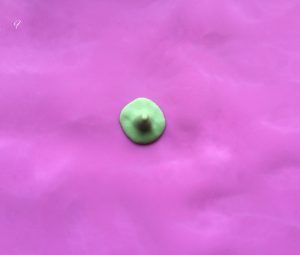
8. Press a small ball of modeling paste in a sunflower center mold and set the mold aside.
9. Mold a Mexican hat shape out of a small ball of modeling paste. Let it dry.
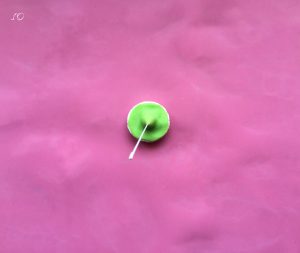
10. With a bit of edible glue, stick the Mexican hat onto the back of the sunflower center. Make a hook on a 22-gauge floral wire and insert it through the hat and the center of the flower.
11. Roll out some conditioned 100% edible porcelain or gum paste onto a groove board and cut out 175 sunflowers petals (30 petals each for 5 sunflowers and 25 for their calyxes).
Add a 30 gauge floral wire through the vein and press the petals between a petal veiner before thinning the edges with a ball tool. Allow to dry. Once dry, Airbrush the petals, mixing yellow and green.
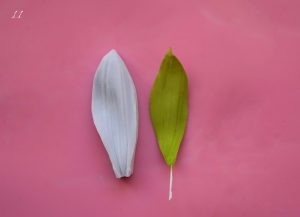
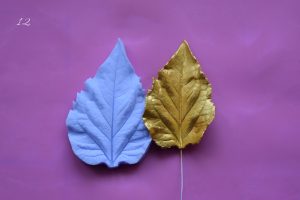
12. Roll out some conditioned 100% edible porcelain or gum paste onto a grove board and cut out 15 sunflower leaves. Add a 26-gauge floral wire through the vein and press between a leaf veiner before thinning the edges. Allow to dry. Color the leaves with a metallic gold and then airbrush the leaves with a bit of black to give an antique effect.
13. Group together 10 petals/leaves to create the sunflower’s calyx and secure with floral tape.

14. Color the shredded coconut with autumn gold. Dust the center of the flower with foliage green. Brush a bit of edible glue around and dip it in the colored coconut. Dust the center of the flower brown and a bit black. Glaze it. Insert the first 15 petals, one at a time, around the center. Add a second layer of 15 petals filling the gaps between the petals of the first layer. Group 3 gold leaves and secure all the way down the length of the wire with green floral tape.
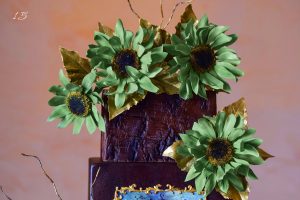
15. Cover the 6-inch square dummy, and adhere the strips prepared in step 4. Place three sunflowers on top and one at the right side.
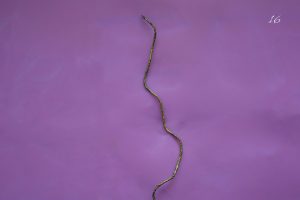
16. Cover a 26-gauge floral wire with brown flower tape and give it the shape of a small branch.
17. Place the last sunflowers on the left side of the second tier of your cake and embellish your creation with the decorative branches created in the previous step.
