
Wedding cake designer and sugar artist, Enrique Rojas created a stunning architectural cake inspired by an iconic Versace dress for our L’Amour Fashion issue. Enrique shares a simple step-by-step tutorial to recreate the design for yourselves.
Components:
- Gum paste
- Wafer paper
- Non-stick mat
- Rolling pins
- Knife cutter
- Cornflour for dusting
- Metal ruler
- Small scissors
- Dresden tool
- Edible glue and brush
- White royal icing
- Nozzles round #1.5
- Tracing paper
- Pencil
- Airbrush
- Dark copper dust
- Gold dust
- 00 fine brush
- Rejuvenator
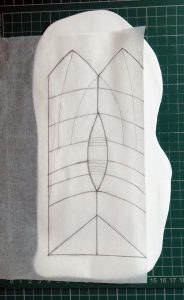
Step 1 – Draw the outline of the pattern of the folded element onto a piece of parchment paper as shown.

Step 2- Roll some white gum paste to 2 mm thickness, place the parchment stencil over the top, and with a pencil, trace the previously drawn pattern onto the paste.
Enrique notes: You can transfer the pattern onto fondant using pencils as long as your pencil does not contains lead. Modern pencils are made of Graphite which is non toxic to humans in small quantities but some pencils from dubious companies might have some other metals added in. Always check. If in doubt, use a scribe or a Dresden tool to emboss the pattern.
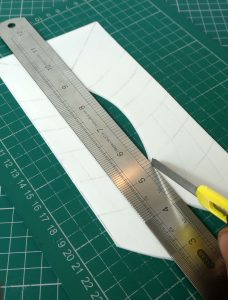
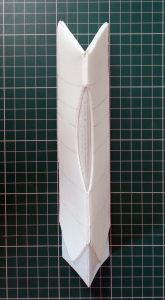
Step 3 – Using a metal ruler and a sharp knife, cut out the required shape as shown.

Step 4 – Cutout the little oval piece in the center of the folded piece as shown.

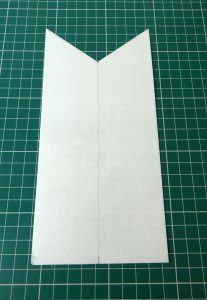
Step 5 – Make a full cut on the folded shape on the straight shorter side as shown.

Step 6 – Placing the ruler along the fold line, run the knife softly to score the paste and make folding easier. Do not fully cut through it.
Step 7 – Using the pattern, trace it onto a Wafer paper and cut the outline as shown.
Step 8 – Run the knife softly through the middle and fold it as shown.
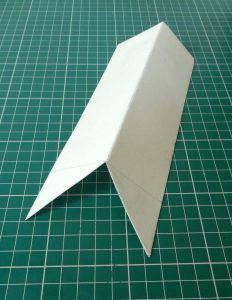
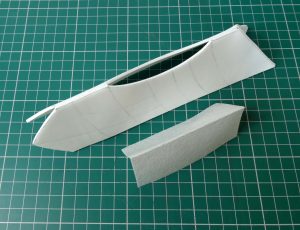
Step 9 – Lift the gum paste element and place it on top of the wafer paper as shown..
Step 10 – Fold inside the winglets on the skirt element as shown. Leave to dry overnight.

Enrique notes: Measure the perimeter of the tier to calculate the number of folded elements you need around the tier. In this project the tier is 7-inches and we used 11 folded skirt pieces.
Step 11 – Cut a small piece of wafer paper, big enough to cover the skirt element oval opening.
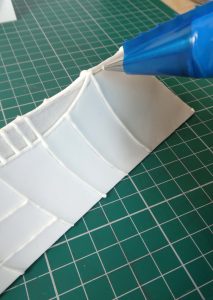
Steps 12-13 – Brush some edible glue on the inside of the element and press the wafer paper into it.


Steps 14-15 – Fit the #1.5 [or 1] nozzle onto a piping bag and fill with royal icing. Pipe lines of royal icing following the pattern previously transferred onto the skirt element as shown.

Steps 16–17 – Using the Dresden tool, make a deep incision onto the fondant as shown. It’s important that they be the exact same width of the skirt element as this will help to secure it to the tier with some royal icing as shown.
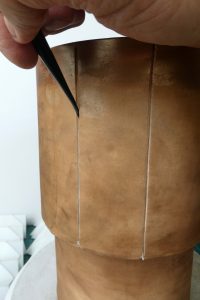

Step 18 – Repeat the above steps until you have the number of skirt elements required to go around the perimeter of the tier [ 11 in this project]. Mix dark copper and rejuvenator and airbrush the bottom-tier.

Step 19 – Mix some gold dust and rejuvenator and using a 00 Brush, paint the royal icing line pattern in gold as shown.


