
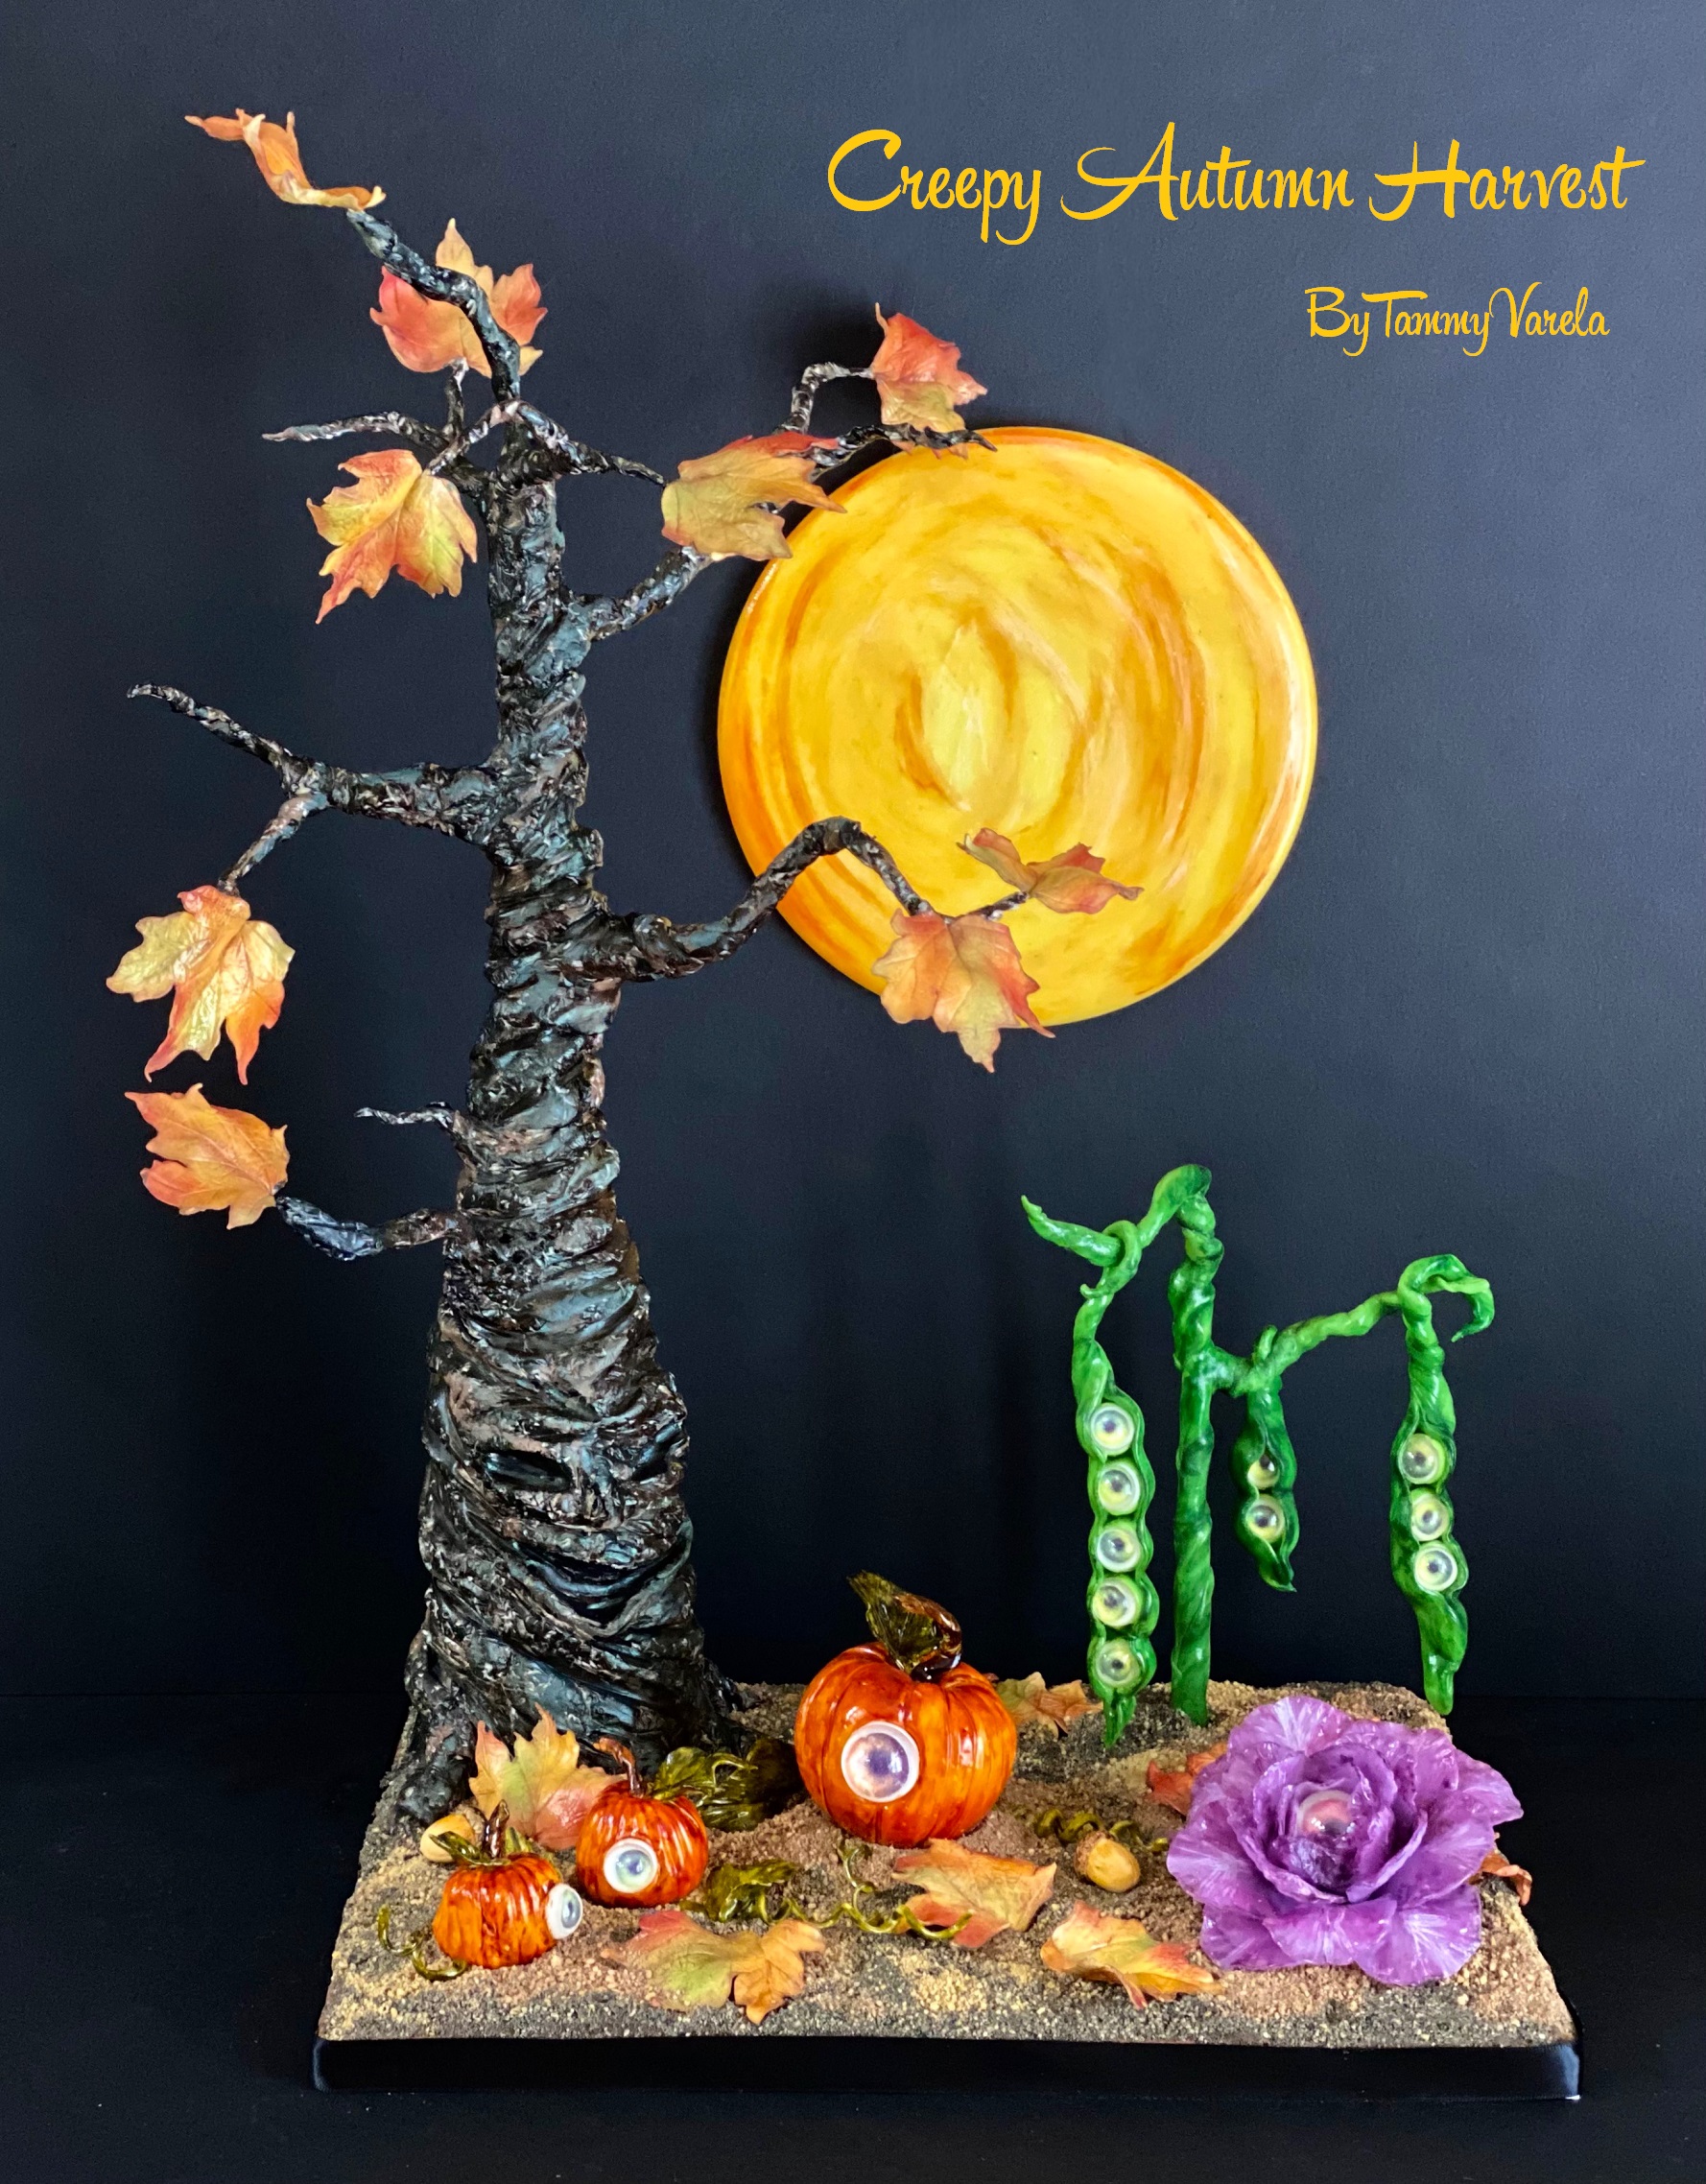
Creepy Isomalt Flowers

By Tammy Varela
Create creepy flowers to decorate around the spindly spider showpiece.
Edibles:
Clear isomalt
Bronze luster dust
Dilution solution
Gel food color: black, green
Airbrush color: purple
Equipment:
Silicone eye mold
Paintbrushes
Silpat mat
Blowtorch
Scissors
Fan
Create the Eyes
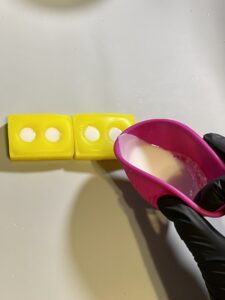
- Heat clear isomalt to a boil, then let it settle for about 2 minutes. Pour the isomalt into the holes of the silicone eye molds, then pour it out. You will be left with a clear coating then let it sit for a few minutes.
- Once cooled, take some bronze luster dust mixed with dilution solution and paint a small circle in the middle of the isomalt. Then take some black gel color and paint a small dot in the center of the bronze circle. Let it sit to dry for a few minutes.
- Heat white isomalt to a boil then let it settle for about 2 minutes. Pour into holes until full. Let it cool for about 5-10 minutes.
- Pop eyes out of mold then place on silpat mat. Lightly torch over eyeballs to take out the small bubbles. Let it cool for about 2 minutes.


Form the Petals
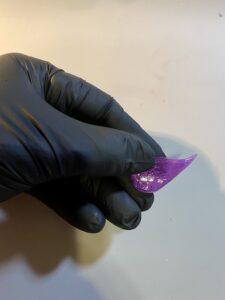
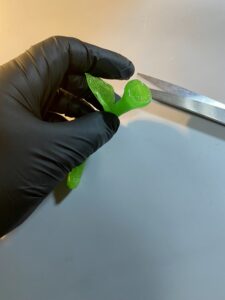
- Heat clear isomalt and add purple airbrush coloring. Start the pulling process. Take your thumb and index finger and gently pull a piece of the isomalt. Then take your scissors and cut at an angle on the pulled section.
- Bend and twist the petal to the desired shape. Continue the process until you make a total of 5 petals per flower.
- Take a small ball of pulled isomalt and slightly flatten it. Then take your petals and attach them using your torch to heat the surfaces lightly.
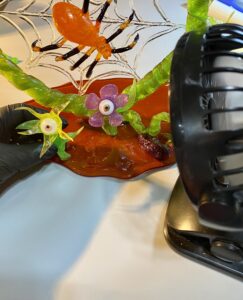
- Once petals are attached, take an eyeball and lightly torch the back of it. Place the eyeball in the middle of the petals.


Create the Leaves
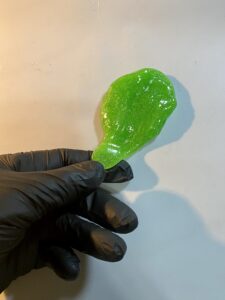
- Heat your clear isomalt and color it green, then let it settle for about 2 minutes. Start the pulling process and leave under the heating lamp. Take your thumb and index finger and gently pull a piece of the isomalt. Then take your scissors and cut at an angle on the pulled section.
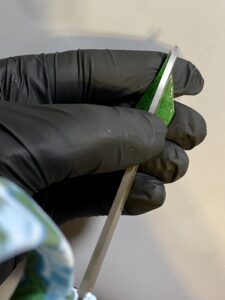
- Take your scissors and gently press down the center of the pulled isomalt piece. Then bend and twist to the desired shape. Repeat the process to make 2-3 leaves per flow.
Finish with the Stems
- Heat some clear isomalt, color it green, and complete the pulling process. Cut a piece and stretch it to make the stem. Use your finger to stretch out one end of the pulled piece.
- Use the torch to attach leaves in desired places on the stem.
- Lightly torch the back of your flower and the stretched part of your stem then lightly press them together.
- Figure out where you want to place each flower, then lightly torch the bottom of the stem and base to adhere. Be sure to cool with the fan to hold the flower into place.


Want the rest of Tammy’s spider tutorial? Find it in the pages of the September/October 2022 issue of ACD!


