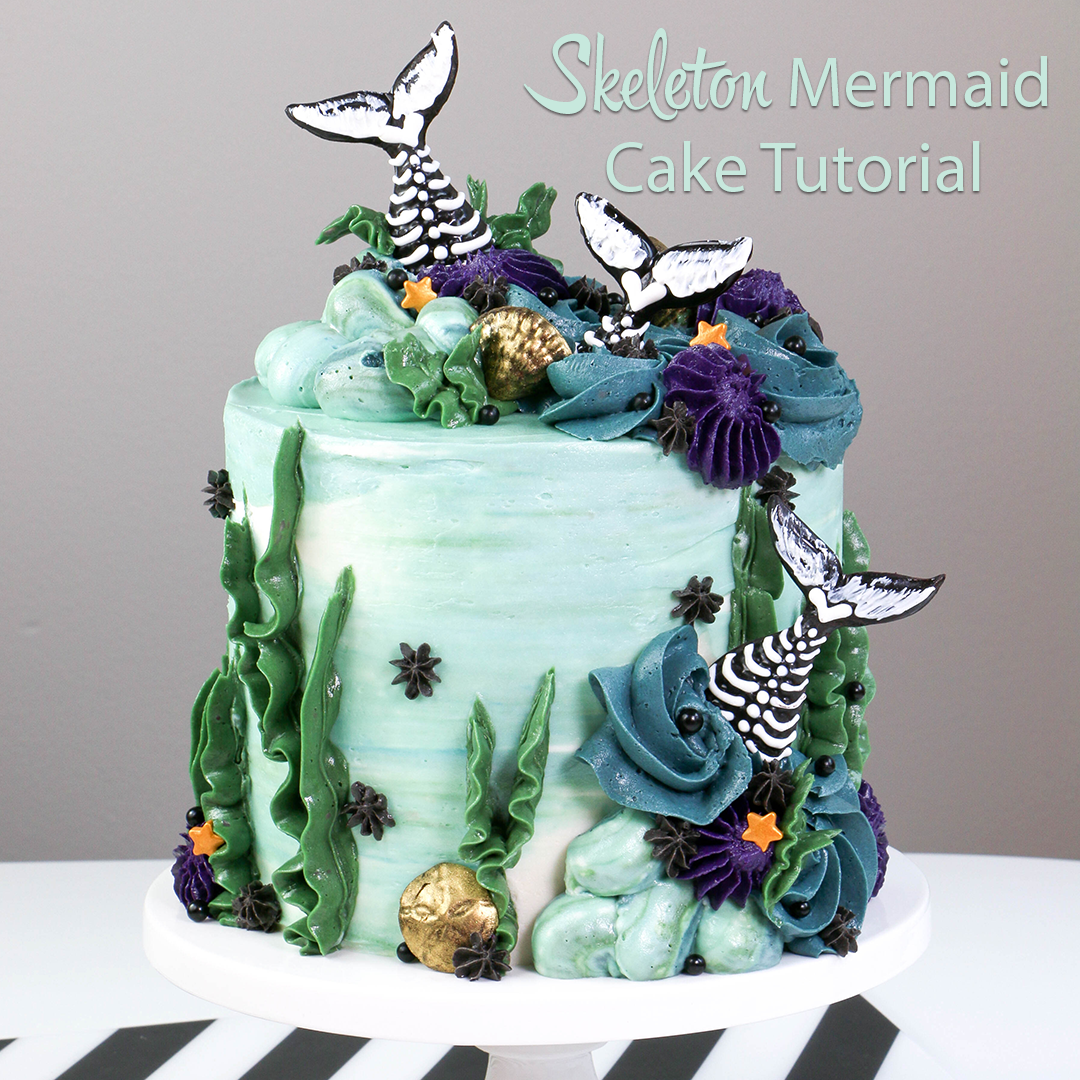
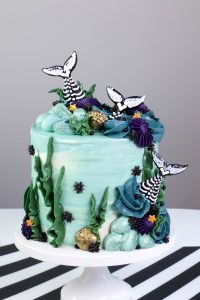
“If you love Halloween like me, you may have noticed the not-biologically-correct animal skeleton trend that popped up in the big box stores a few years back. I fell in love the minute I saw that shelf in Target full of creepy, completely incorrect skeletons and had to take home a few. I mean, we even have a scorpion skeleton!? I don’t know who thinks of this stuff, but I appreciate them. When it came time to plot out my Halloween baking plans this year those creepy critters kept coming to mind. This mermaid tail skeleton cake was created just for your Halloween enjoyment! These spooky little cuties also work as creepy-cool cupcake toppers,” notes Erin Gardner. Learn to create this fabulous cake by following the steps below!
MERMAID TAIL SKELETON CAKE
By Erin Gardner
SUPPLIES * 2 cups black coating chocolate * 1 cup white coating chocolate * Mermaid tail mold * Shell mold * Paper cones or piping bags * Edible gold luster dust * Small paint brush
* 6-inch round layer cake * 2 batches of American or Swiss Meringue Buttercream * Green, blue, purple, and black gel food coloring * Large round piping tip * Leaf piping tip * Large star piping tip * Closed star piping tip * Small star tip * Gold star sprinkles * Black pearl sprinkles
MAKE THE MERMAID TAILS
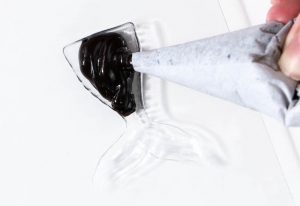
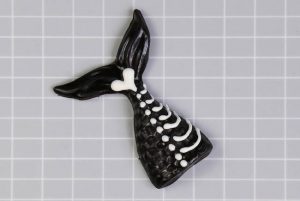
Melt the black coating chocolate in a heatproof bowl. Pour the melted candy into a paper cone or piping bag. Snip a small opening in the bag and use it to fill in the mermaid tail molds. Tap the filled mold against your work surface to pop any air bubbles and to make sure the chocolate gets into all the nooks and crannies. Set the mold aside or pop it in the fridge until the candy has completely hardened, about 1o minutes.
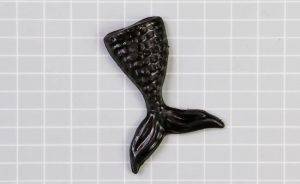
Turn the mold over onto a piece of parchment paper or cookie sheet to release the chocolate tails. If the tails don’t slide right out of the mold, just pop it back into the fridge for a few minutes.
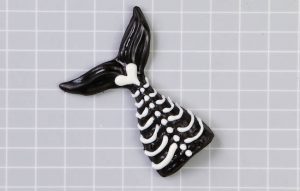
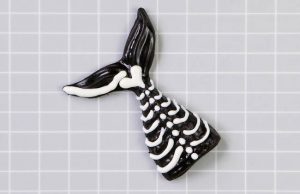
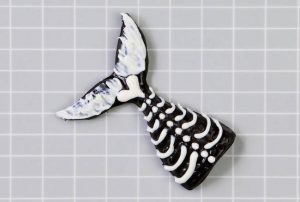
Melt the white coating chocolate in a heatproof bowl. Pour the melted chocolate into a paper cone or piping bag. Snip a small opening in the tip of the bag. Pipe a small heart between the fins and tail. Add a row of dots down the center of the tail for the spine and rows of ribs on either side of the dots.
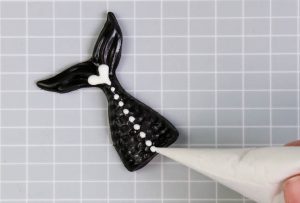
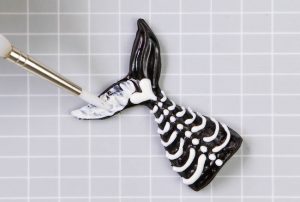
Pipe a thick line of chocolate along the base of one of the fins. Fan the chocolate out across the fin using the tip of a small paint brush. Repeat on the other fin. Repeat the entire process with each of the mermaid tails.
MAKE THE SHELLS
Fill a few of the shell molds with the remaining black coating chocolate. Tap the mold against your work surface and set it aside until the shells are hardened, about 10 minutes. Flip the mold over to release the shells. Brush the surface of each shell with the gold luster dust.
TINT THE BUTTERCREAM
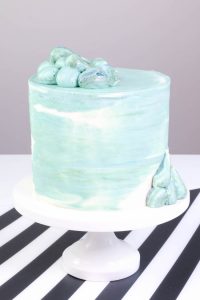
Divide the buttercream in half. Add a few drops of blue and green food coloring to one of the halves. Fold the coloring into the buttercream leaving lots of streaks and white spots behind. Use this buttercream to ice the top and sides of your cake, allowing the color to blend as you spread and smooth it over the cake until it’s #smoothenough. Pop the cake in the fridge while you color the rest of the buttercream.
Divide the remaining buttercream into four parts. Follow the list below to color each of the small amounts of buttercream and match them up to the right piping tip. For moodier colors add a drop or two of black coloring and leave it a little streaky as you mix it in.
* Blue in a piping bag fitted with the large star tip
* Green in a piping bag fitted with the leaf tip
* Purple in a piping bag fitted with the closed star tip
* Dark gray in a piping bag fitted with the small star tip
Use the remaining green/blue buttercream to fill a piping bag fitted with the large round tip.
ALL TOGETHER NOW
Pipe layers of round blobs on the top and sides of the cake with the green/blue buttercream.
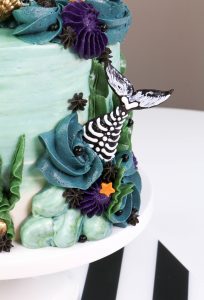
Hold the leaf tip vertically along the side of the cake. Apply pressure and wiggle the bag as you move upwards to pipe a strand of seaweed. Add more around the sides and on top of the cake.
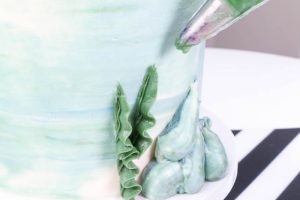
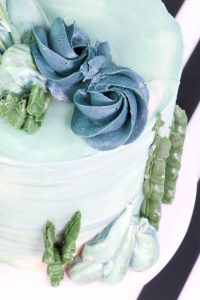
Pipe large blue rosettes to fill in the top of the cake and down the side with the green/blue blobs. Add drop star “urchins” to the cake using the purple and gray buttercreams.
Tuck the finished mermaid tail skeletons into the scene and fill in with the gilded shells, stars, black pearls, and more piped details as needed.
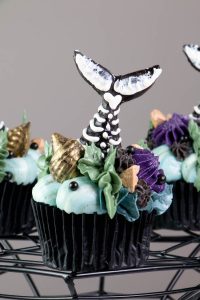
BONUS CUPCAKES!
Watch me use the same piping techniques to top a creeptastic cupcake. I baked the cupcakes using my Black Velvet Cake Recipe and topped them with American Buttercream. I also added gilded chocolate rocks to compete the cupcake look

