
What better way to decorate a celebration cake than with a stunning, handmade mermaid topper! Learn the steps to create a beautiful mermaid figurine with this tutorial from award-winning artist Domy Dobek. Known for her incredible modeling skills, Domy has a line of face and body molds specifically designed to help make your modeling easier.
Mermaid Cake Topper
Components:
- Small flat makeup brush
- 000 fine artist brush for detail painting
- Water brush
- Large soft brush
- Scalpel
- Dresden tool
- Soft silicone brush
- Small and medium metal ball tool
- Rubber-tipped tool
- Scissors
- 6-inch cake drum
- Saracino modeling paste or similar
- Gel colors: blue, brown, super white, and purple
- Magic Colors dust colors: brown, green, pink, and purple
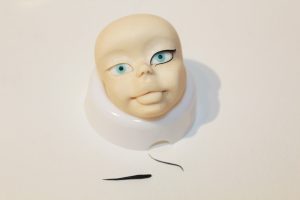
Sculpting the Face
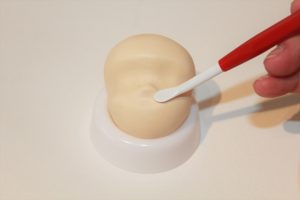
- Roll 50 grams of flesh-colored modeling paste into a slightly elongated ball. Make sure to smooth completely.

- Make a small indentation, one-third of the way down, going from one side of the head to the other, by rocking the smooth, rounded side of a tool against the ball.

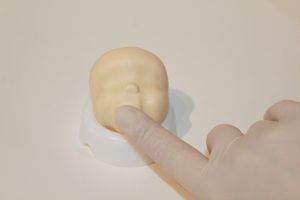
- Use your fingertips to create the eye sockets by pushing into the paste and allowing a small ridge of paste to form between your fingers. This will be the bridge of the nose.
- Use the small end of a paintbrush and press into the paste just under the nose bridge. This will help to define the tip of the nose and the top lip.

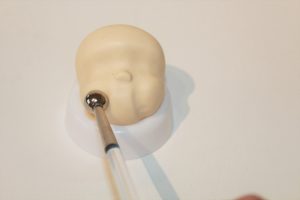
- Use the small/flat end of a Dresden tool to define the nose, pressing into the paste to create a small inverted triangle shape as shown.
6. Use the silicone brush to make two little nostrils at the end of nose.

Sculpting the Lips
- Use a medium ball tool to define the chin, pressing to the left and the right side, leaving a peak of paste running down the centerline.
- Use the tip of your finger to press into the mound of paste you just created; this will create the recess of the chin and there should be a small mound of paste left from which to create the lips.
- Use a small silicone brush or conical tool to create two dimples.
Domy notes: These marks will form the outer edges of the lips.
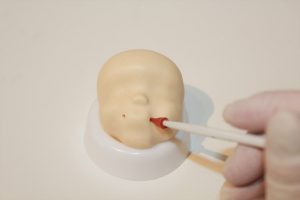
- Use a sharp knife or a scalpel to cut into the paste and form the mouth.

- 5.Using the Dresden tool, gently rub the lips, pushing up and using circular motions to round off the edges of the upper lip.

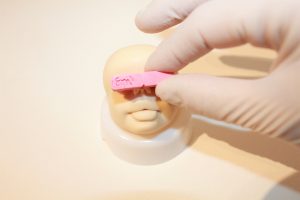
- Define the lips further by shaping with a small, soft-tipped silicone brush.

- Push the cheeks back gently and lift the chin up slightly to give a more flattering profile.
Domy notes: Take care here, you don’t want to reshape the face too much.

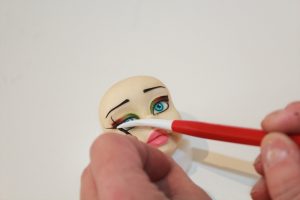
- Define and part the lips by gently pressing the silicone tool between them as shown.

Shaping the Eyes
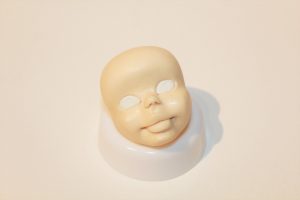
1.Use theEasy Eyes Tool to imprint the shape of the eyes, this will help you to create identical-size and correctly spaced eyes.
2.Remove the extra paste using a sharp tool.

3.Roll two very small balls of white paste and fill the eye sockets.
4.Use a small ball tool to define the eyelids and brow bone as shown.

5.Roll two tiny (similar-size) balls of blue paste and two even smaller balls of black paste. These will create the iris of the eye.
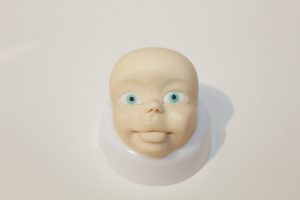
6.Use the Dresden tool to create a crease line in the eyelid, and to pull the paste over the eye a little to create the lid.

7.Roll some black paste into a very thin rope and outline the eye as shown.
8.Use a little ice blue gel color and a fine artists brush in size 000 to add some detail to the iris.
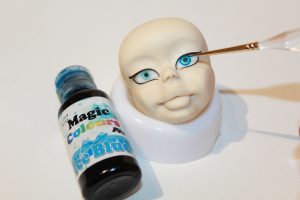
9.Use a little chestnut brown gel color to paint in a cut crease along the eyelid.

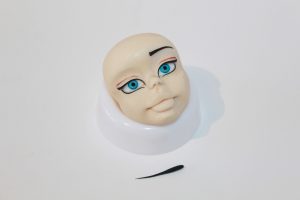
10.Roll a tiny amount of black paste into an elongated teardrop and cut two small eyebrows, then adhere above the brow bone.
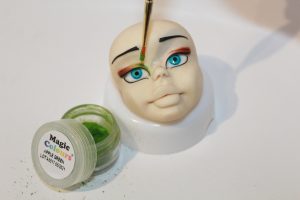
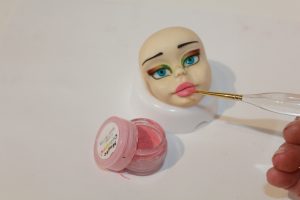
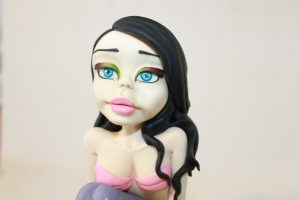
11.Use a little dust color and a small, soft brush to add a little “eyeshadow” to the eyelids.
Domy notes: I used brown and green petal dust colors.
12.Use a little petal pink dust color to stain the lips.
13.Add a few tiny drops of super white gel color to the pupils;this will give them a bright, open, awake appearance.

14.Roll some more black paste into thin teardrops and attach to the eyes for the eyelashes. Flare the lashes outward to the left and right respectively. This will make the eyes look large and open.
Creating the Rock and Pool
1.Add some black gel color to 300 grams of white fondant and marble to create the appearance of stone. Model into a loose rock shape. Take a piece of scrunched up aluminum foil and texture the rock all over.
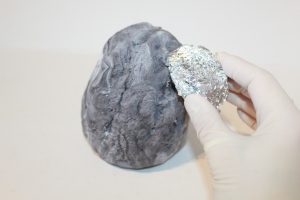
2.Dust the rock using a plush dusting brush and some black petal dust. This will highlight the texture you just applied.

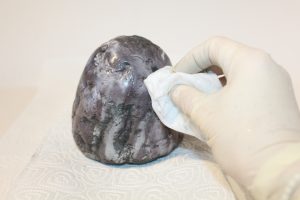
3.Remove any excess dust using a food-safe wipe or some clear alcohol.
- 4.Mix a little blue gel color into 200 grams of white paste. Marble the color throughout until the paste is almost fully saturated and press into a round disc. Place the“water” disc onto a covered board and then place the rock on top as shown.

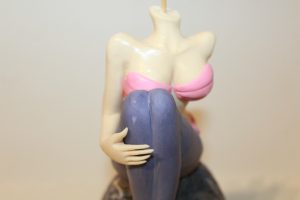
Sculpting the Mermaid’s Body
1.Roll 150 grams of purple paste into a tapered cone, bend slightly at the center point, and then attach the tail to the rock using a long skewer, with several inches protruding.
Domy notes: Take care to leave enough of the skewer exposed so you can attach the torso and head later.

2.Roll 70 grams of flesh-toned modeling paste into a slightly tapered cylinder, with the small end forming the waist.
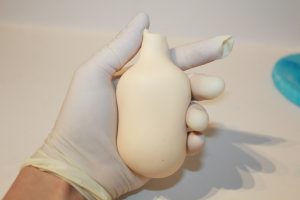
3.Pinch the center to define the waist, and the top to create a neck. Pinch the paste at the top right and the top left to form the shoulders.
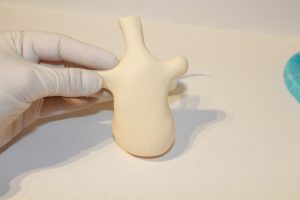
4.Make a small cut in the center of the torso to define the breastplate, and then start shaping the breasts using the soft silicone brush.
Domy notes: You can use your fingers to smooth the breasts and create a nice round shape.
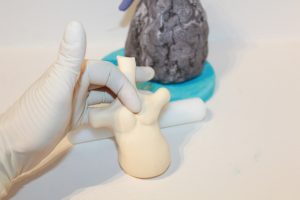
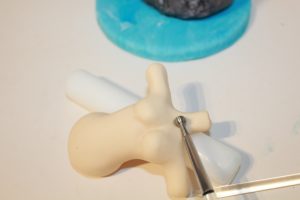
5.Use the ball tool to define the clavicle and the Dresden tool to define the collarbone.
- Create a small seashell “bra” by rolling small teardrops of pink paste and adhering them together to form two shells.
- Remove any excess paste from the shoulders and attach the torso to the tail, and the bra to the torso to cover the breasts.
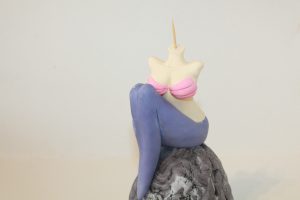
- Roll a thin rope of fondant to hide the join where the tail and torso meet.

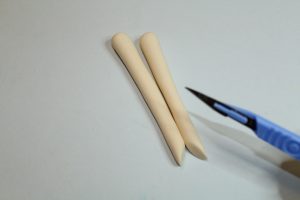
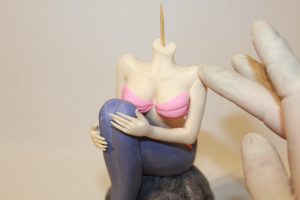
- To create the arms, roll two slightly tapered ropes from flesh-toned modeling paste. Cut the bottom of the paste on an angle as shown.
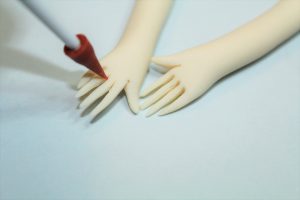
- Cut a small “V” shape from the hand to form the thumb and fingers.

- Cut the remaining paste into four fingers and gently shape to define.
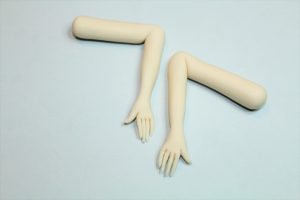
- Using the tip of your finger, press the arm in at the bottom (just above the hand) and at the center point, to create the wrist and the elbow.

- Bend the arms at the elbow as shown.
- Attach the arm to the torso and position as shown, with the arm holding the tail.
- Attach the second arm, and blend the seams using a soft-tipped silicone brush and your fingertip.
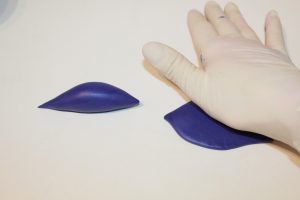
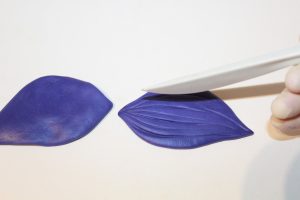
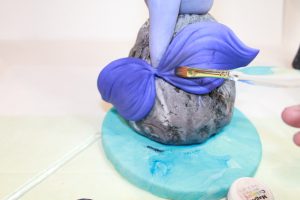
- Roll two teardrop shapes from purple modeling paste (15 grams each) and flatten to create the tail fins.
- Use a knife tool to add texture to the fins.
Final Assembly and Finishing Touches
- Attach the head to the torso and blend the seam. Next, attach a small ball of black paste to the back of the head to round out the back.
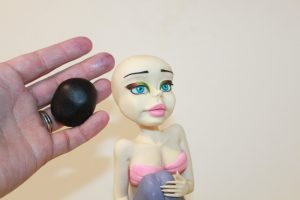
- Create some hair pieces either by using a mold (as shown) or by rolling teardrop shapes from black paste, texturing with a knife tool and attaching to the hair.
Domy notes: Start from the back and work forward, making sure to gently shape the hair around the face.
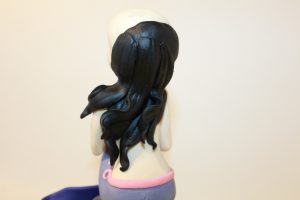
- Dust the tail with a little black petal dust to define the texture and finally add a touch of shimmery petal dust to make it shine.


