
Painted Wildflowers Tutorial
By Neetha Syam
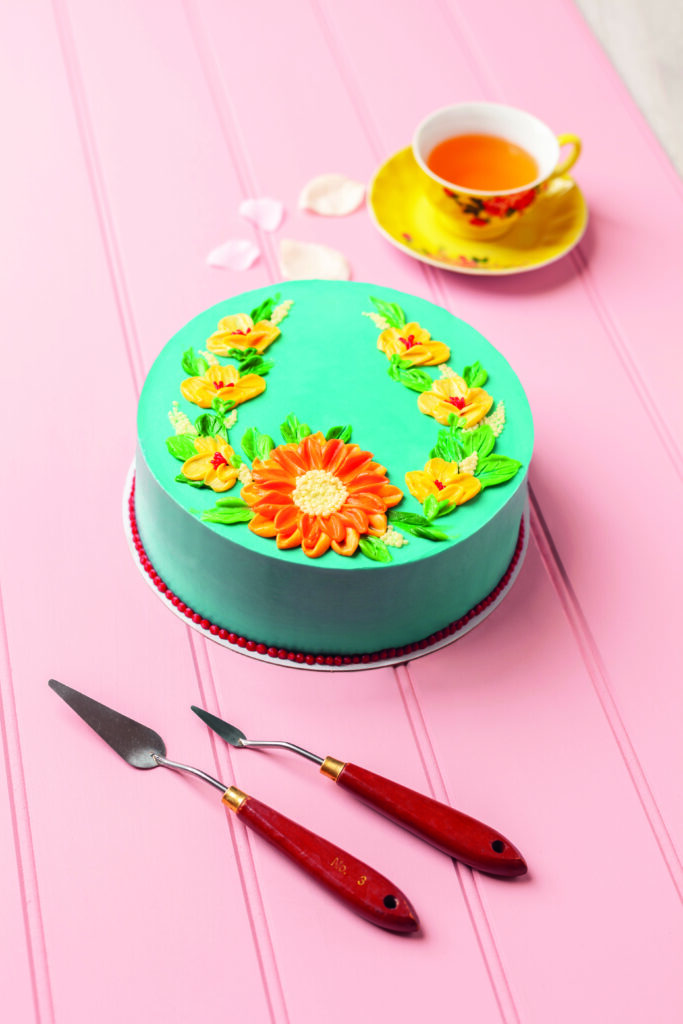
This palette-knife painted cake features a clean, sleek design with a statement chrysanthemum in the middle paired with some cherry blossoms. This design is perfect for one-tier cakes or even on bigger tiered cakes. You can really play with the colors too – there are no limits to how you can vary this design.
You will need:
20-centimeter (8-inch) cake
Colored buttercreams: blue, dark green, light green, orange, dark orange, yellow and red
Uncolored buttercream
Cake drum
Palette knives – small, medium and large
Cake smoother
Piping bags
Coupler
Wilton 3 writing nozzle for cake border
Cocktail sticks (toothpicks)
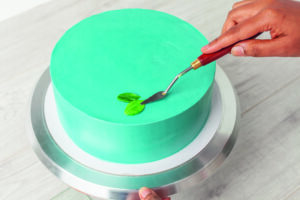
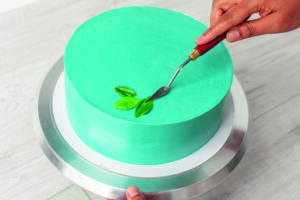
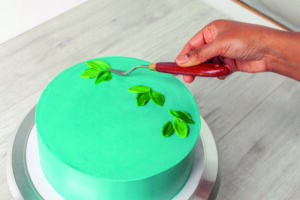
Painting the leaves
1. Pick up some dark green buttercream using a small palette knife. Apply it gently, flat on the cake, to paint a leaf.
2. Paint a second leaf in light green buttercream, to contrast with the dark green.
3. Pipe a set of three leaves in alternating shades of green.
4. Repeat to form a crescent pattern around the top of the cake.

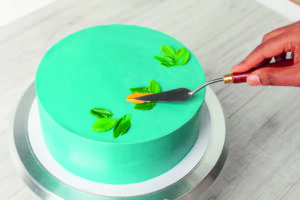
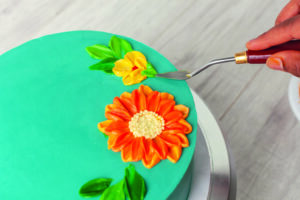
Painting the chrysanthemum
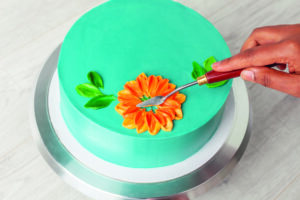
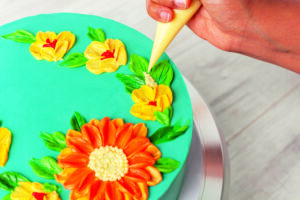
1. Using a large palette knife, pick up orange-colored buttercream and start painting petals.
2. Apply the petals in a circular pattern next to each other. Make sure to apply them with even pressure, and avoid squashing or smudging the petals you’ve already painted.
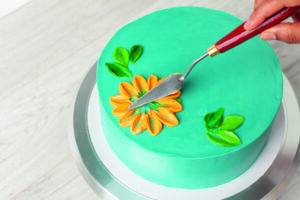
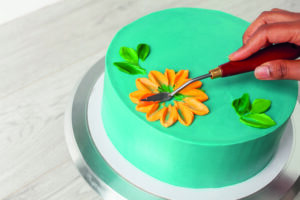
3. Using a small palette knife, pick up dark orange-colored buttercream, and paint smaller petals between each pair of larger petals.
4. Repeat in a circular pattern.
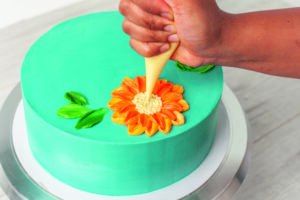
5. Using a piping bag with uncolored buttercream and a hole cut at the end, pipe small dots in the middle of the flower.
Tip: Use a small, medium or large palette knife depending on the size of the flower you
are painting.
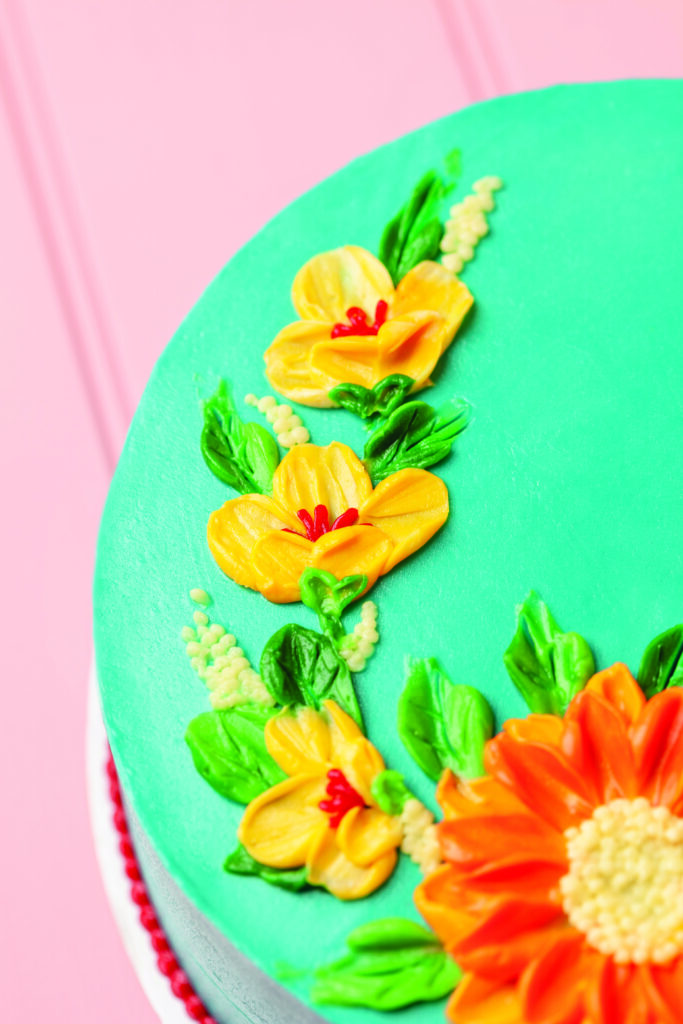
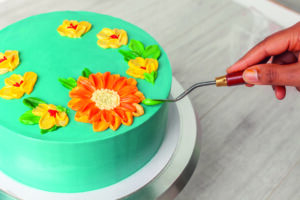
Painting the cherry blossom
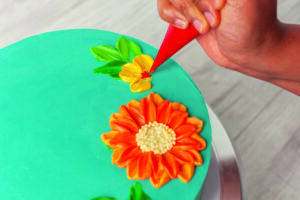
1. Using a small palette knife, pick up some yellow buttercream and paint broader petals for cherry blossoms.
2. Using a piping bag with red buttercream and a hole cut at the end, pipe small dots in the middle of the cherry blossom.
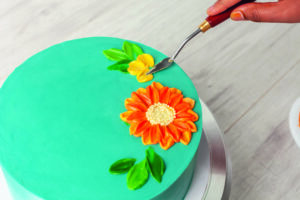
3. Paint two more yellow petals over the top and small green details at the bottom to finish off the blossom.
Adding leaves and leaf details
1. Pick up some dark and light green buttercream using a small palette knife and paint leaves coming from underneath the flowers to give a realistic look.
2. Repeat the same process for all the flowers, looking for gaps where you can naturally place the leaves. The trick is to be careful not to squash the petals.
3. Using a cocktail stick, draw lines to resemble the veins of the leaves.
4. Use the cocktail stick to smooth the stems of the flowers.
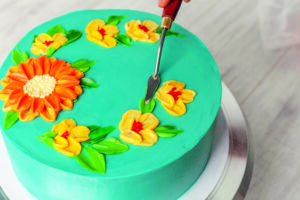

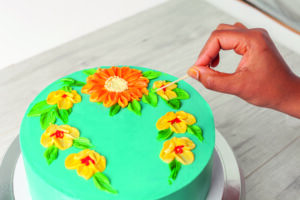
Adding buds and piping the cake border
1. Using the piping bag containing the uncolored buttercream (with a fine hole cut at the end), pipe small dots in between the flowers. These are filler elements that will bring the whole design together.
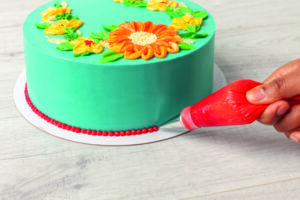
2. Using a piping bag with red buttercream and a Wilton 3 writing nozzle, pipe well-formed round dots all around the base of the cake as a border. This completes the project.
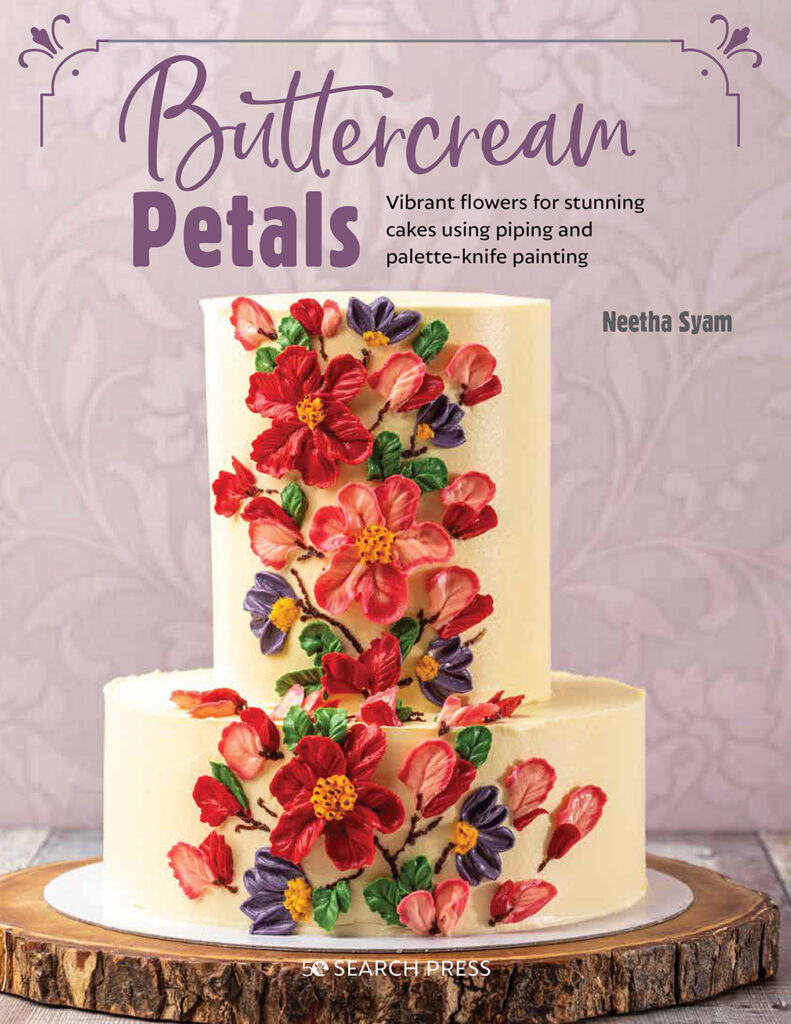
Republished with permission from Buttercream Petals by Neetha Syam. Search Press. July 2021.
