- Stencil
- Powder Dust & Edible Paints
- Paint Brushes
- Non Slip Matt
- Vodka or Lemon Extract (Optional)
- Royal Icing Optional
- Fondant Foam Pad (Optional)
- Straight Pins
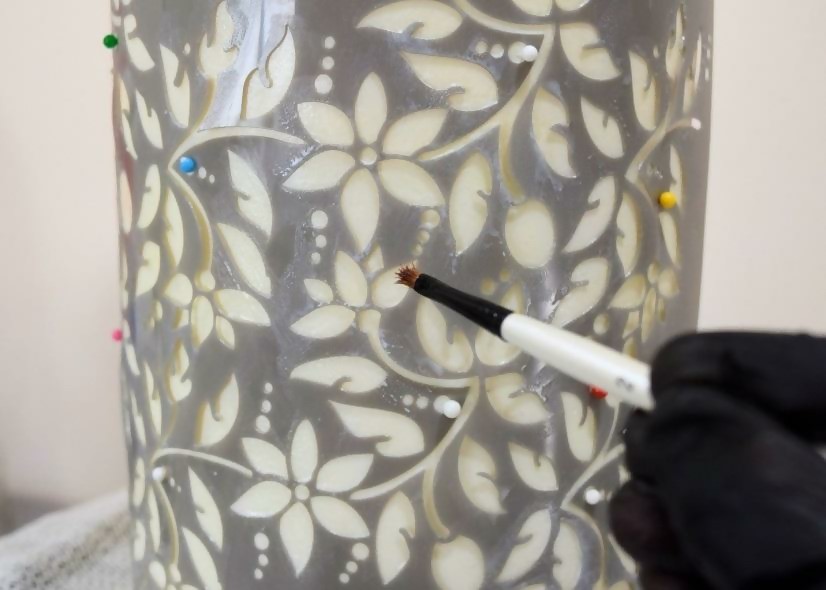
Once your cake is covered in fondant and ready, place it on a nonslip matt to ensure it does not move while working on it. Place the stencil on your cake and secure it with fine straight pins. Some stencils may tend to lift in some areas so you may want to apply them where needed. I suggest using a rotating table as this is helpful in moving your cake around when having to paint different areas. I also place a fondant foam pad on top of the cake to avoid leaving any finger prints if I need to secure the cake from the top. This also helps if you find yourself in an awkward position trying to paint an area.

Before applying the royal icing, make sure it has a thin consistency but not runny. I use it as a form of glue for my petal dust, and it also allows you to give it a bit of texture which you will see in this tutorial.
Apply your royal icing to the entire area of your stencil. Allow it to dry a bit before applying your petal dust to avoid it from clumping.
Adding your base colors.
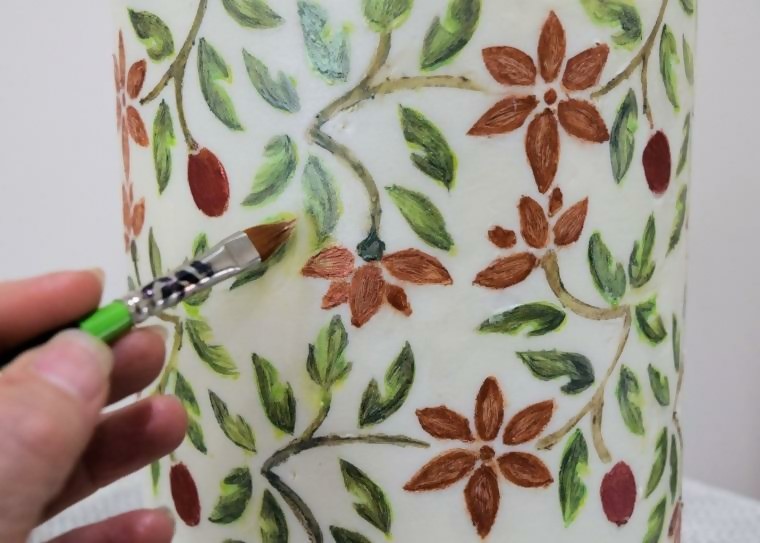
For the flowers, I used two methods for applying the petal dust. In some areas, I applied the petal dust a bit diluted in a paste like consistency and in others, I applied it directly. Use the method that works best for you and what you are trying to achieve.
When applying the petal dust or paint, make sure to always stroke your brush in one direction to avoid removing the paint with a back and forth motion.
For the pattern used in this tutorial, I started the application at the base of each flower petal and leaves continuing in an upward motion. Depending on the stencil pattern you are using, your motion may vary.
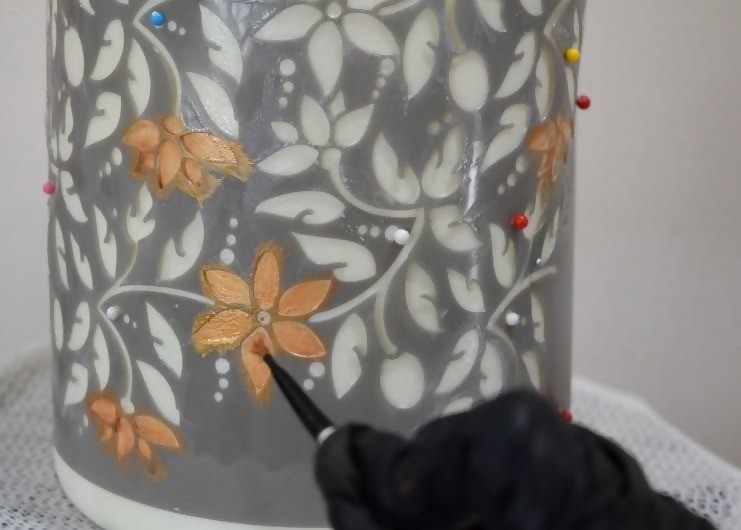
I know at this point it looks very messy but I can assure you it will look amazing once you have completed each step! ☺
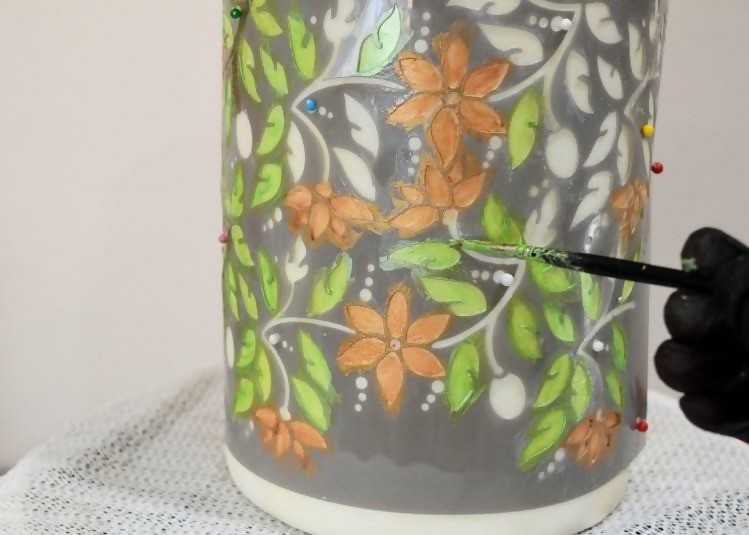
After your base colors have been applied, allow it time to dry then add more if needed.
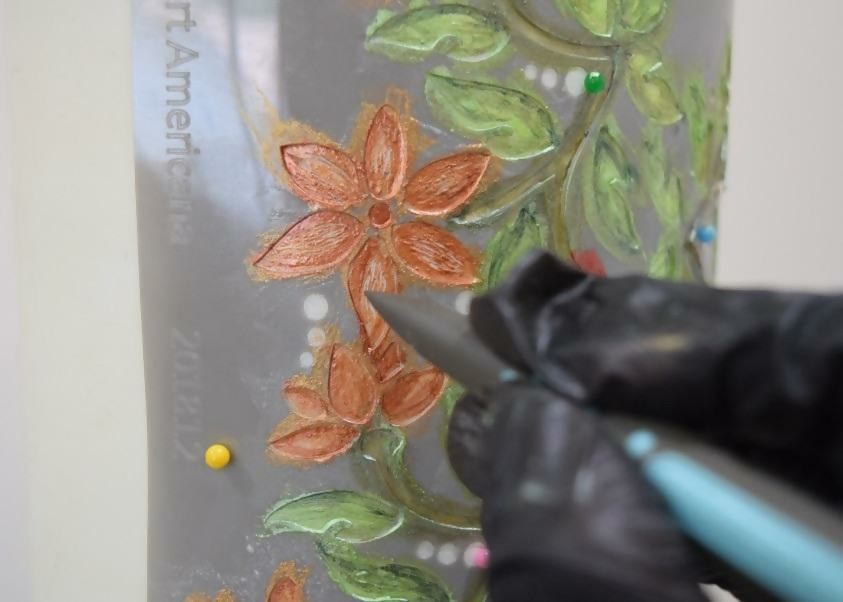
Details With Your Fondant Tool:
Using a firm / soft fine tip, gently stroke the area.
If your edible paints are too dry, just reapply them in the manner you originally did. I love this process because you can always remove and add paint as needed while implementing additional colors for shading and details.

Before removing your stencil, allow the paint time to dry.
Once you have removed your stencil, if may have areas where excess paint or royal icing need to be removed. If this is the case, you simply use a paint brush with a dab of vodka and gently stroke the area to clean it.
Finalizing Your Details:
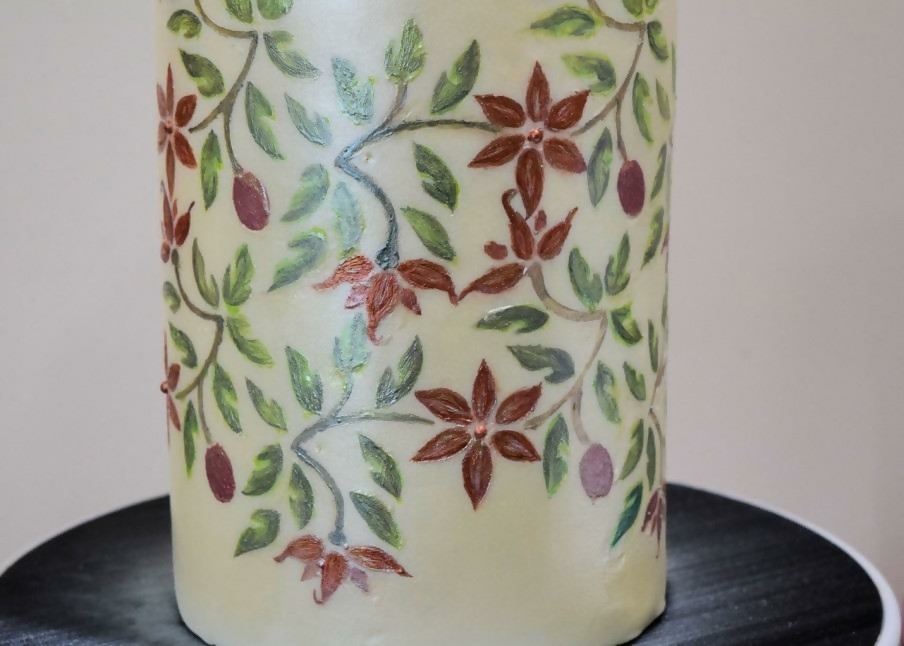
After you have removed all the excess paint and royal icing, add the final touches. This would depend on your pattern.
For this pattern, I defined the tips of the flower petals and added some flair to the buds. For an extra touch, I added a small royal icing bead in the center of each flower. I then airbrushed the entire area with a pearlized color to blend and soften my piece.
