by Karen Keaney
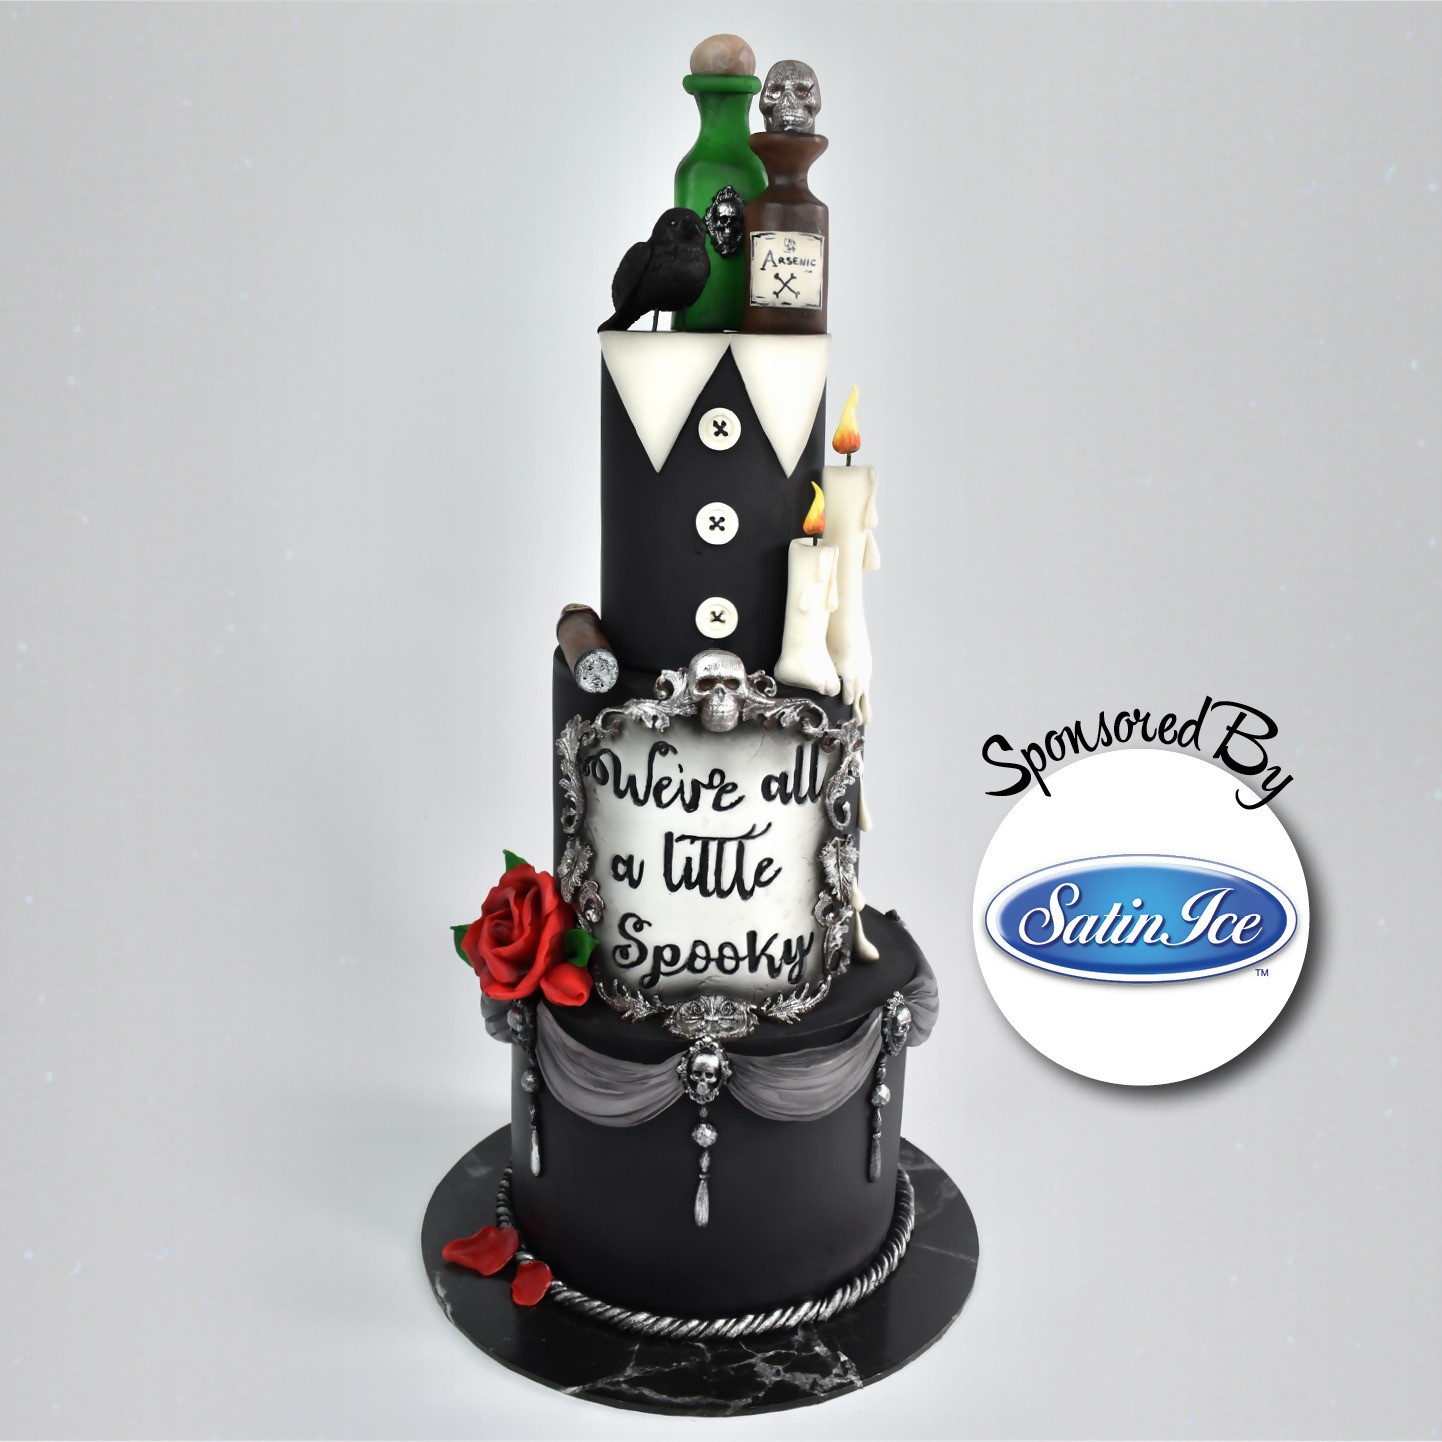
You’ll love the flavor and finish of Satin Ice’s ChocoPan modeling chocolate! Here, Karen models sweet and spooky decorations for a shrieking great showstopper this Halloween. Short on time? Make the decorations to adorn cupcakes or a single tier to treat the family.
Components
Equipment:
- 12-inch (30-cm) black masonite cake board
- Sweet Stamp “Curly” set
- Knife
- Dresden tool
- Needle tool
- Ball tool
- Sponge
- Vintage art baroque mold (IOD)
- Leaf mold (Etsy)
- Curlicues mold (FPC)
- Small skull mold (Chocolate mold from Amazon)
- Skull cameo mold (Marvelous Moulds)
- Bird mold (FPC)
- Droplet mold (First Impressions)
- Airbrush
- Paintbrushes
- Sugar shapers
- Rolling pin
- Cocktail sticks
- Sponge
Edibles:
- 1 x 4-, 6-, and 8-inch (10-, 15-, and 20-cm) cakes covered in black Satin Ice fondant, all 6 inches (15cm) tall
- 500g Satin Ice fondant (sugarpaste): white
- Airbrush color for chocolate: black (Spectrum Flow)
- Edible gold and silver highlighter (Cake Lace)
- Petal dusts: black, yellow, red hybrid, and old silver metallic dust (Roxy & Rich)
- 7 oz ChocoPan modeling chocolate: red
- 7 oz ChocoPan modeling chocolate: green
- 12 oz ChocoPan modeling chocolate: white
- 12 oz Dark ChocoPan modeling chocolate
- 7 oz ChocoPan modeling chocolate: black
- 18 oz ChocoPan modeling chocolate: gray (mix 30/70 white and black)
- Edible glue
- Cornstarch
• Alcohol
Make the Plaque
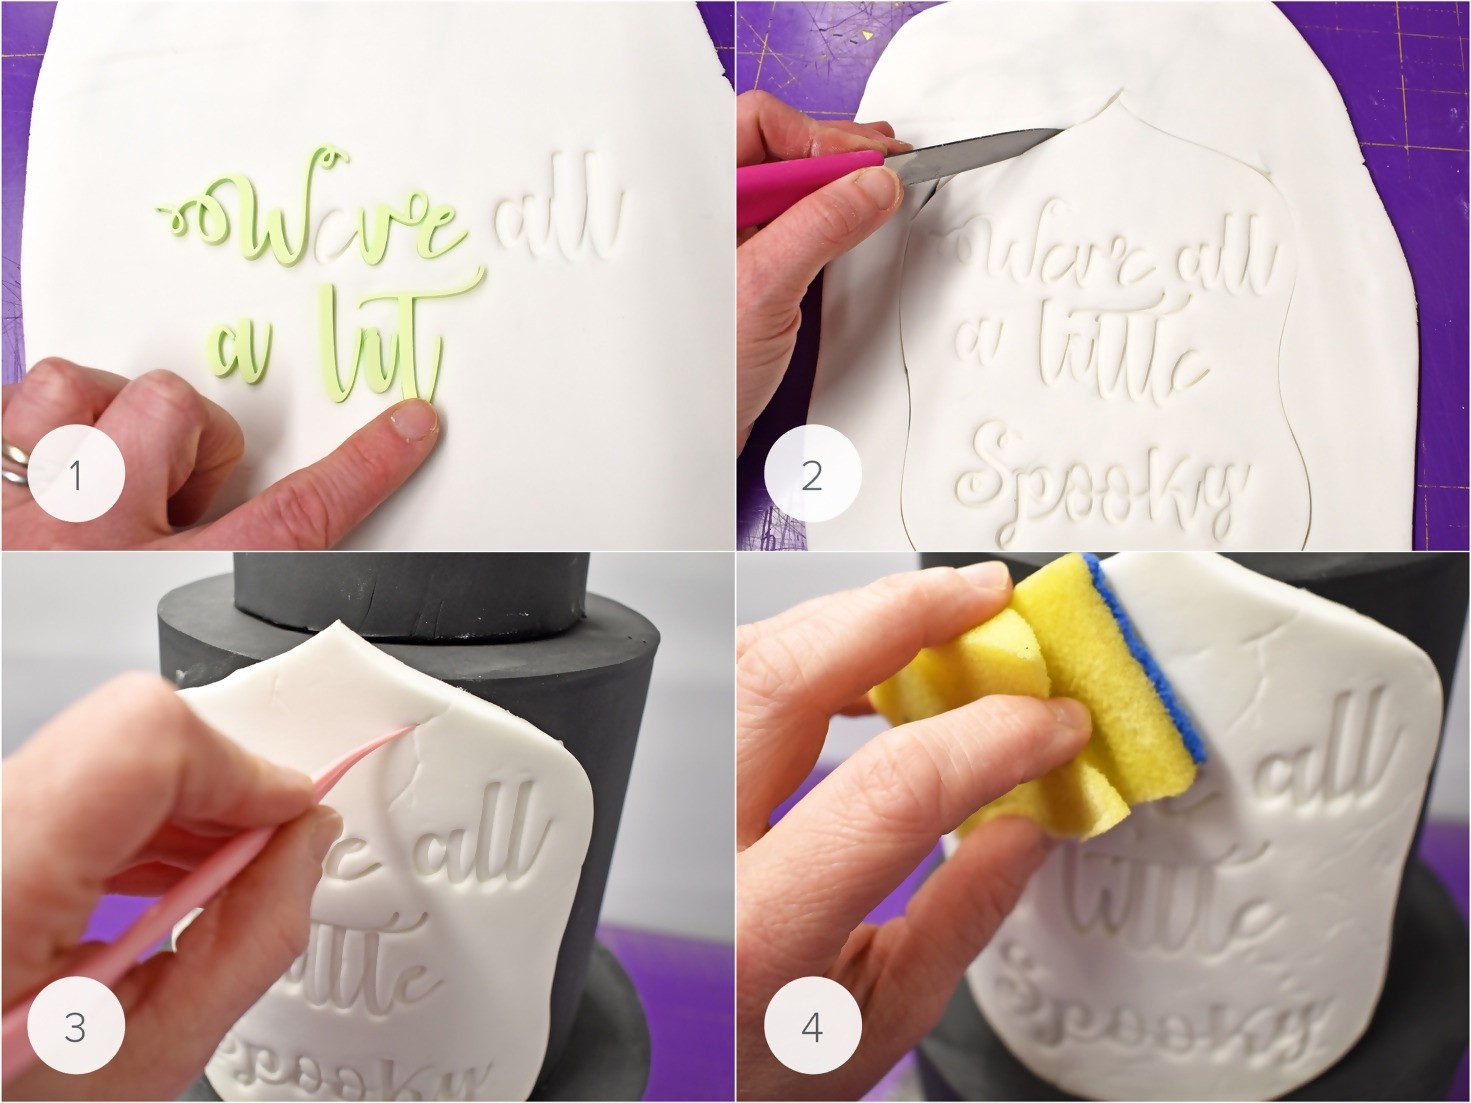
Step 1: Roll out some white Satin Ice fondant and use the Sweet Stamp letters to emboss “We’re all a little spooky” onto the fondant.
Step 2: Cut out a decorative shape around the words as shown.
Step 3: Attach the plaque to the middle tier of the cake and distress it by scoring some cracks with a Dresden tool.
Step 4: You can distress the plaque even further using a clean, dry sponge.
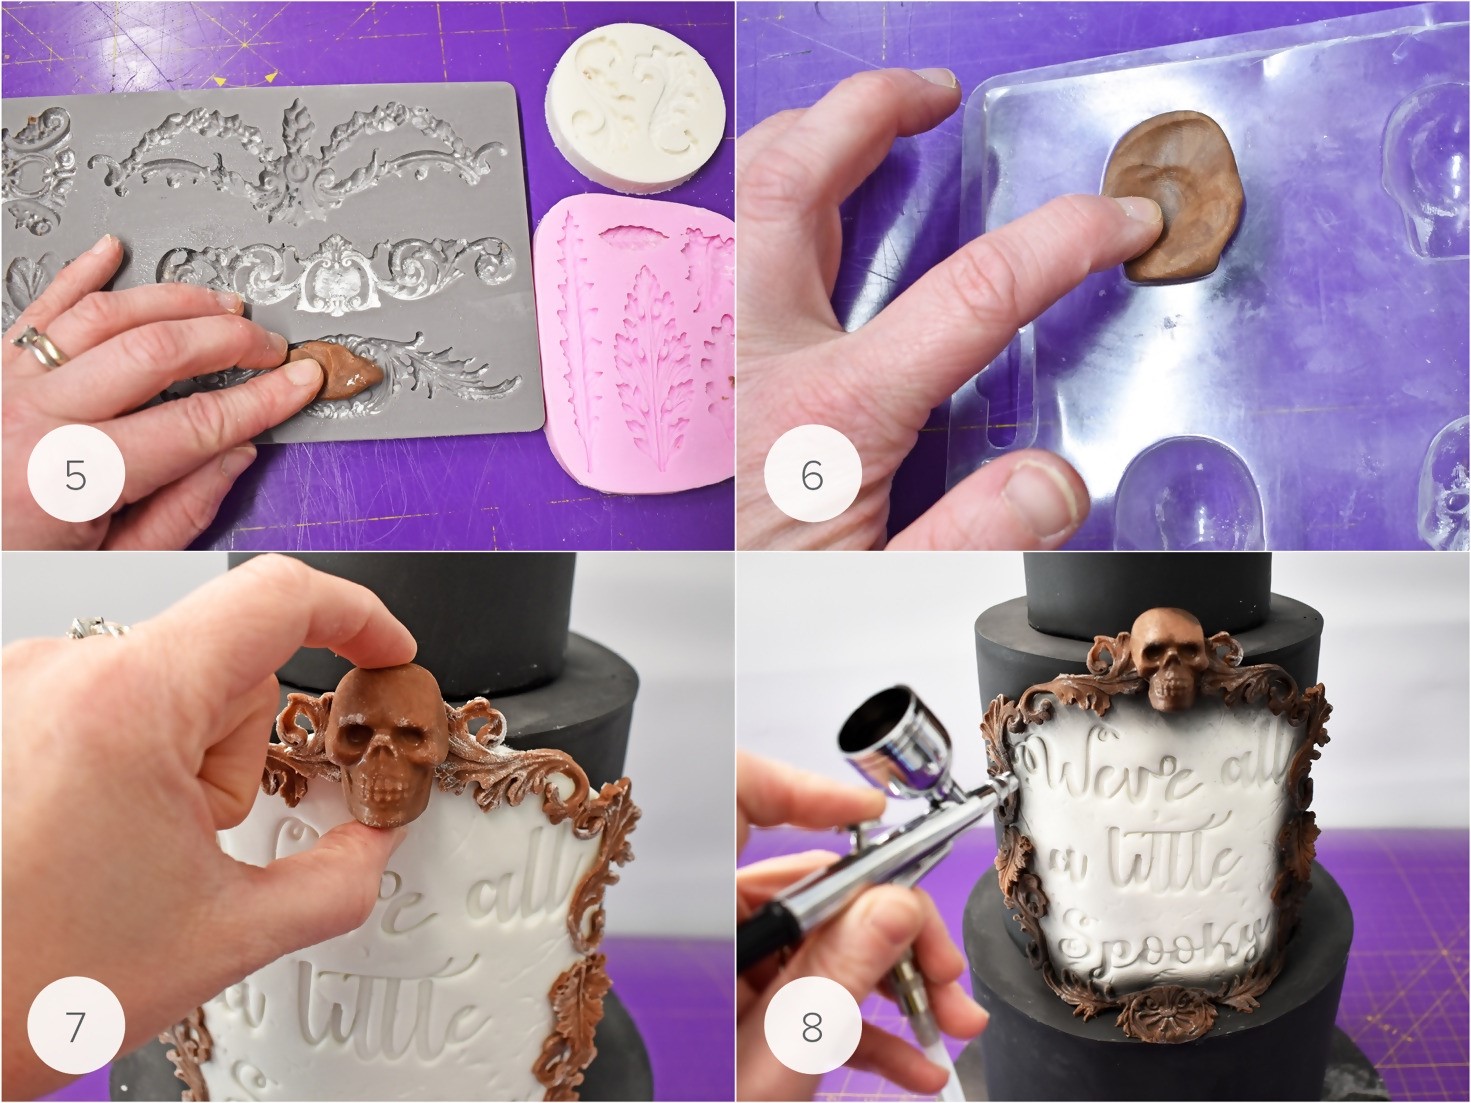
Step 5: Make some moldings to attach around the plaque using dark modeling chocolate and the IOD, leaf, and curlicue molds.
Karen’s Top Tip: Dust the molds liberally with cornstarch to prevent sticking; you can remove this later with clear alcohol and a paintbrush or by lightly steaming.
Step 6: Make some skull molds using dark modeling chocolate and the small skull mold.
Karen’s Top Tip: As the chocolate mold is not very flexible, pop it into the freezer and it will be easier to remove.
Step 7: Attach the molding around the plaque using edible glue.
Step 8: Airbrush around the border of the plaque with black airbrush color.
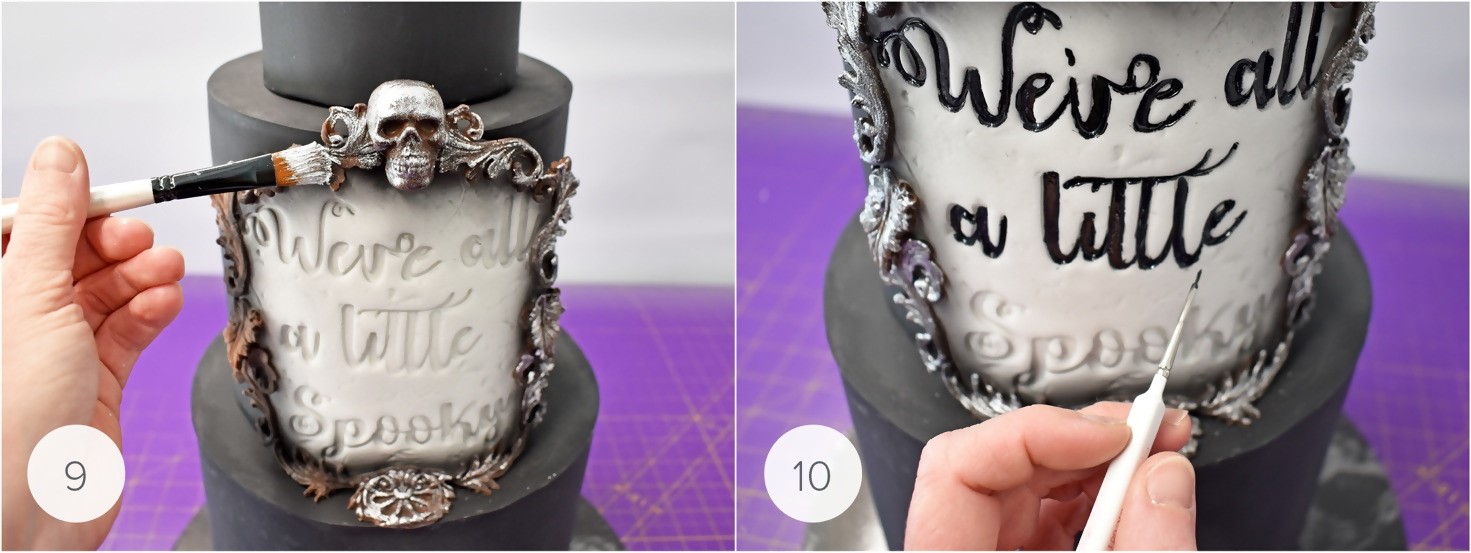
Step 9: Mix the silver highlighter with alcohol and paint the plaque border.
Karen’s Top Tip: Leaving some of the darker chocolate underneath exposed gives a great antiqued effect.
Step 10: Mix the black dust with alcohol and paint the lettering
Make the Rose
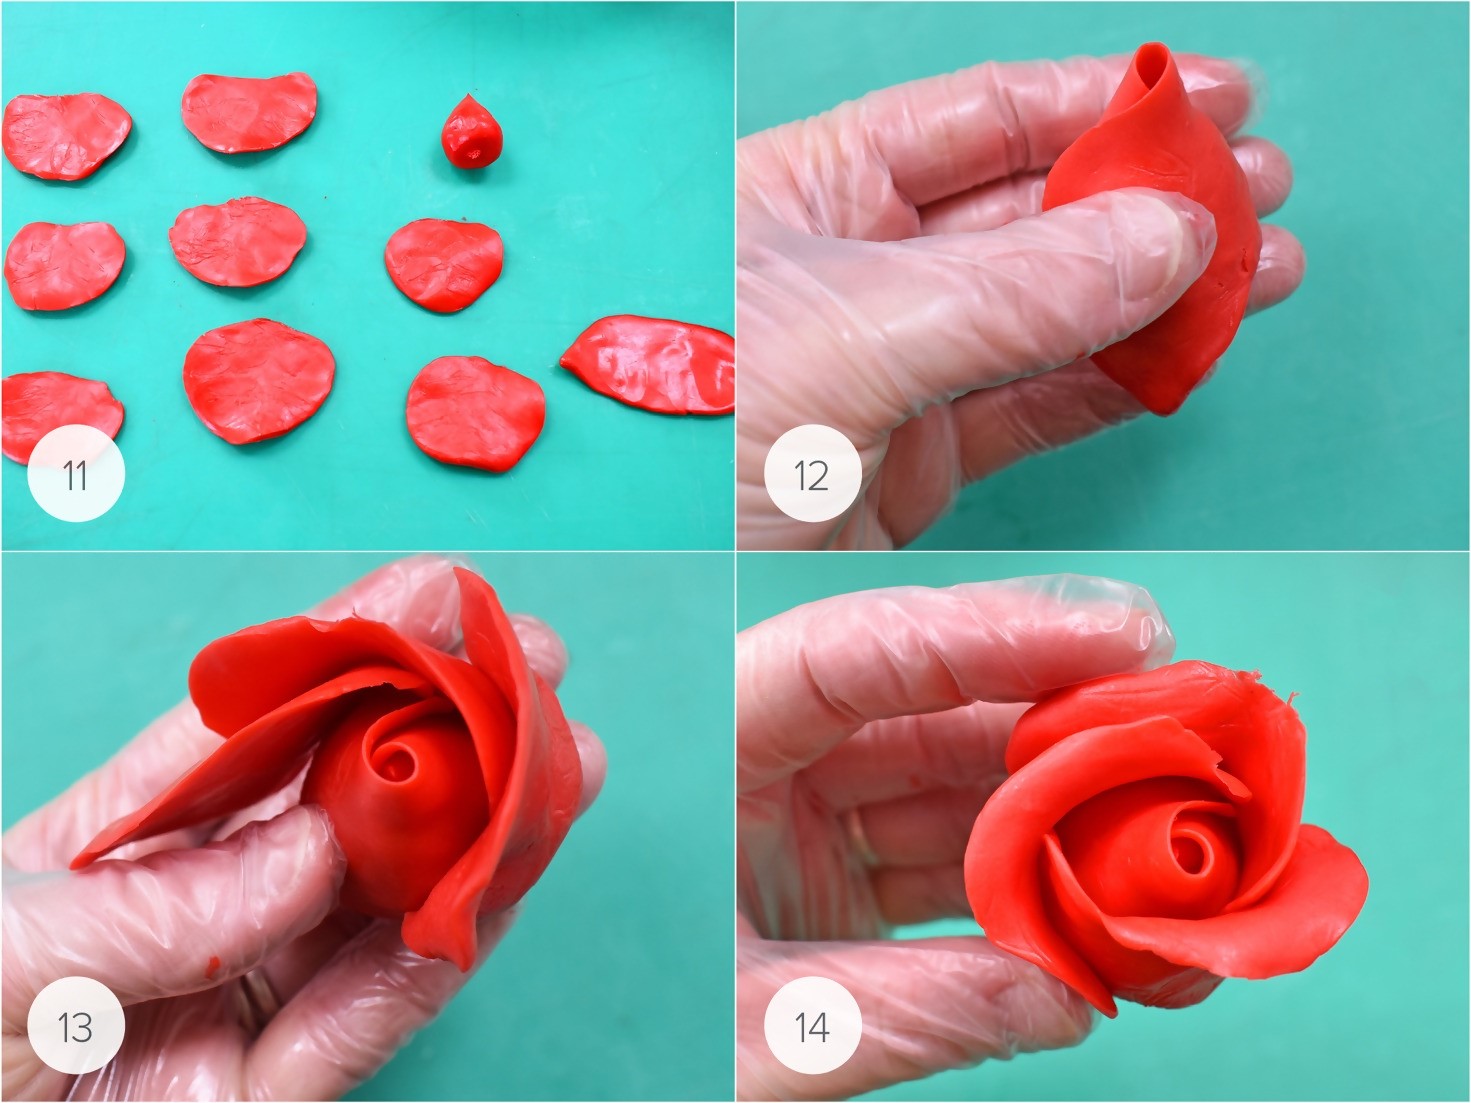
Step 11: Roll nine balls of red modeling chocolate and flatten each one, thinning the edges with your fingers. Make one of these pieces longer than the rest. Roll a teardrop shape for the center.
Step 12: Take the longest petal and wrap around the teardrop as shown. If you want to make a bud, you can stop at this point.
Step 13: Take three petals and wrap them around the bud as shown.
Step 14: Roll down the edges of the petals.
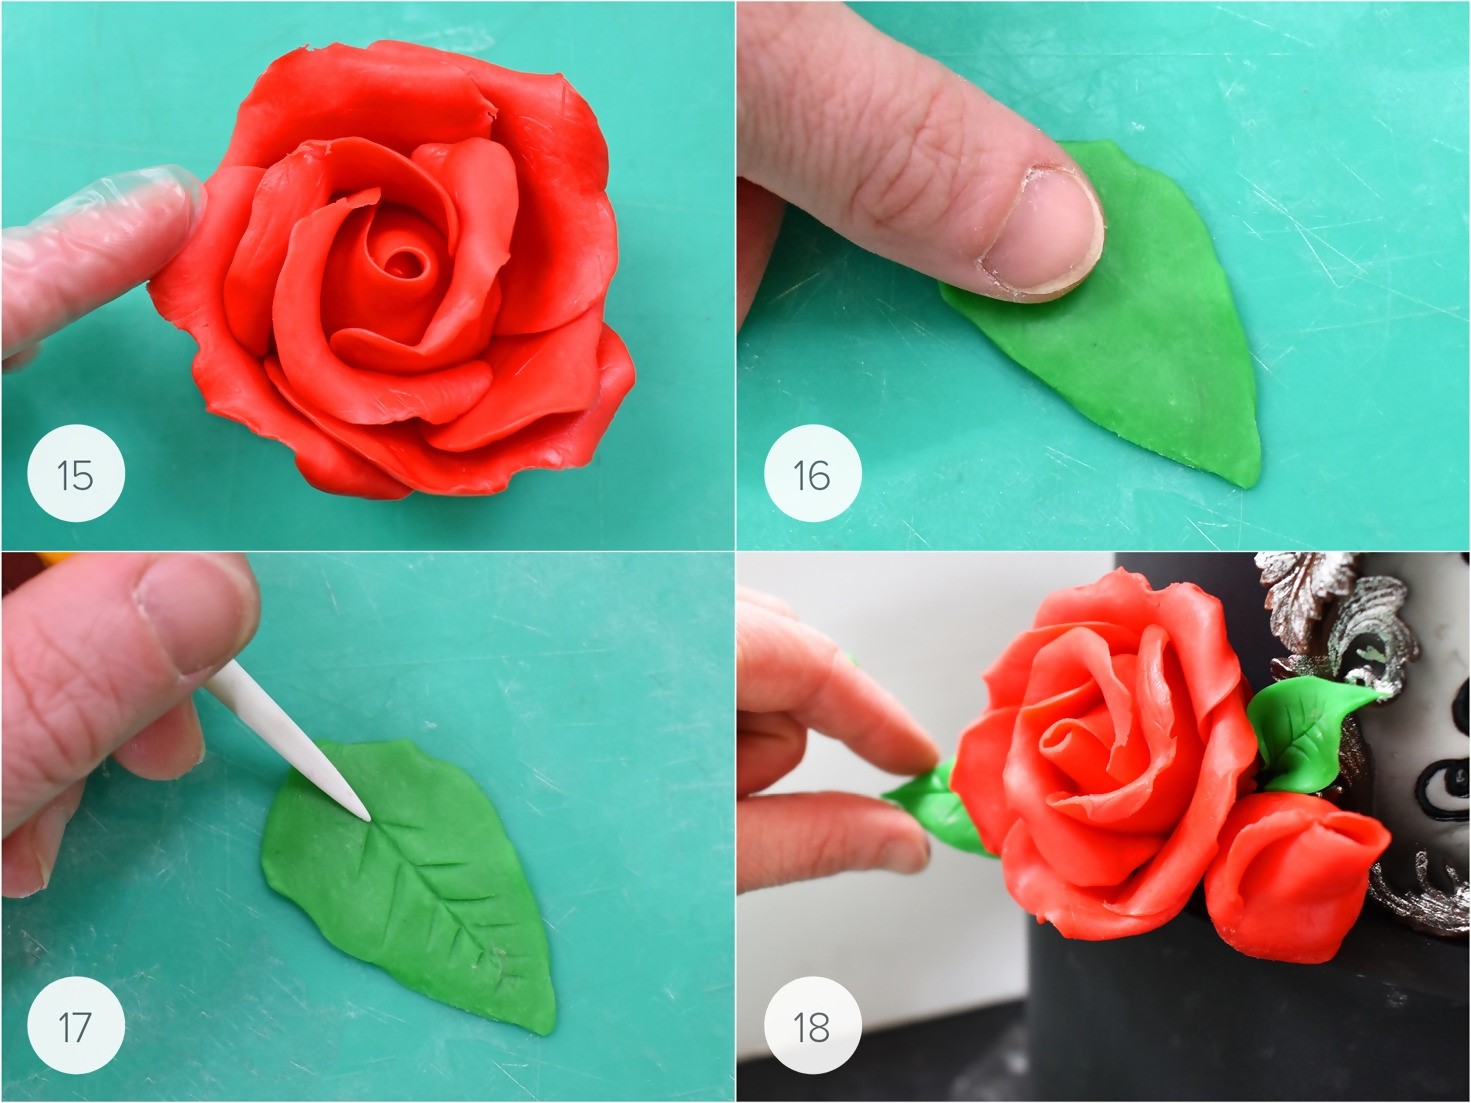
Step 15: Add the remaining five petals in the same way.
Step 16: Roll a teardrop-shaped piece of green modeling chocolate and flatten with your thumb, thinning the edges.
Step 17: Use a Dresden tool to score in the veins as shown.
Step 18: Attach the rose, bud, and leaves to the side of the cake, use edible glue if necessary.
Make the Candles

Step 19: To make the candles, roll some bright white modeling chocolate into a cylinder shape.
Step 20: Stand the cylinder upright and use a ball tool to create a hollow in the top of the candle.
Step 21: Roll some smaller pieces to create the drips, then attach to the side of the candles and on the side of the cake.
Step 22: Attach the candles to the side of the cake and insert a cocktail stick into the top of each one. Roll a slightly larger piece of modeling chocolate to create the flame for each candle and attach to the top of the cocktail sticks.
Create the Blouse Tier

Step 23: Roll out some bright white modeling chocolate and cut out two triangles to create the blouse collar for the top tier.
Step 24: Use a button mold and some bright white modeling chocolate to make three buttons.
Step 25: Attach the collar to the top tier using edible glue.
Step 26: Attach the buttons under the collar using edible glue and attach small strips of black modeling chocolate for the thread.
Create an Edible Cigar
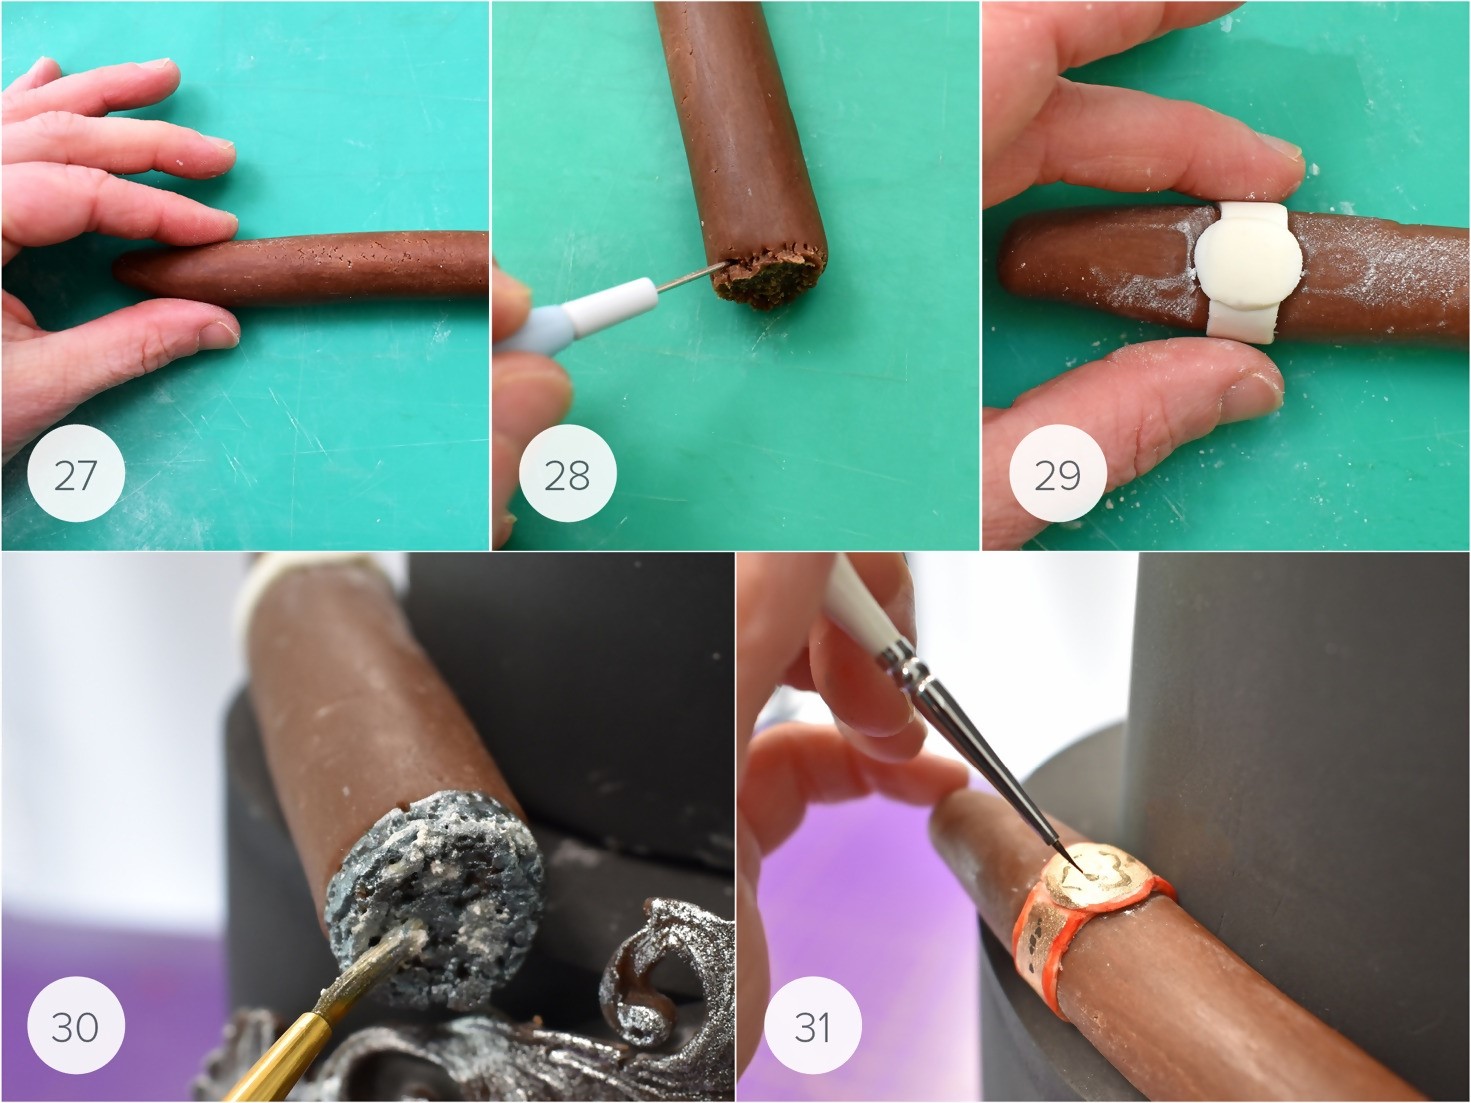
Step 27: For the cigar, roll out some dark modeling chocolate into a cigar shape.
Step 28: Use the needle tool to pick at the top of the cigar to create the ashes.
Step 29: Make a small label for the other end of the cigar using bright white modeling chocolate. Attach the cigar to the cake using edible glue.
Step 30: Paint the ashes using old silver dust mixed with alcohol.
Step 31: Paint the outside of the label with red dust mixed with alcohol, the inside with gold highlighter mixed with alcohol, and some squiggles with black petal dust mixed with alcohol to represent tiny text on the label.
Make Sweet Skulls
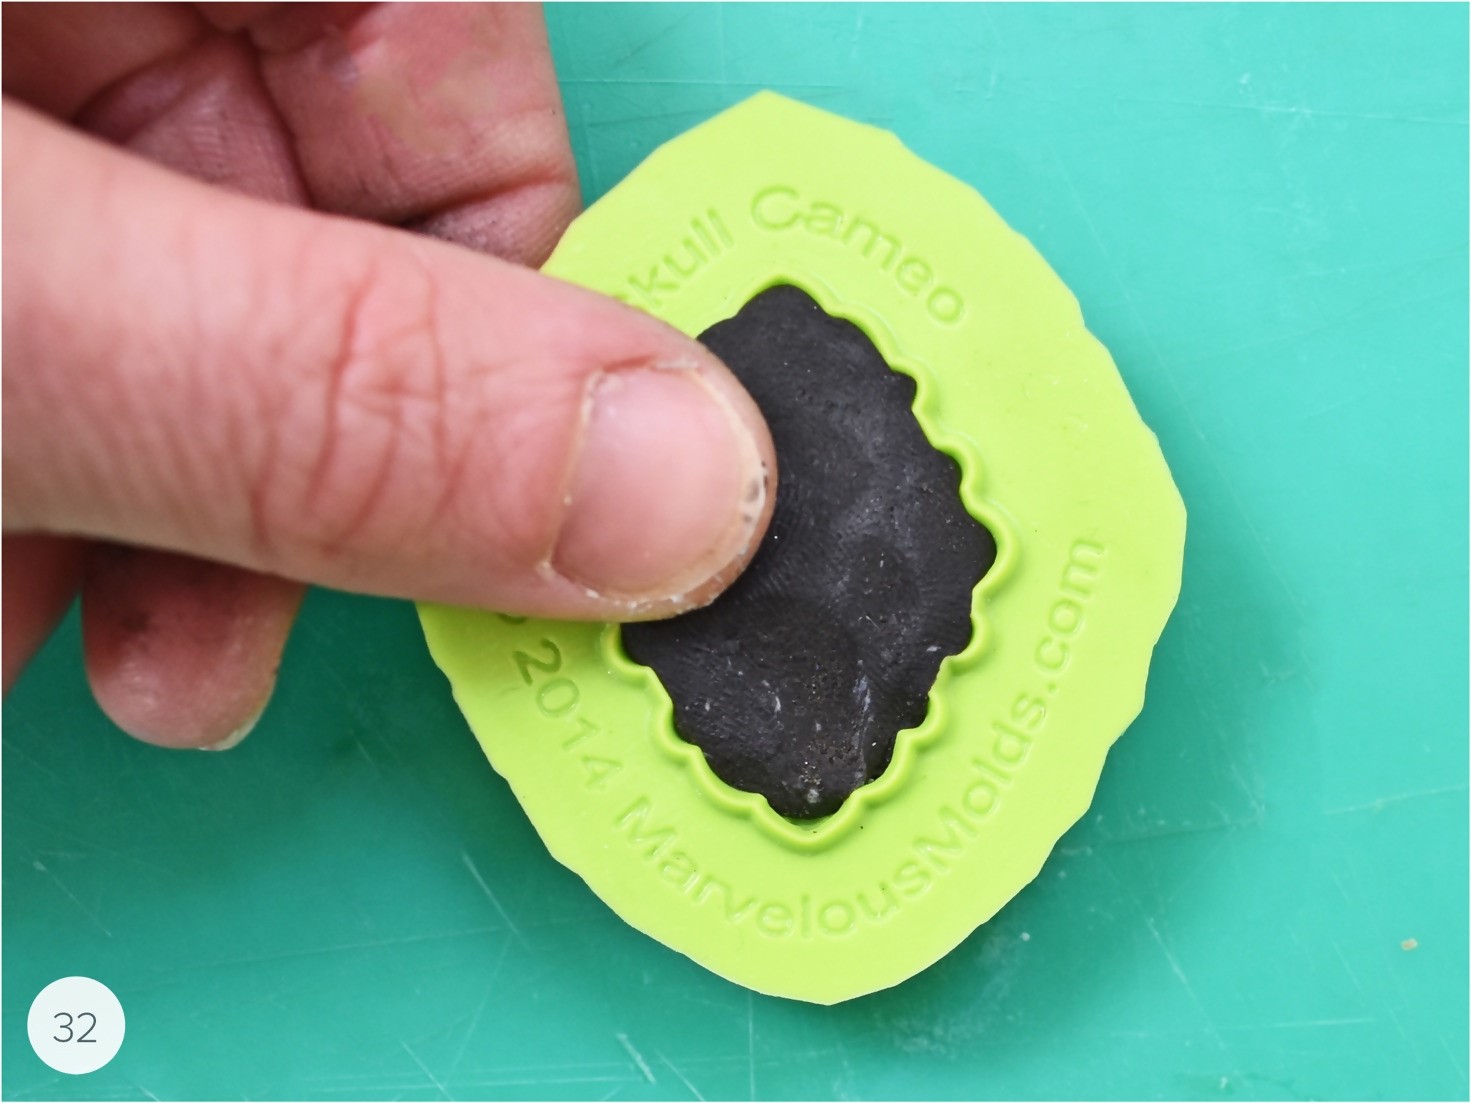
Step 32: Use the skull cameo mold and some black modeling chocolate to make seven skulls.
Add Drama with Drapes
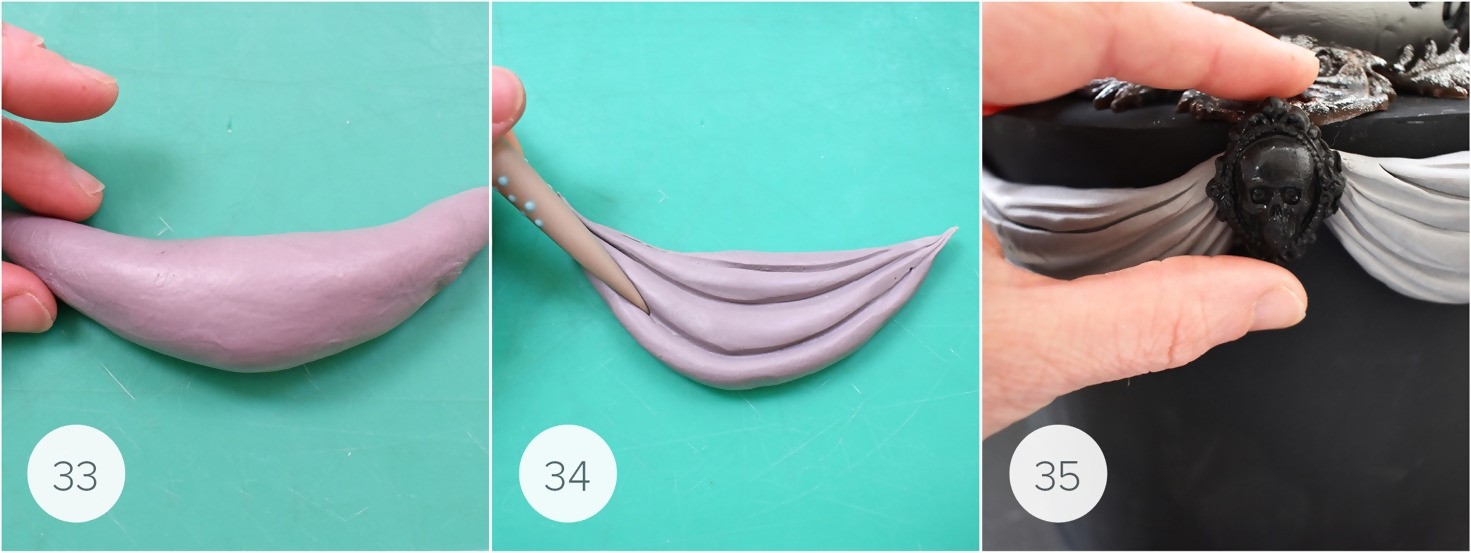
Step 33: To make the drapes, roll out some gray modeling chocolate into a small banana shape as shown.
Step 34: Flatten the shape slightly with your hand and score some lines using the pointed sugar shaper.
Step 35: Attach the drapes and skulls, as shown, all around the bottom tier using edible glue.
Add Droplets
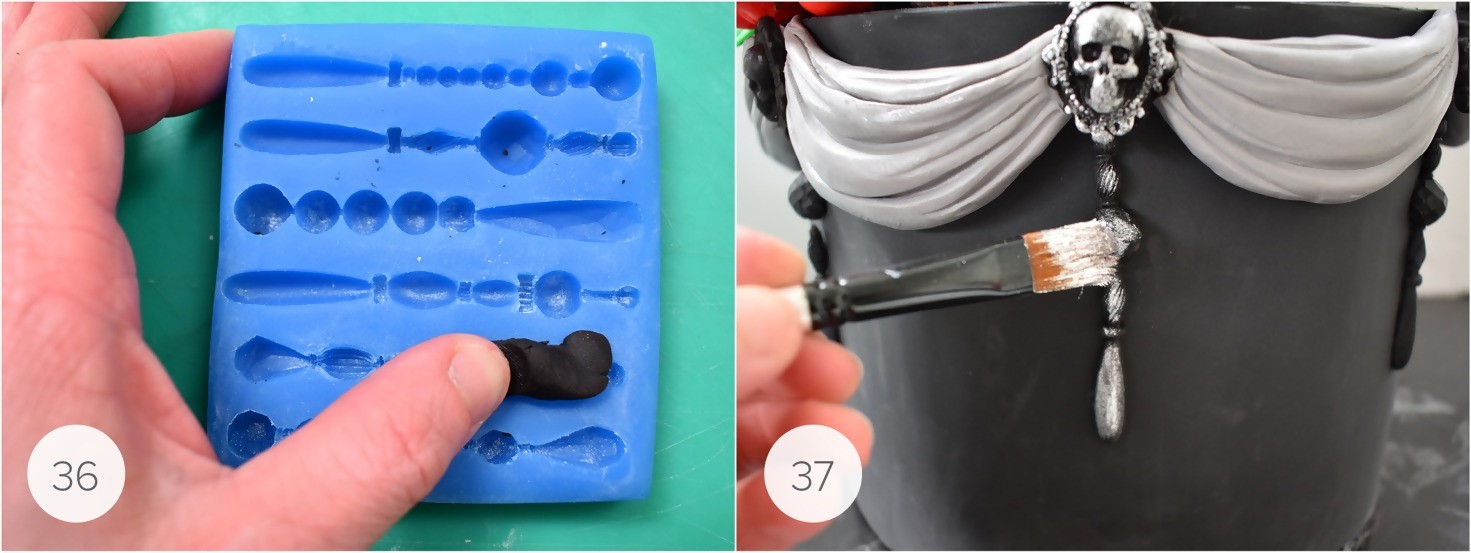
Step 36: Use the droplet mold and some black modeling chocolate to make six droplets.
Step 37: Attach the droplets under the skulls using edible glue and paint the skulls and droplets with the silver highlighter mixed with alcohol.
Make the Bottles
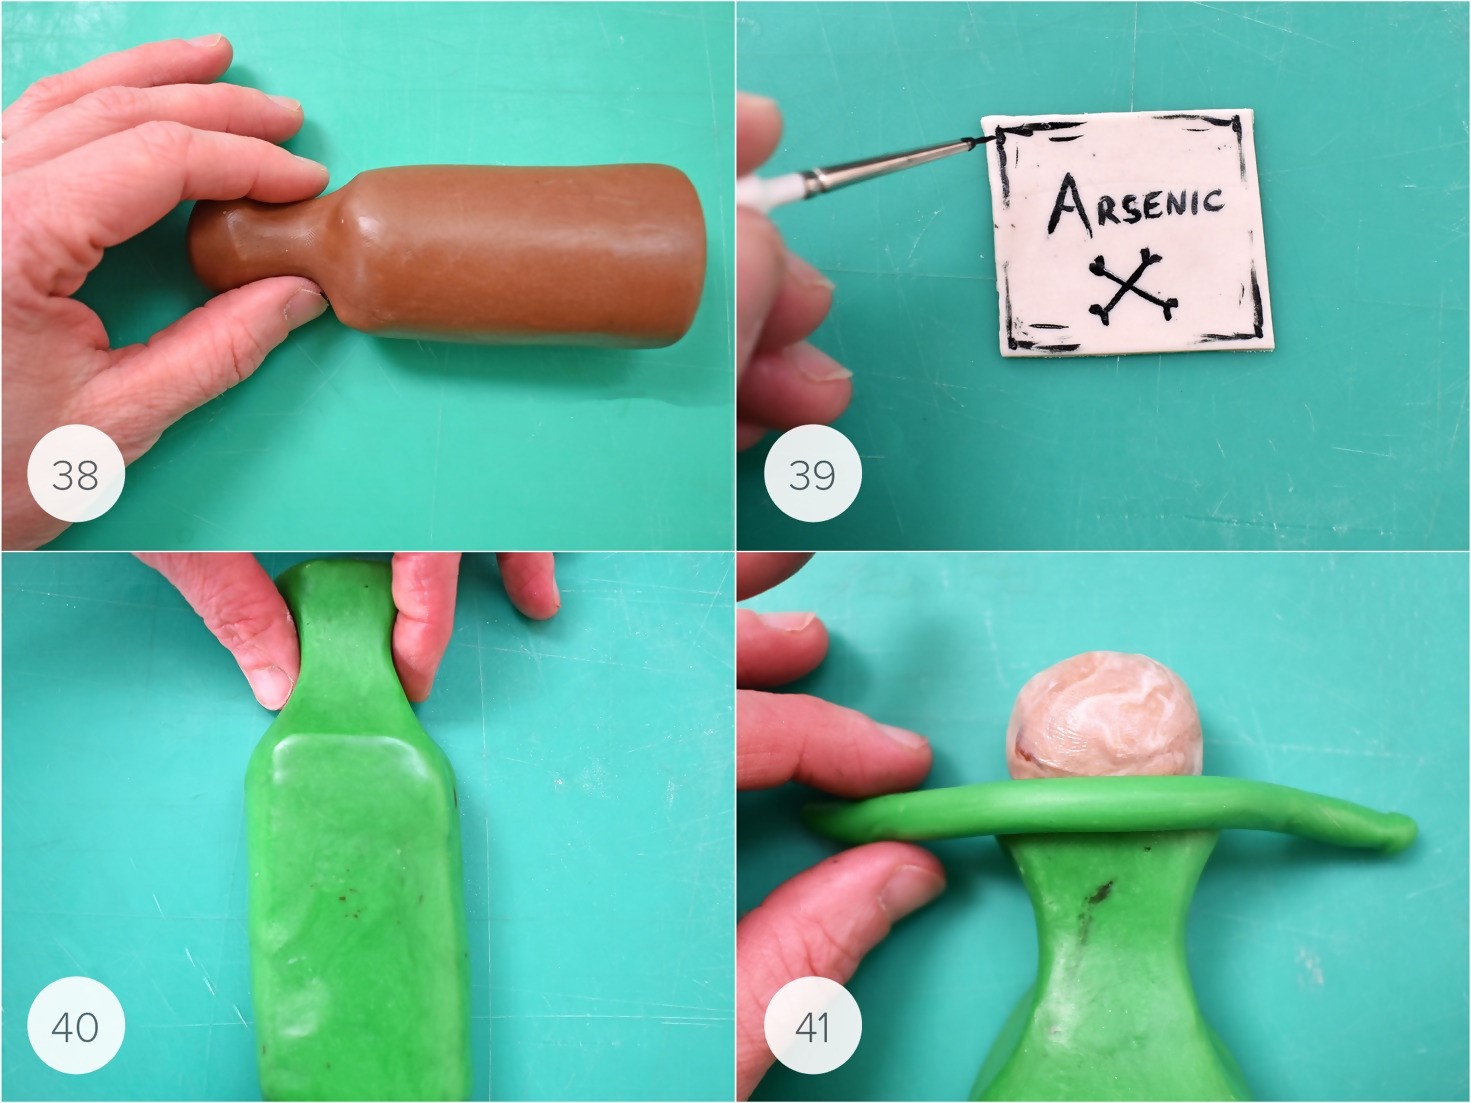
Step 38: Mold some dark modeling chocolate into a bottle shape as shown.
Step 39: Roll out a square of bright white modeling chocolate for the label and use the black dust mixed with alcohol to paint “arsenic” and some lines on the label as shown.
Step 40: Use the green modeling chocolate to create a green bottle, slightly larger than the brown bottle.
Step 41: Roll some brown and bright white modeling chocolate together into a ball to make the stopper and a snake of green to create the top of the bottle.
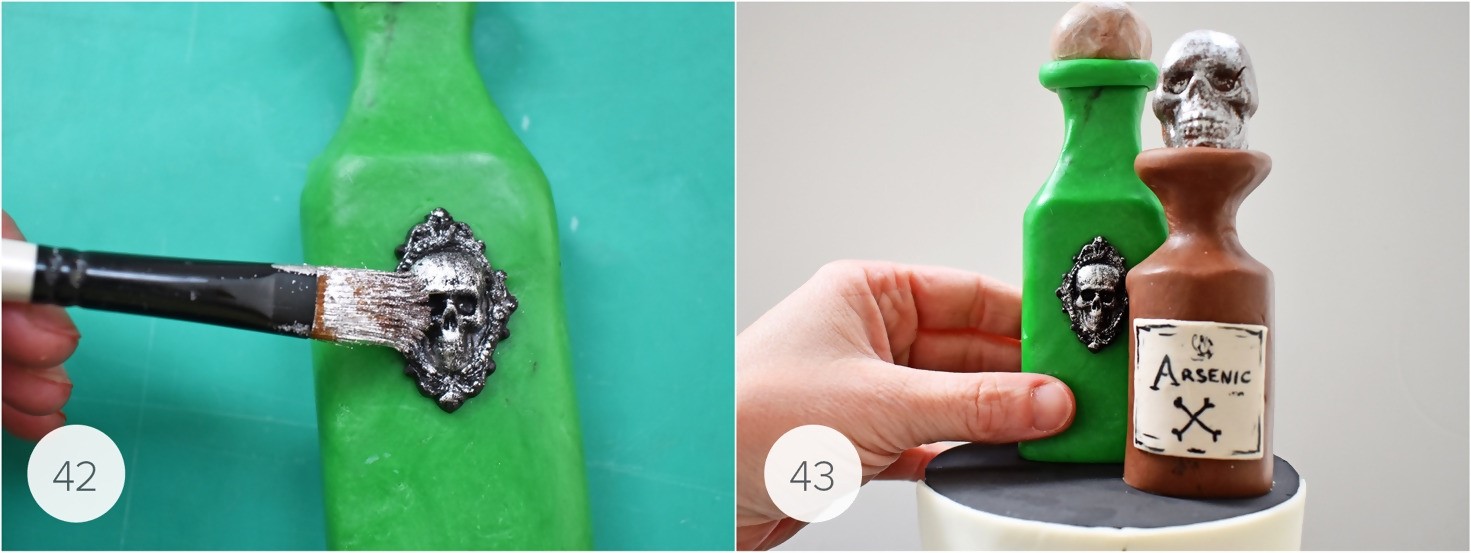
Step 42: Attach a skull to the green bottle and paint it silver.
Step 43: Attach the bottles to the top of the cake using edible glue.
Make the Raven
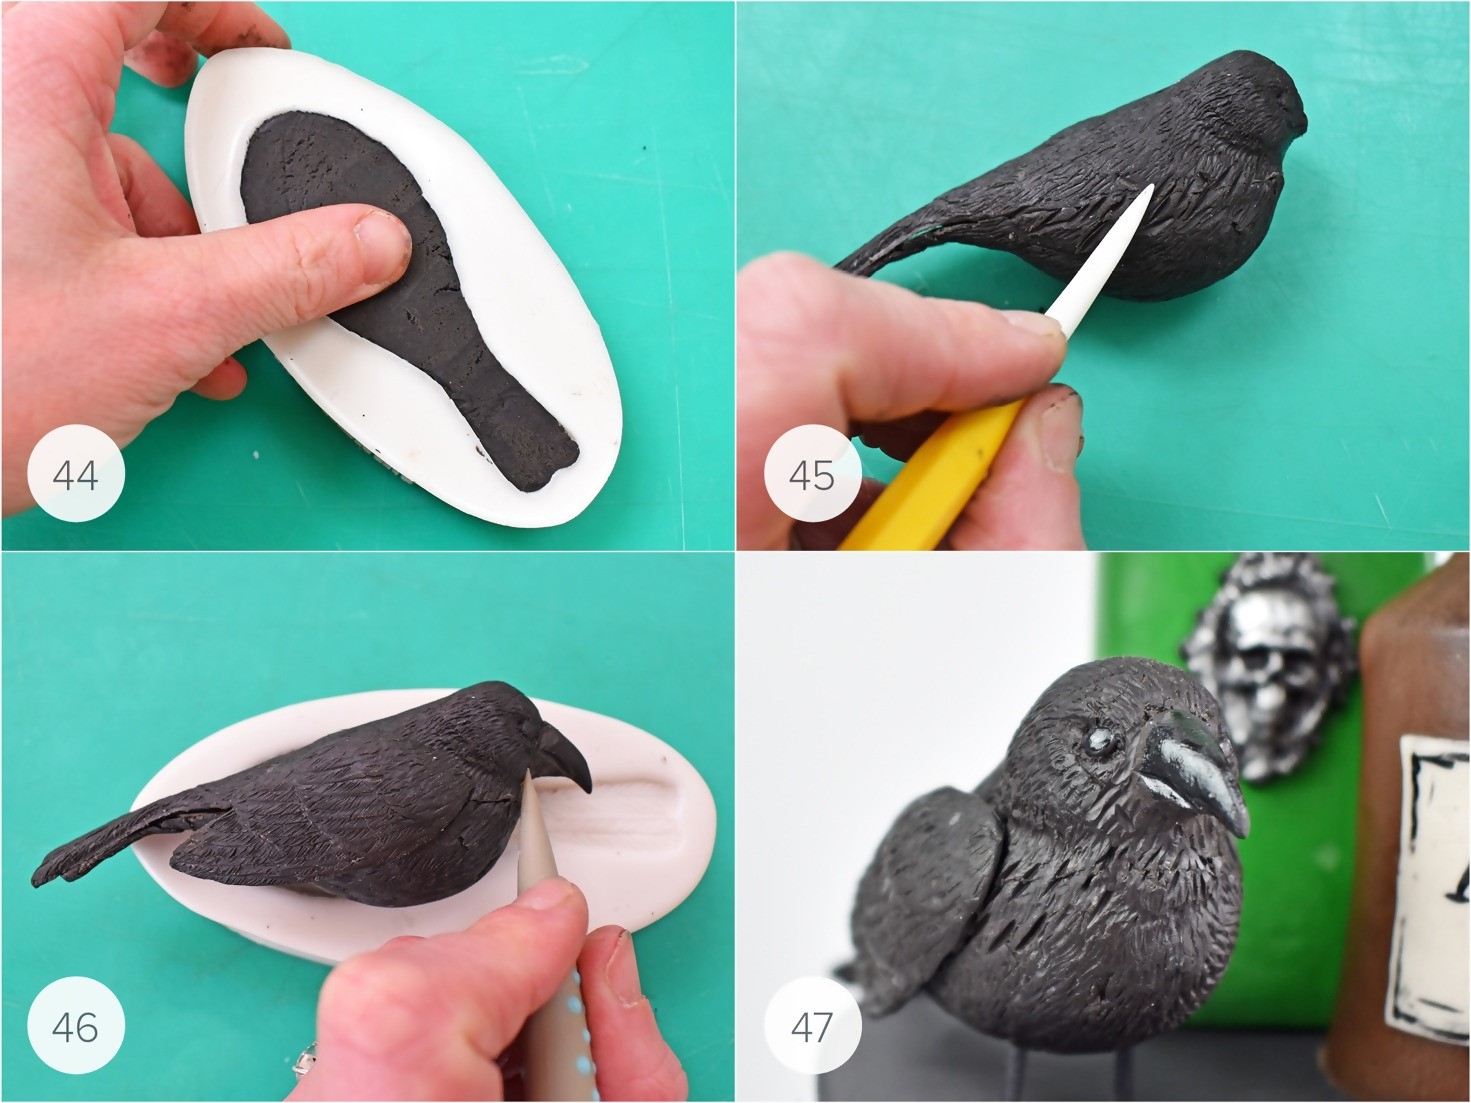
Step 44: Fill the three-part bird mold with black modeling chocolate and pop it into the freezer for 10 minutes.
Step 45: Remove the chocolate from the mold, stick the body together using a little edible glue, and use a Dresden tool to blend the feathers, hiding the seam.
Step 46: This bird’s beak is quite small, so I added a bigger one using a little back modeling chocolate. Attach the wings using edible glue.
Step 47: Paint two cocktail sticks with black petal dust, insert them into the top of the cake, and push the raven onto the sticks.
Add Finishing Touches
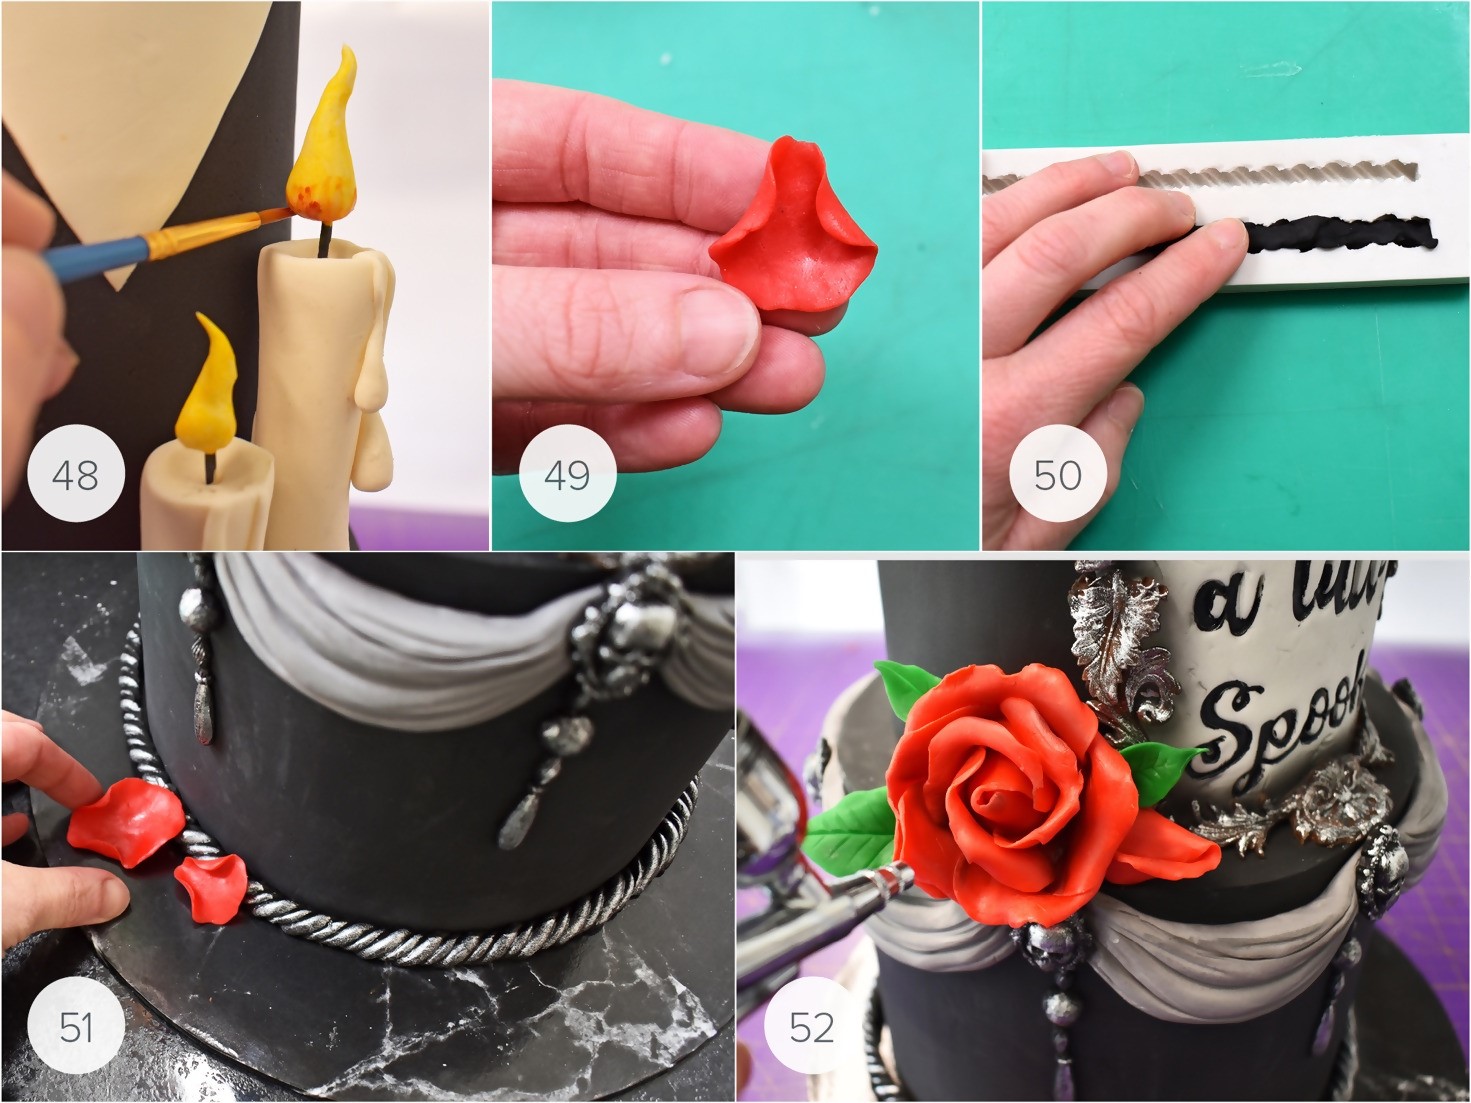
Step 48: Paint the candle flames using the yellow and red petal dust mixed with alcohol. Paint yellow all over and then add a little red on the bottom. Paint the cocktail sticks black.
Step 49: Roll out a ball of red modeling chocolate, flatten into a circle, and roll in two sides to create a petal shape.
Step 50: Fill the rope mold with black modeling chocolate.
Step 51: Attach the rope mold all around the bottom tier and paint silver. Attach the petals with edible glue.
Step 52: Use the black airbrush color to shade the rose, drapes, candles, collar, and bottles.
_
About Karen Keaney:
With a background in art and an accomplished baker, Karen is an international award-winning cake designer, a proud member of the Panel of Chefs of Ireland and the Northwest Culinary Team, and a Satin Ice Artist of Excellence.
