
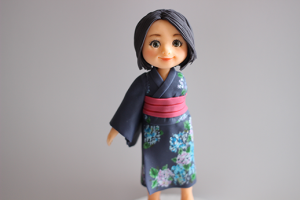
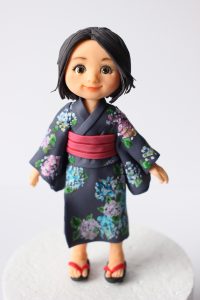
Multi-award winning, international instructor, Sachiko Windbiel shares her unique modeling style in this detailed step-by-step tutorial. Learn how to transform Renshaw fondant and create these adorable Kimono girl cake toppers. Sachiko says, “It’s summertime in Japan, which means it’s time to enjoy the summer festivals and the fireworks displays! These two girls are excited to go to the waterside to take in the colorful sky displays. For this Fun and Special Occasion, the girls are donning their Yukatas, which are lightweight, casual Kimonos. The Yucatan add to the festive feel of the evening. And the girls have fun meeting their friends and taking selfies with which to remember this special summer night. “

Components
- Rolling Pin
- X-Acto Knife
- Pin
- Toothpick
- Edible Marker (Brown, Black)
- Fine tipped detailing brush
- Flat modeling tool
- Modeling tool
- Petal dust ( brown, pink)
- Confectioner glaze
- Flesh tone fondant (Head 0.8oz, Arms 0.5oz, Legs 1.5oz)
- Hair (Black 1oz)
- Renshaw White fondant (Body 1oz)
- Sandals (Black 0.2oz, Red 0.1oz)
- Summer Kimono (Dark Blue 2oz)
- Belt (Pink 0.5oz)
- Tylose
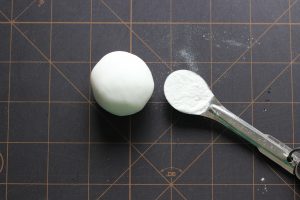
Sachiko notes: You will need to add a small amount of tylose to the fondant to help it dry. Color all of your fondants before you start and keep it wrapped tightly in plastic wrap. Make the Gum paste eyeballs at least one day in advance and make sure they match in size and shape.
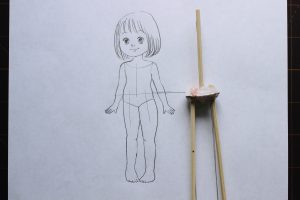
Step 1: Use hot glue to secure the skewers into position as shown.
Sachiko notes: The skewers and cardboard will provide the support for the figure.
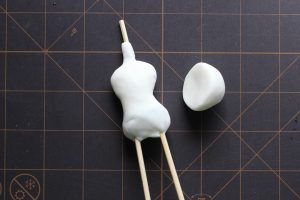
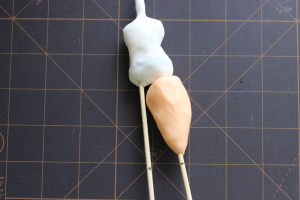
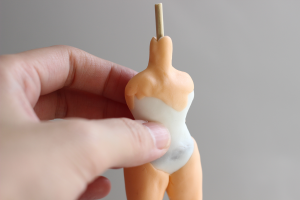
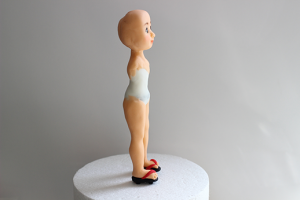
Step 2: Take a ball of white fondant to create the body shape. Attach corn syrup (which will act as a glue) to the top skewer, extending about 1.5 inches above the cardboard. Press the fondant onto the skewers and cardboard, and shape it into a torso and hips as shown. Take the second piece of fondant and shape into a half-ball.
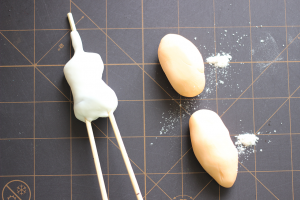
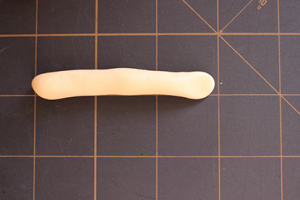
Step 3: divide the flesh tone fondant ( as shown) to create the head, the arms, and the legs.
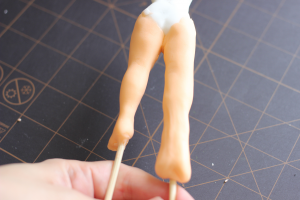
Step 4: Add corn syrup to the right-sided, extended skewer (do not apply the corn syrup to both skewers at once) and place the fondant on the skewer to form the leg. Gently roll the fondant down the skewer, and smooth to make the fondant even and straight.
Step 5: Shape leg with your fingers, pressing to create indentations for the knee and ankle; and gently flatten the bottom end to form the foot.
Sachiko notes: If there is too much fondant, you can pull some of the excess down the leg and pinch off.
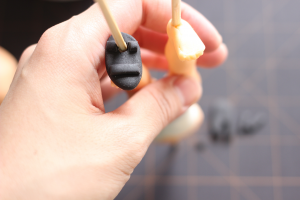
Step 6: Use an X-Acto knife to carefully cut in the toes as shown.

Step 7: Use a toothpick to shape the toes.
Step 8: Follow steps 4/5 to create the left leg. Pull the skewer slightly away from the other leg.
Sachiko notes: Do not be overly concerned about the shapeliness of the legs because eventually, the yukata will be covering them. The toes, however, will be seen.
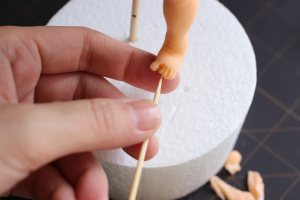
Step 9: Attach a small amount of flesh-toned fondant and form into the neck and shoulders as shown.
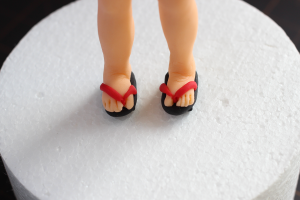
Step 10: Cut two ovals to form the sandal elements, from black fondant, as shown. Cut two notches into the sandals to form the toe bar (the notch will allow you to slide the sandals over the skewer). Roll four very small rolls of fondant to form the straps.
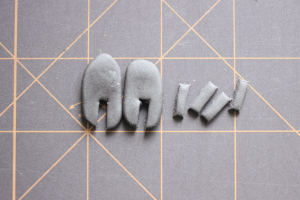
Step 11: Attach the sandals to the soles of the feet using a little edible glue. Finally, add the sandal straps as shown.
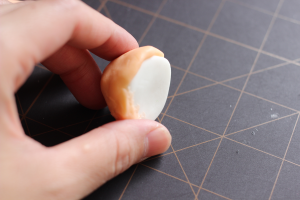
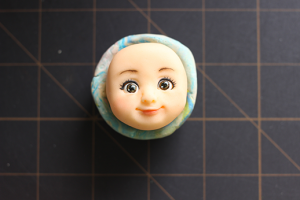
Step 12: Begin making the head by adding flesh tone fondant to the outside of the head support (half ball you made earlier) using your fingers to fuse the fondant around the back of the head. Blend until smooth and seamless.
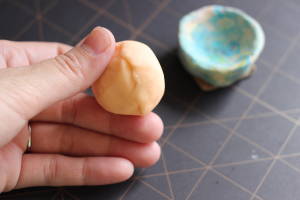
Sachiko notes: Always assess the proportions. It is easy to make the head too large so think SMALL
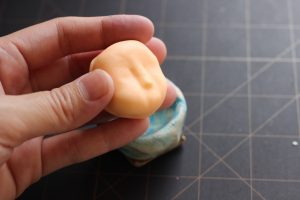
Step 13: Use the modeling tool to rough out the facial features, including the nose.
Step 14: Paint the eyeballs, which were created the day previously, with brown or black edible markers
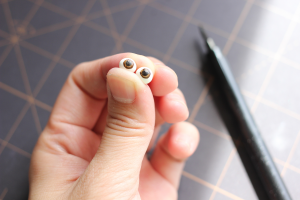
Step 15: Insert the eyeballs, pressing them in gently with a toothpick. Use your fingers and the modeling tool to smooth the fondant around the edges of the eyes.
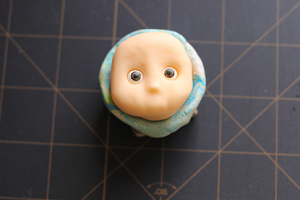
Step 16: Use a pin and a toothpick to create the nostrils, giving the nose form and definition, as shown.
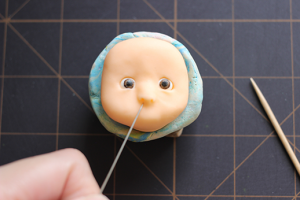
Step 17: Cut in the mouth with an X-Acto Knife.
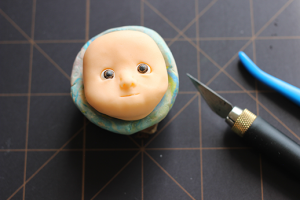
Step 18: Shape the lip line with the modeling tool and a toothpick.
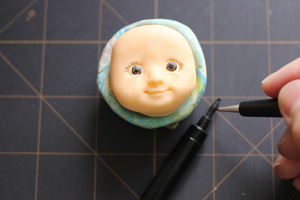
Step 19: Using a very fine detailing brush and the edible black marker, paint on the eyelashes.
Step 20: Roll a tiny amount of black fondant into a thin sausage and apply to the eyes to create the eye-liner.

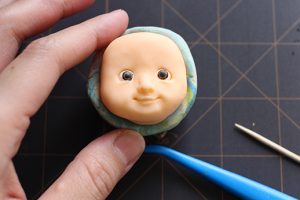
Step 21: Use a little pink petal dust for the lip and the cheeks, and brown dust for the eyebrows. To finish the face, lightly apply a small amount of confectioner glaze to the eyes and to the lips.
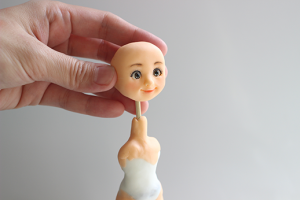
Step 22: Determine a balanced point for the neck and make a small hole at that point with a toothpick. Apply Corn Syrup to the skewer and place the head onto the skewer and neck.
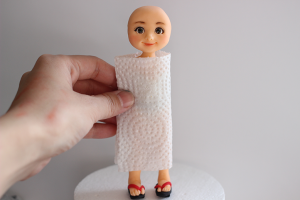
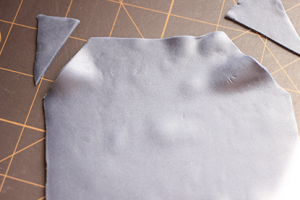
Step 23: Wrap a piece of paper towel around the body of the figurine to determine the size of the Kimono. Then using the paper towel as a size guide, cut the fondant for the yukata.
Step 24: Wrap fondant around the body, securing with a little water. Shape the fondant yukata around the body. Trim the fondant as necessary and blend the seams.
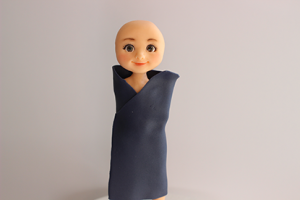
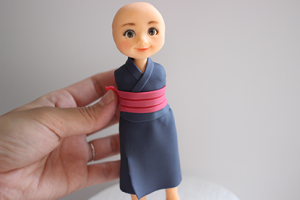
Step 25: Cut small flat strips of fondant to form the collar. Then cut wider fondant pieces for the waistband.
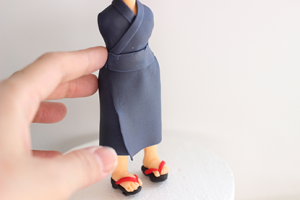
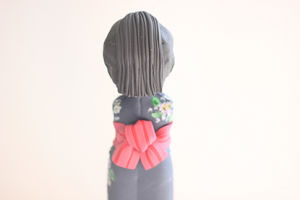
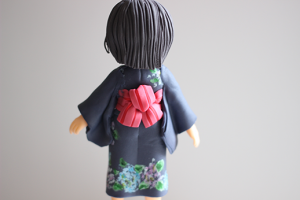
Step 26: Create the “Obi” by wrapping a colorful strip of fondant around the waist and attaching two small bows at the back, as shown.

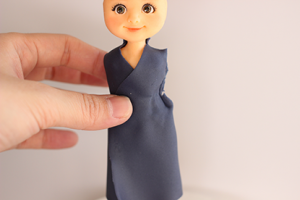
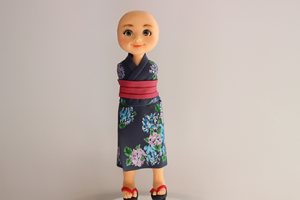
Step 27: Mix a little pink, green, and blue gel color with water in separate bowls (it will look like oil paint). Carefully paint on little flowers and leaves to create the Yukata design. Allow to dry.
Step 28: Attach a thin layer of black fondant to the back side of the head, this will form the basis of the hair and improve the overall shape of the head.
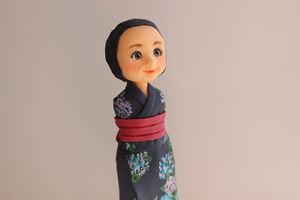
Step 30: Create more pieces of hair by rolling small balls of black fondant into strips and texturizing with a flat modeling tool. Cut the bottom of the hair to create a blunt edge and attach to the top of the head.
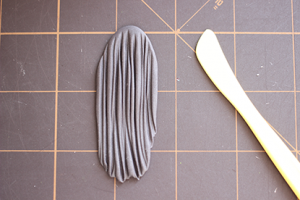
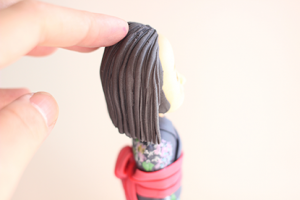
Step 31: Add more pieces of hair using the above step until you are happy with the finished appearance.

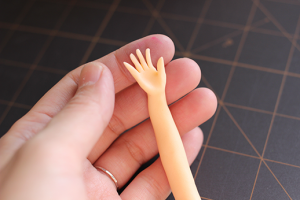
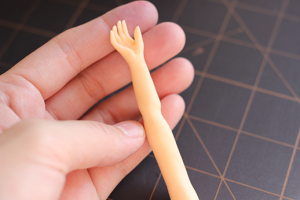
Step 32: Take a small piece of flesh-toned fondant and roll into a sausage shape for the arm, flatten one end of the arm (to form the hand) and round off the other end (to form the shoulder). Use your finger to shape the arm, creating indentations for the elbow and wrist.
Step 33: Using an X-Acto knife, cut in the thumb and fingers. Use your finger to gently position the thumb forward.
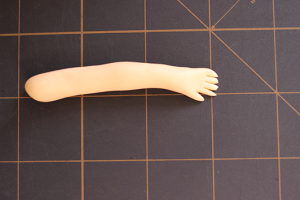
Step 34: Use a toothpick to shape the fingers.
Sachiko notes: The hand will be showing from underneath the sleeve, so take your time to make sure the fingers are separated and delicate. Repeat the above steps to create the second arm.
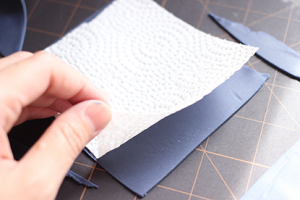
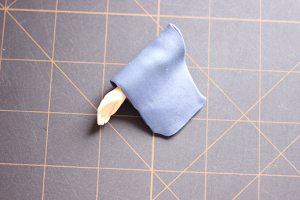
Step 36: Use a piece of paper towel, wrapped around the arms, to create a guide/template for the Yucata sleeves.
Step 37: Using the paper template, cut two pieces of black fondant to form the sleeves and wrap around the arms as shown.
Step 38: Attach the arms to the figurine using a little edible glue and carefully blend the seams.
Step 39: Paint the kimono sleeves using a little edible paint created by mixing gel paste with water. Follow the same pattern as used on the kimono dress. Allow to dry.


