

A winter wonderland needs sparkle and shimmer, it makes an occasion extra special, and now you can add this magic to your cakes! Because metallic accents so often require extra labor and materials, Satin Ice has simplified the process by providing a fondant pre-mixed with glitter that is food safe. Hoorah!
In this trendy tutorial Violet Lin Tran shows us how easy it is to create a stunning holiday cake to show off Satin Ice Shimmer Collection!
Edibles:
- Pre-baked cake tiers or cake dummies
- Satin Ice Shimmer Fondant in Sliver and Gold
- Satin Ice Fondant in Navy and White
- Tylose powder
Equipment:
- Rolling pin
- Snowflakes plunger cutters
- Craft knife
- Dresden tool
- Small leaf cutters
- Circle cutter sets
- Oval cutter sets
- Scalloped circle cutters
- Wheel cutter
- Water or edible glue
Prep ahead:
Cover the top tier with Satin Ice Silver Shimmer fondant: 1.5 lbs required for the 5 x 5 inch (12.7 x 12.7cm) tall tier pictured.
Mix 2 parts Satin Ice Navy fondant with 1 part Satin Ice Silver Shimmer fondant to create a shimmery navy color and cover bottom tier: 2 lbs total required for the 7 x 5 inch (18 x 12.7cm) tall tier pictured.
For the decorative pieces in the tutorial steps below, pre-treat fondant with Tylose powder to strengthen it and allow for easier manipulation and quicker drying time: mix approximately 1/2 tsp Tylose per pound of fondant.

Tutorial Steps:

1 Roll some Tylose treated Satin Ice Pearl Shimmer fondant to 2mm thickness and punch out snowflakes using a plunger cutter.
2 Roll out some Tylose treated Satin Ice Pearl Shimmer fondant to 2mm thickness and cut out random tree shapes (approximately 5.5 inch tall) with a craft knife.
3 Using the thin end of a Dresden tool, mark some bark details and knots.
4 Using a craft knife, cut out holes or large knots in the tree cut outs and using the dull back end of the craft knife, press random lines into the sides of the trees as shown.

5 Roll out some Tylose treated Satin Ice Gold Shimmer fondant to 2mm thickness and using a small leaf cutter, cut out some leaf shapes. Using the thin end of a Dresden tool, mark a line on the bottom half of each cut out; dab some water on the end and pinch the bottom of the leaf cut outs to create a 3D effect.
6 Roll some Satin Ice Gold Shimmer fondant to 2mm thickness and use a 2.5 inch long oval cutter to make 5 cut outs. Place cut outs under plastic to prevent them from drying out.
7 Mix some white fondant with some Tylose treated Satin Ice Gold Shimmer fondant to create a lighter shade. Use a 1.75 inch (4.5cm) long oval cutter to make 5 cut outs then place cut outs under plastic to prevent drying out.
8 Take one of each size of oval cut out and brush a line of water down the center of each as pictured.
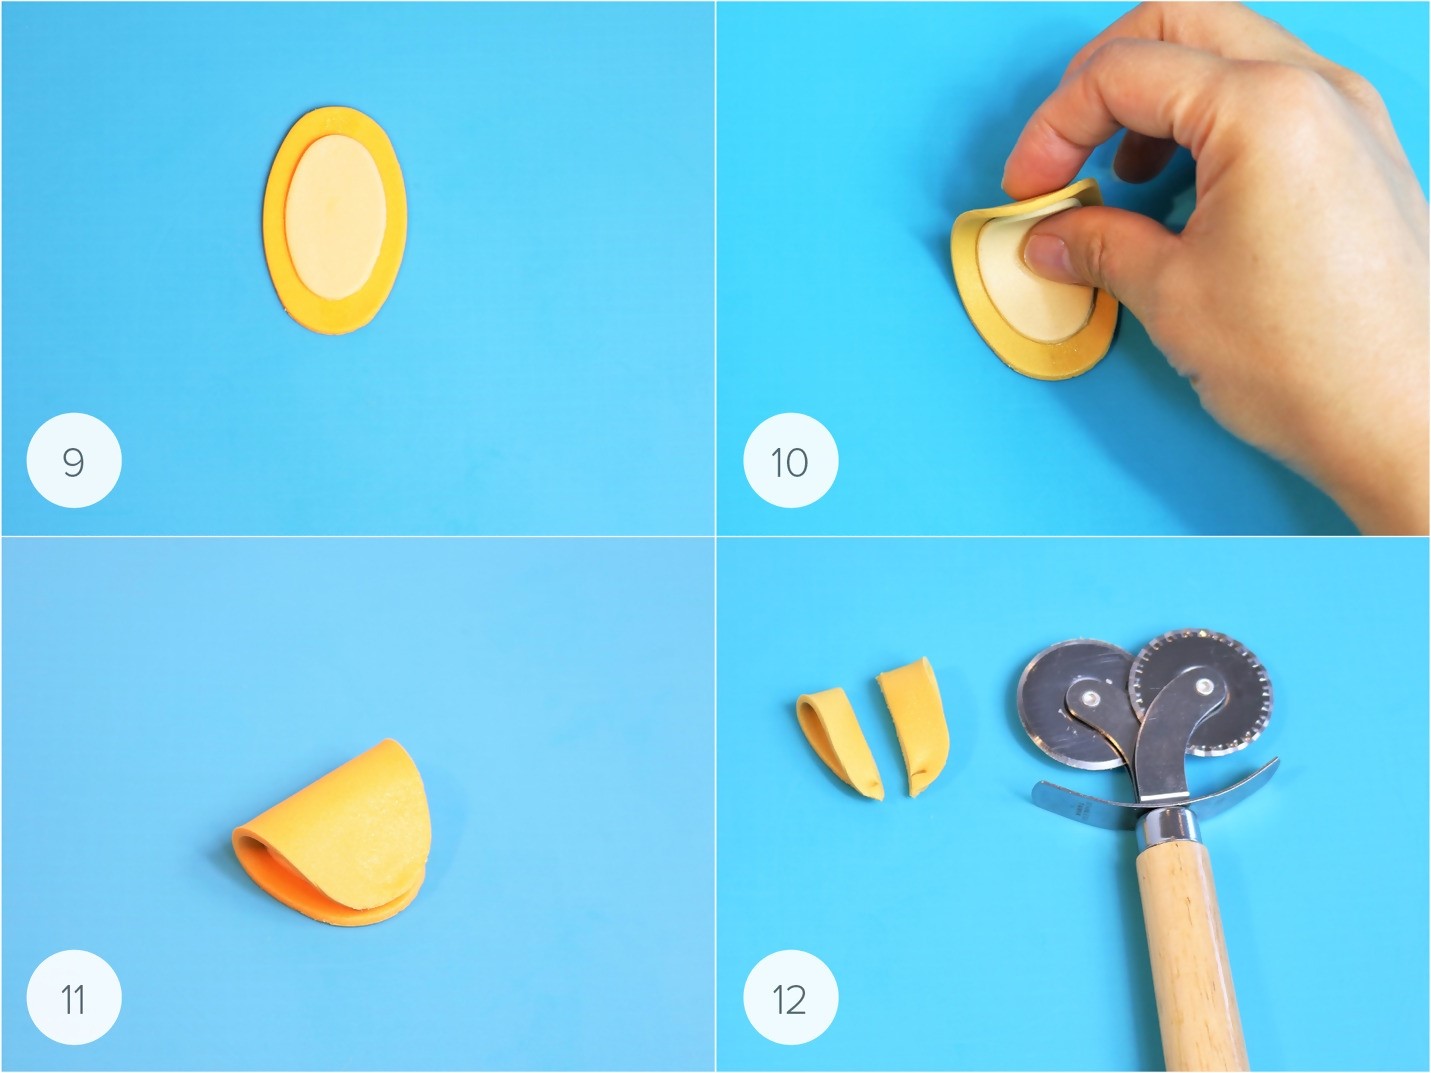
9 Place the smaller oval on top of the larger one.
10 Fold one end over so the two ends touch but do not flatten or crease the piece.
11 Add water where the ends touch and press down to stick together.
12 Using a wheel cutter, cut the folded oval piece lengthwise in half.

13 Turn each end over so the cut end is at the bottom and flare out the top end with your fingers to create a petal look. Repeat steps 8 to 13 for the other four sets of oval cut outs.
14 Roll some Tylose treated Satin Ice Gold Shimmer fondant to 2mm thickness and cut out a circle with a 2.25 inch (6cm) wide circle cutter.
15 Wet the entire surface of the circle cut out with water or edible glue
16 Attach the petals side by side, in a circle as shown.

17 & 18 Using a 1.5 inch (4cm) circle cutter, punch out a hole in the center to create a wreath shape.
19 Create trim for the center of the wreath; roll some Tylose treated Satin Ice Gold Shimmer fondant to 2mm thickness and cut out a scalloped circle using a 2.25 inch (6cm) double-sided circle cutter for the outside and a 1.5 inch (4cm) circle cutter for the inside.
20 Make a slit as shown using a craft knife; using water or edible glue attach the trim to the inside portion of the wreath shape; create a base to sit your wreath on by rolling a thick piece of Tylose treated fondant (1/4 inch thick) and cutting out a scalloped circle.
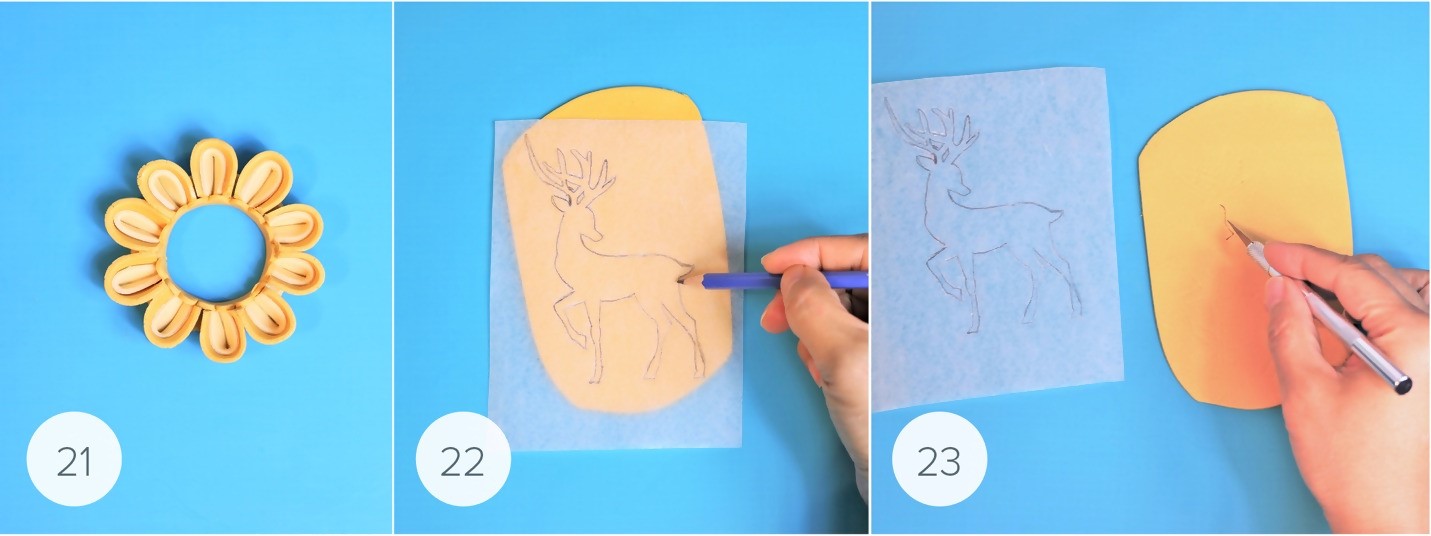
21 Let both set up and dry overnight or until you can lift the wreath without it changing shape; once dry, sit the wreath on top of the base and attach with a moistened piece of fresh fondant underneath or edible glue.
22 To make the reindeer silhouette cut out, find a silhouette image you like online and print out; place wax paper over the image and trace the outline of the silhouette onto the wax paper with a non-toxic pencil; place the traced image on top of a small sheet of Tylose treated Gold Shimmer fondant and trace over the outline again with the pencil, marking and imprinting the fondant beneath.
23 Using a craft knife, cut out the reindeer silhouette by tracing over the markings imprinted; let set 10 minutes before adding water to the back and attaching to the side of your cake
