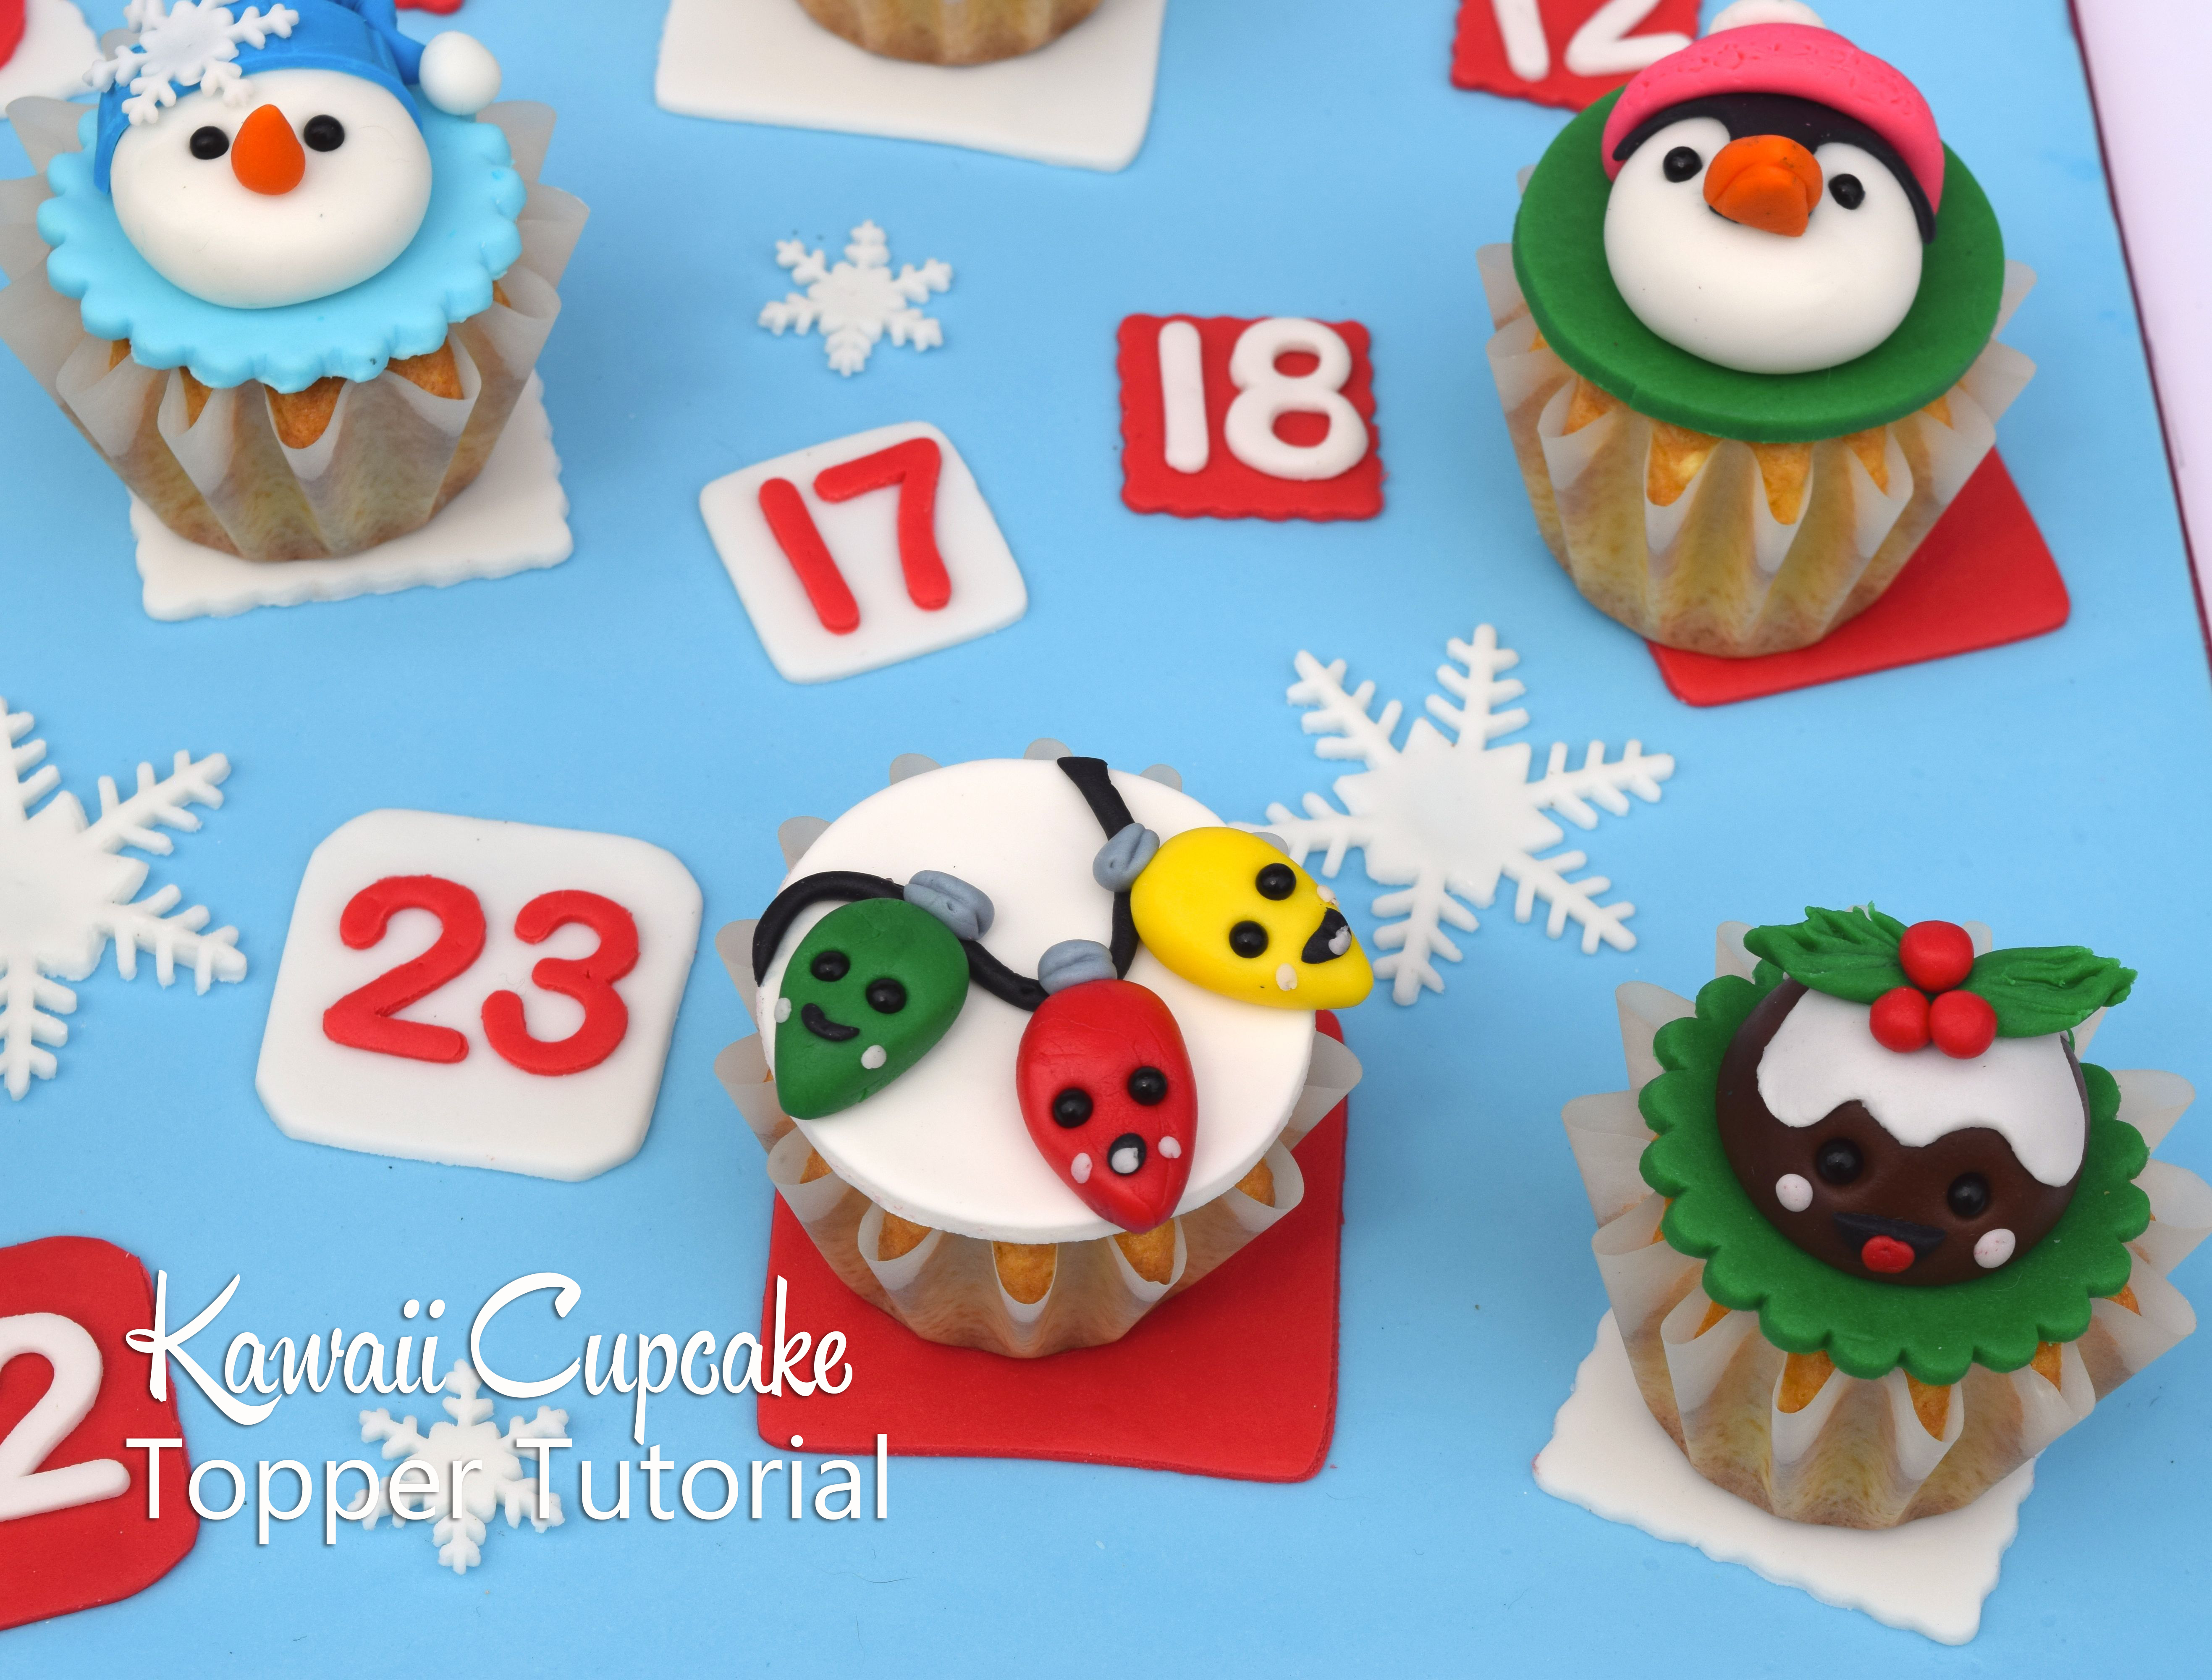
Our Holiday issue features four fantastic cupcake topper tutorials from Jean Schapowal of Cakes With Character. We loved these cute toppers so much we asked Jean to come up with a few more designs. Learn how to create FIVE cute Christmas-themed toppers with this easy step-by-step tutorial below.
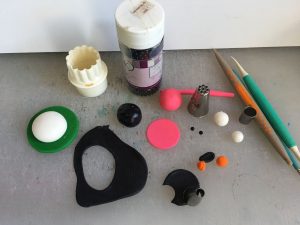
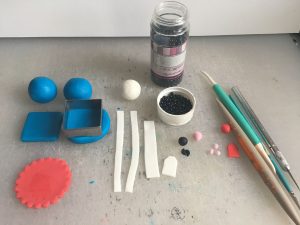
Components:
Satin Ice fondant in a variety of holiday colors
Small rolling pin
Sharp knife
Edible glue
Small brush
black dragees
3-inch round circle cutter
3-inch round fluted cutter
Snowflake plunger cutters
Edible dust: pink, silver
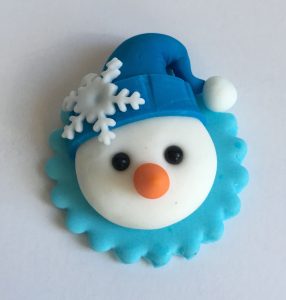
Snowman Topper
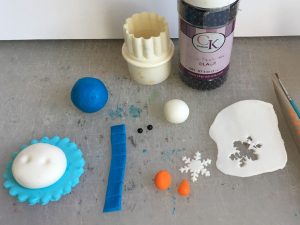
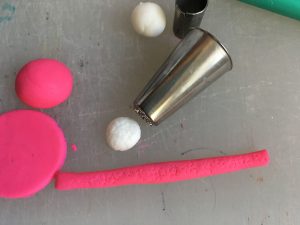
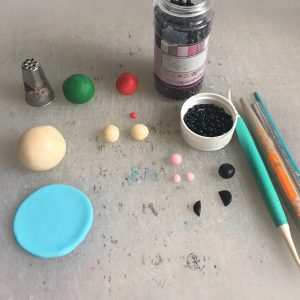
STEP 1: Roll out some light blue fondant and use the fluted cutter to make a base for the topper. Roll a 1-inch ball of blue fondant for the hat and a 1½-inch ball of white fondant for the head. Prepare the other decorative elements as shown.
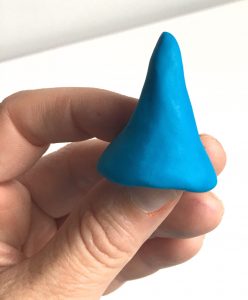
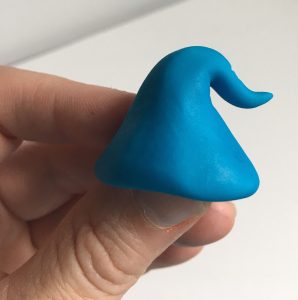
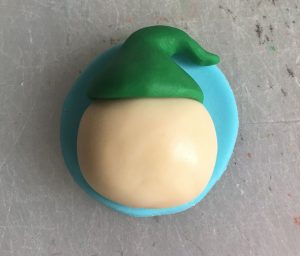
STEP 2: Take the blue fondant and form into a conical shape, hollow out the base slightly. Bend the tip of the cone over to make the snowman’s hat.
STEP 3: Attach the snowman’s head to the base and flatten slightly. Next, attach the hat using edible glue. Roll out some blue fondant and cut a thin strip for the trim of the hat. Using the knife, score some lines to mimic a crotchet hat and attach the trim to the hat.
STEP 4: Roll a small ball of white fondant for the pom-pom and attach. Use the bone tool to make two holes for the eyes and add the black dragées. Roll a very small conical shape for the “carrot nose” using orange fondant. Finally, add a little snowflake for décor.
Penguin Topper
STEP 1: Prepare the topper base by rolling out some green fondant and cutting out a disc with the circle cutter. Roll a 1½-inch ball for the penguin’s head and prepare the decorative elements as shown.
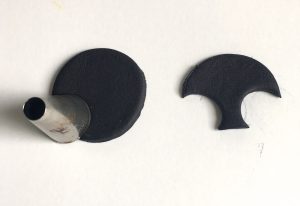
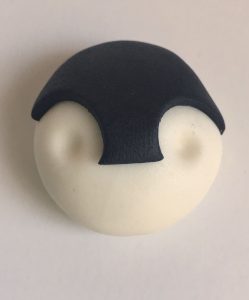
STEP 2: Roll out some black fondant thinly and cut out a 1-inch circle. Punch out two small holes to create the penguin’s mask and attach to the head.
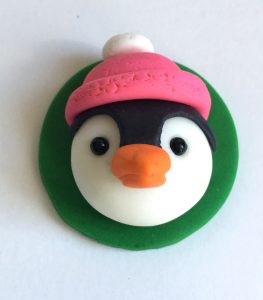
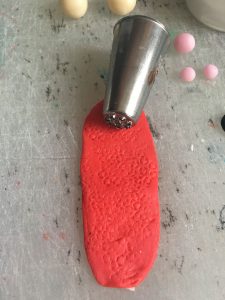
STEP 3: Divide a ball of pink fondant into two and roll one into a rope. Using the grass tip, continuously score the surface. This will create a nice texture for the hat. Roll a small pea-size ball of white for the pom-pom and texturize similarly. Attach the hat to the head.
STEP 4: Attach the penguin to the cupcake base, and using the bone chisel tool, create two eye sockets and add the dragées. Finally, add a small triangle made from orange fondant for the beak.
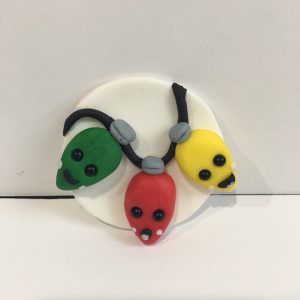
Christmas Light Topper
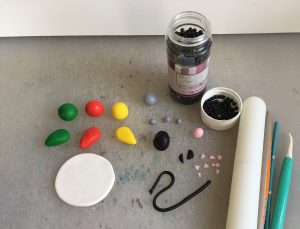
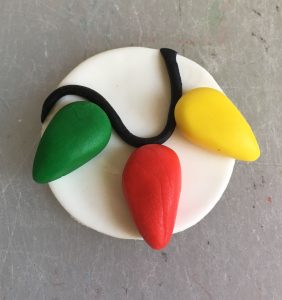
Cut a circle of white fondant for the base of the topper, and prepare three “lights” by rolling balls of red, green, and yellow fondant and tapering at one end. Prepare the other decorative elements as shown.
Glue the lights to the base with a little water or edible glue and add a string made from a small piece of extruded black fondant.
Add some pea-sized pieces of gray fondant to the lights, black dragees for the eyes, and some black fondant for the mouth. Add a little pink fondant for the kawaii cheeks.
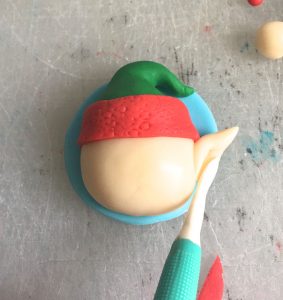
Elf Cupcake Topper
Cut a circle of light blue fondant for the base of the topper. Roll a 1-inch ball and two smaller balls from flesh-toned fondant, and a small ball or green and red respectively. Prepare the other decorative elements as shown.
Glue the larger flesh-colored fondant ball to the base, this will form the head. Taper the green ball into a cone shape and bend the tip over to make a hat. Attach to the base as shown.
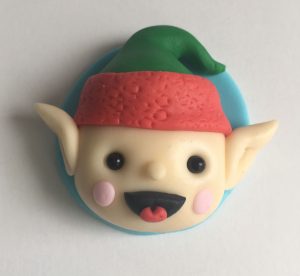
Using a grass tip, texturize a strip of red fondant to create the band of the hat. Attach to cover the seam as shown. Taper the smaller balls of flesh-toned fondant and attach to the head for the ears.
Add two black dragees for the eyes, a little button nose, and two pink kawaii cheeks. Cut a small black semi-circle from black fondant for the mouth and a little tongue using a touch of red fondant.
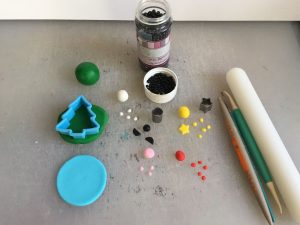
Christmas Tree Topper
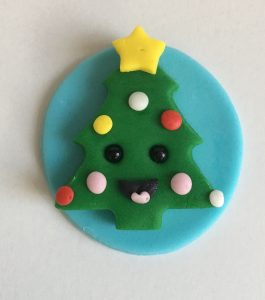
Cut a circle from light blue fondant for the topper base, roll some green fondant and cut a Christmas tree using a cookie cutter. Prepare some baubles from pink, red and white fondant and cut a little star as shown.
Glue the Christmas tree to the base and add the decorative baubles. Add two black dragees for the eyes and small semi-circle of black fondant for the mouth. Add the pink kawaii cheeks and finally a star to the top.
Christmas Present Topper
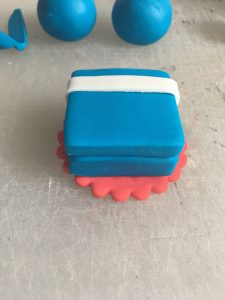
Roll some red fondant and cut a fluted circle for the base/ Roll some blue fondant into a thick disc and a thinner disc and cut two square shapes for the present. The thicker one will form the base and the thinner will form the lid. Roll and cut some strips for the bow, and prepare the other decorative elements as shown.
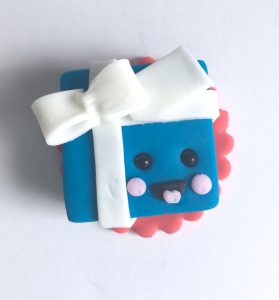
Glue the box to the base of the topper and add two strips of fondant to create the bow.
Create a decorative bow from two strips of white fondant and secure to the box.

Add two dragees for the eyes, kawaii cheeks using some pink fondant and a little mouth using black fondant.

