
Our much-loved columnist, Erin Gardner is back with another delicious recipe! We’ve all made decorative accents for party cakes with fondant…but have you ever thought about using cookie dough? Gasp, right…why has no one thought of this before? Erin shares her adventures in baking, as she uses sugar-cookie dough in a rainbow of colors to make some fun, decorative accents for a perfect party cake.
For my next Adventure in Buttercream, I’ve invited along one of buttercream’s besties—the sugar cookie. It is a party–cake issue, after all! What’s a party without a few good friends?
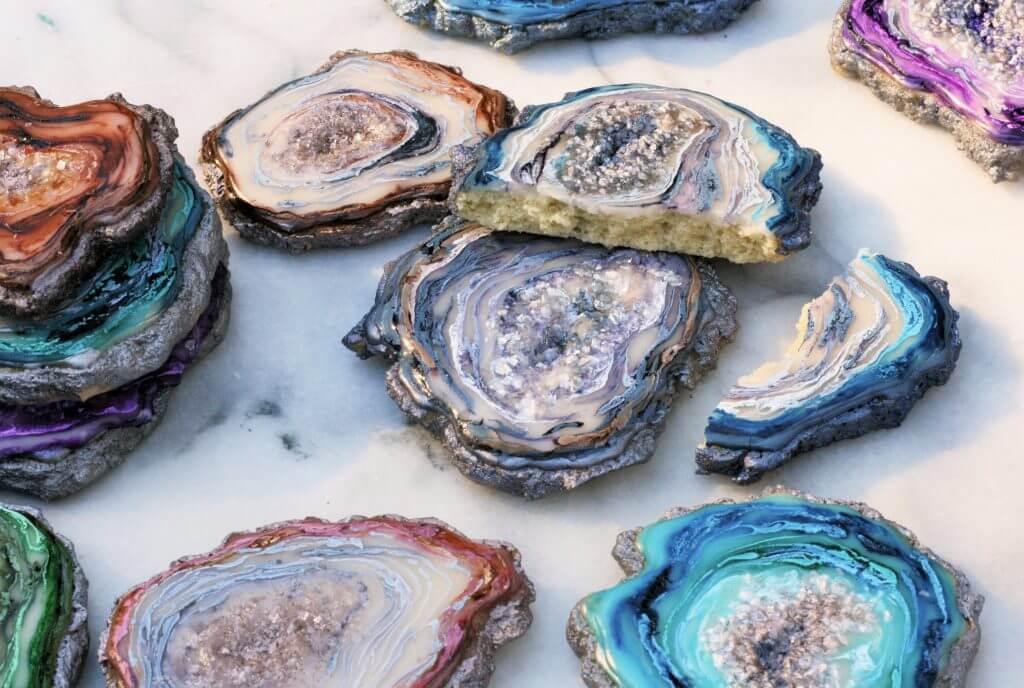
Sugar–cookie dough has long held a superpower that, I believe, we’ve only begun to scratch the surface of understanding: the ability to mimic fondant. You can color it, knead it, sculpt it, and layer it, just like fondant. Unlike fondant appliqués or sculpted pieces, it doesn’t take hours or days to dry, just minutes to bake. From a flavor perspective, is there a comparison? I’m not a fondant-hater by a long stretch, but have you ever snuck down to the kitchen at midnight for a strip of fondant? Didn’t think so.
Of course, sugar–cookie dough has its limitations. Getting dough to look pure white is a task. I’m sure someone in the cake world (Me? You?) will conquer that mountain any day now. The bake time needs to be watched like a hawk or you’ll lose your bright colors. The dough has to also be super-chilled or frozen to ensure that the shapes are maintained. At the moment, it’s not a dead ringer for fondant, but it sure makes for a tasty runner–up.
Components:
1 batch sugar–cookie dough (your favorite or my recipe on ErinBakes.com)
Gel food coloring: vibrant pink, orange, yellow, green, blue, and purple
Parchment paper
1-inch circle cutter
Toothpicks
Rolling pin
Bench scraper
6-inch round cake finished in classic buttercream swoops
A Rainbow of Colors
Coloring sugar–cookie dough is very similar to coloring fondant. Knead the dough a few times to warm up the butter and make the dough pliable. Poke a well in the dough and drop in a few dots of color. When coloring cookie dough, keep the yellow-ish hue in mind when deciding how much coloring to add. By all means, use gel food coloring when tinting sugar–cookie dough. Water-based food color would turn this whole thing into a huge mess. I’m sure powdered colors would do a great job as well, I just haven’t tested them myself. Follow my lead and divide your dough into six parts, then tint each one a different color of the rainbow. Or customize this project by using colors that match your party’s theme. Dust your work surface with flour as needed if the dough gets too sticky.
Preheat the oven to 325°F and place a rack in the center of the oven.

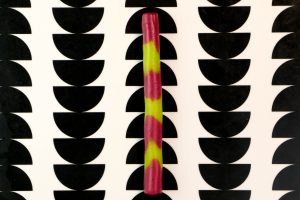
Cookie Candles
Pinch off two egg-size portions of dough in contrasting colors. Set the pieces of dough side by side and roll the dough to about ¼ inch thick. Cover the rest of the dough with plastic wrap to prevent it from drying out while you’re working. Keep the dough covered when not in use.


Cut three circles from one color and four circles from the other color. Peel away the extra dough and set it aside to reuse.

Stack the circles up, alternating the colors. Give the stack a gentle squish to make sure they’re adhered to one another.

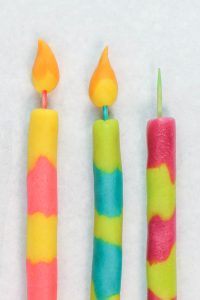
Roll the log between your hands to start blending the doughs and elongating the log. Once you’re confident it’s one solid piece, roll the dough against your work surface to make the body of the candle as long and thin as you’d like. Place the log onto a parchment-lined cookie sheet. Insert a toothpick into one end of the log, leaving about ½ inch of the toothpick sticking out. I used colored toothpicks for extra flair, but you can use whatever you have. Obviously, make it known to all who will be served this cake that there are toothpicks supporting the candle flames. Just like you would with sugar flowers.
Pinch off small gumball-size rounds of yellow and orange dough. Roll the colors together to make a single ball. Allow the colors to blend but remain distinct. Shape the ball into a teardrop and slide it onto the end of the toothpick. Pop the tray in the freezer while you work on the other candles. Allow all of the candles to freeze solid before baking.


Bake the candles for 8 minutes or until they’ve just lost their raw sheen. If your oven runs hot, set the timer for 6 minutes and just hang out nearby until you’re confident they’re done. Allow the cookies to cool completely before using them on the cake.
Cookie Sprinkles
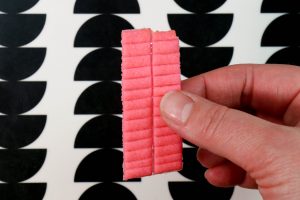
Cut six pieces of parchment paper (a piece for every color you’re using) into small rectangles approximately 6×4 inches in size. Tear off another egg-size mound of dough and roll it out on one of the small parchment rectangles until very thin, thinner than you’ve probably rolled sugar–cookie dough before, thinner than you’d roll fondant to cover a cake. I was able to make out the pattern on my cutting board through the dough—that’s pretty thin!
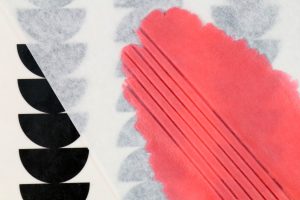
Use a bench scraper to score long lines in the dough about ¼ inch apart. Turn the paper and cut the strips into 3/4-inch segments. Leave this grid intact on the paper and move it to a cookie sheet. Pop the sheet in the freezer until the dough is solid, about 5 minutes. Repeat with the other colors.
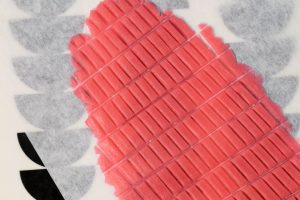
Bake the frozen sheets of dough for 4–5 minutes. These will bake up very fast, so don’t wander too far once you’ve hit the 4-minute mark. Allow the cookies to cool completely before breaking them up into sprinkles.

Pick up the baked cookie sheets in segments and snap the sprinkles apart. It’s a very satisfying process. These cookie sprinkles and candles can be made up to a week in advance and stored in an airtight container or zip-top bag at room temperature.

All Together Now
I gingerly placed each of my sprinkles onto a freshly iced cake. (I mean, this is in a magazine.) Please feel free to be more haphazard in your approach. Gently push the candle cookies into the top of the cake. Serve, party, and enjoy!

