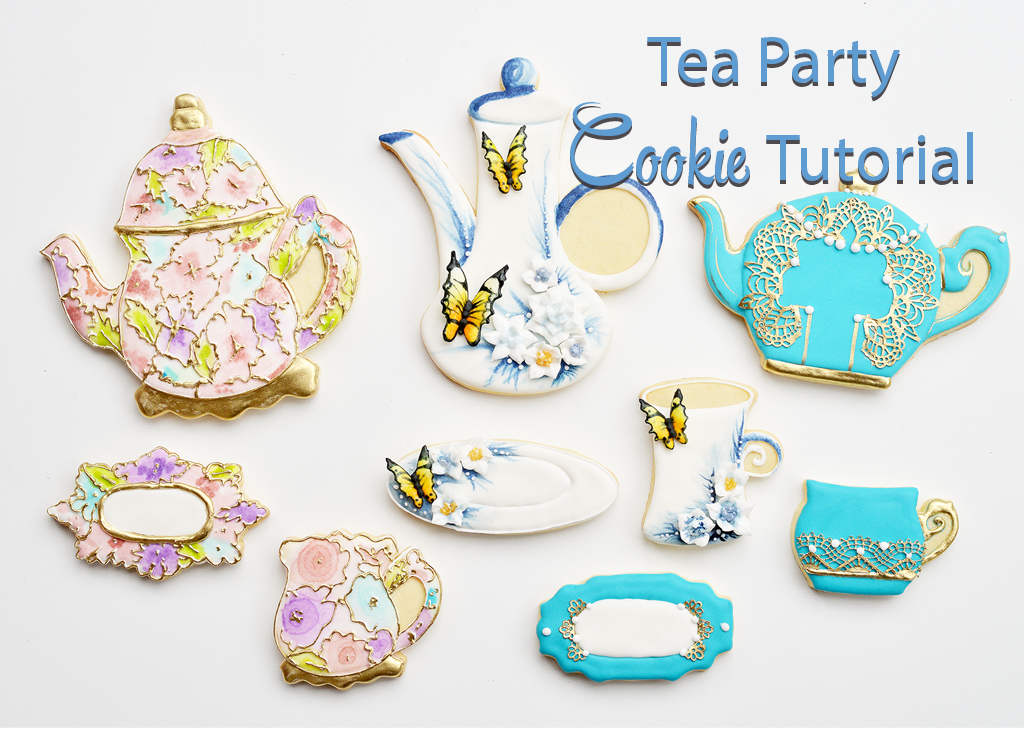
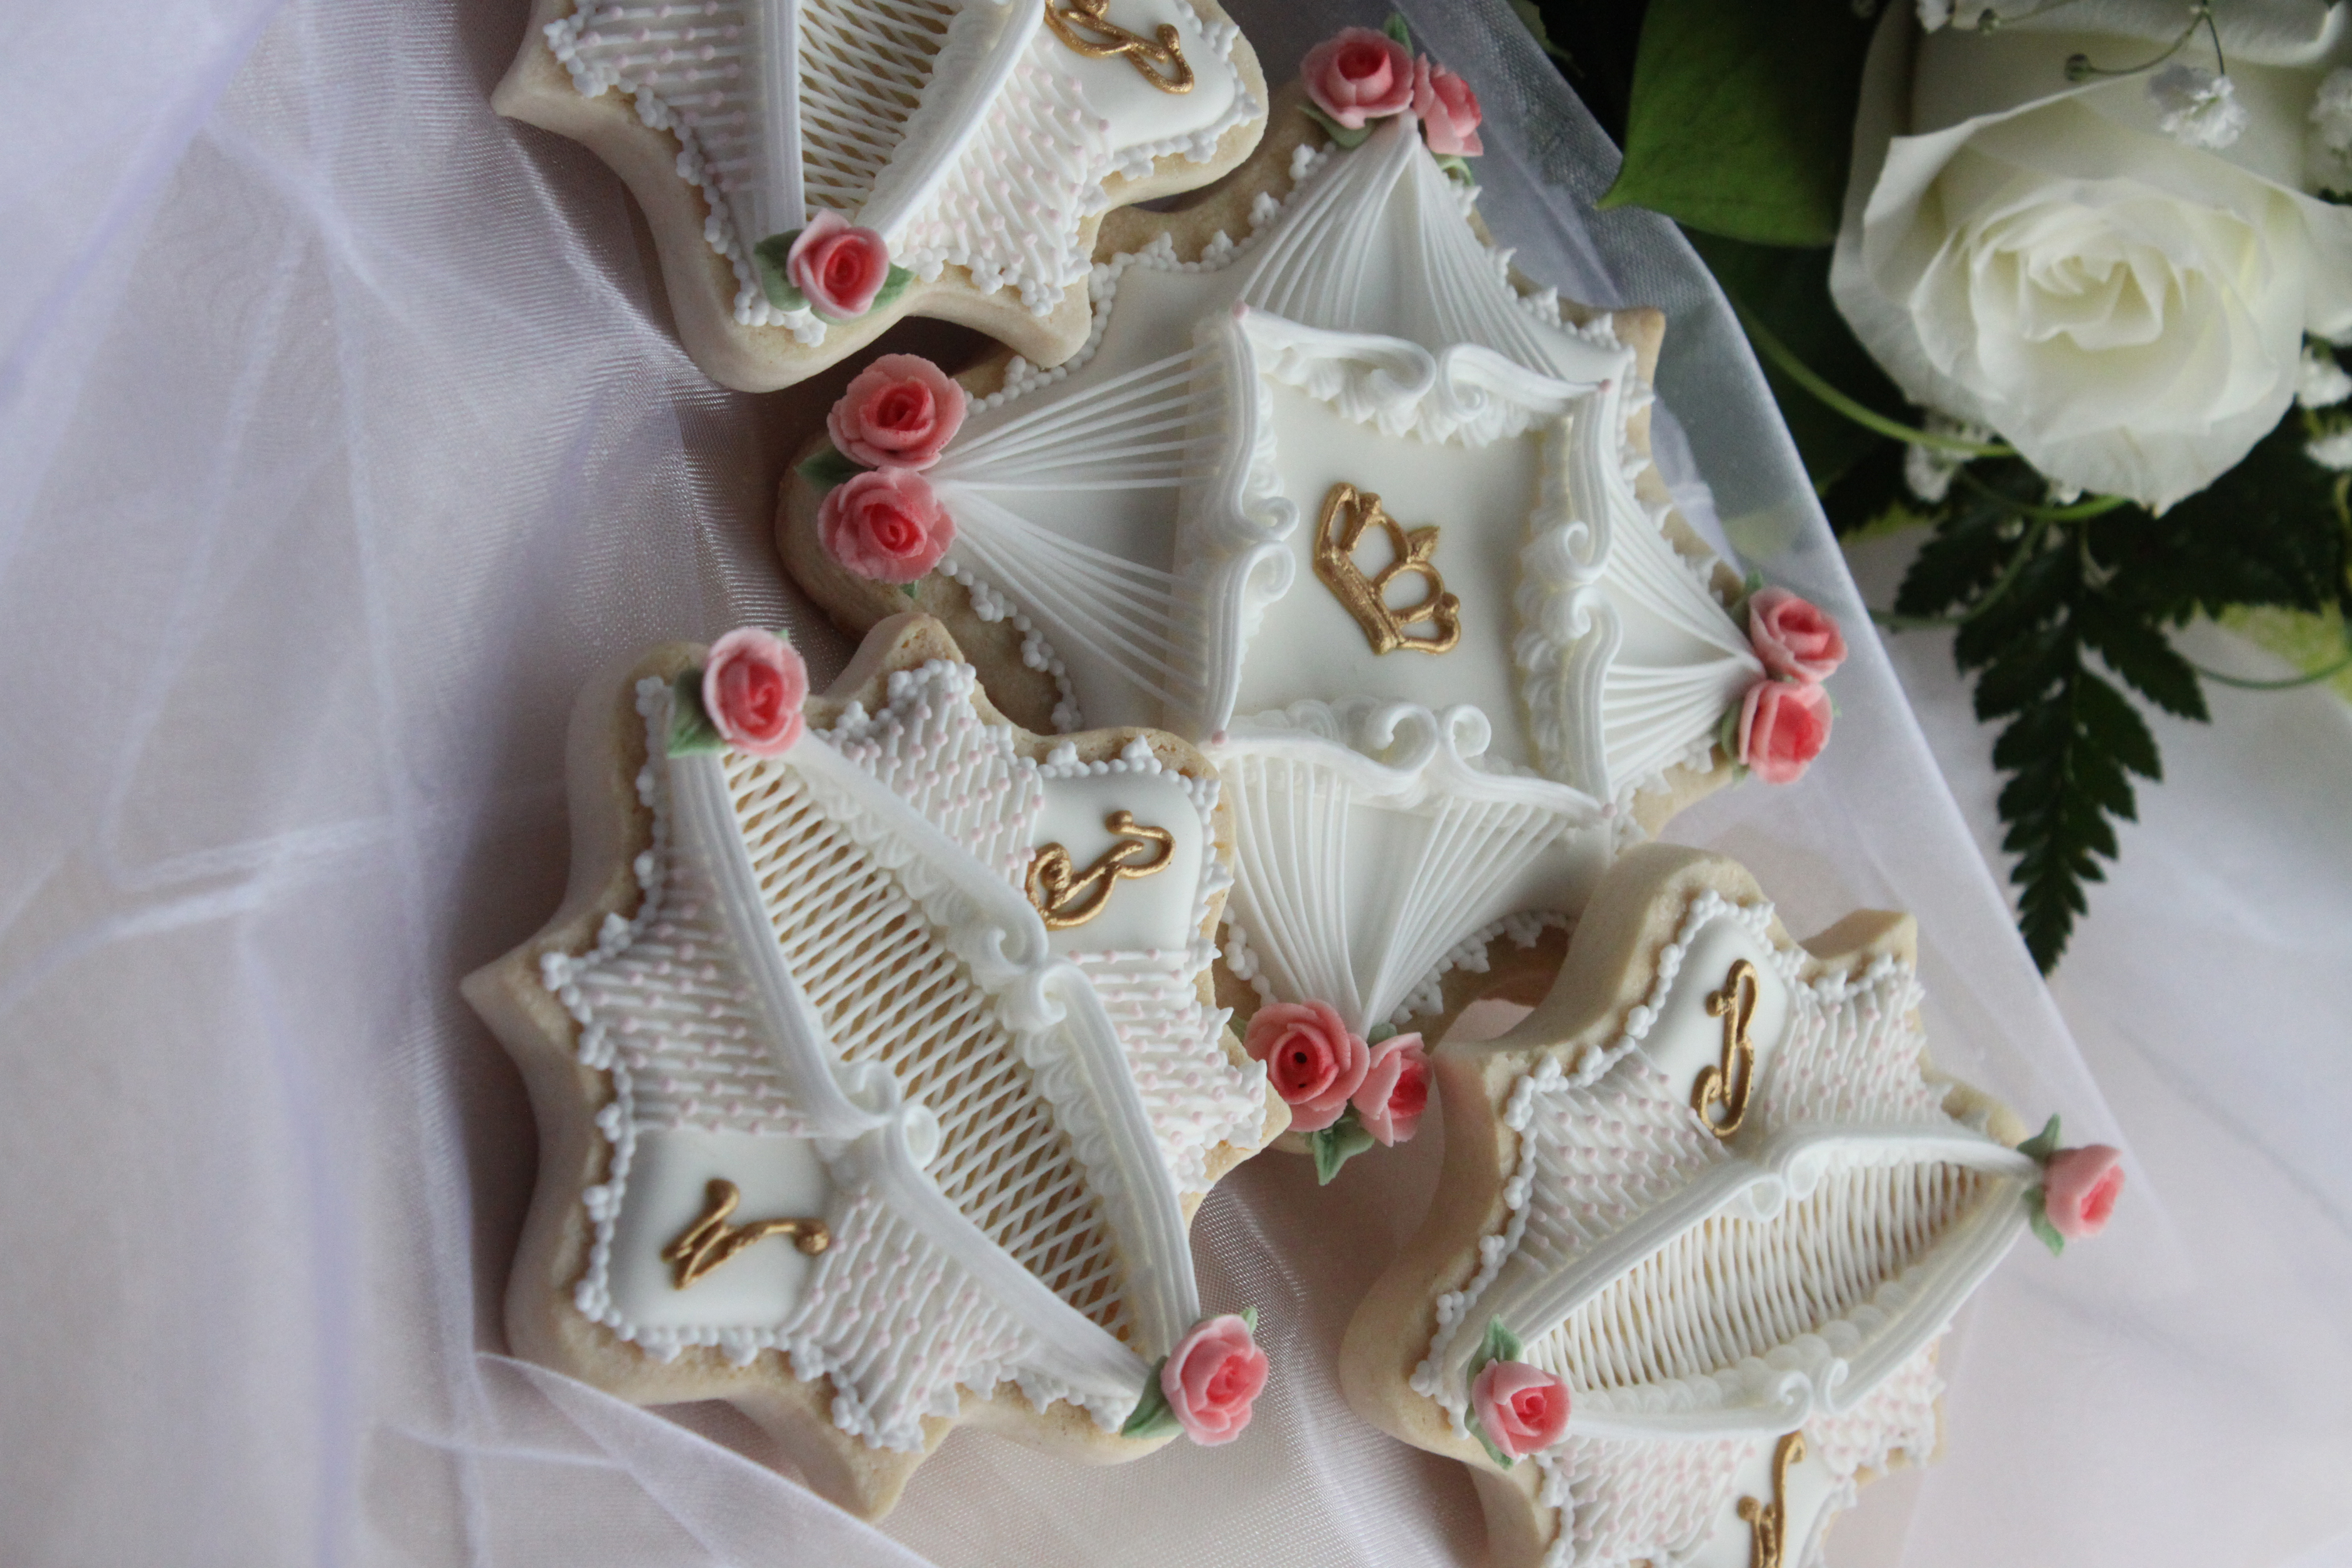
Our fabulous January/February issue features a collection of cake, cookie, and cupcake tutorial inspired by vintage tea-parties. Our trend report features a stunning collection of tea-party inspired cookies by the very talented Sonja Tomic. For a tutorial of how to create these stunning cookies, check out this wonderful step-by-step below.
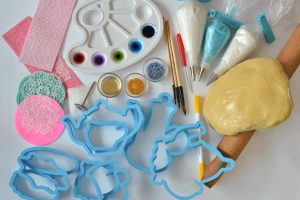
Components:
- Flood consistency royal icing
- Medium consistency royal icing
- Stiff consistency royal icing
- Decorating bags
- Decorating tip #1
- Decorating tip #2
- Decorating tip #3
- Leaf decorating tip
- Scribe tool
- Edible marker
- Brushes
- Fine tip brush
- Gel food colors
- Gold luster dust
- Alcohol or flavored extract for painting
- Paint pallet or small cup for mixing paint colors
- Sugar lace mat
- A paper towel
- Sprinkles
- Scissors
- Parchment paper
- Flower nail
- This specific Vintage China cookie cutter set is available on etsy (https://www.etsy.com/shop/strivami)
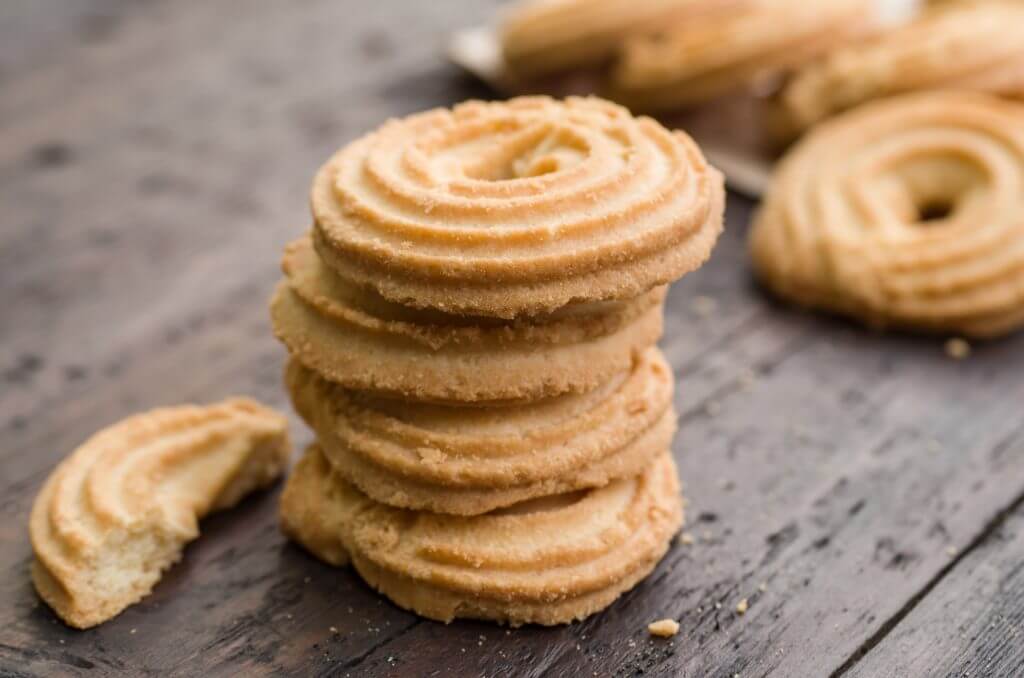
SUGAR COOKIE DOUGH
- Use a basic sugar cookie recipe.Cream the butter and sugar.Add the egg and the flavoring to the butter sugar mixture. The dry ingredients add little by little
- Mix it into a dough and chill.
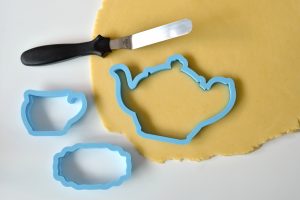
- Rolling out the dough between two layers of parchment paper # that prevents the dough from sticking to the rolling pin.
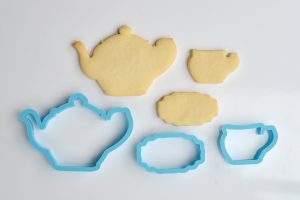
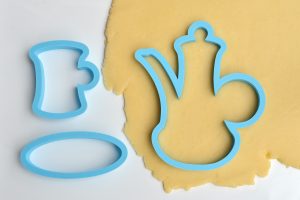
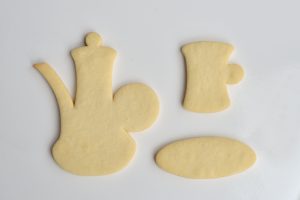
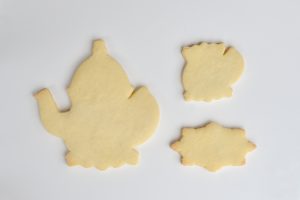
- Cut out all the dough using the teapot,cup and saucer cookie cutters
- Bake cookies according to recipe instructions.Cool completely before decorating.
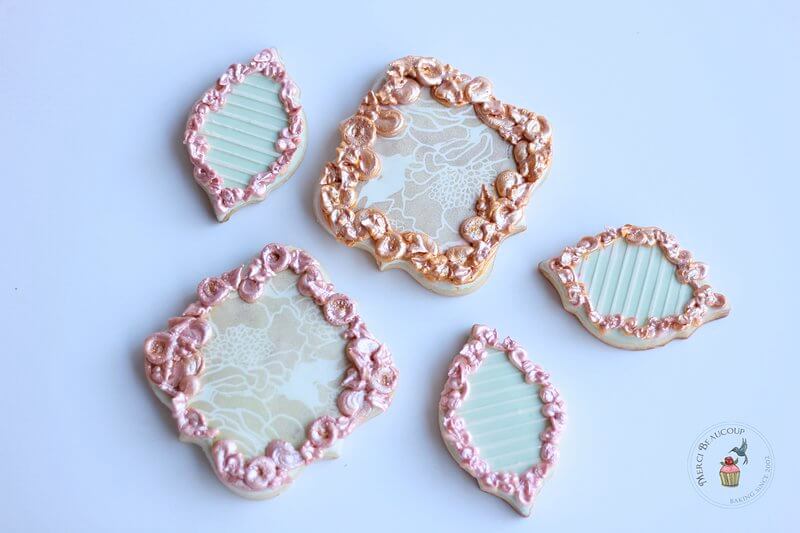
Vintage China cookie set with sugar lace
Step 1: Prepare the cookies following the baking instructions above.
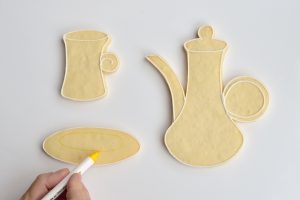
Step 2: With flood consistency royal icing and a decorating tip #1, outline the cookie.
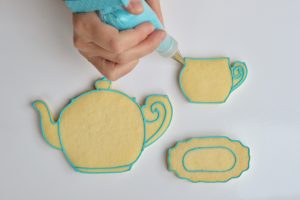
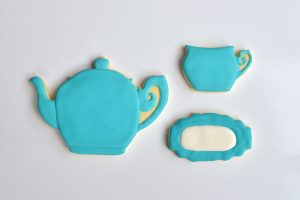
Step 4: Fill your cookie with the blue flooding consistency royal icing and use a scribe tool to evenly distribute the icing. Let the base layer of icing dry for 8 hours or overnight. It is essential that the icing be rock solid.
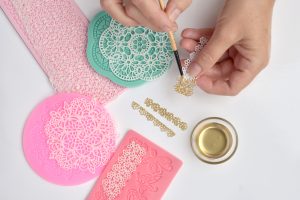
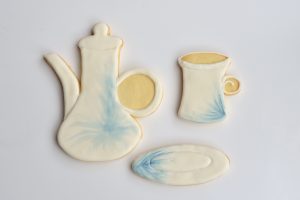
Step 5: Prepare the sugar lace according to the manufacturer’s instructions.You can use any design of mat you prefer. Cut out the desired shape of sugar lace. Mix gold pearl dust with a few drops of alcohol and apply the gold paint to the lace using a soft brush. Brush the back of the sugar lace to adhere it to the dry royal icing. Trim the excess. Place your edible lace onto the cookie and gently press onto the surface of the dry royal icing.
Sonja notes: Use a brush to seal the edges.
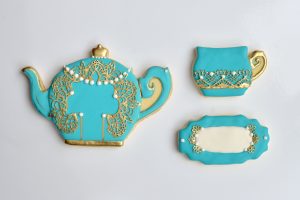
Step 6: To finish the cookies, add little edible pearls, airbrushed or luster dusted icing and a sprinkling of glittery disco dust .
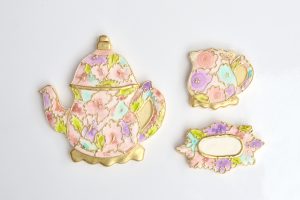
Vintage China cookies set with royal icing flowers and butterflies
Step 1: Using a basic sugar cookie recipe, roll the dough and cut out the dough using the Vintage China tea set cookie cutters.
Step 2: Bake the cookies according to recipe instructions. Cool completely before decorating.
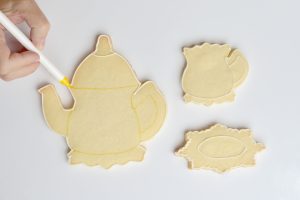
Step 3: With an edible ink marker, draw a basic outline, to use as a guide while you pipe.With the flood consistency royal icing and a decorating tip #1, outline the cookies.
Sonja notes: Meanwhile, prepare your royal icing and transfer to two piping bags fitted with a #1 and a #2 tip.
Step 4: Flood the cookie with the white royal icing and use a scribe tool to evenly distribute the icing. Let the base layer of icing dry 8 for 8 hours or overnight.
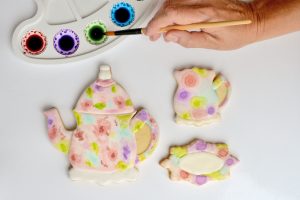
Step 5: Use a fine brush with rounded bristles to apply the edible watercolor and paint the details as shown.

Royal Icing Butterflies
Step 1: Draw a butterfly outline using a template and place under a sheet of baking parchment or cellophane. Create the outline of the butterfly’s wings. You can make the black outline as thin or thick as you desire.
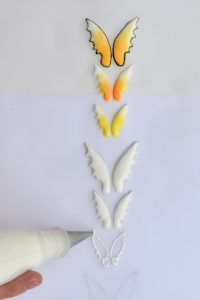
Step 2: With a piping bag filled with piping-consistency royal icing and fitted with a small round tip, carefully pipe the outline of the butterfly wings, not to include the butterfly’s body. Flood the wings and use the scribe tool or toothpicks to bring the icing to the edges. Let it dry for 8-12 hours
Sonja notes: You can add more or less colors and drag the icing in different directions to create swirls or hearts in the butterflies. Once dry, carefully remove the royal icing butterflies from the parchment paper (carefully roll the paper off the edge of a counter top instead of pulling on the wings or run a small tapered palette knife under each butterfly.
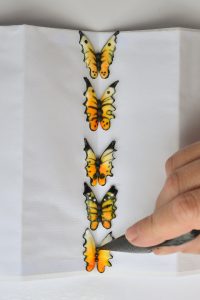
Step 3: Place the wings onto a piece of folded cardboard, arrange rows of wings along the V-shaped folds. Pipe the butterfly bodies between the two wings so it attaches to both wings and allow to dry overnight. You can even add hand-painted designs using edible paint.
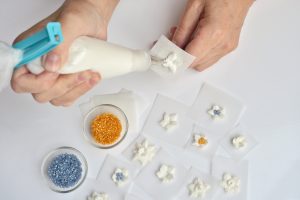
Royal icing flowers
These simple royal icing flowers make great decorations for cookies!
Step 1: Use scissors to cut small squares of waxed or parchment paper. Fit the piping bag with a leaf tip and fill the bag with stiff royal icing and the icing color of your choice for the flower’s petals. Squeeze a little dot of icing on top of your flower nail to adhere the paper to keep it in place.
Pipe a row of leaves, turning the flower nail after each leaf to create a row of outer petals. Squeeze until you have your desired petal size, release pressure, and pull the bag away. Leaving the center empty.
Allow the first petals to dry a few minutes before adding a second petals following the same steps.You can add as few or as many details as you desire. Carefully slide the paper off of the nail, transferring it to a flat surface to harden. Allow to dry at least 30 minutes. Once completely hard, these flowers will be very easy to remove by hand or using a spatula.
Sonja notes: Store them in an airtight container, away from moisture and humidity. Fill in the center of the flowers with sprinkles.The sprinkles create the perfect texture for the center of these cookies.
Vintage China cookie set with watercolor technique
This watercolor technique will give your cookies a painterly look.
Step 1: For roll-out cookie dough use your favorite recipe and use a Vintage China cutter to cut out the cookies and bake them according to the recipe directions.
Step 2: With an edible ink marker, draw a basic outline to use as a guide while you pipe.
Step 3: With flood consistency royal icing and a decorating tip #1, outline the cookie. Flood the cookie with the white royal icing and use a scribe tool to evenly distribute the icing. Let the base layer of icing dry for 8 hours or overnight. Place a small amount of food gel colors onto a plate. Add a few drops of vodka or flavored extract to create a thin watery paint. Adding various amounts of alcohol to the food color gel can create many shades.
Sonja notes: Food coloring is very concentrated and you only need a small amount to achieve the perfect color.
Use a fine brush with rounded bristles to apply the edible watercolor and paint the details. Blend the concentrated food color on the top of the paint tray with a small amount of alcohol to create a thicker dark paint for shading. With a very light shade of the color paint any detail. Allow the painted cookie to dry for several hours.
Step 5: Fit a pastry bag with a small round tip #1 and fill the pastry bag with medium consistency royal icing. Lift the pastry bag while squeezing and begin piping the details. Stop squeezing to attach the end of the detail.
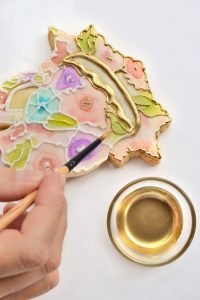
Step 6: Mix a few drops of alcohol with some gold pearl dust and apply it to the outline icing with a soft brush.

