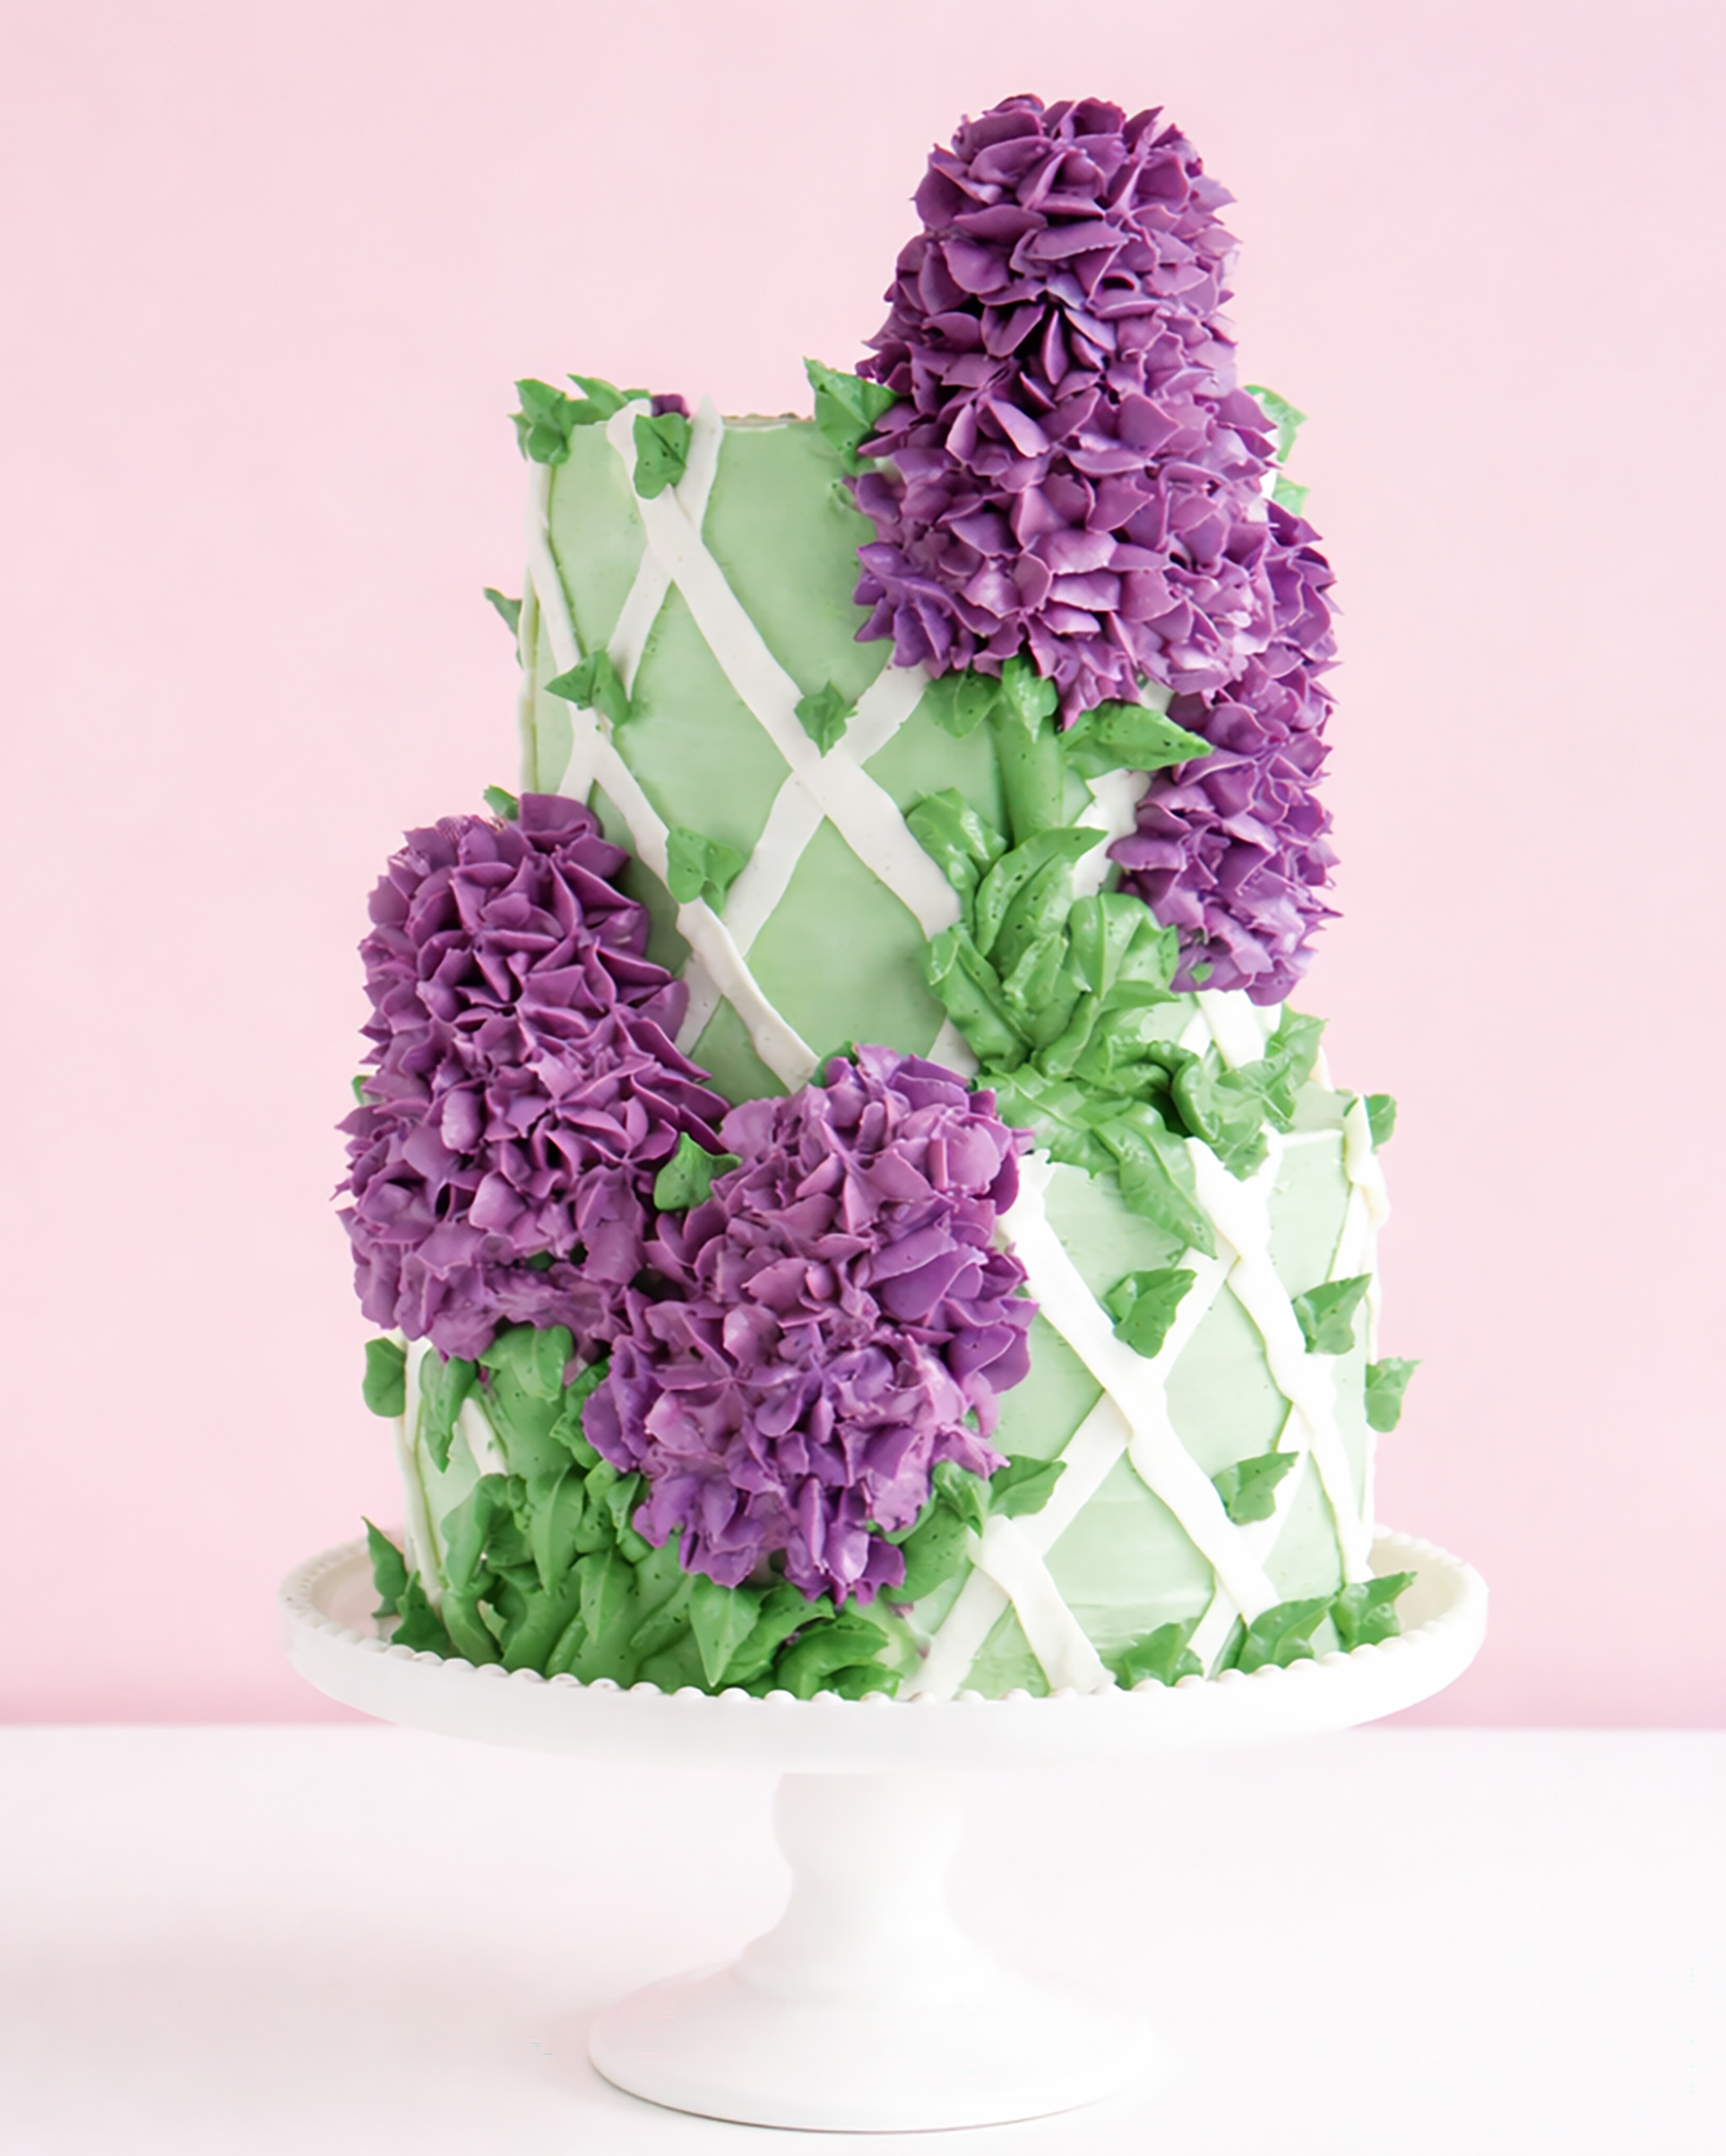
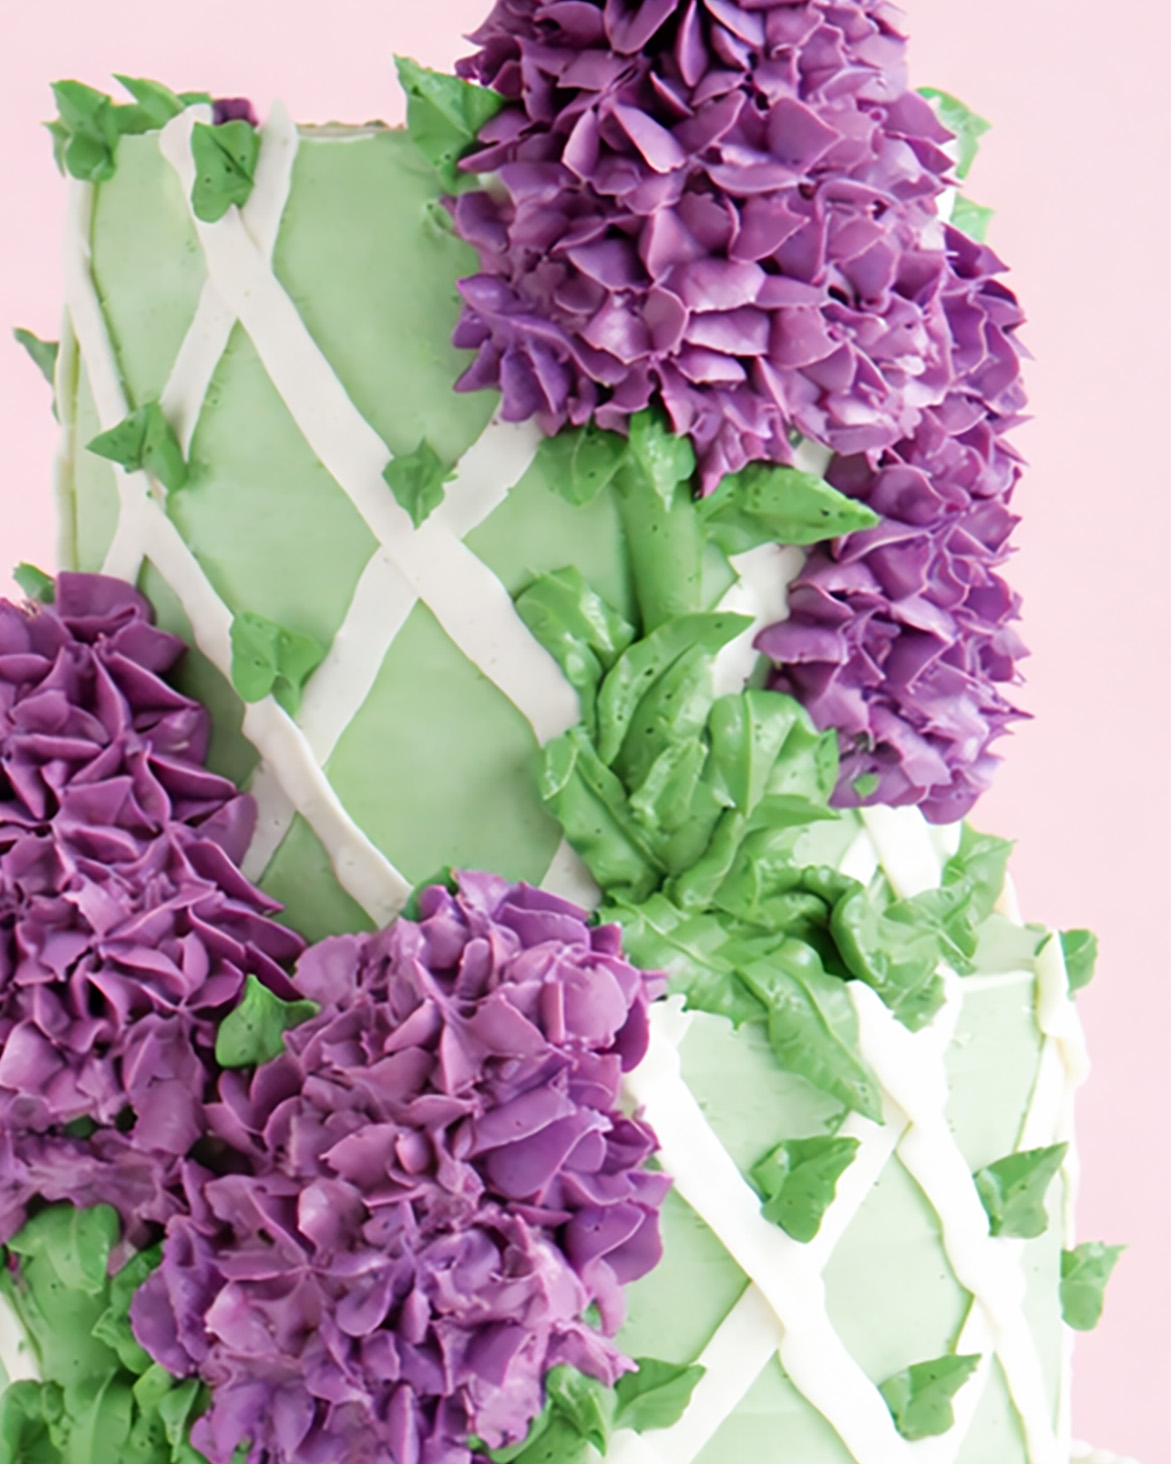
Unfortunately, buttercream doesn’t really stand tall on its own. It needs a little help. Using a crusting American buttercream will enable you to create very dimensional flowers, but it has its limits. At a certain point, buttercream will start to sag and flatten under its own weight. For this buttercream lilac tutorial from Erin Gardner, ice cream cones play a supporting role—literally. It gives another meaning to the term “cake cone!”
You will be thrilled with the depth and the 3D quality ice cream cone supports give to very simply piped buttercream lilacs. Also consider what other roads this idea could lead you down. Domed supports for 3D hydrangeas or alliums, maybe? Or even hanging bougainvillea!
A note on traveling with cake: The ice cream cones hold up very well after being pressed into the cake and piped on. However, if you have to travel with a cake like this, you might consider inserting a dowel or straw into the cake first and then sliding the cone down over it. That way, the dowel would catch the cone should it slide or shift during delivery.
Edibles:
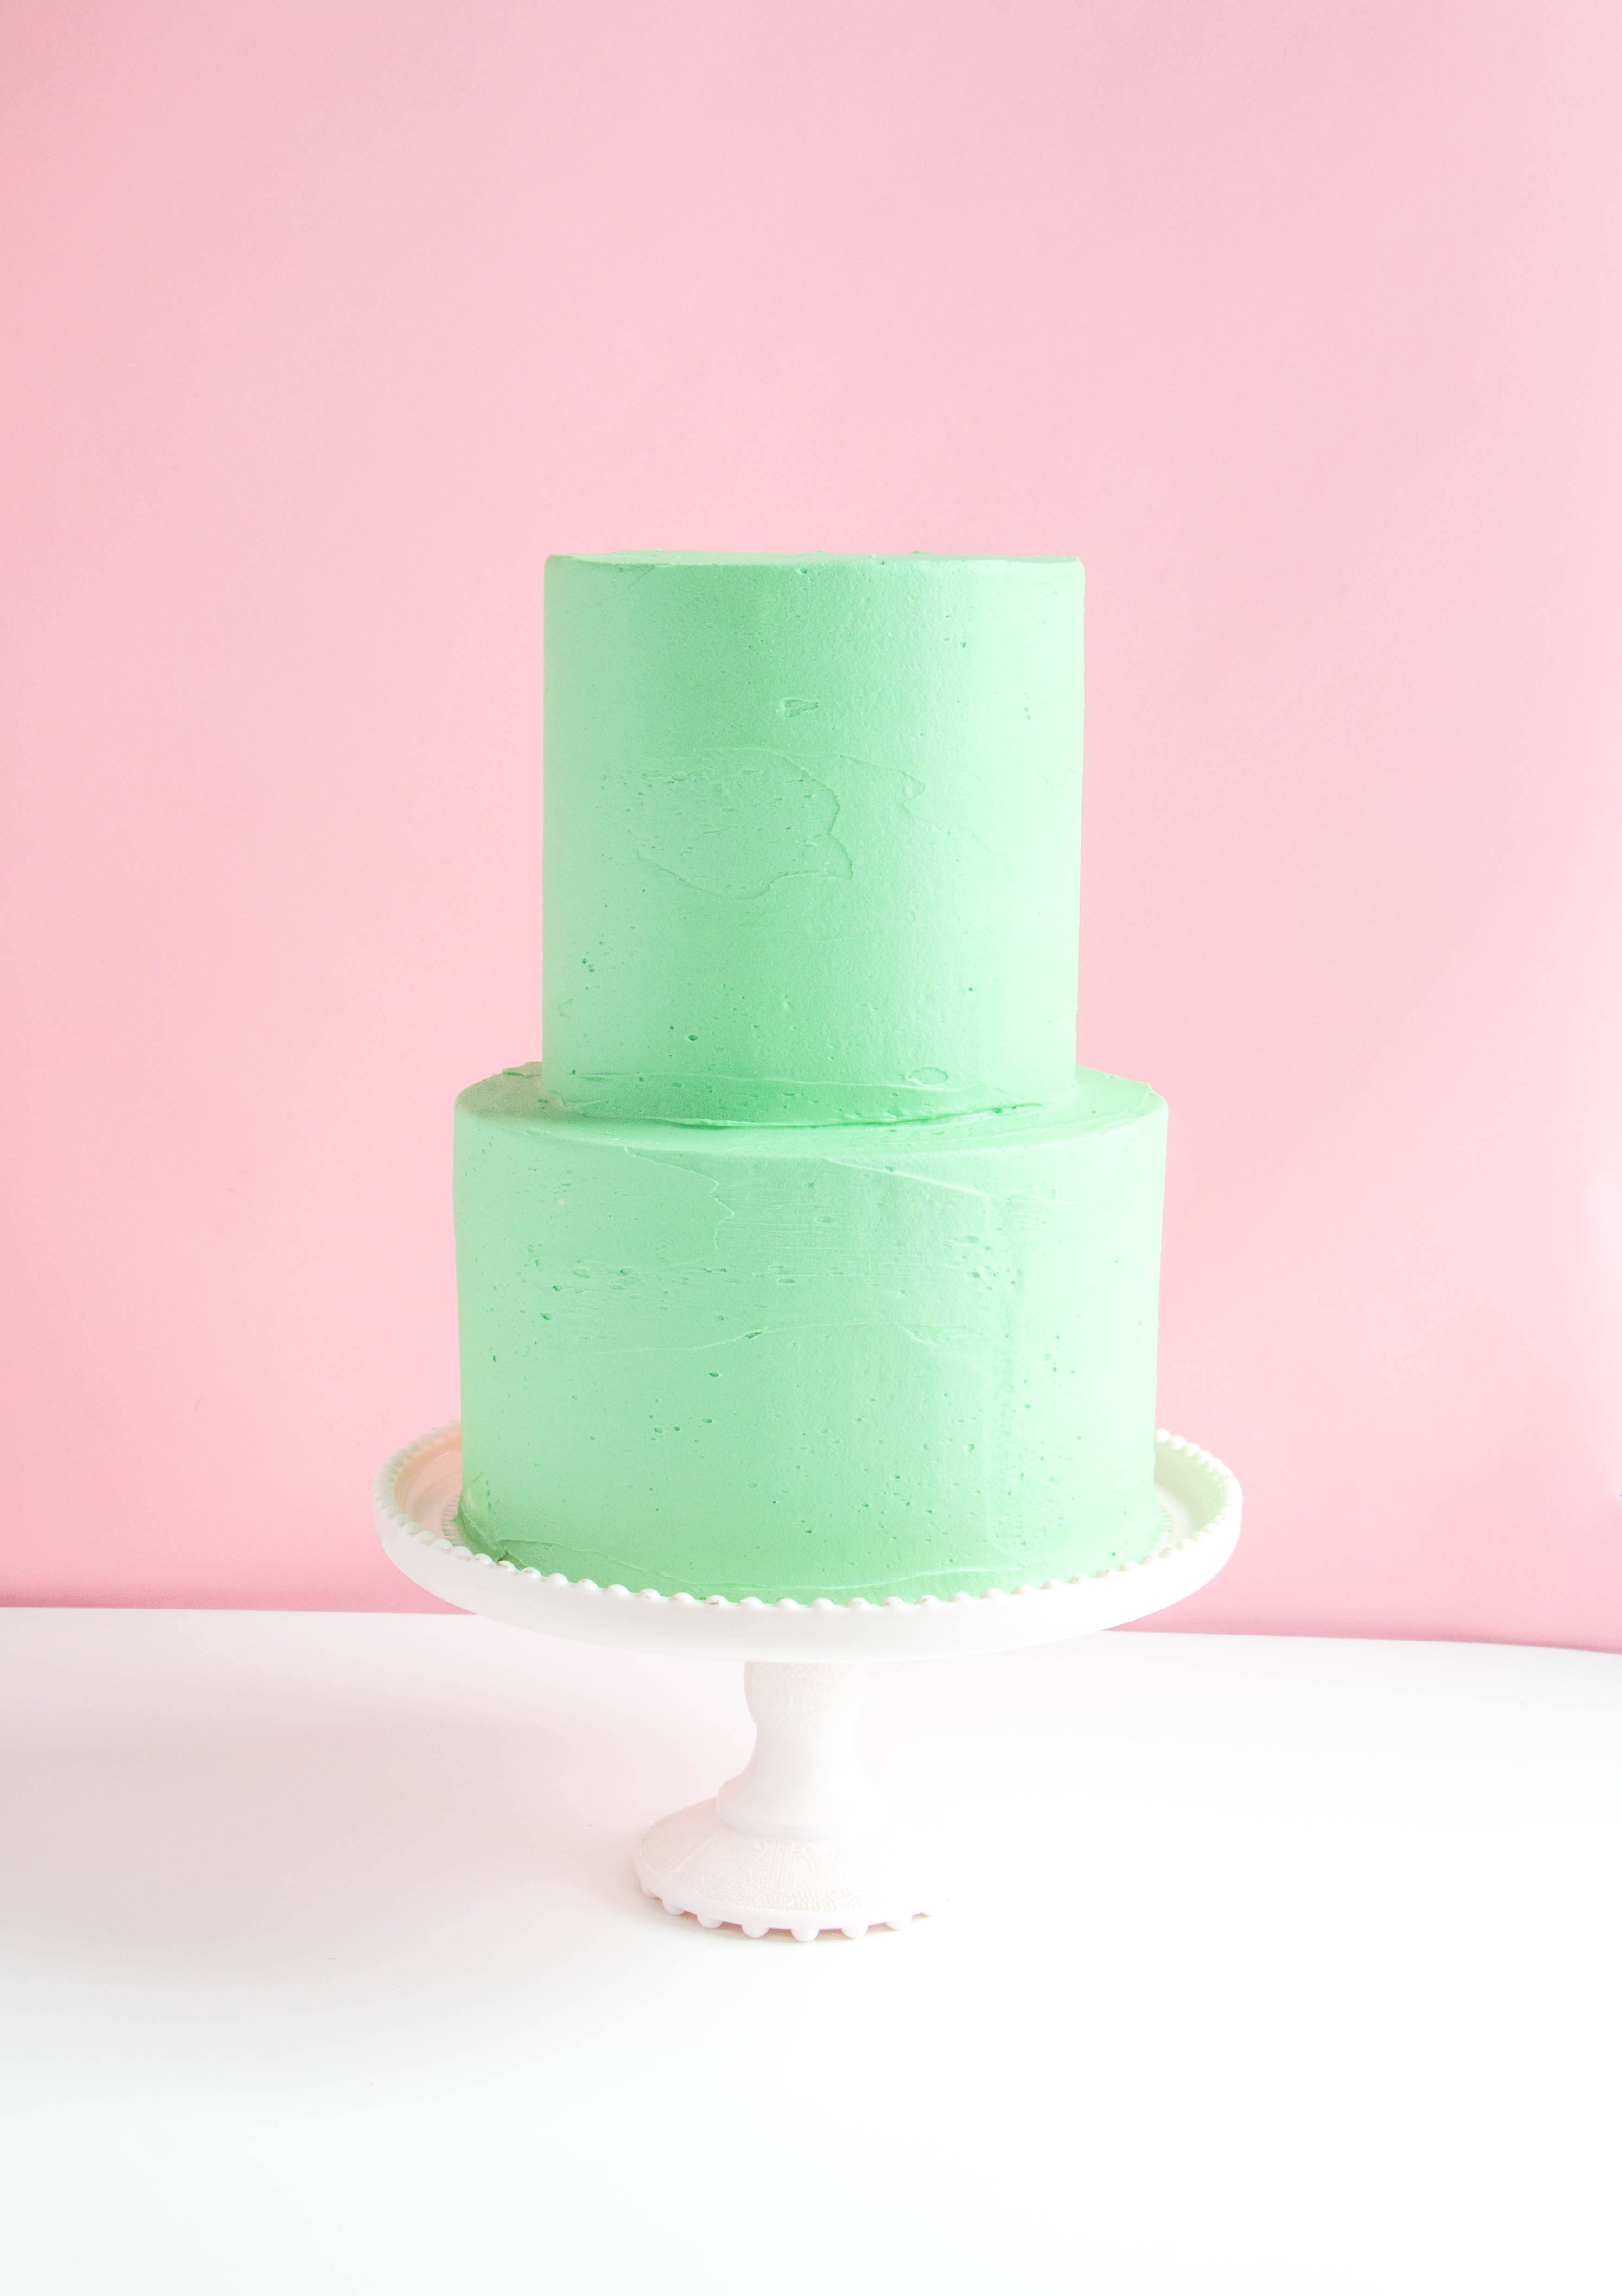
- 2-tier cake finished in green buttercream
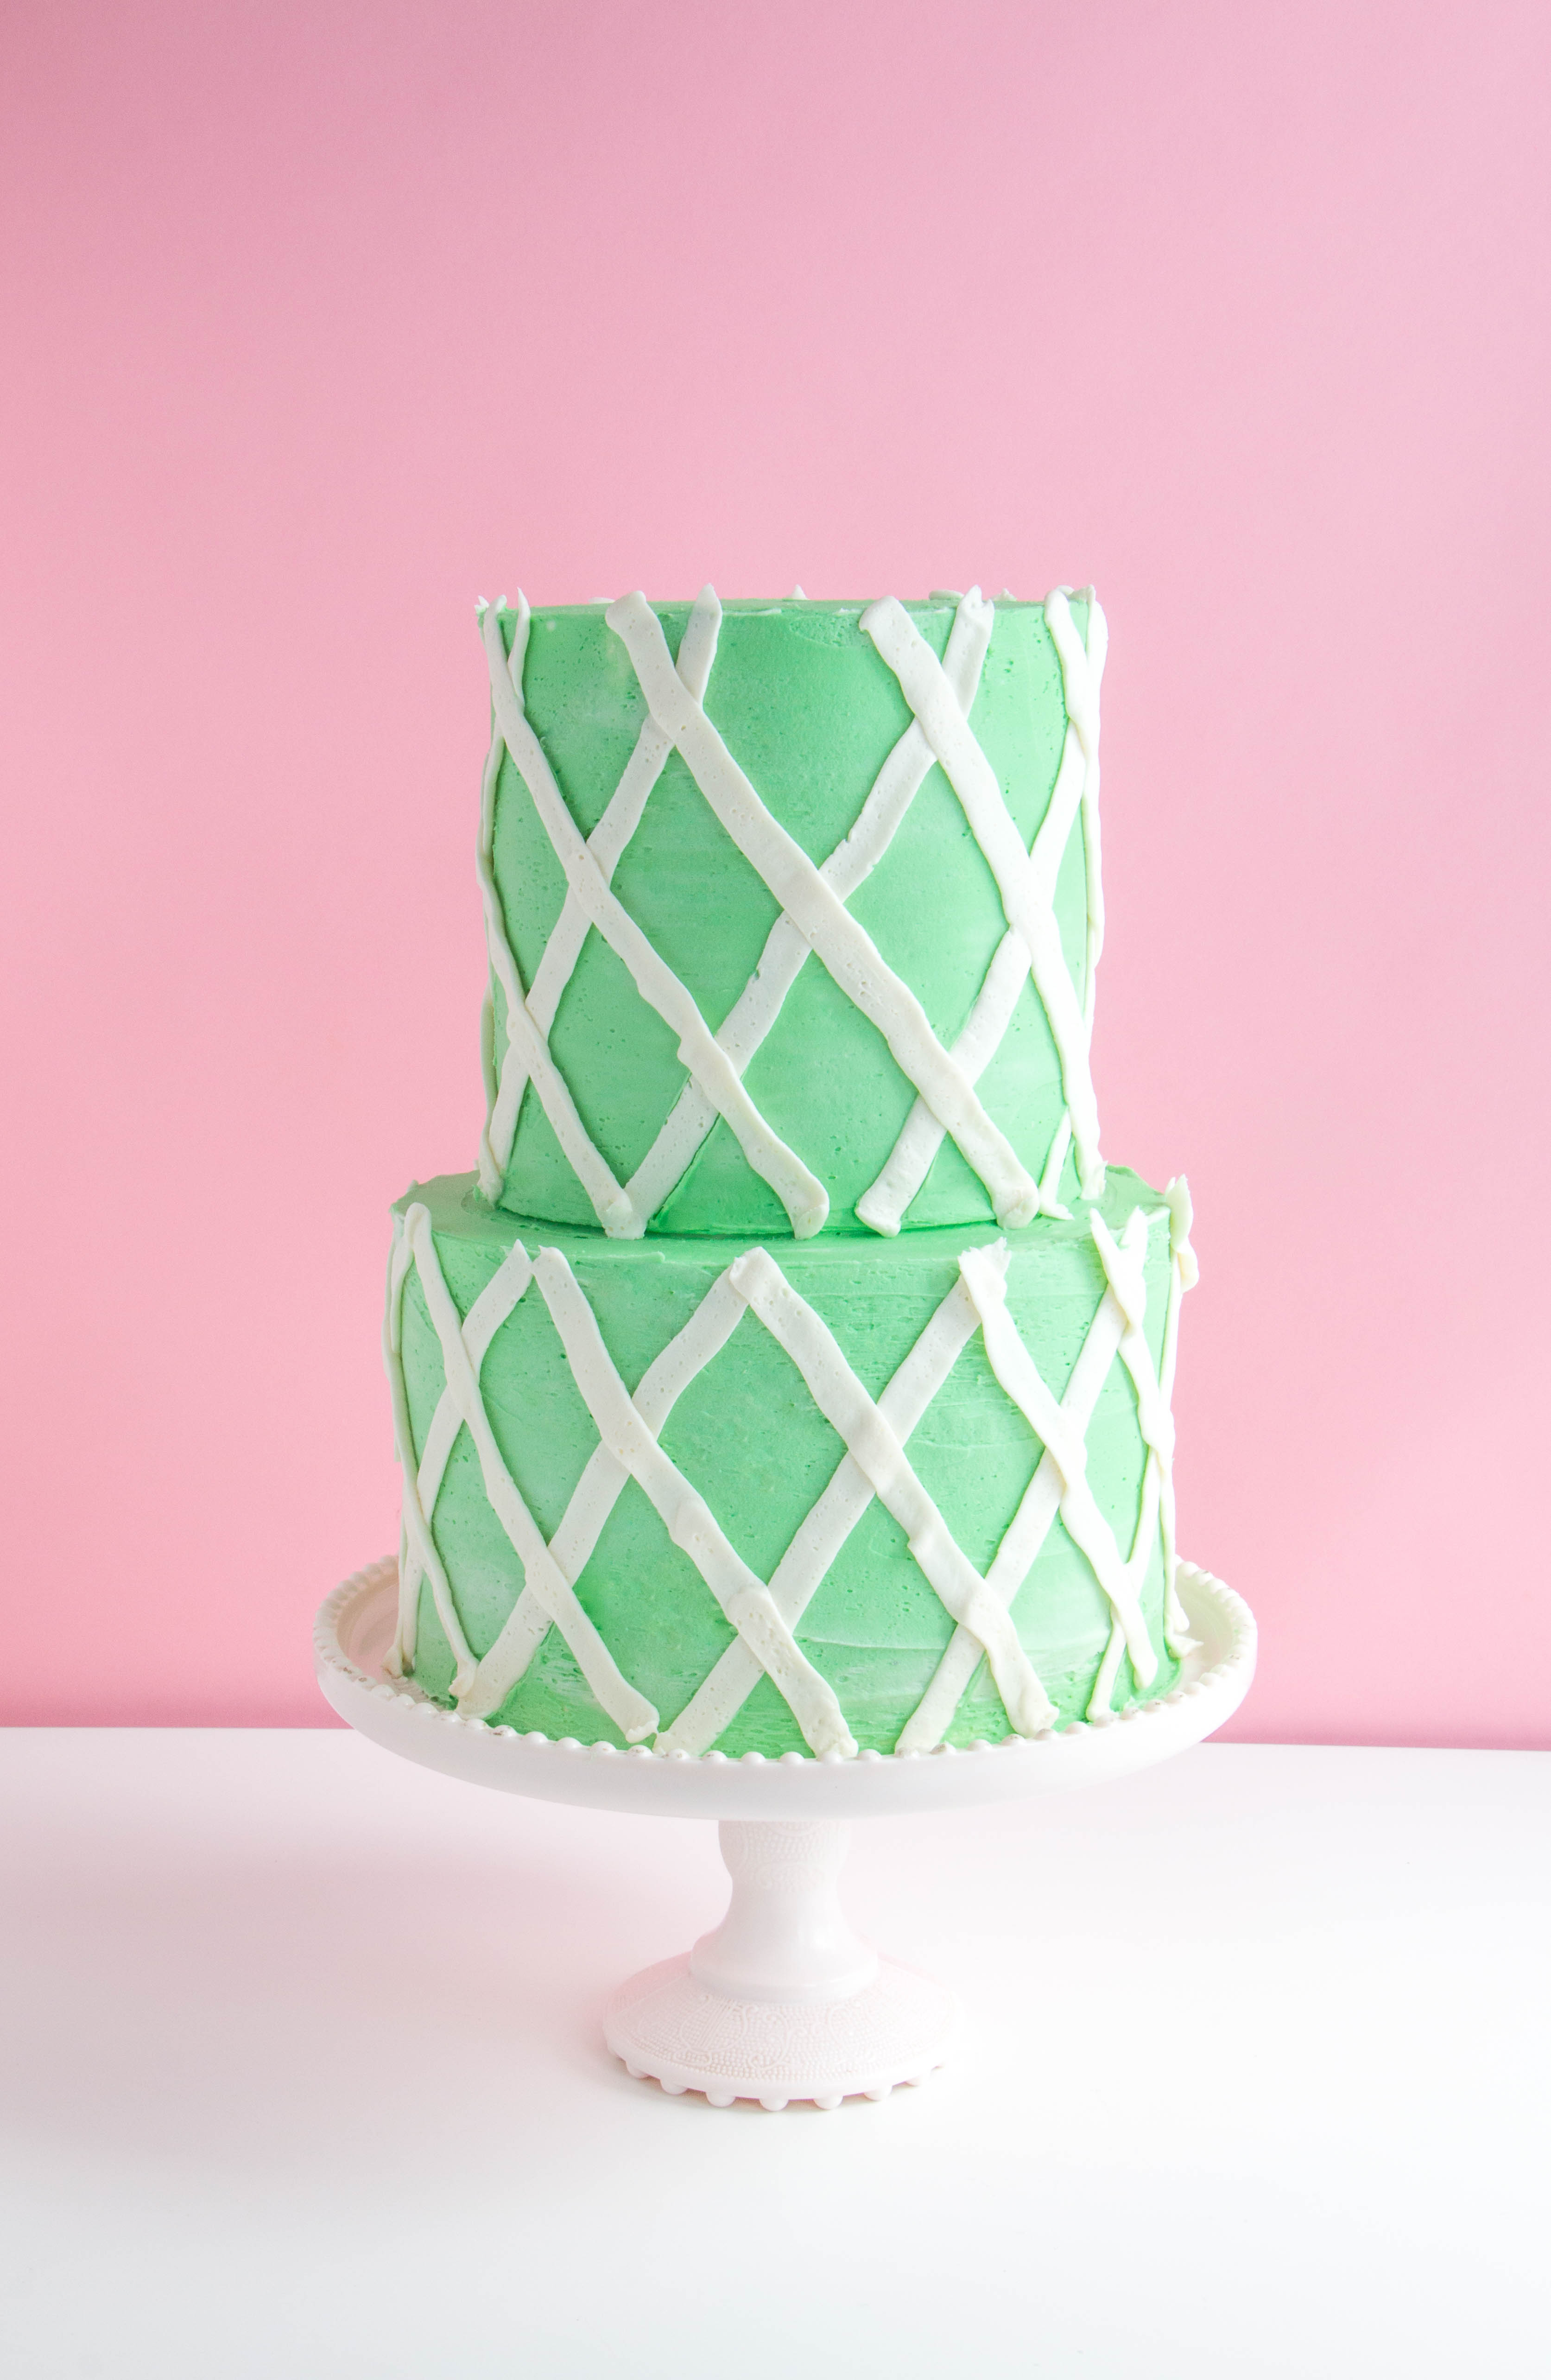
- 2 cups white buttercream
- 4 cups leaf green buttercream
- 4 cups mottled purple buttercream
- Flat-bottomed wafer ice cream cones
Equipment:
- Basket weave tip
- ¼” round tip
- Large star tip
- Large leaf tip
- Piping bags
- Serrated knife
Pipe the Lattice
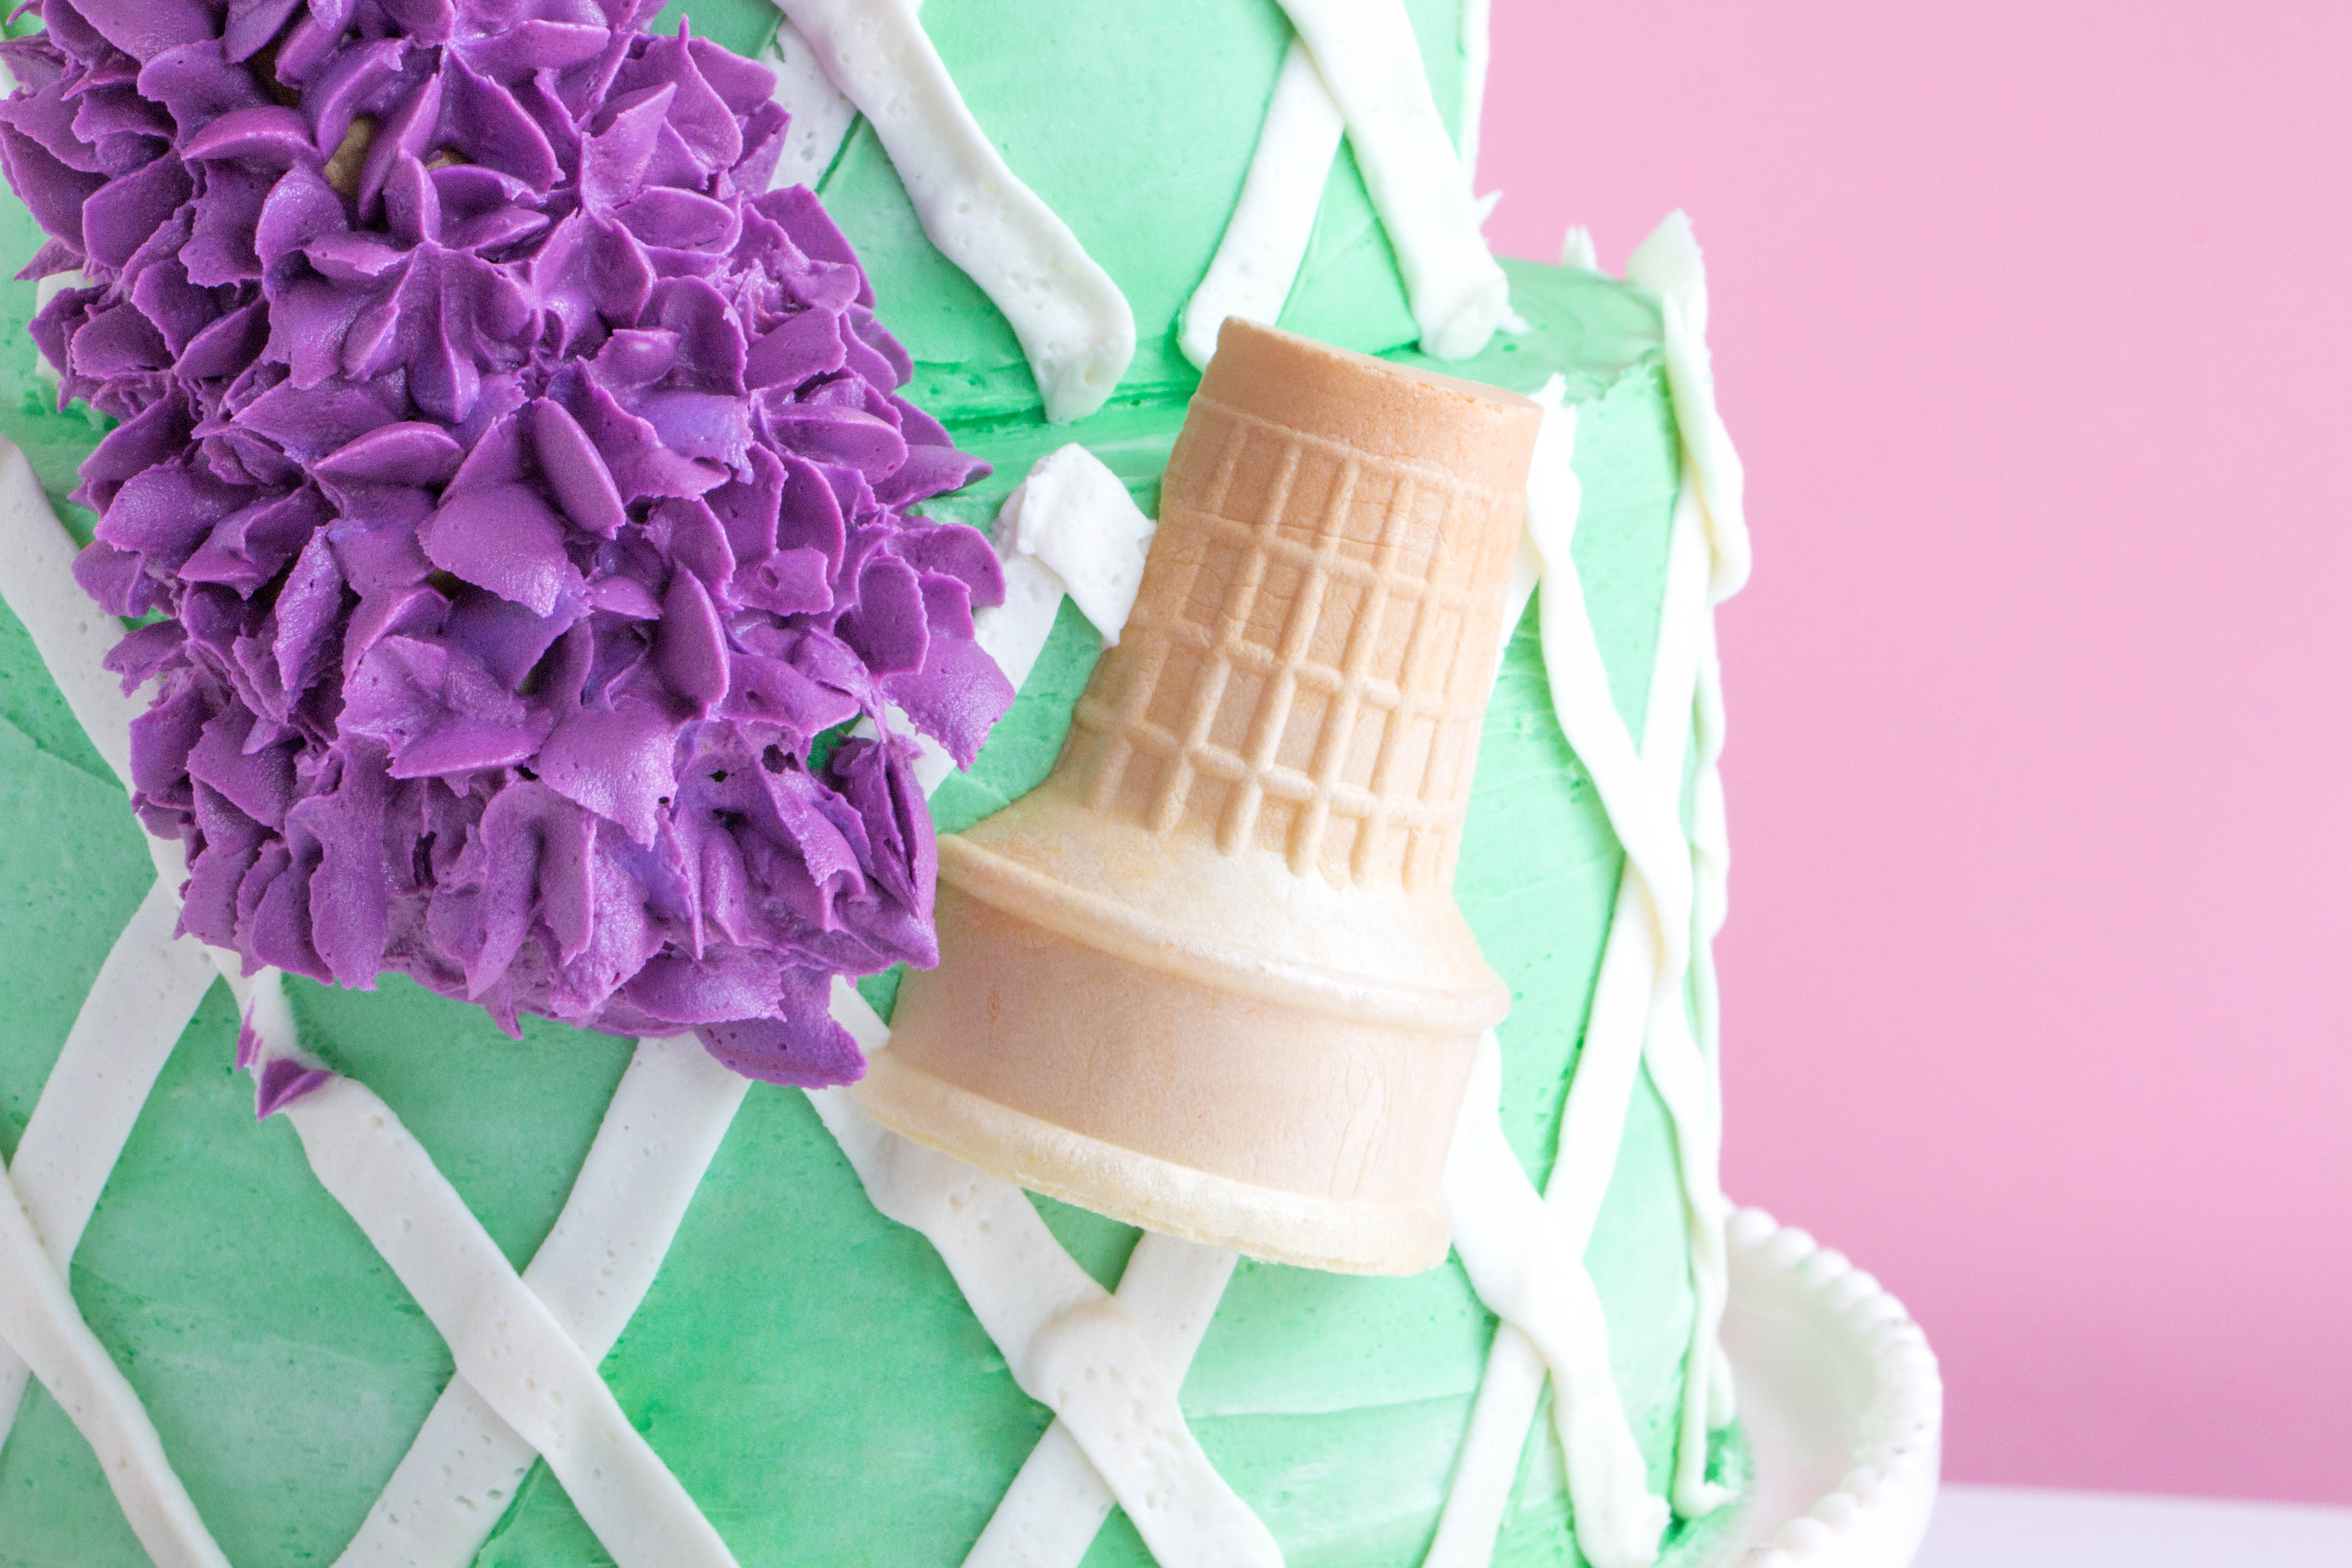
- Fill a piping bag fitted with a basket-weave tip with white buttercream. Position the bag with the flat side of the tip facing up and pipe crisscross lattice lines around the sides of both tiers of the cake. Don’t be concerned with it being overly smooth or neat. The lilacs and leaves will cover up any trace of carelessness.
Pipe the Lilacs
- Fill a piping bag fitted with the large leaf tip with half of the leaf green buttercream. Fill a piping bag fitted with the round tip with the remaining green buttercream. Fill a piping bag fitted with the large star tip with the purple buttercream.
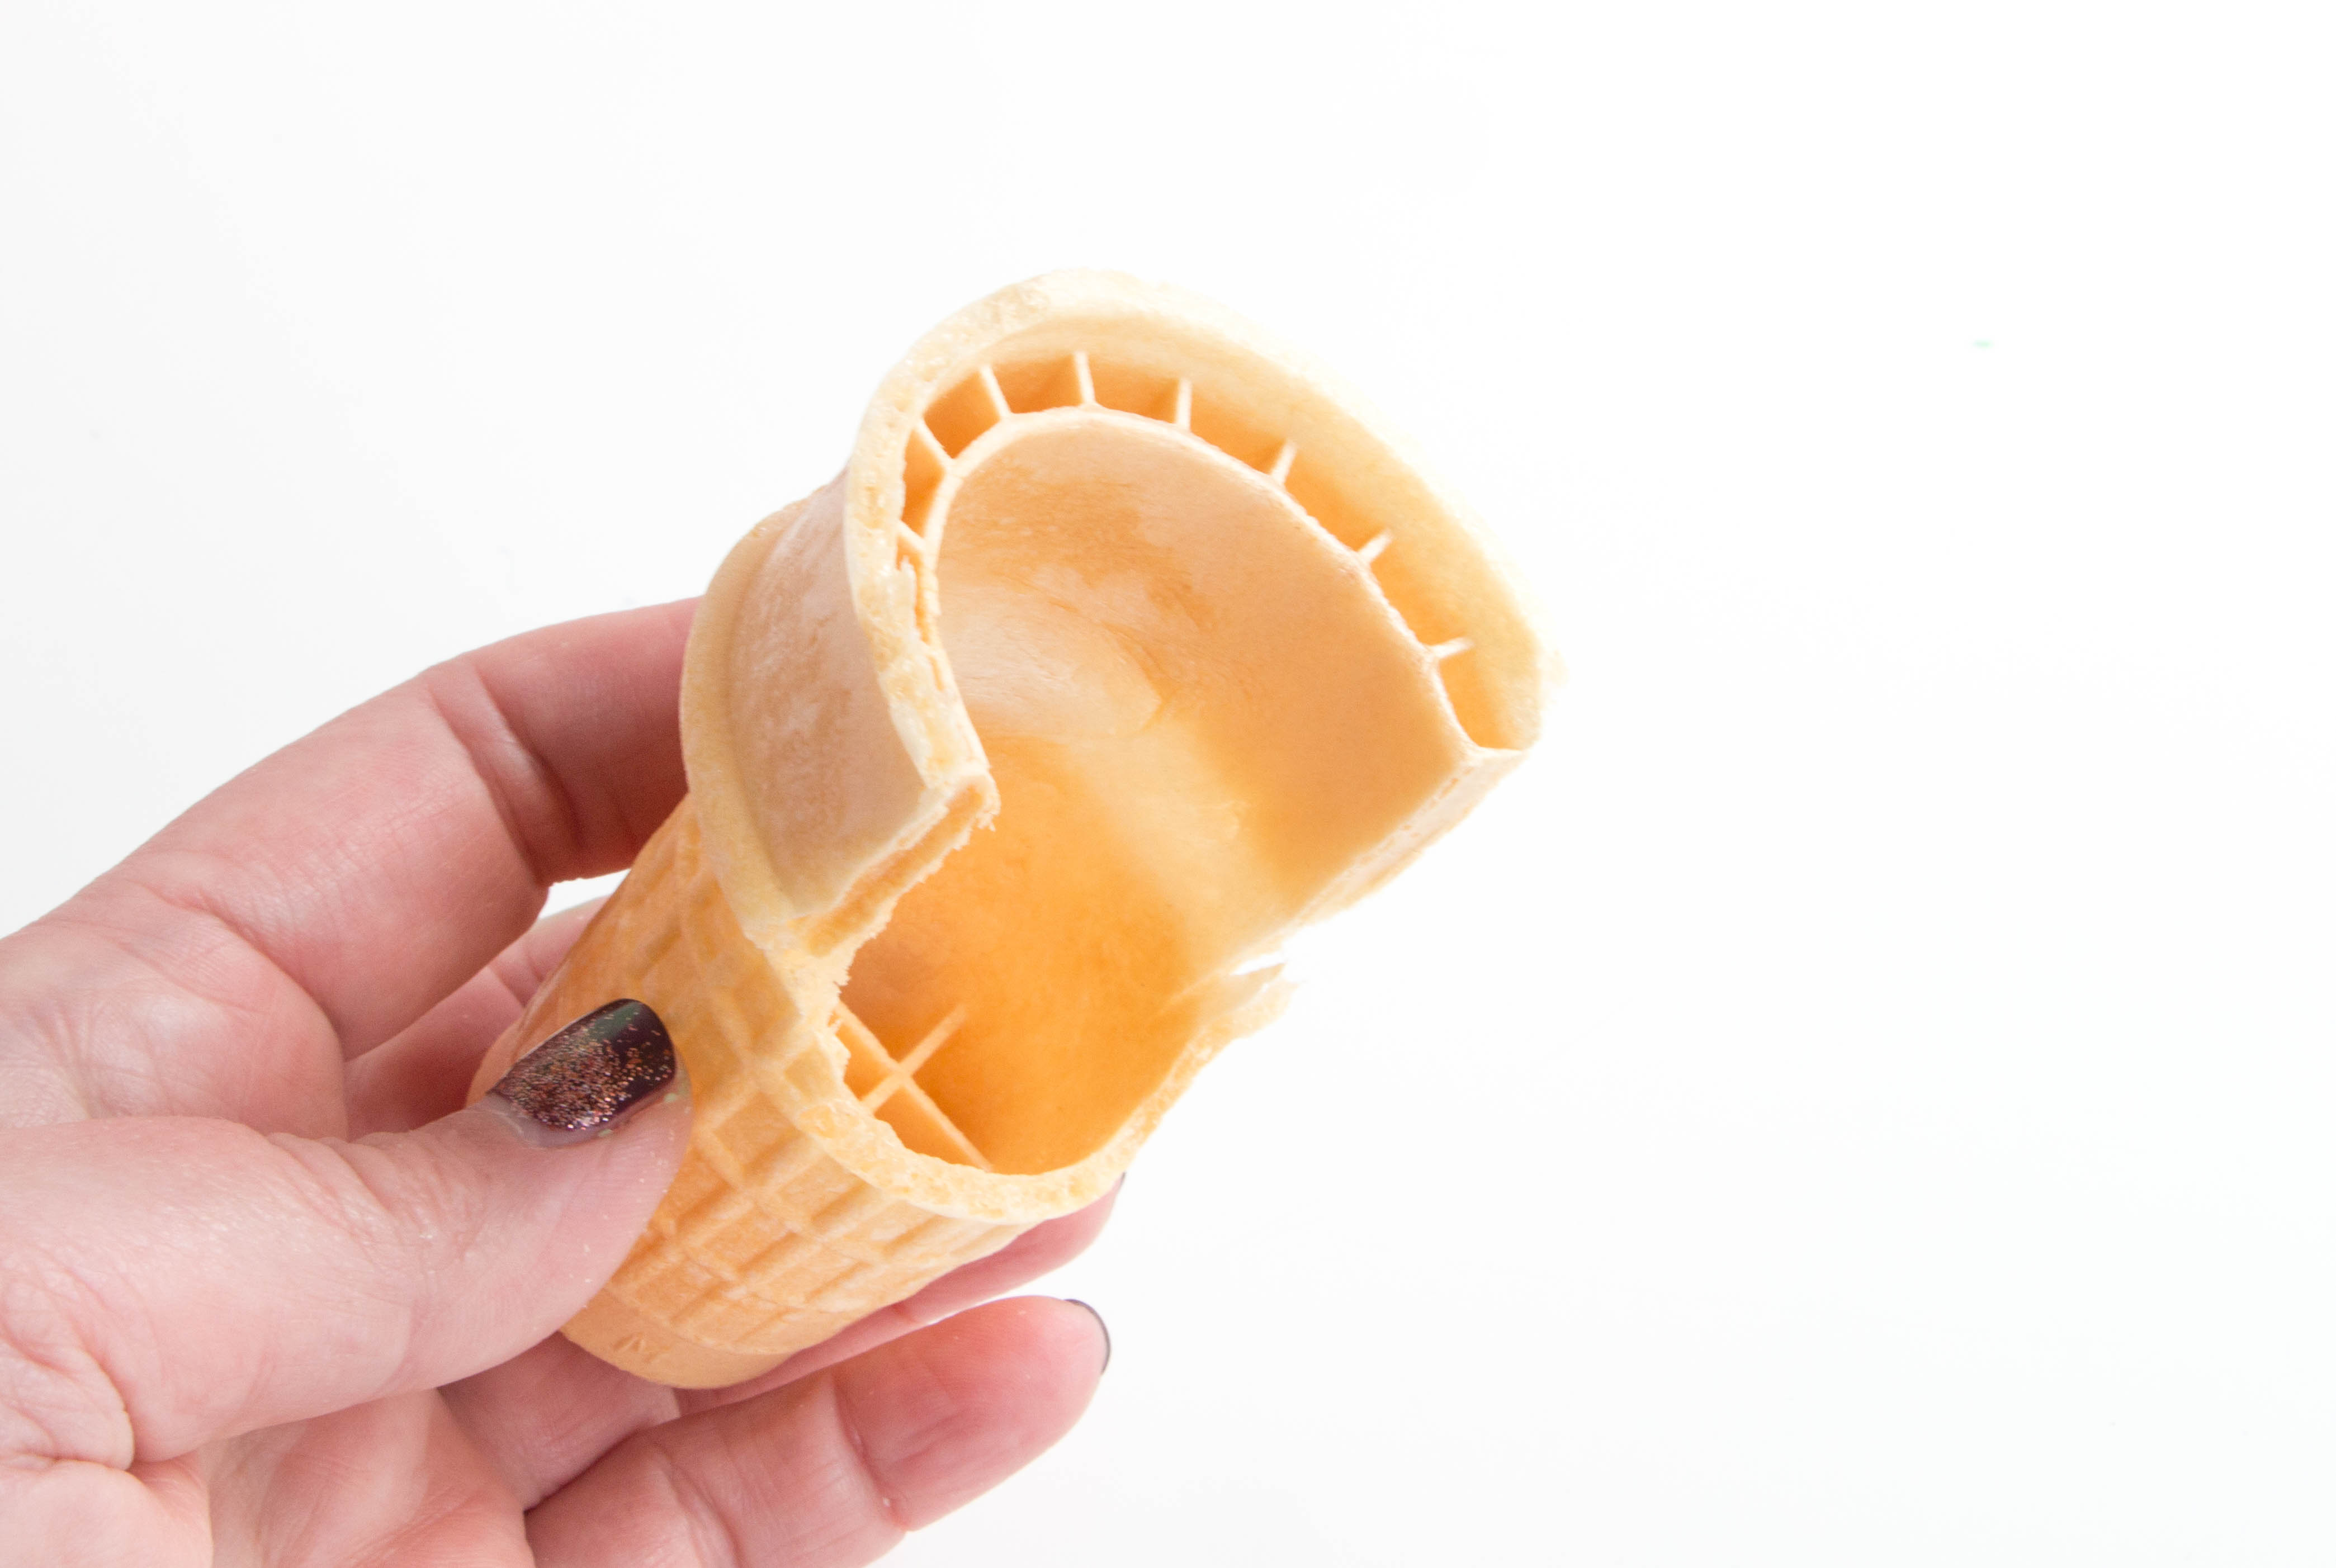
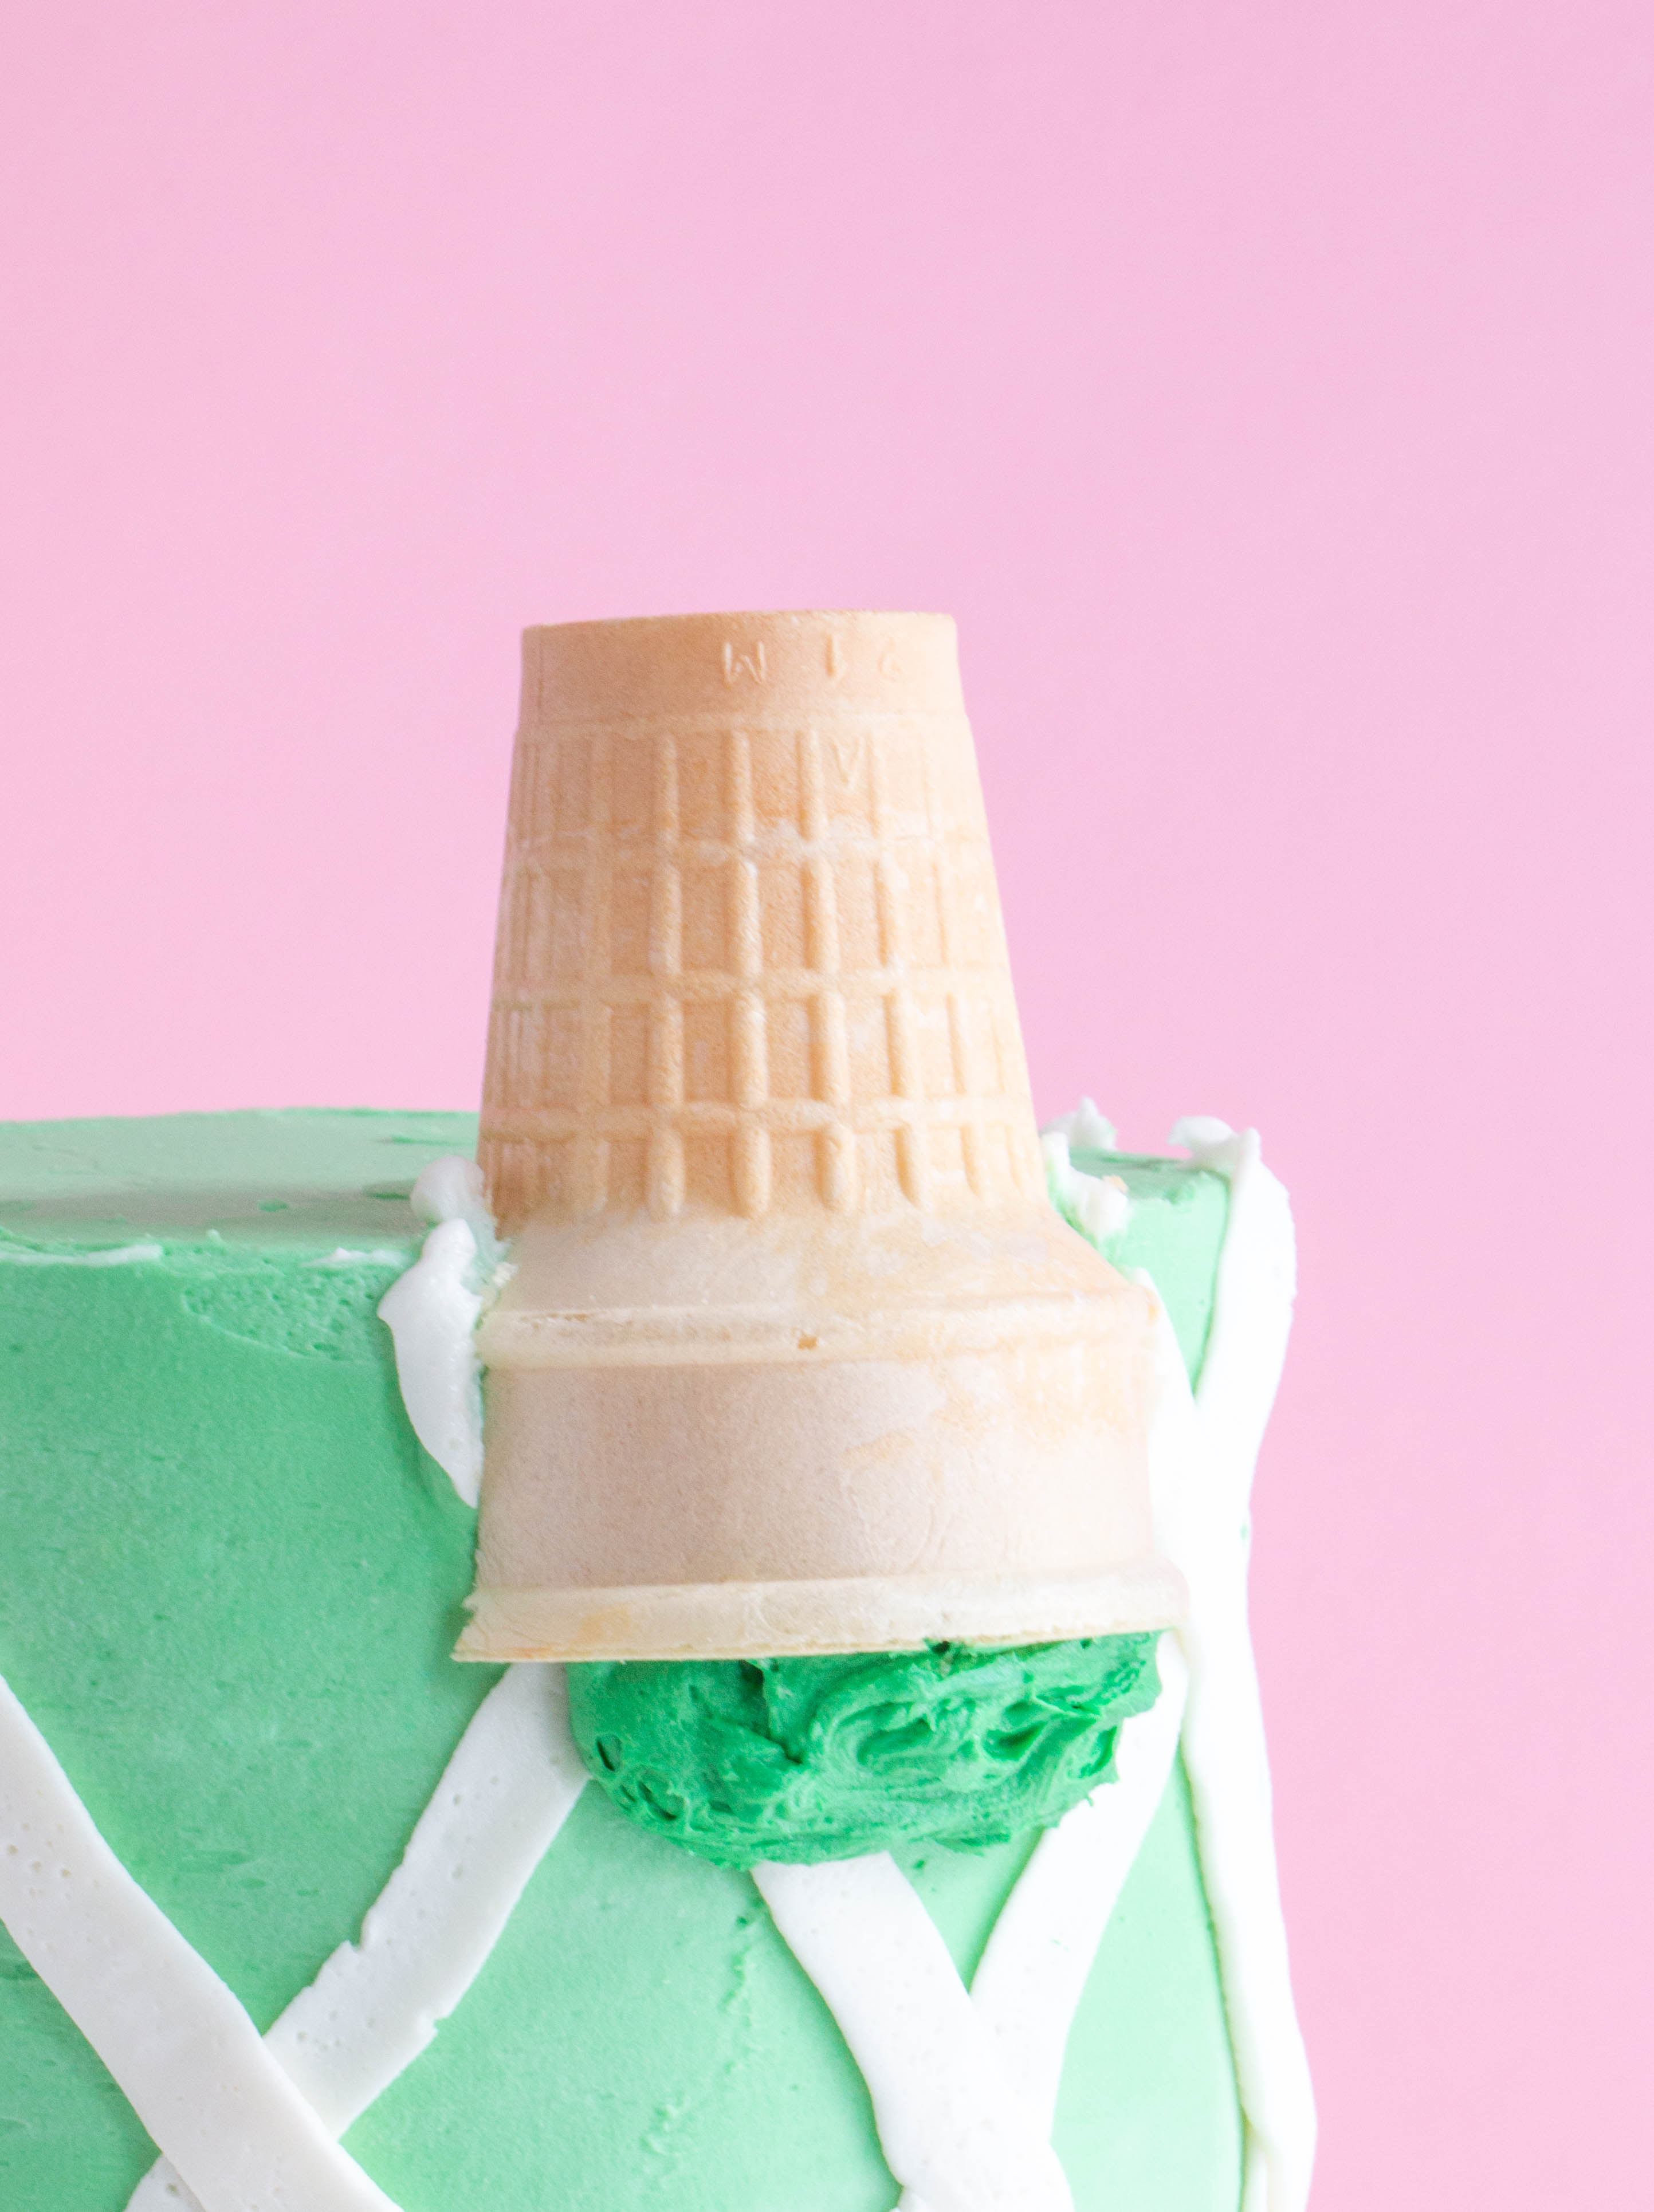
- Using a serrated knife, carefully cut down through the middle of an ice cream cone, stopping at the base of the wide part of the cone. Turn the cone on its side and cut down into the base of the wide part of the cone toward your first cut. Basically, you’re cutting a notch out of the top of the cone.
- Using the green buttercream, pipe a blob of buttercream where you’d like your first lilac to live. Set the cone on top of the blob, nestling the notched-out part of the cone against the top edge of the cake. Press it down into the cake to secure it. Pipe some of the green buttercream up into the cone to help round out the bottom of the shape.
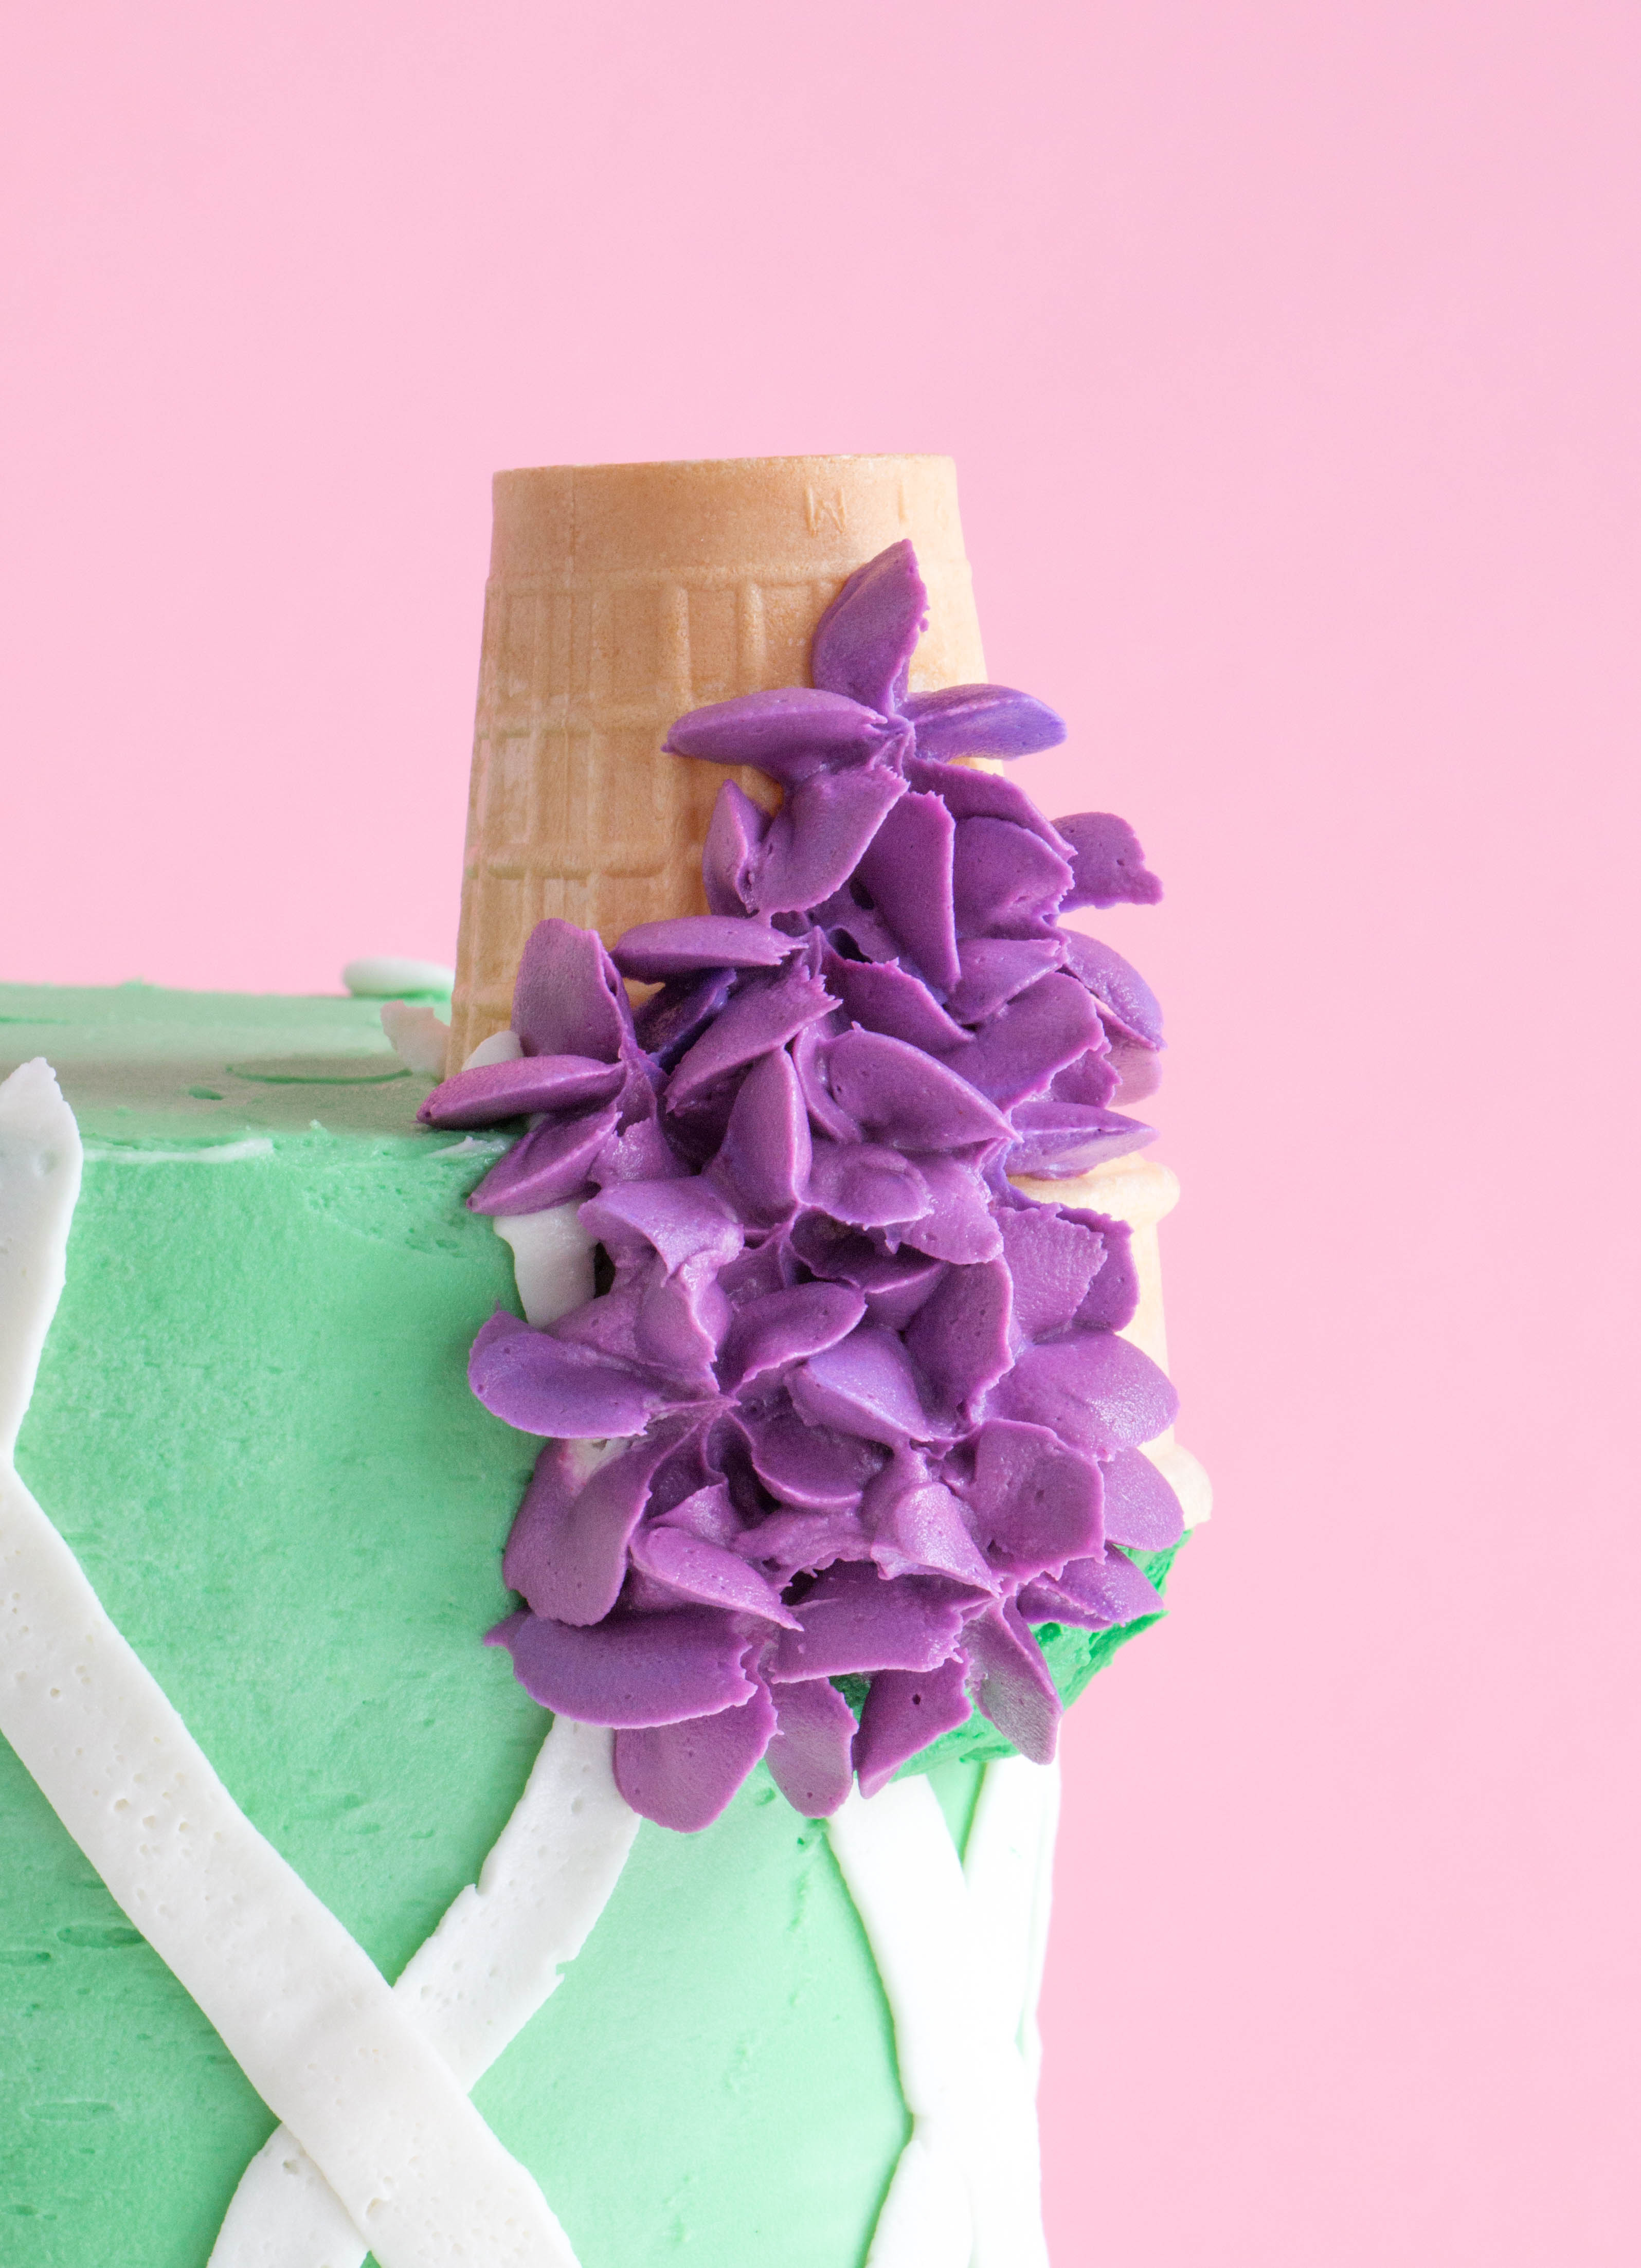
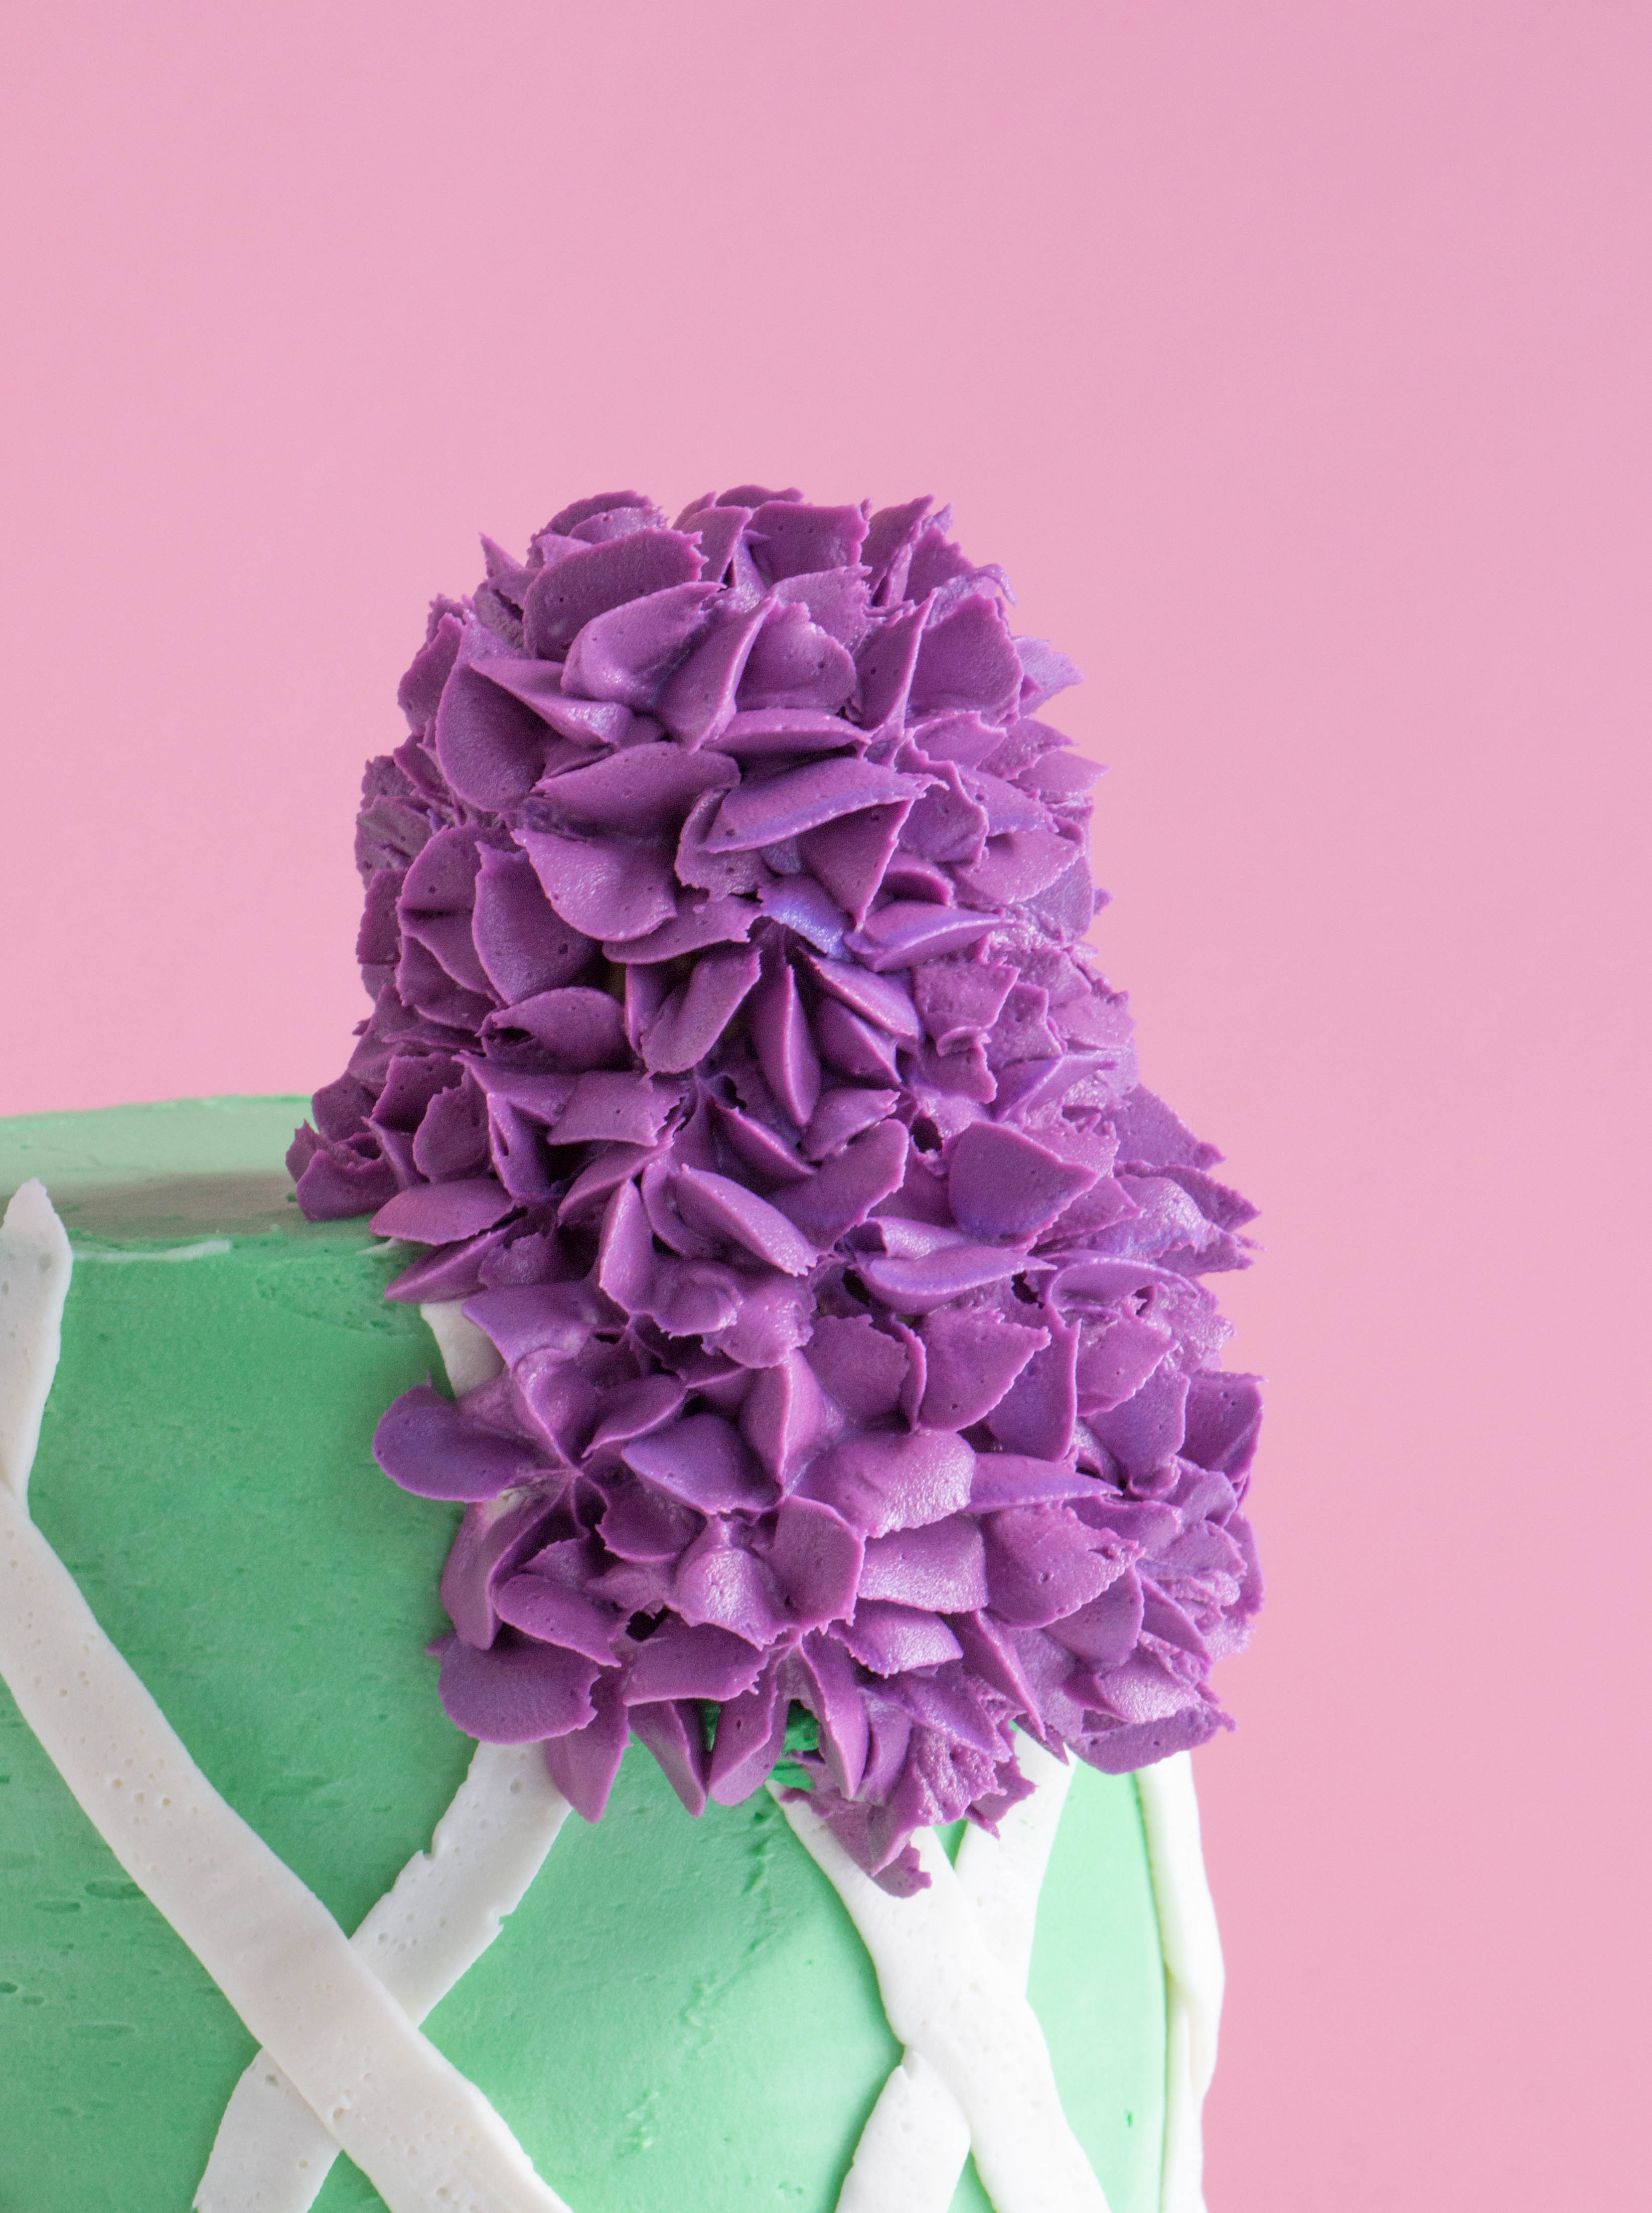
- Pipe purple drop stars all over the cone. Start where the cone touches the cake to help weigh it down, then fill in the top and side of the cone.
- To pipe a lilac on the side of the cake, first cut a cone entirely in half. Press the cone against the side of the cake and pipe green buttercream up inside of it to help secure it to the cake and round out the bottom of the shape. Cover the cone with piped purple drop stars. Repeat around the sides of the cake to make as many lilacs as you like.
Pipe the Stems and Leaves
- Pipe stems coming down from each of your lilacs using the leaf green buttercream and a round tip. Add leaves coming out from the base of the stems and coming out from under each of the flowers. Hold the leaf tip so that it looks like it’s a tiny mouth about to chomp down on what’s in front of it. Apply pressure to the bag and then pull away from the cake, releasing pressure as you go. Add tiny leaves all over the lattice to finish the cake.
This tutorial originally appeared in the January/February 2019 issue of American Cake Decorating.
