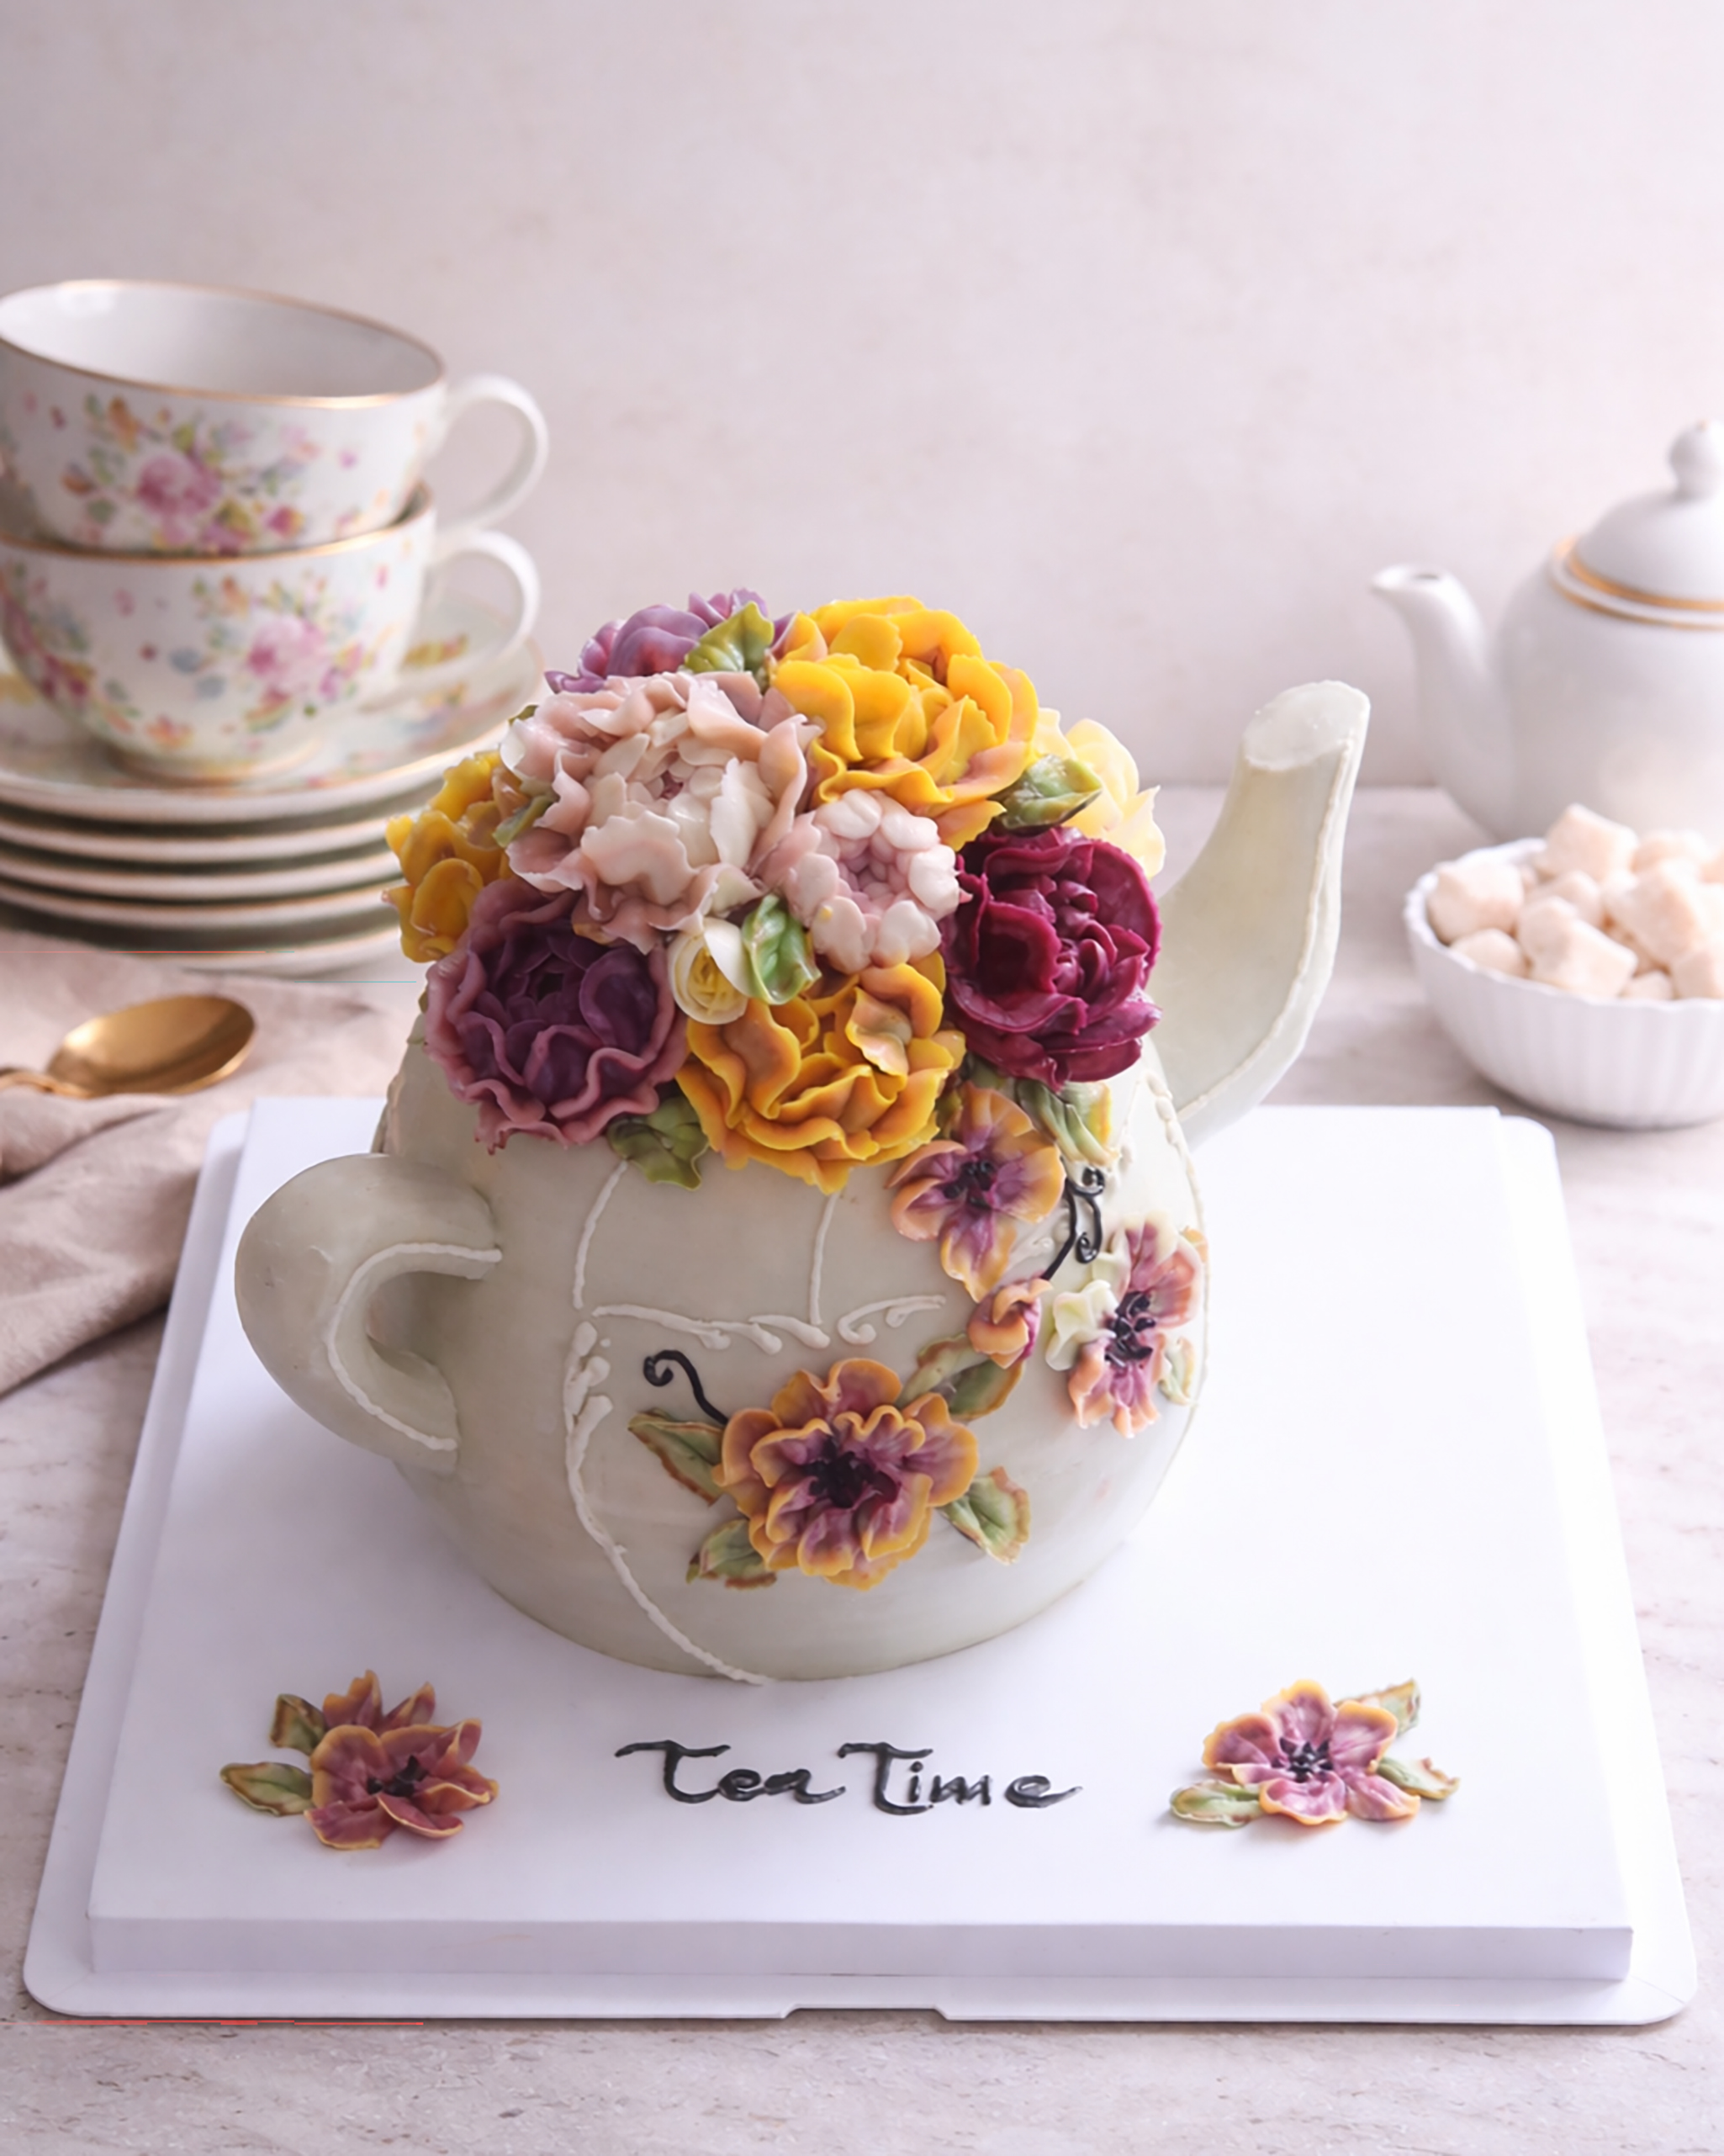
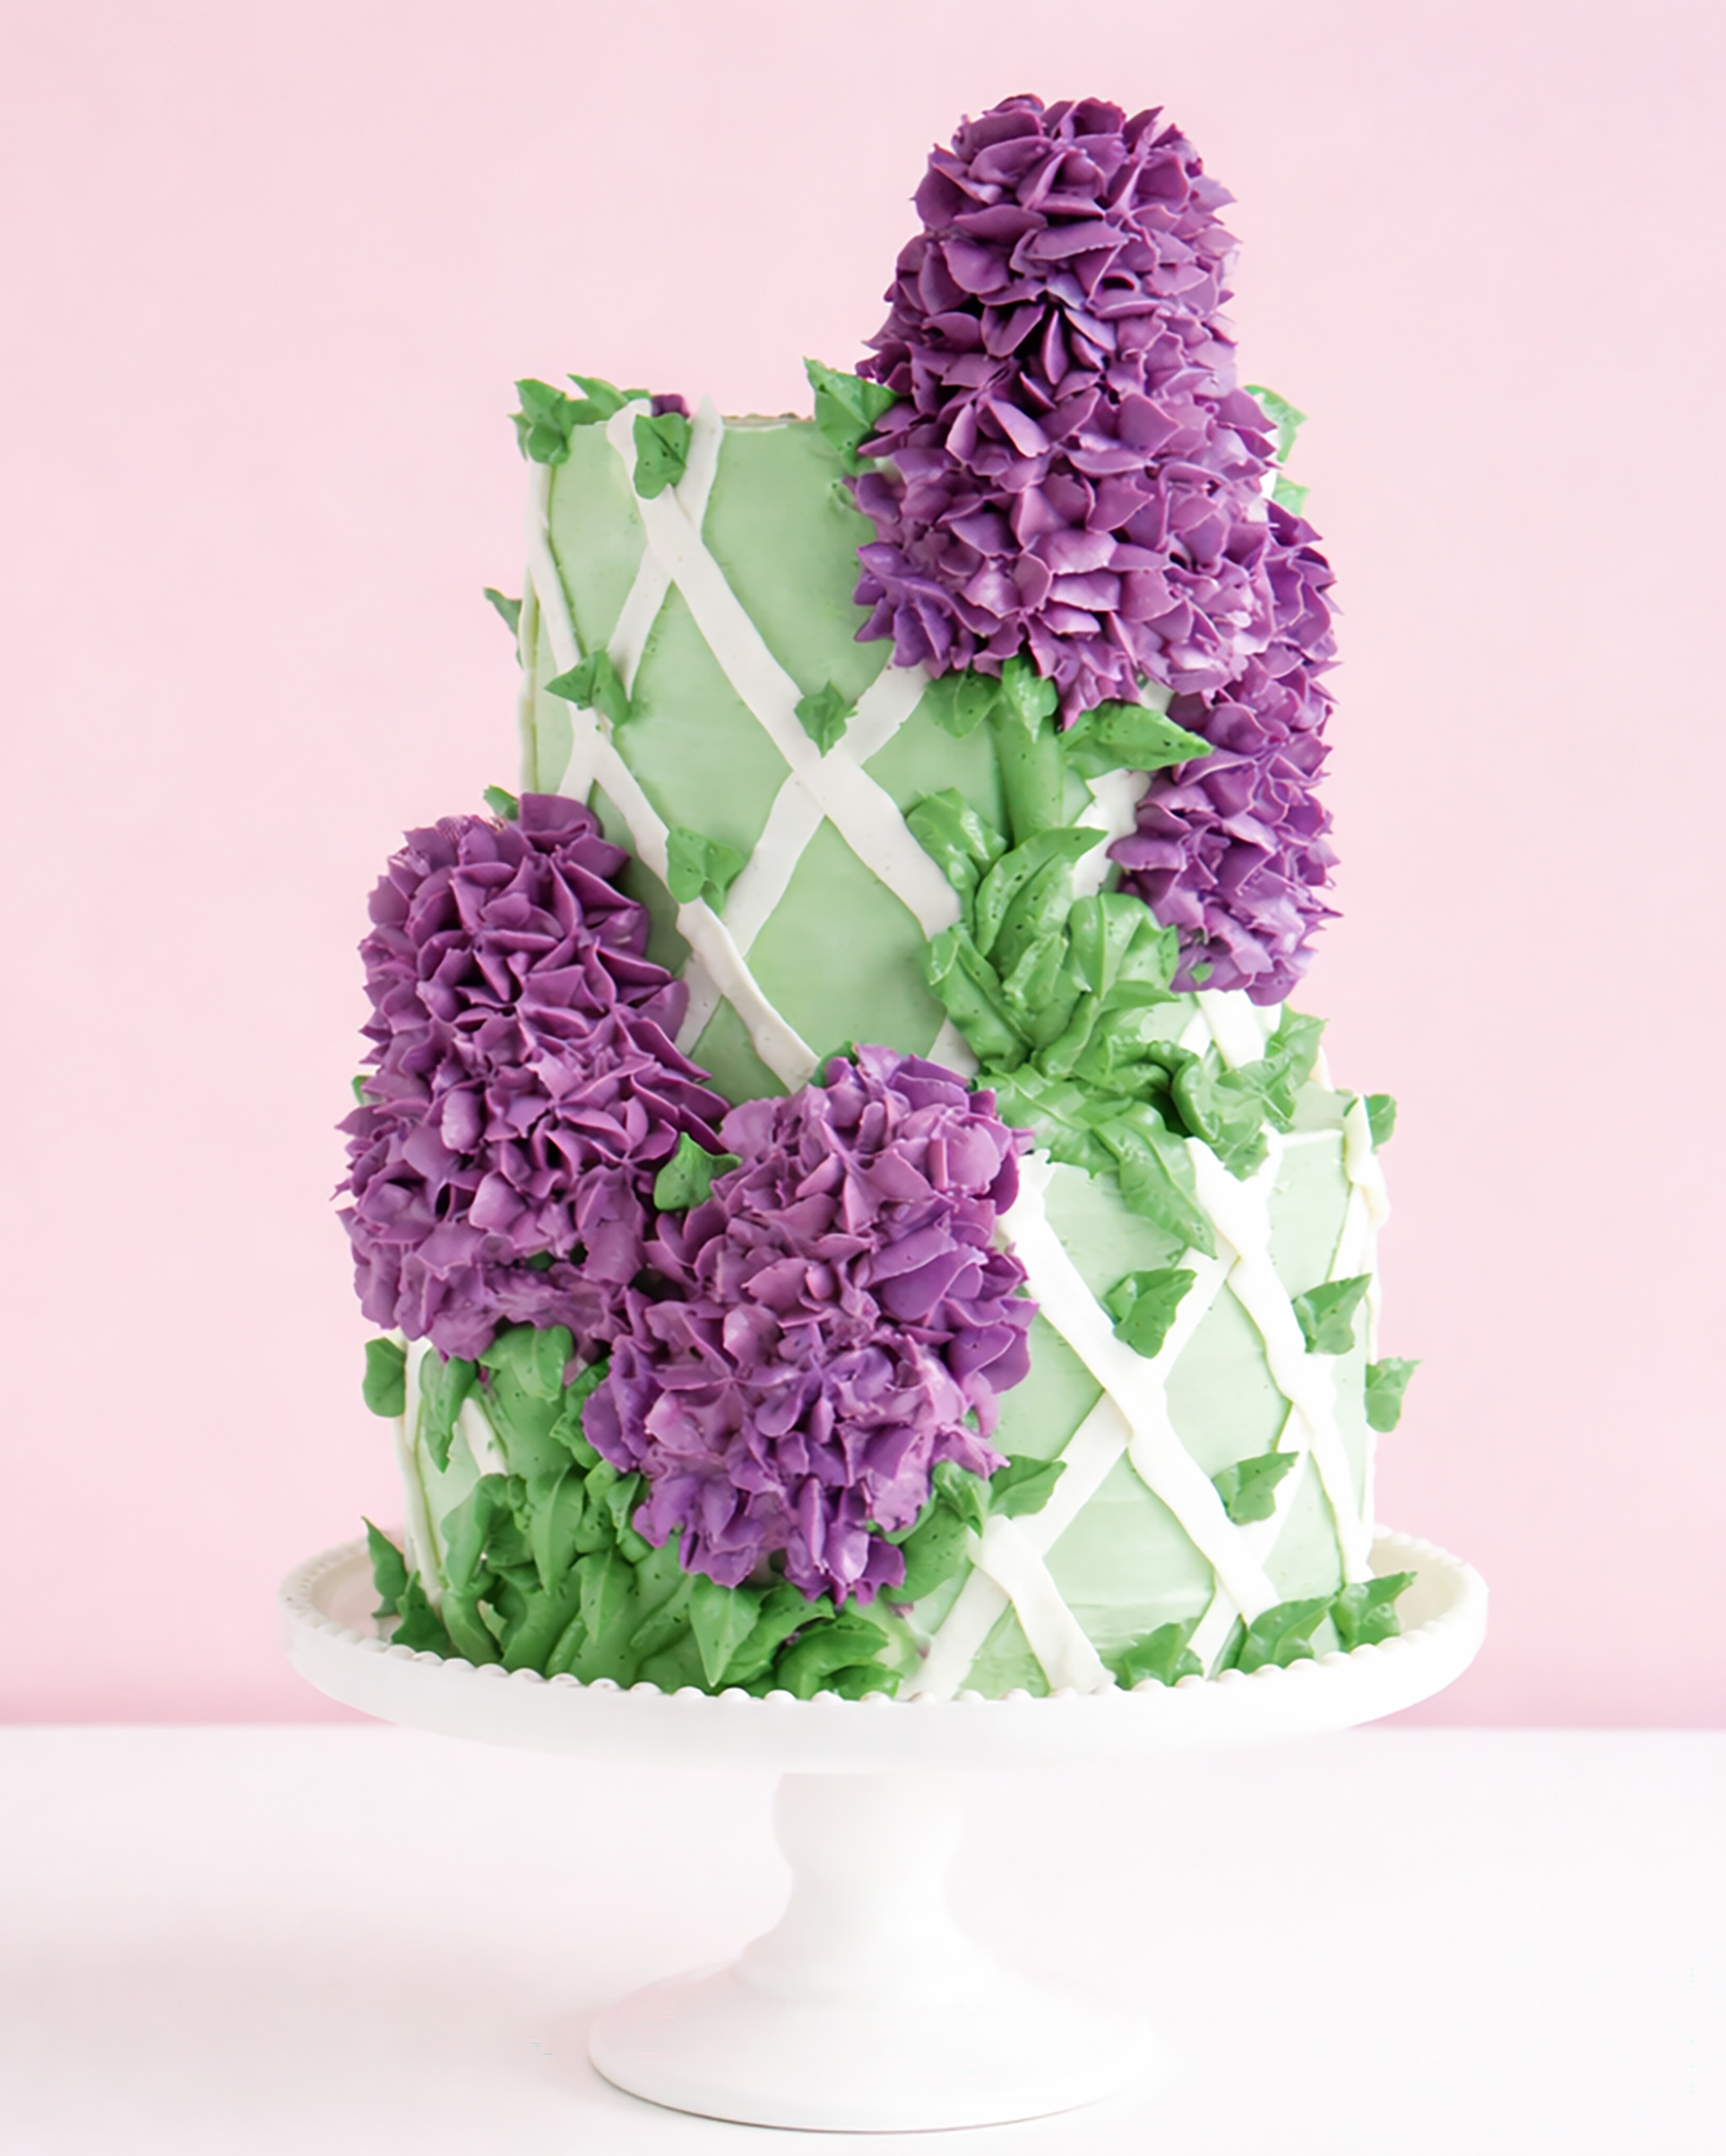
Picture-perfect, glossy buttercream-flower cakes are one of the biggest cake trends. Learn to create a gorgeous buttercream teapot cake adorned with Juliet roses and peonies by following this detailed tutorial from Thao Nam Nguyen.
It proves you don’t need fondant for clean lines! To set yourself up for success, take your time and remove each section carefully, tapering the pot at the top and bottom. Remember, you can always remove more cake, but it is harder to add it back if you cut too much away. Make sure to clear your work surface so that you don’t transfer any crumbs into the final coat.
Edibles:
- Vanilla cake
- Italian meringue buttercream: plain, magenta, ochre, violet, pink, and green
Equipment:
- Serrated knife
- Smoother
- Marker
- Cake dummy
- Sharp knife
- X-Acto knife or box cutter
- Offset spatula
- Toothpicks
- Piping tips: #104, #123, #2, and leaf (Wilton)
- Piping bags
- Flower nail
- Flower scissors
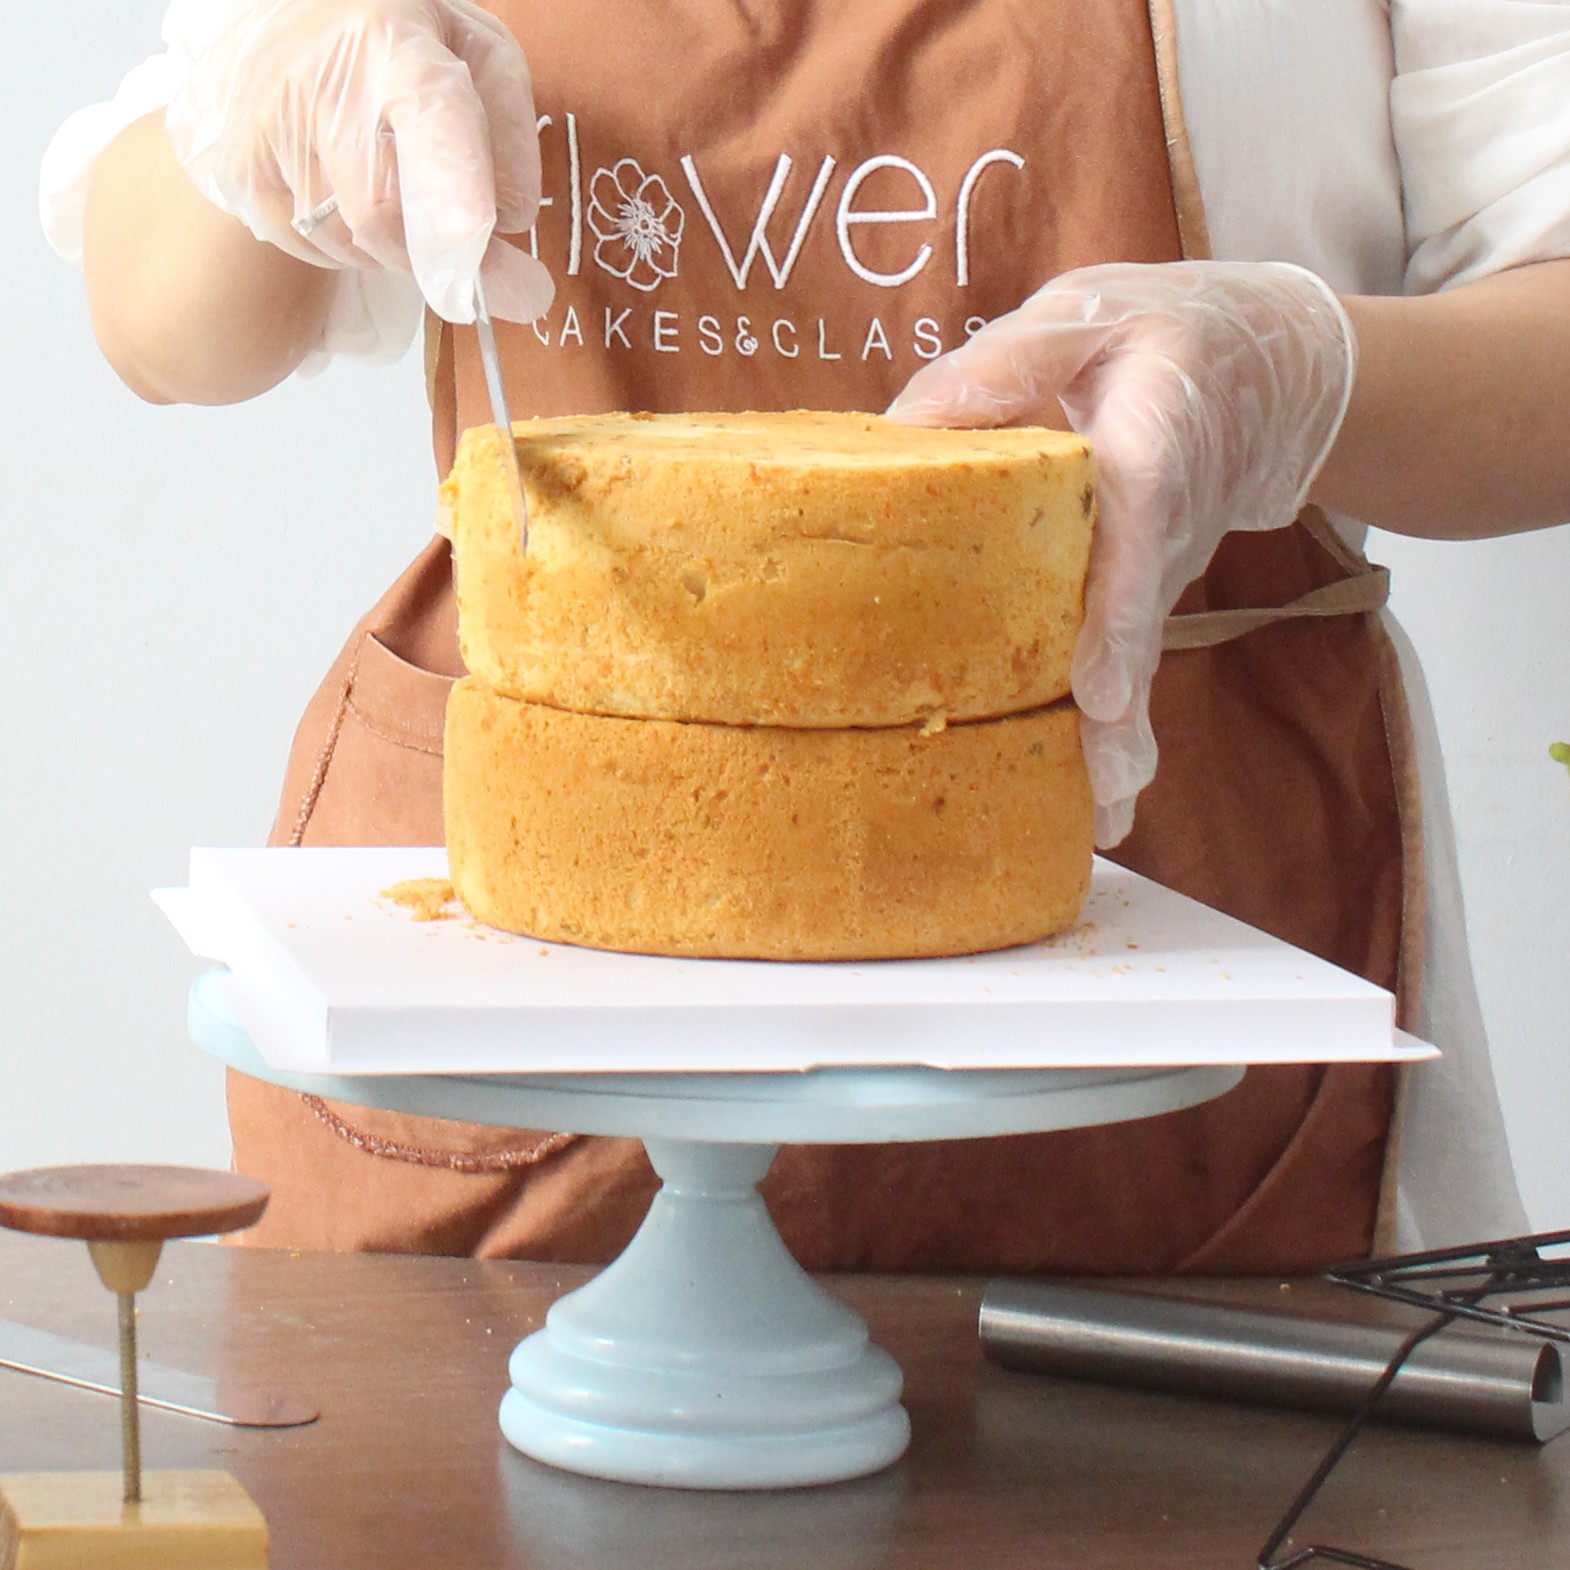
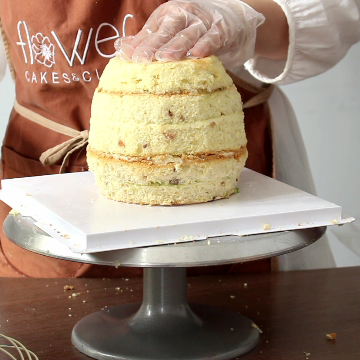
Carve the Cake
- Torte, fill, and stack two 8-inch-by-3-inch vanilla cakes. Refrigerate the cake for several hours until firm before carving.
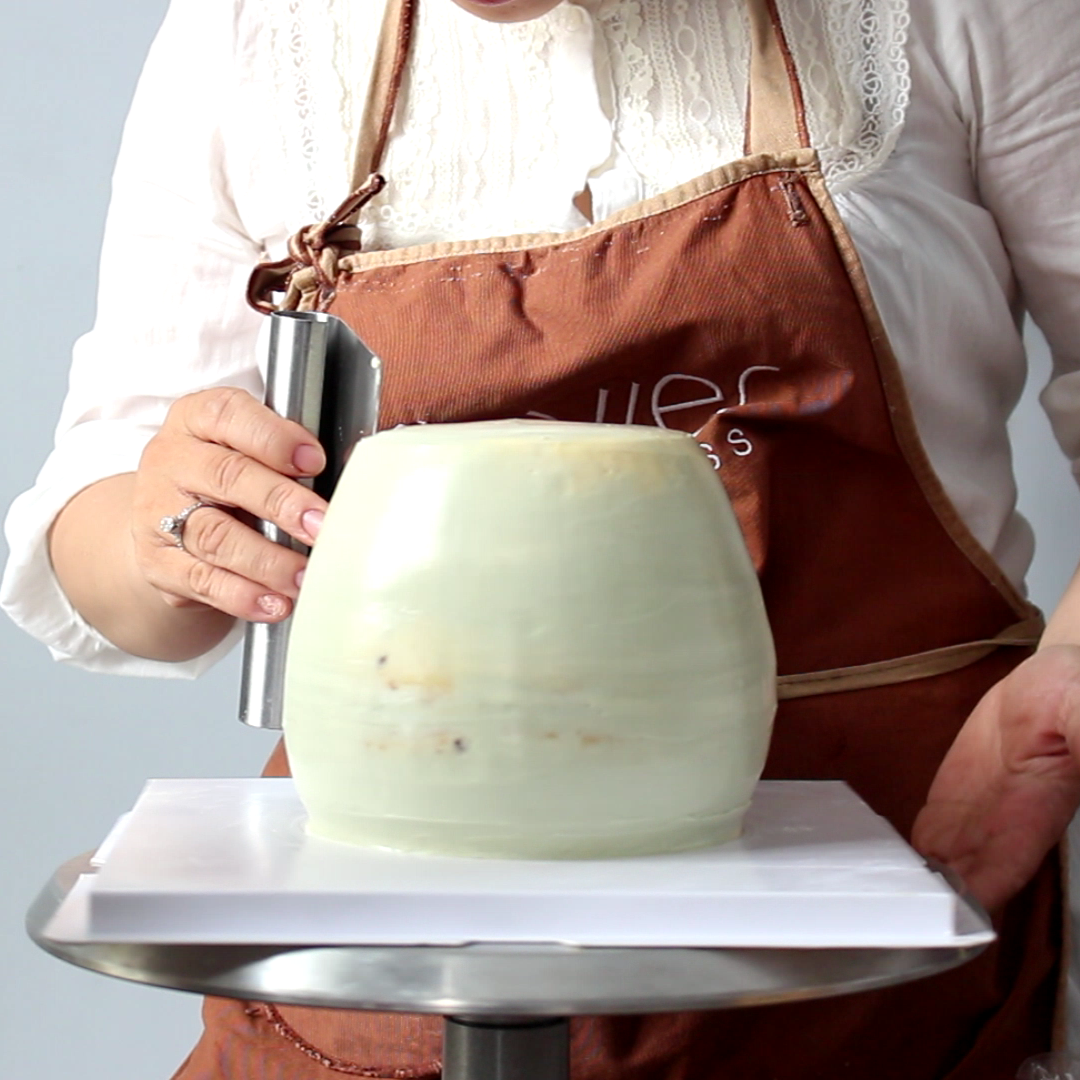
- Using a serrated knife, carve the cake by removing outer segments to create the shape of a teapot.
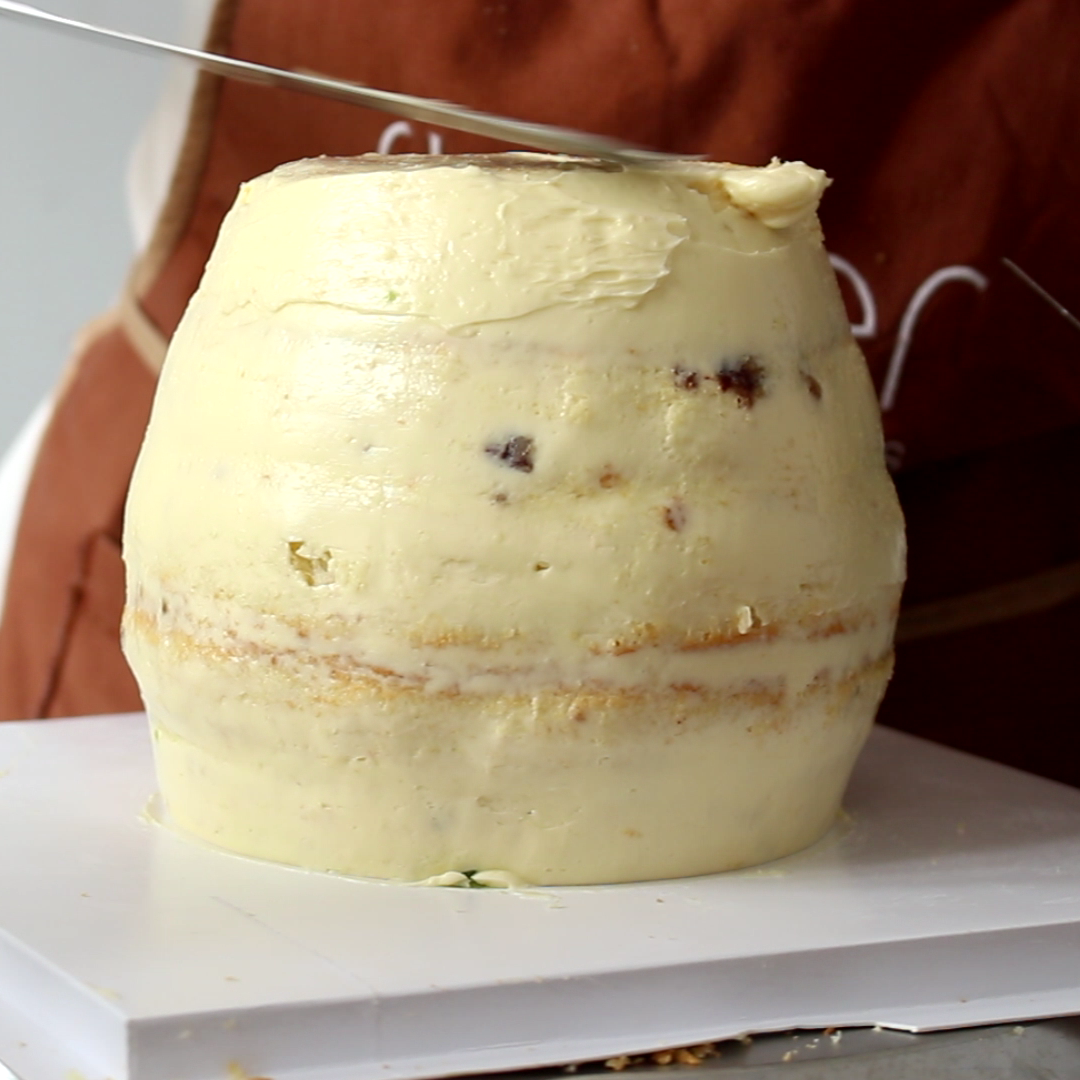
- Once carved, apply a crumb coat of buttercream to seal in any loose crumbs. Place the crumb-coated cake back into the refrigerator for 10 to 15 minutes.
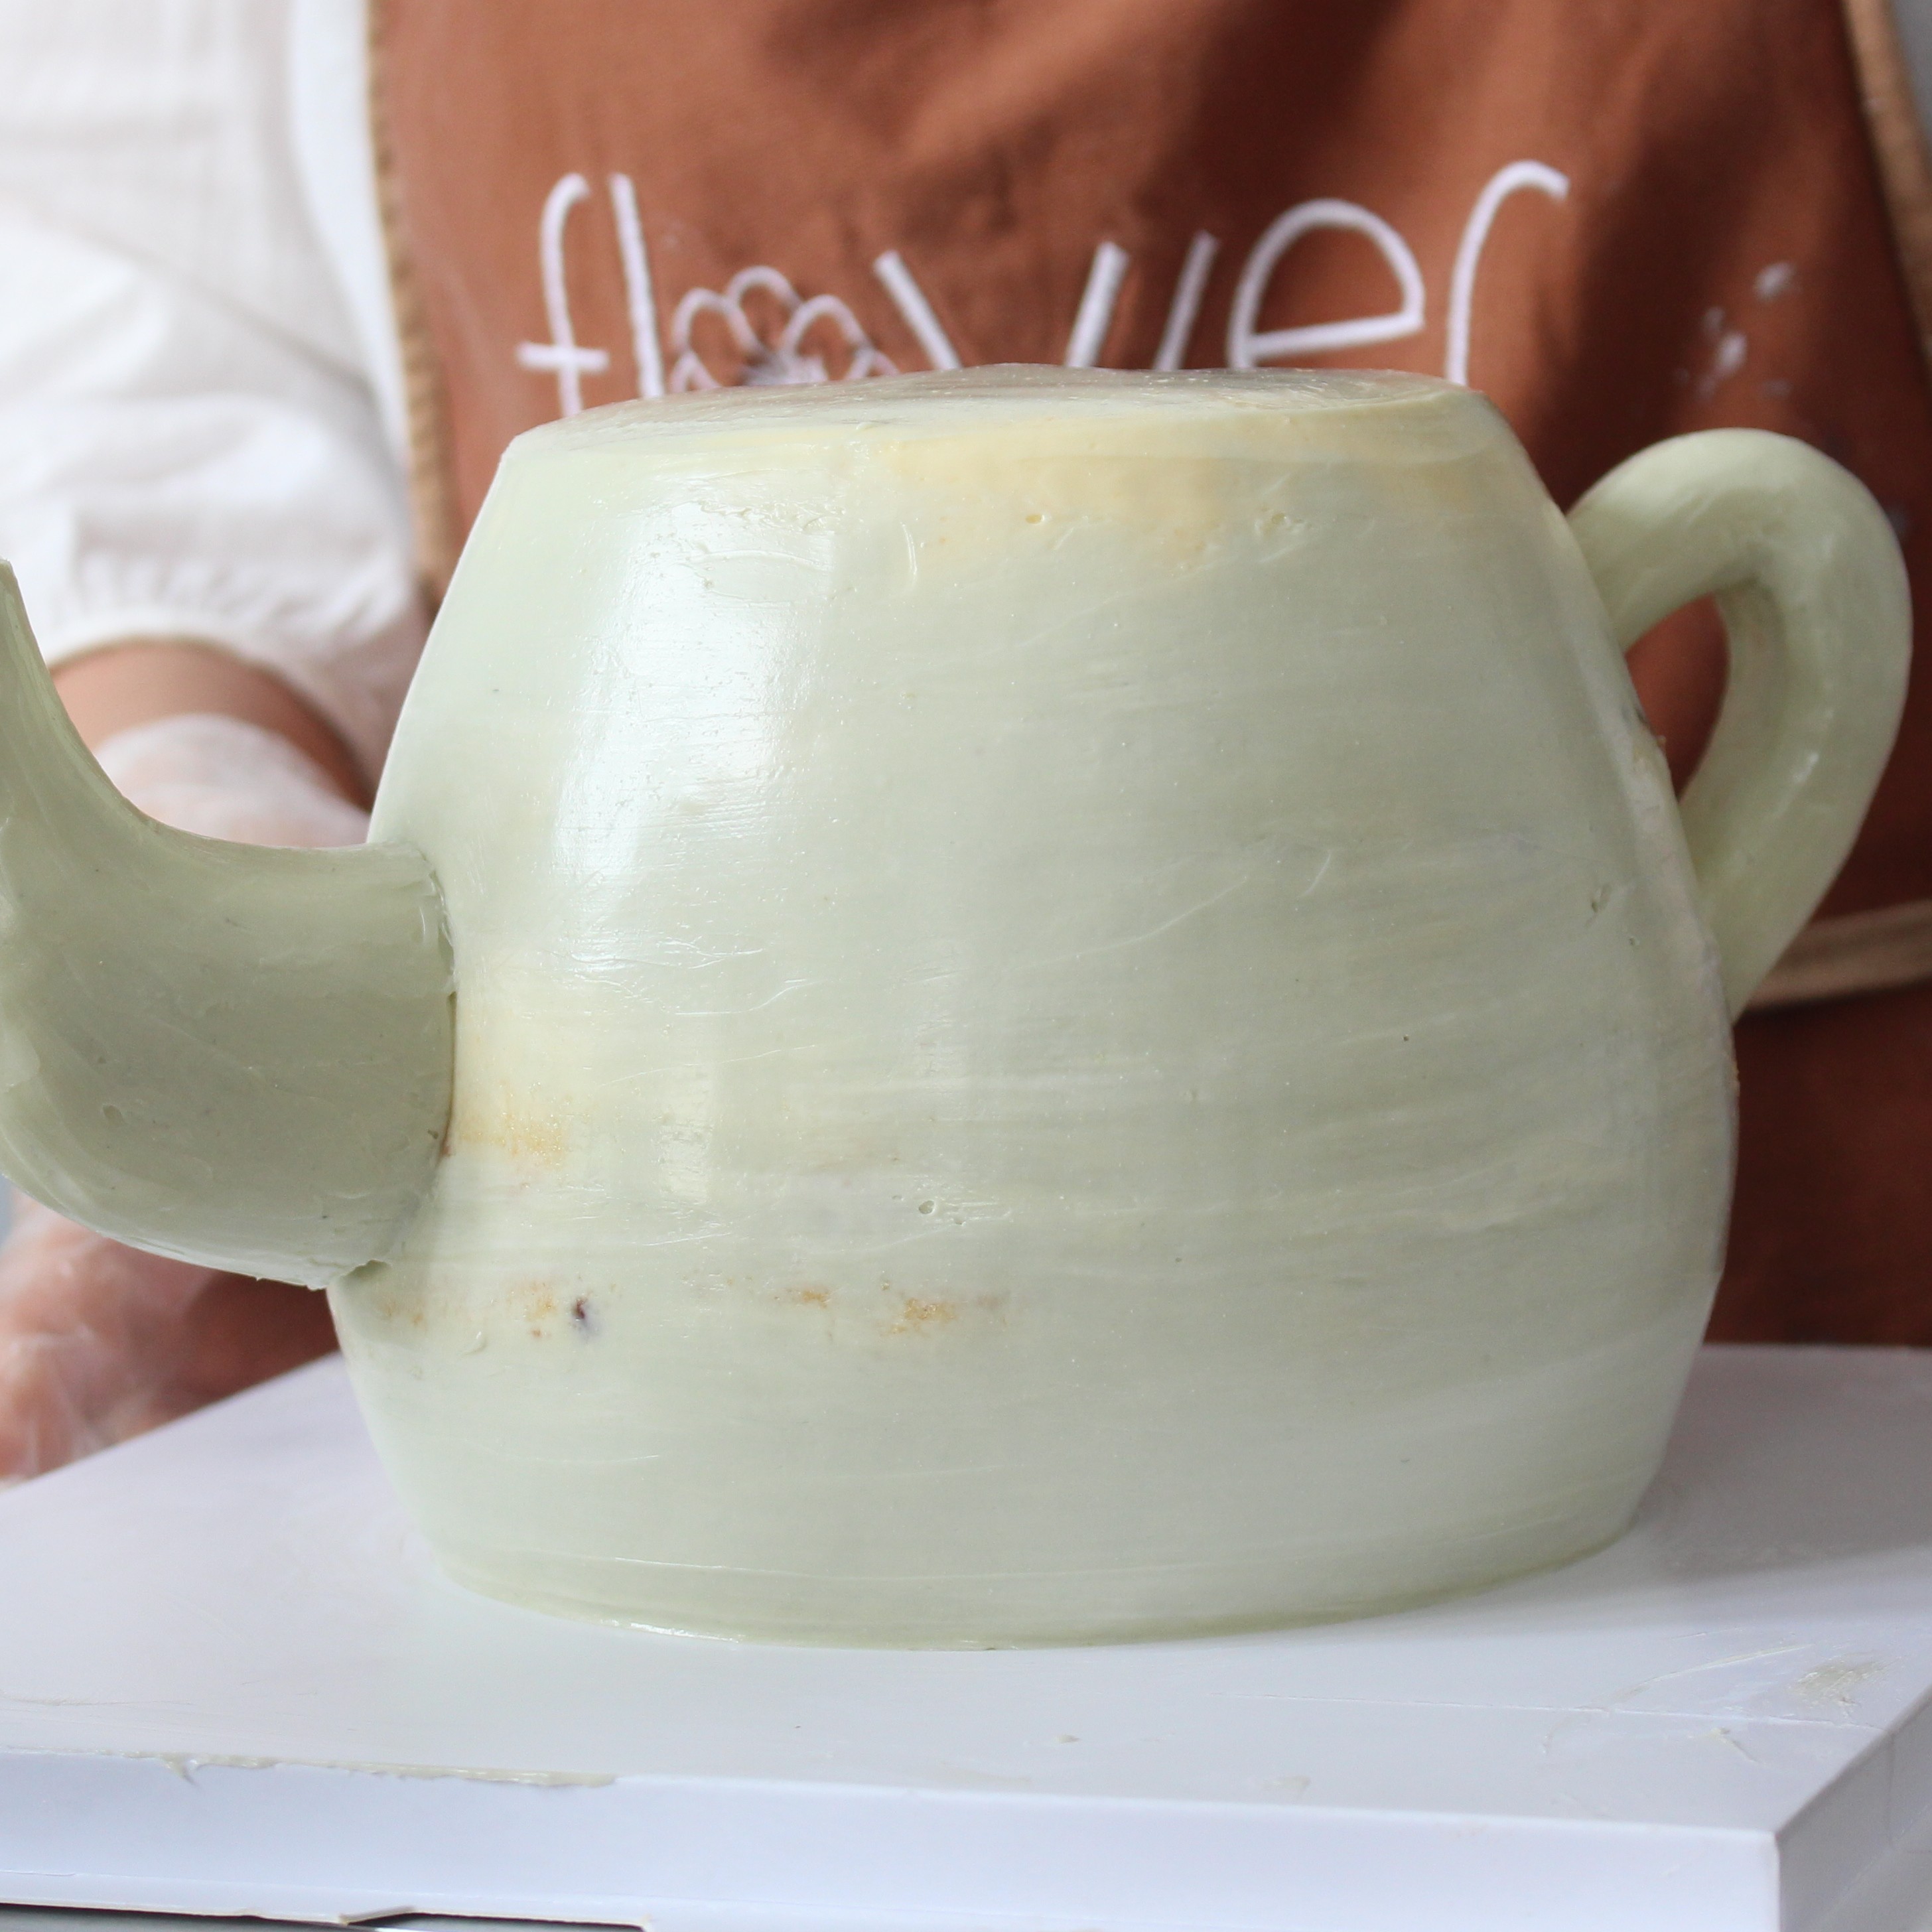
- Remove the cake and cover with a final coat of buttercream. Smooth the buttercream using a cake smoother.
Make the Spout and Handle
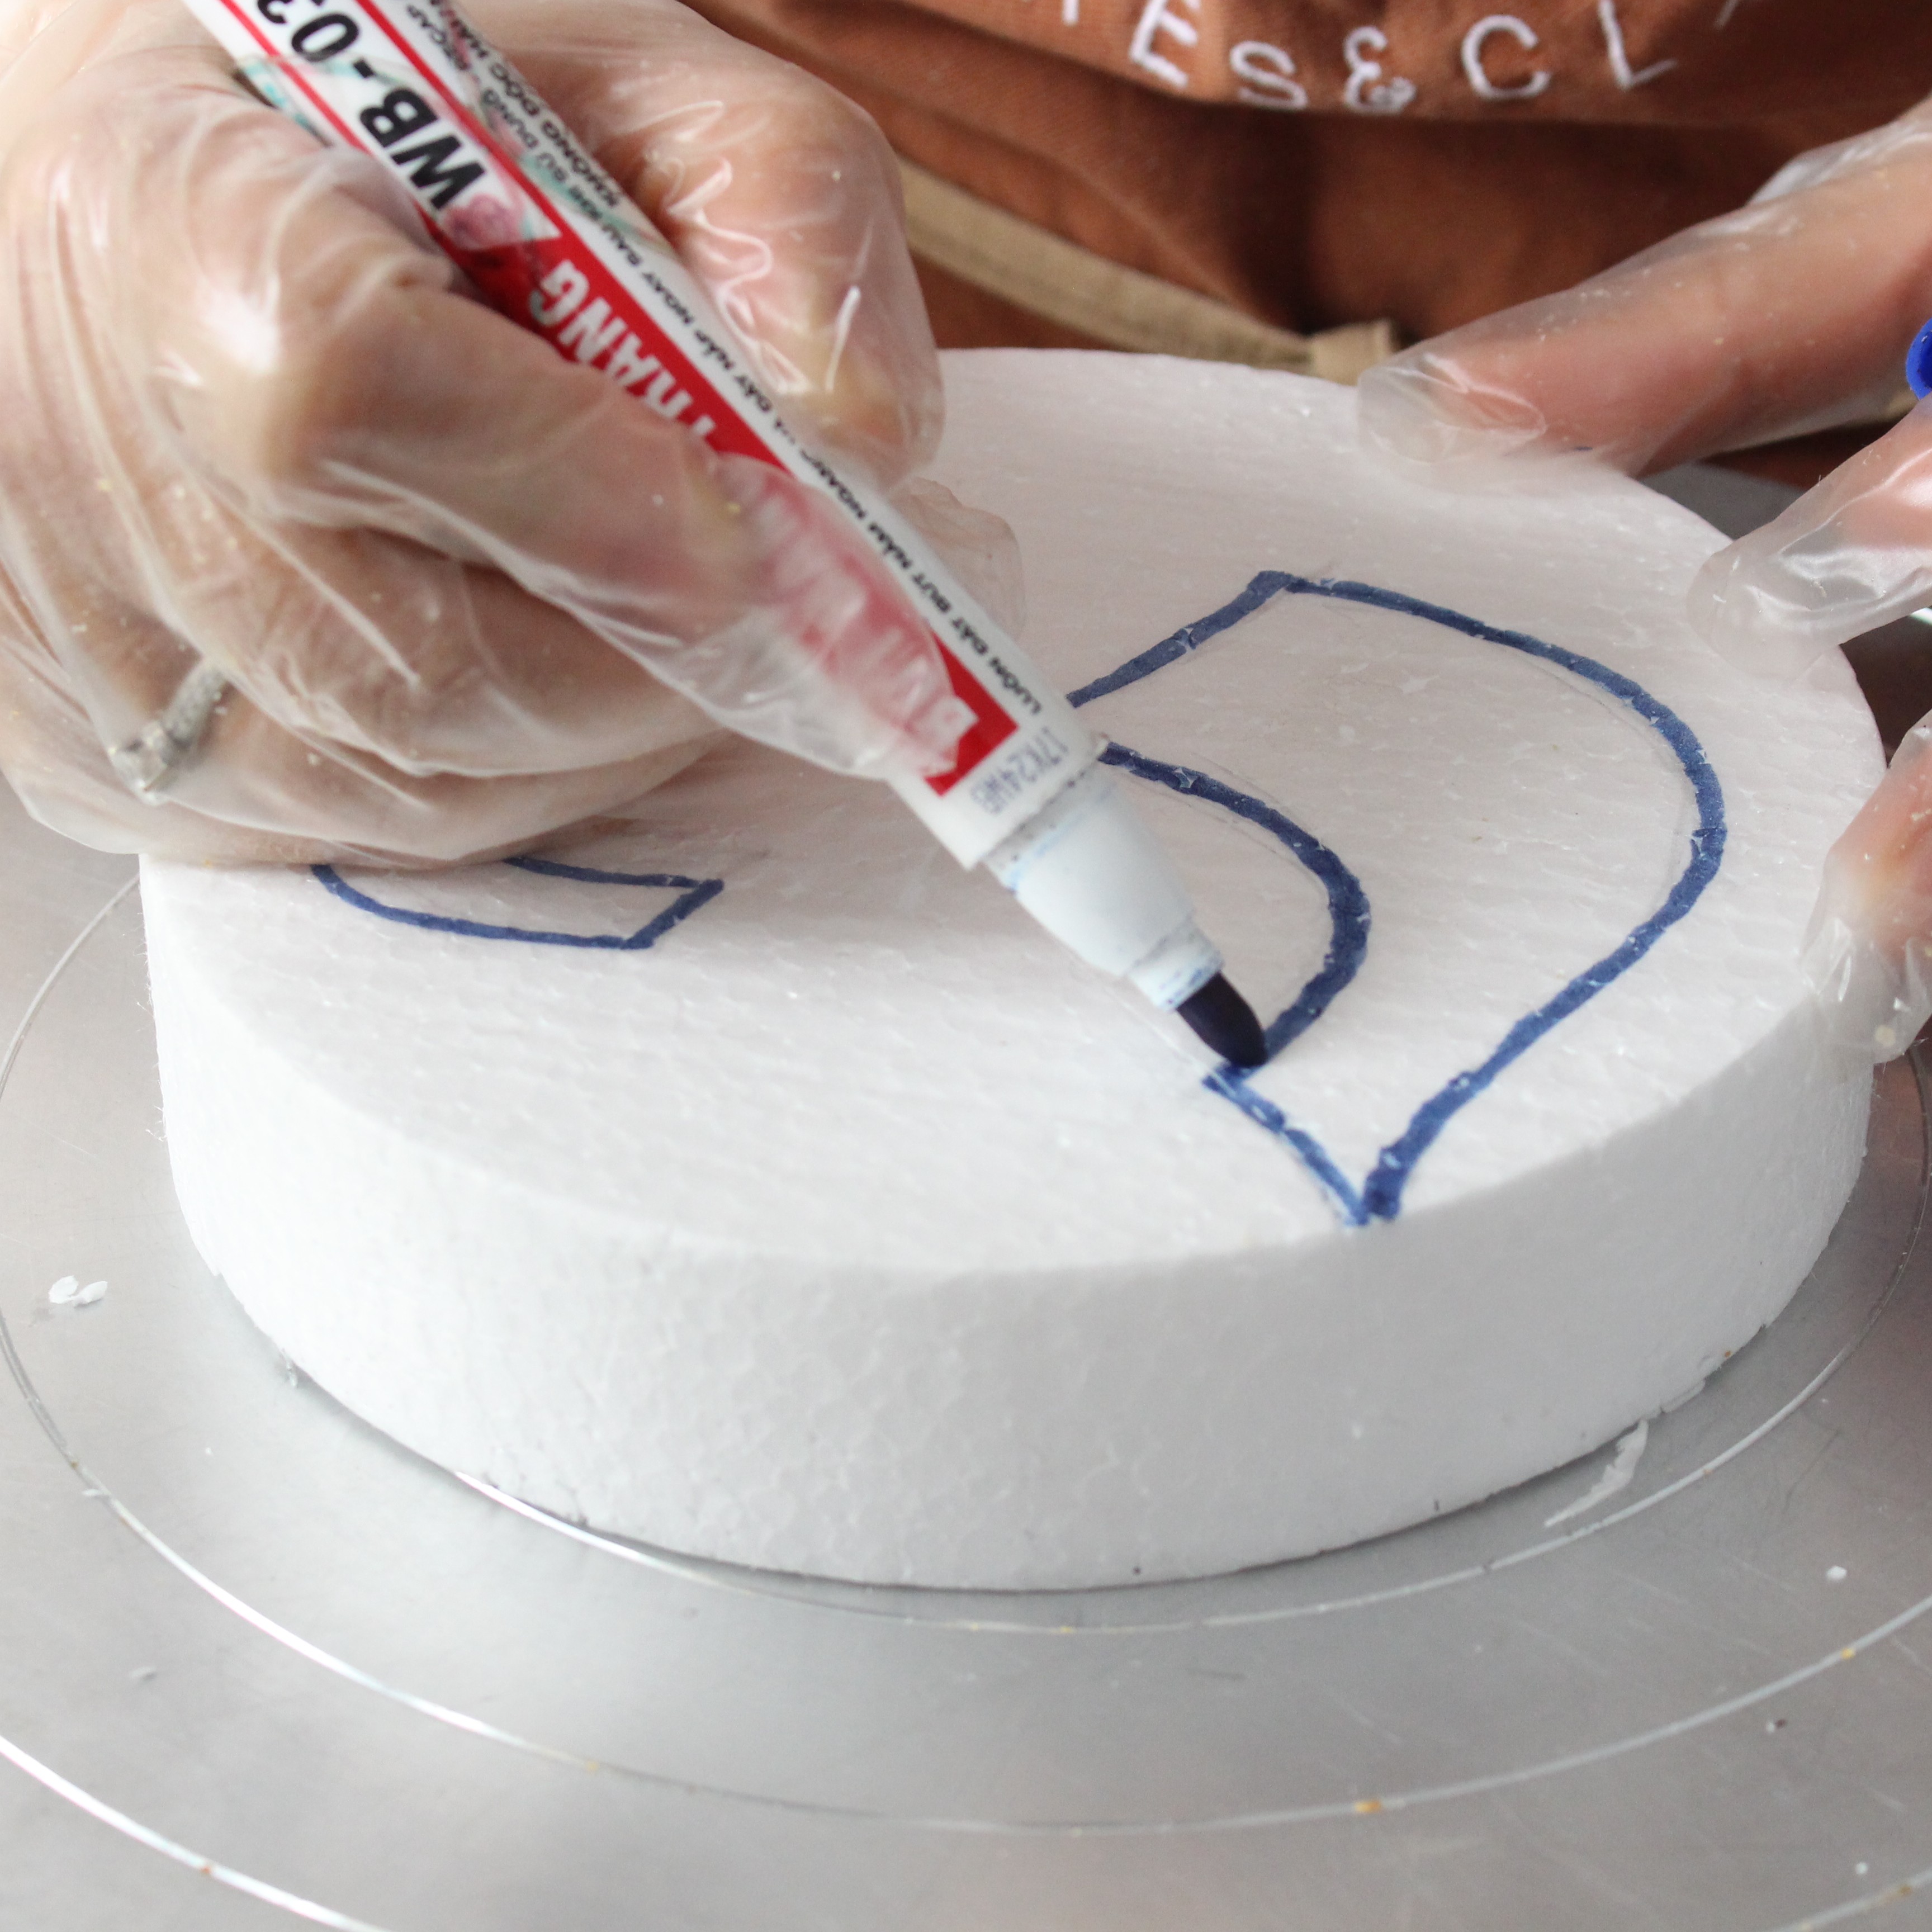
- Draw a spout shape and a handle onto a 6-inch-by-2-inch round cake dummy.
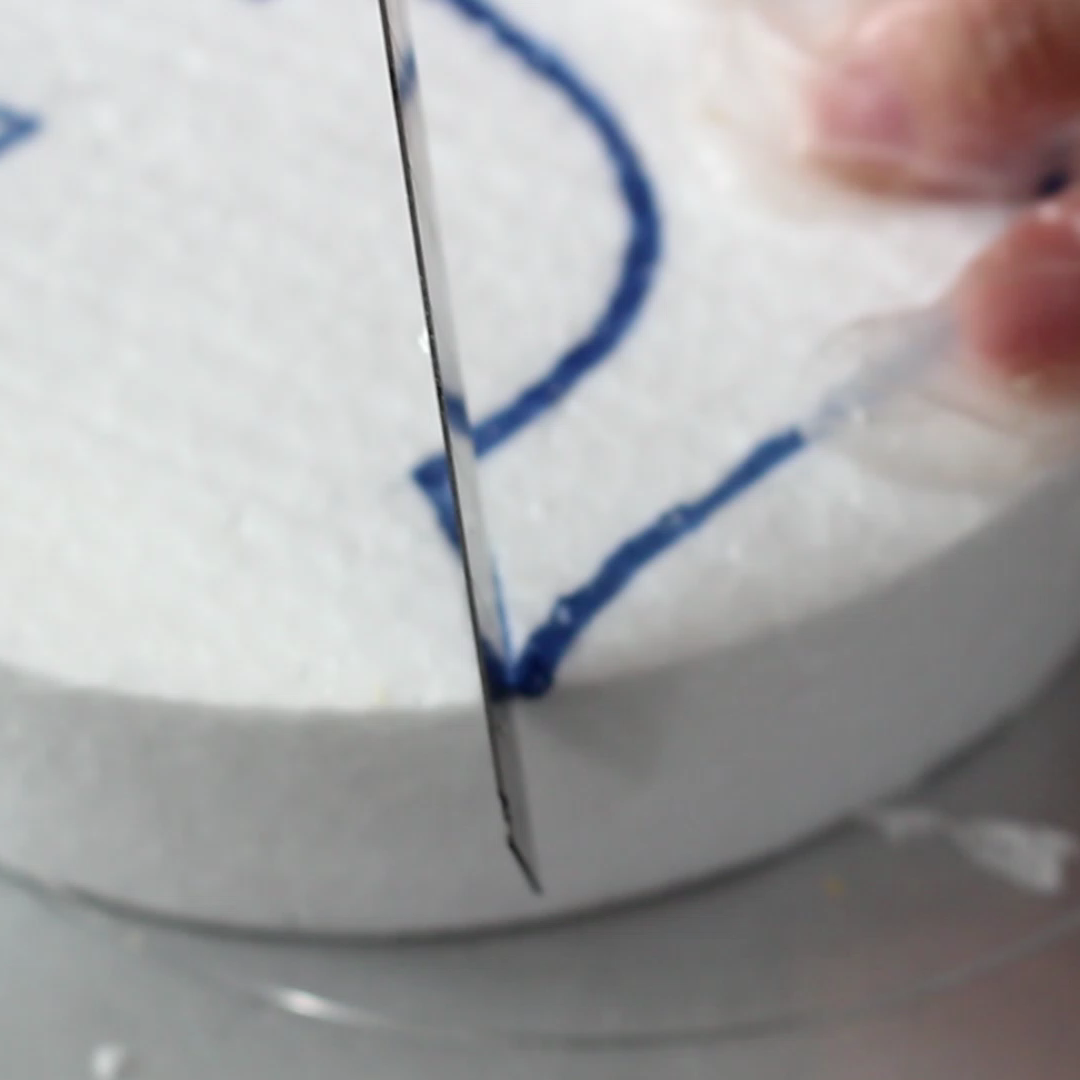
- Use a sharp knife to cut around the shape cleanly.
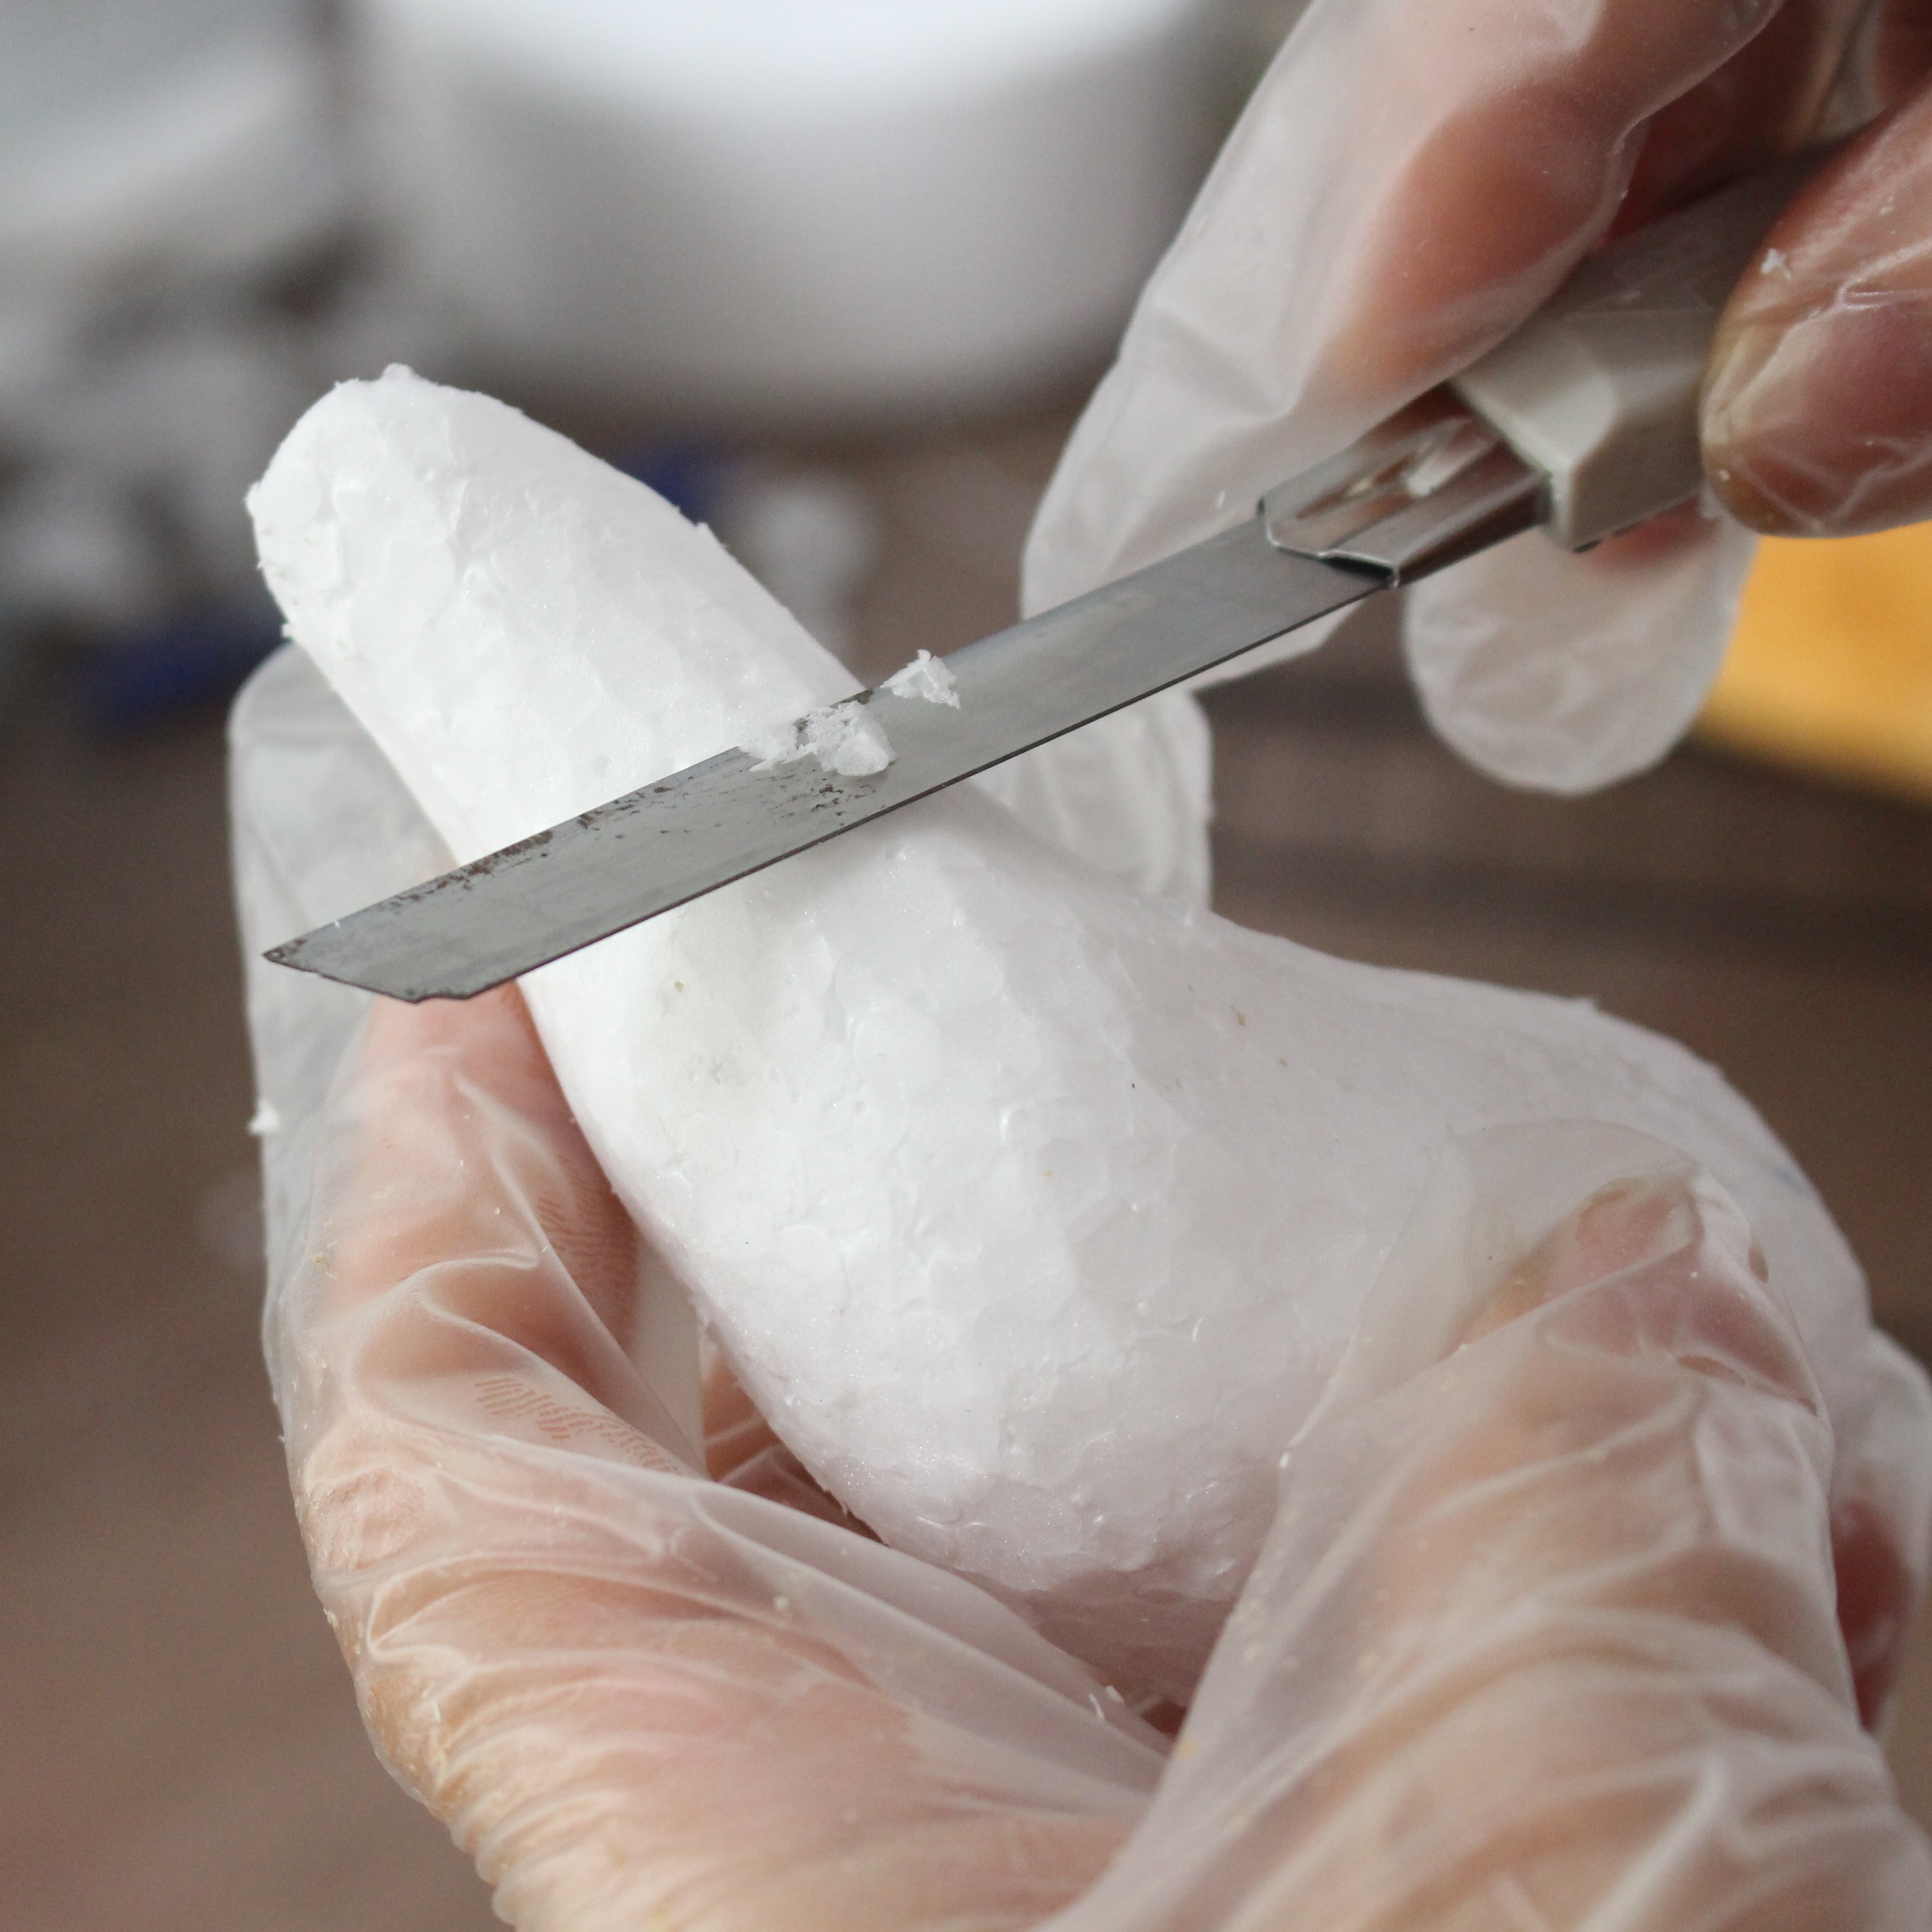
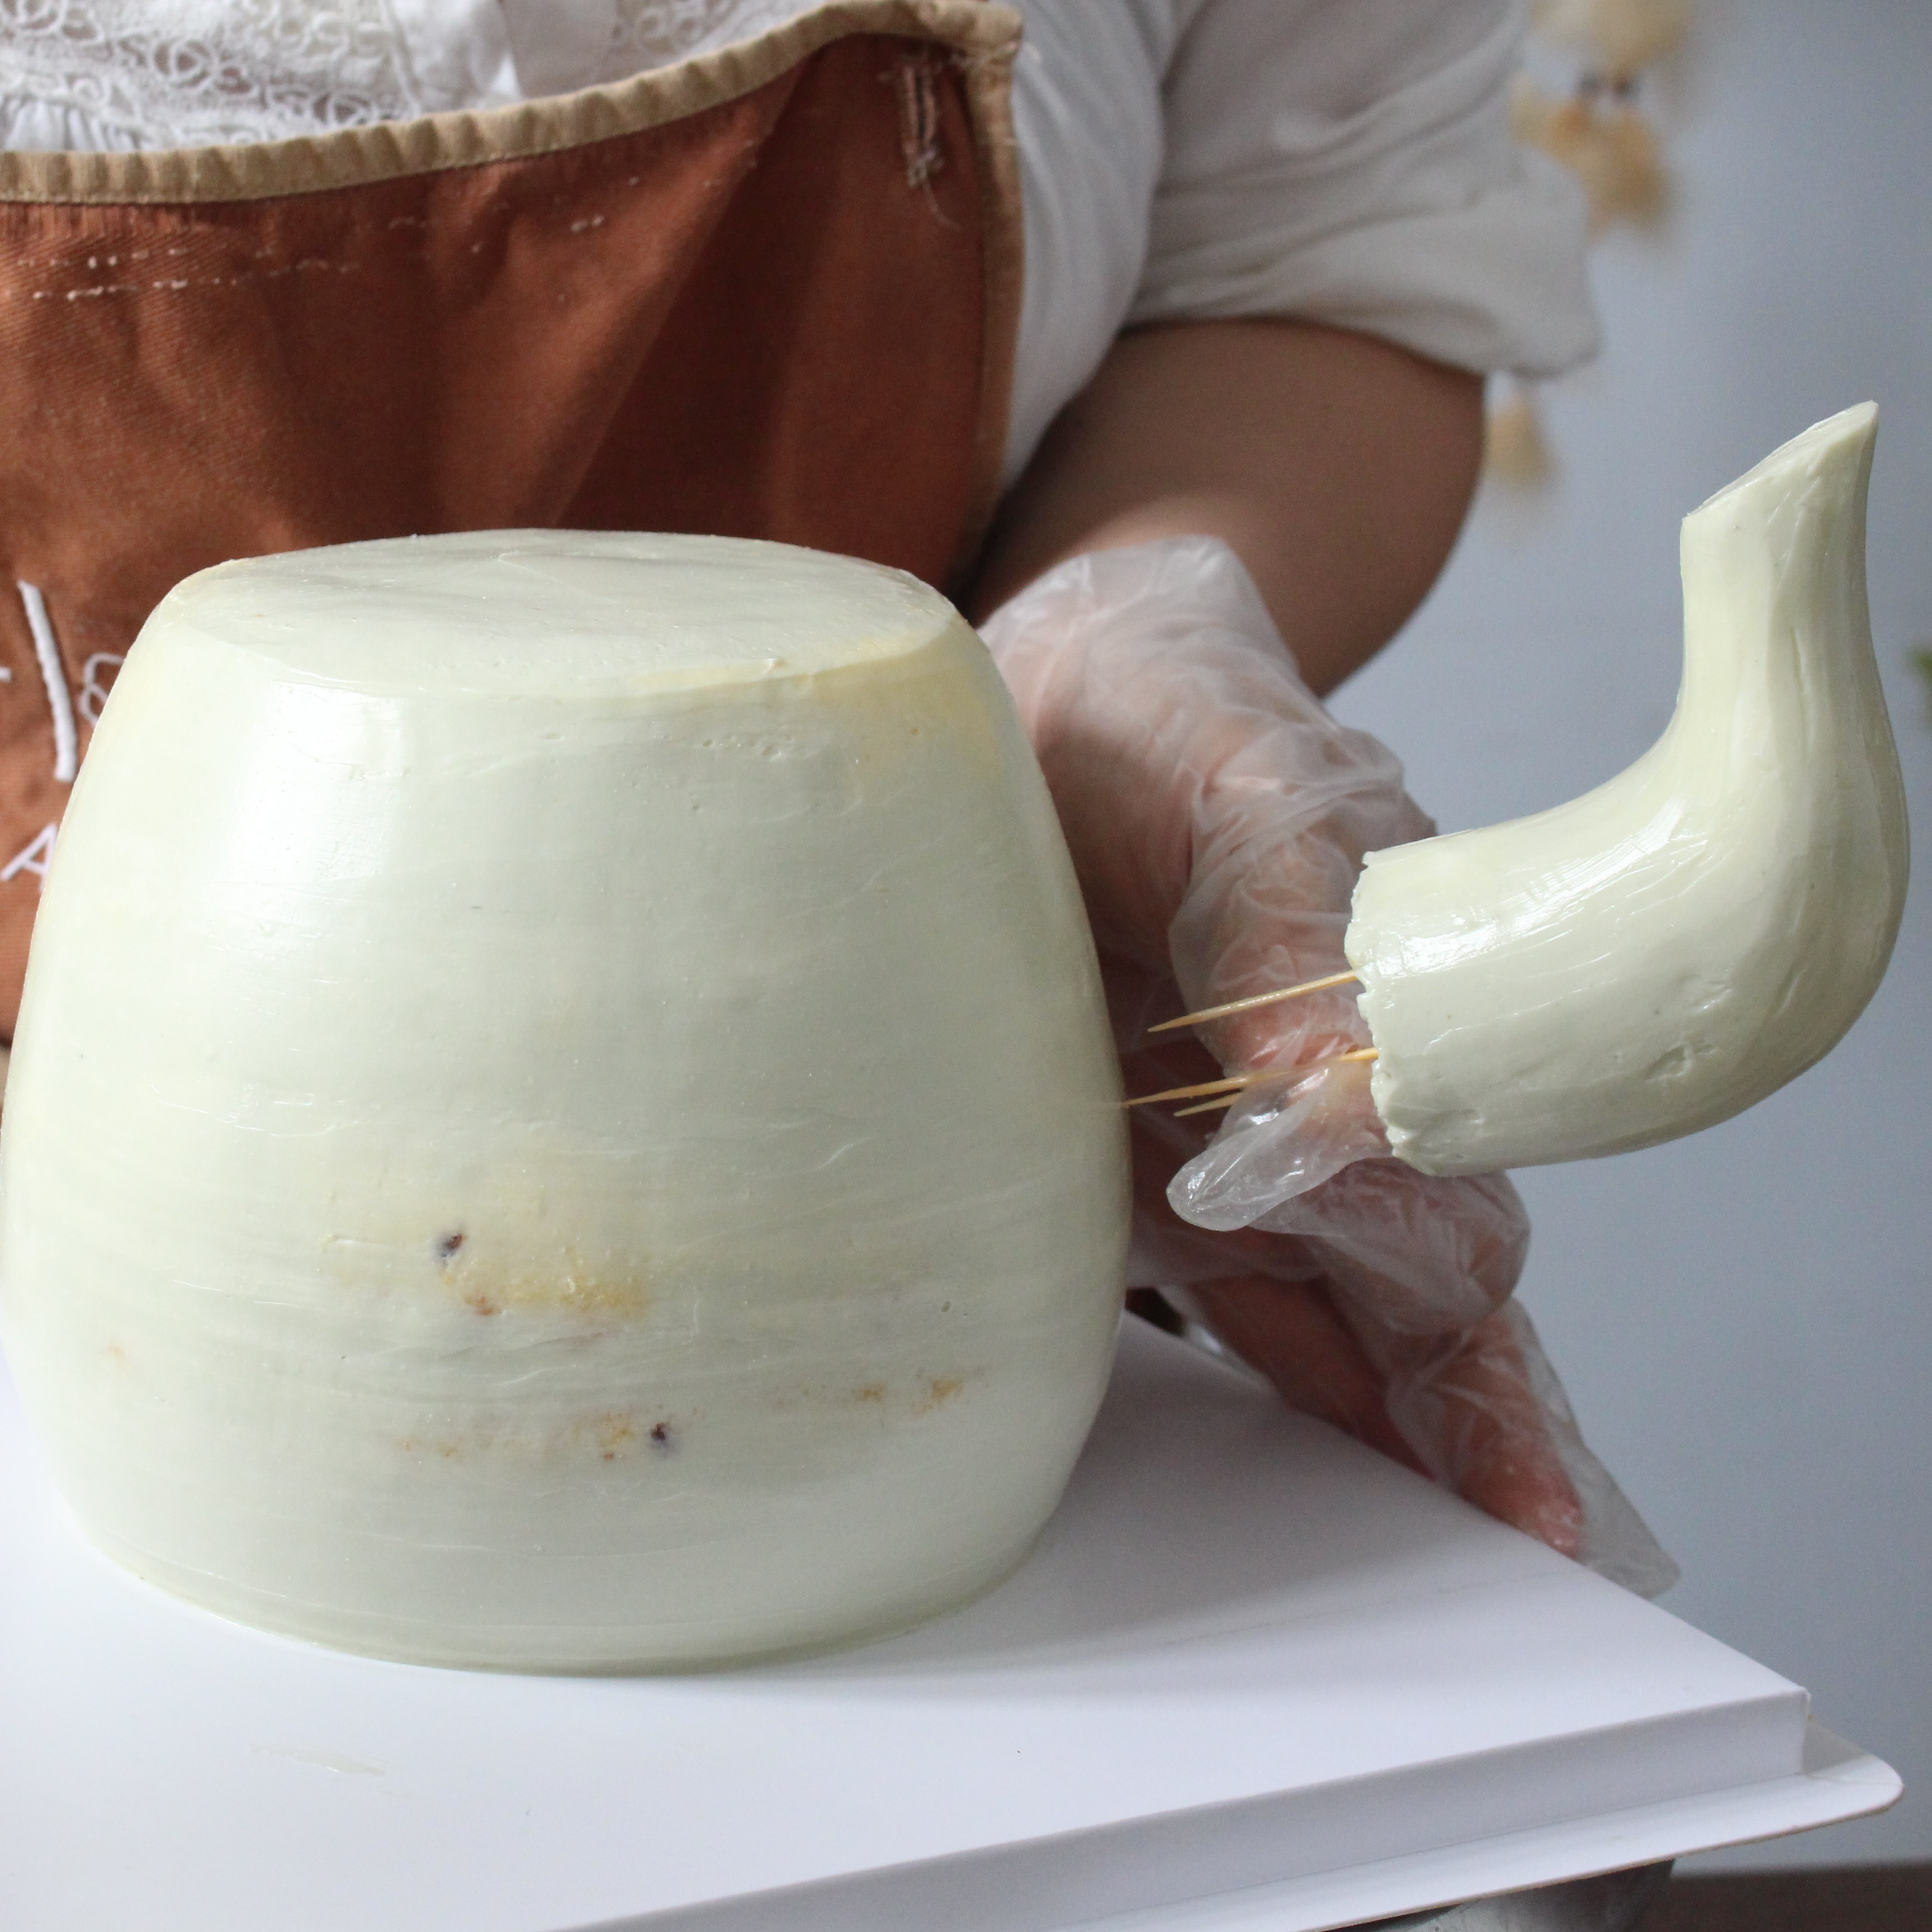
- Using a sharp blade such as an X-Acto knife or a box cutter, carefully sculpt the spout by removing the sharp corners of the foam to give the spout and handle a rounded appearance.
- Use a small offset spatula to apply a crumb coat of buttercream and use a thin piece of acetate to smooth the surface of the spout. Place the teapot’s spout into the refrigerator until the buttercream is firm; this will make it easier to connect it to the teapot.
- Repeat the process for the handle.
- Use toothpicks to connect the spout and handle with the teapot. Smooth the surface again with more buttercream, making sure to blend the area where the spout meets the pot.

Pipe the Juliet Rose
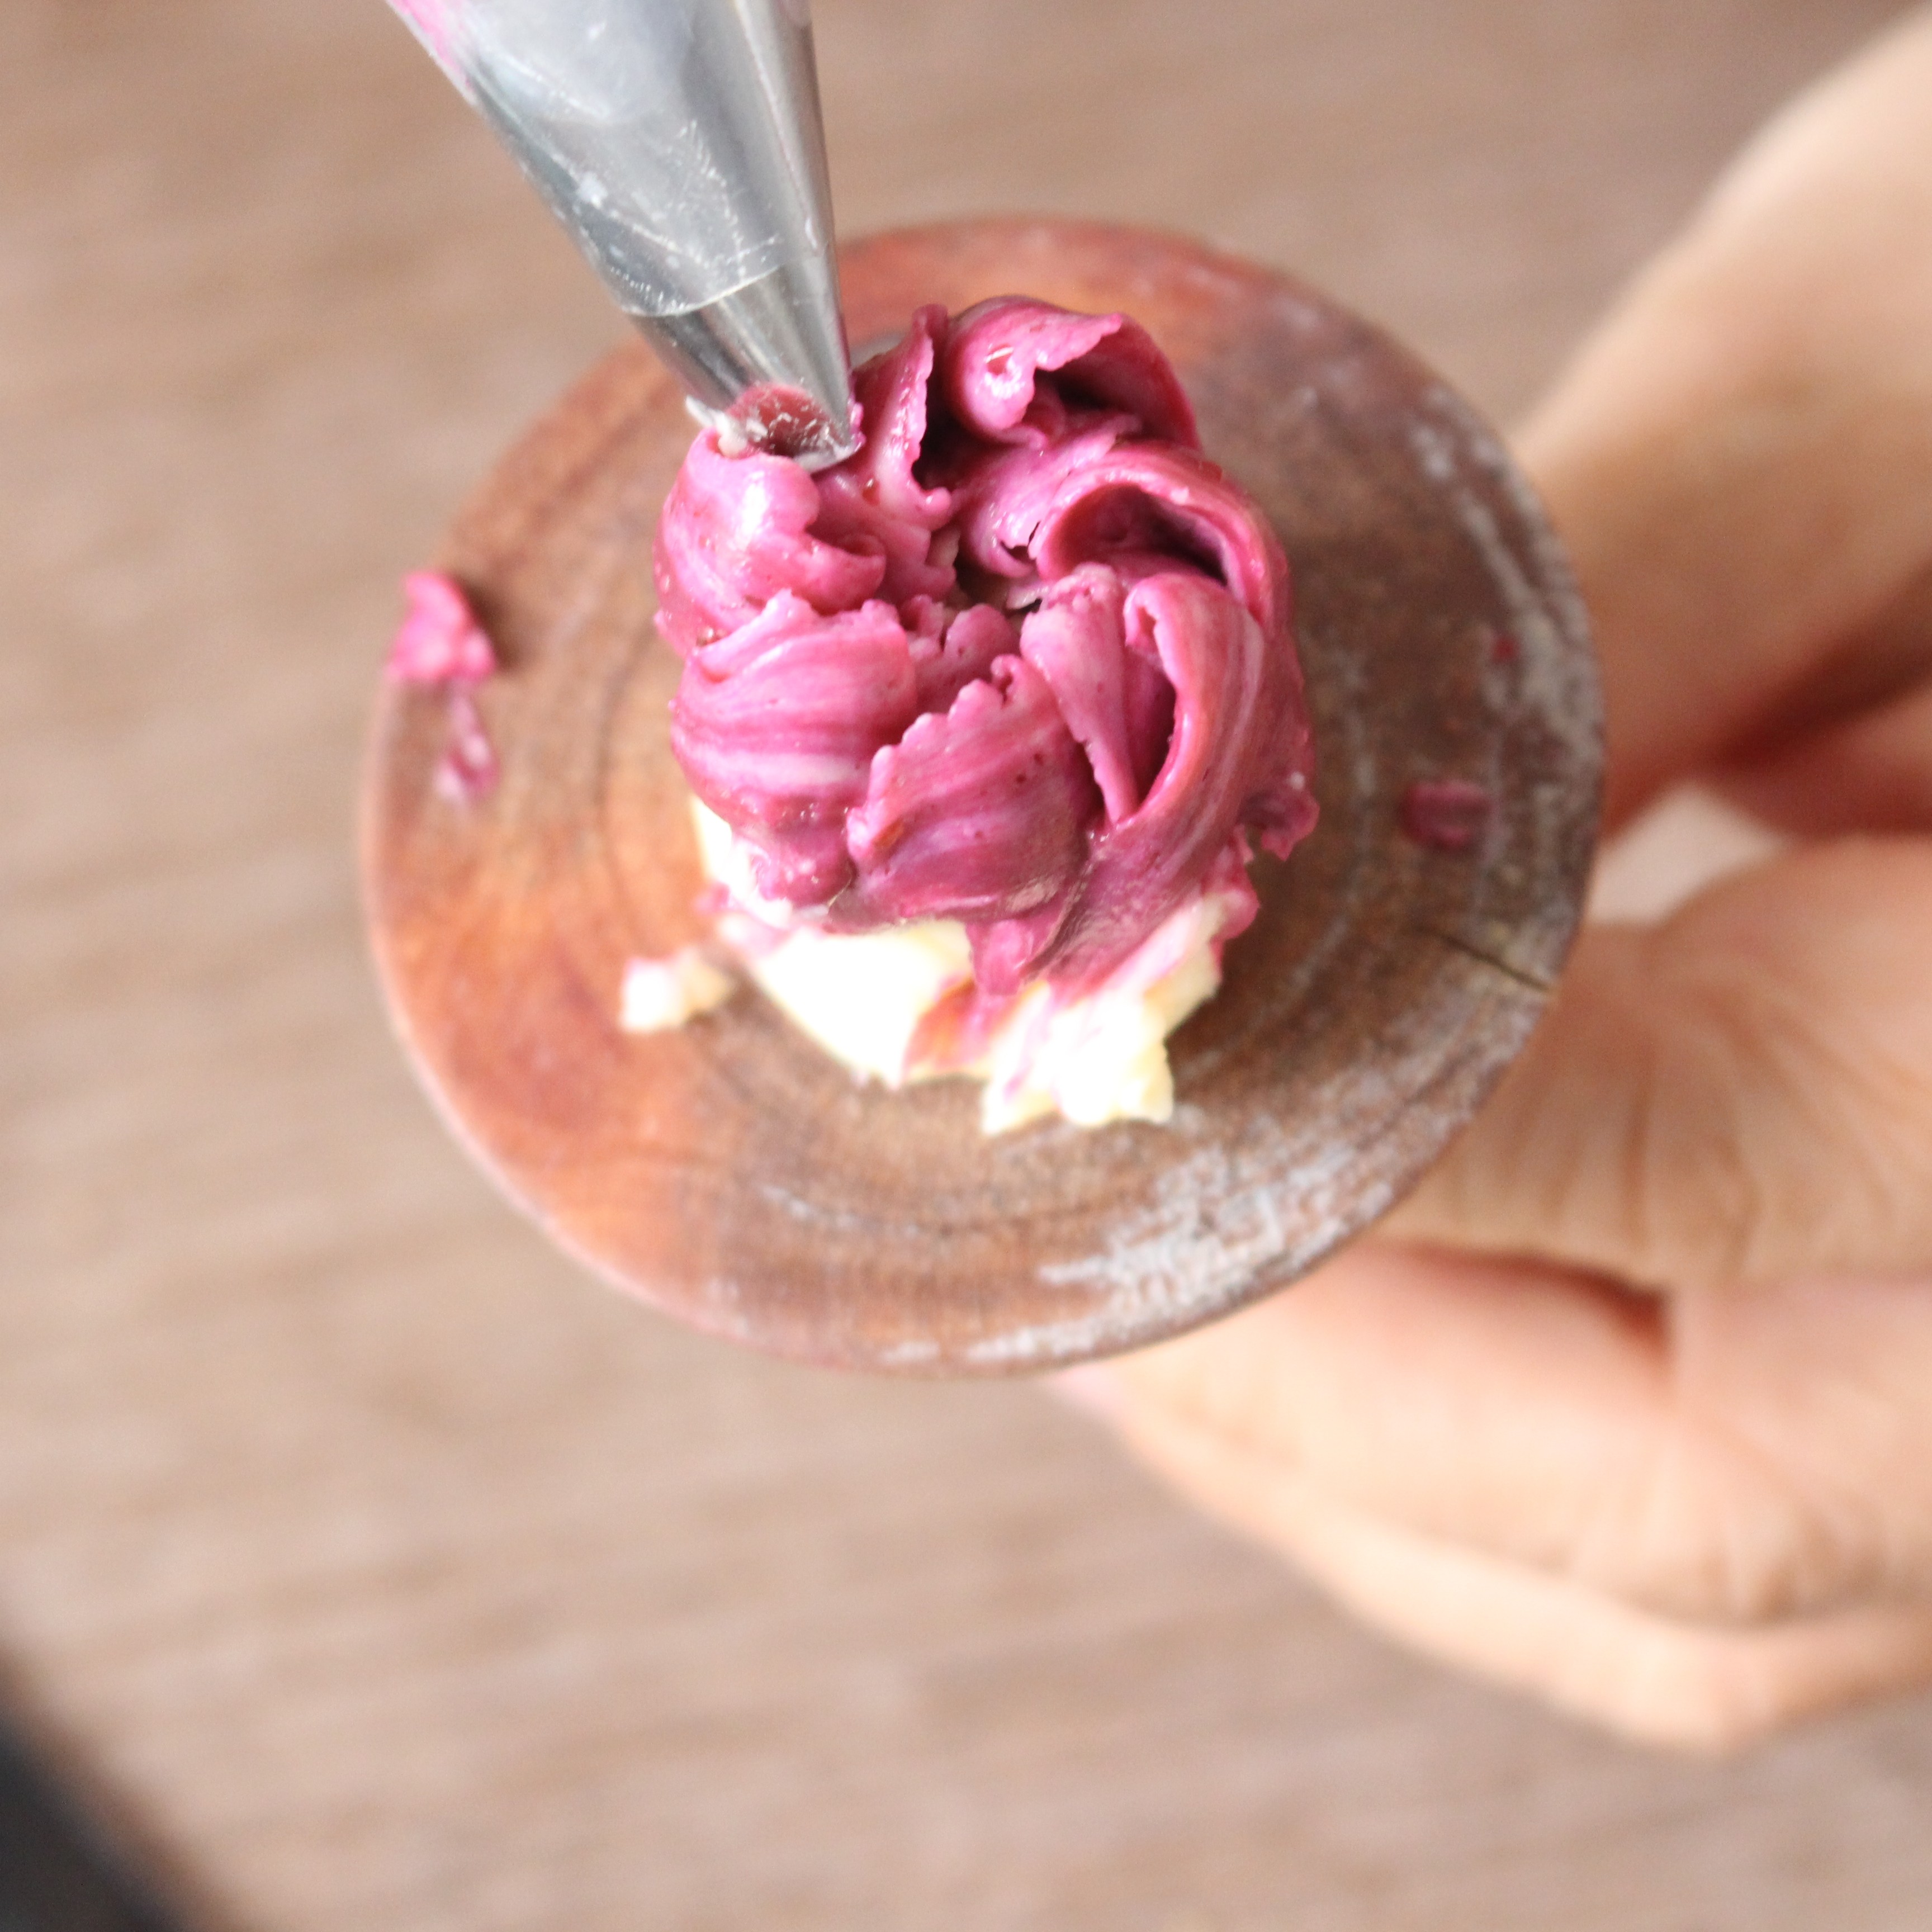
- Using a #104 piping tip and magenta buttercream, hold the piping bag with the smaller end of the tip facing up. Pipe a cone onto a size 7 flower nail and then add the first 3 petals to form a bud. Start at the center of the base, apply pressure, 2 at the same time, lift the tip and turn the nail, then pull the tip down. Continue with another two rows of petals.
- Slide the tip into the gap between the petals, and using a similar pressure from the previous step, add more petals. Pipe the petals with a curved shape, piping toward the body. As you add a new layer of petals, make them slightly taller than the previous layer and fan them out slightly to open the flower. If you want to make a bigger flower, just add another row of petals. Use flower scissors to gently lift the finished flower to the cake.

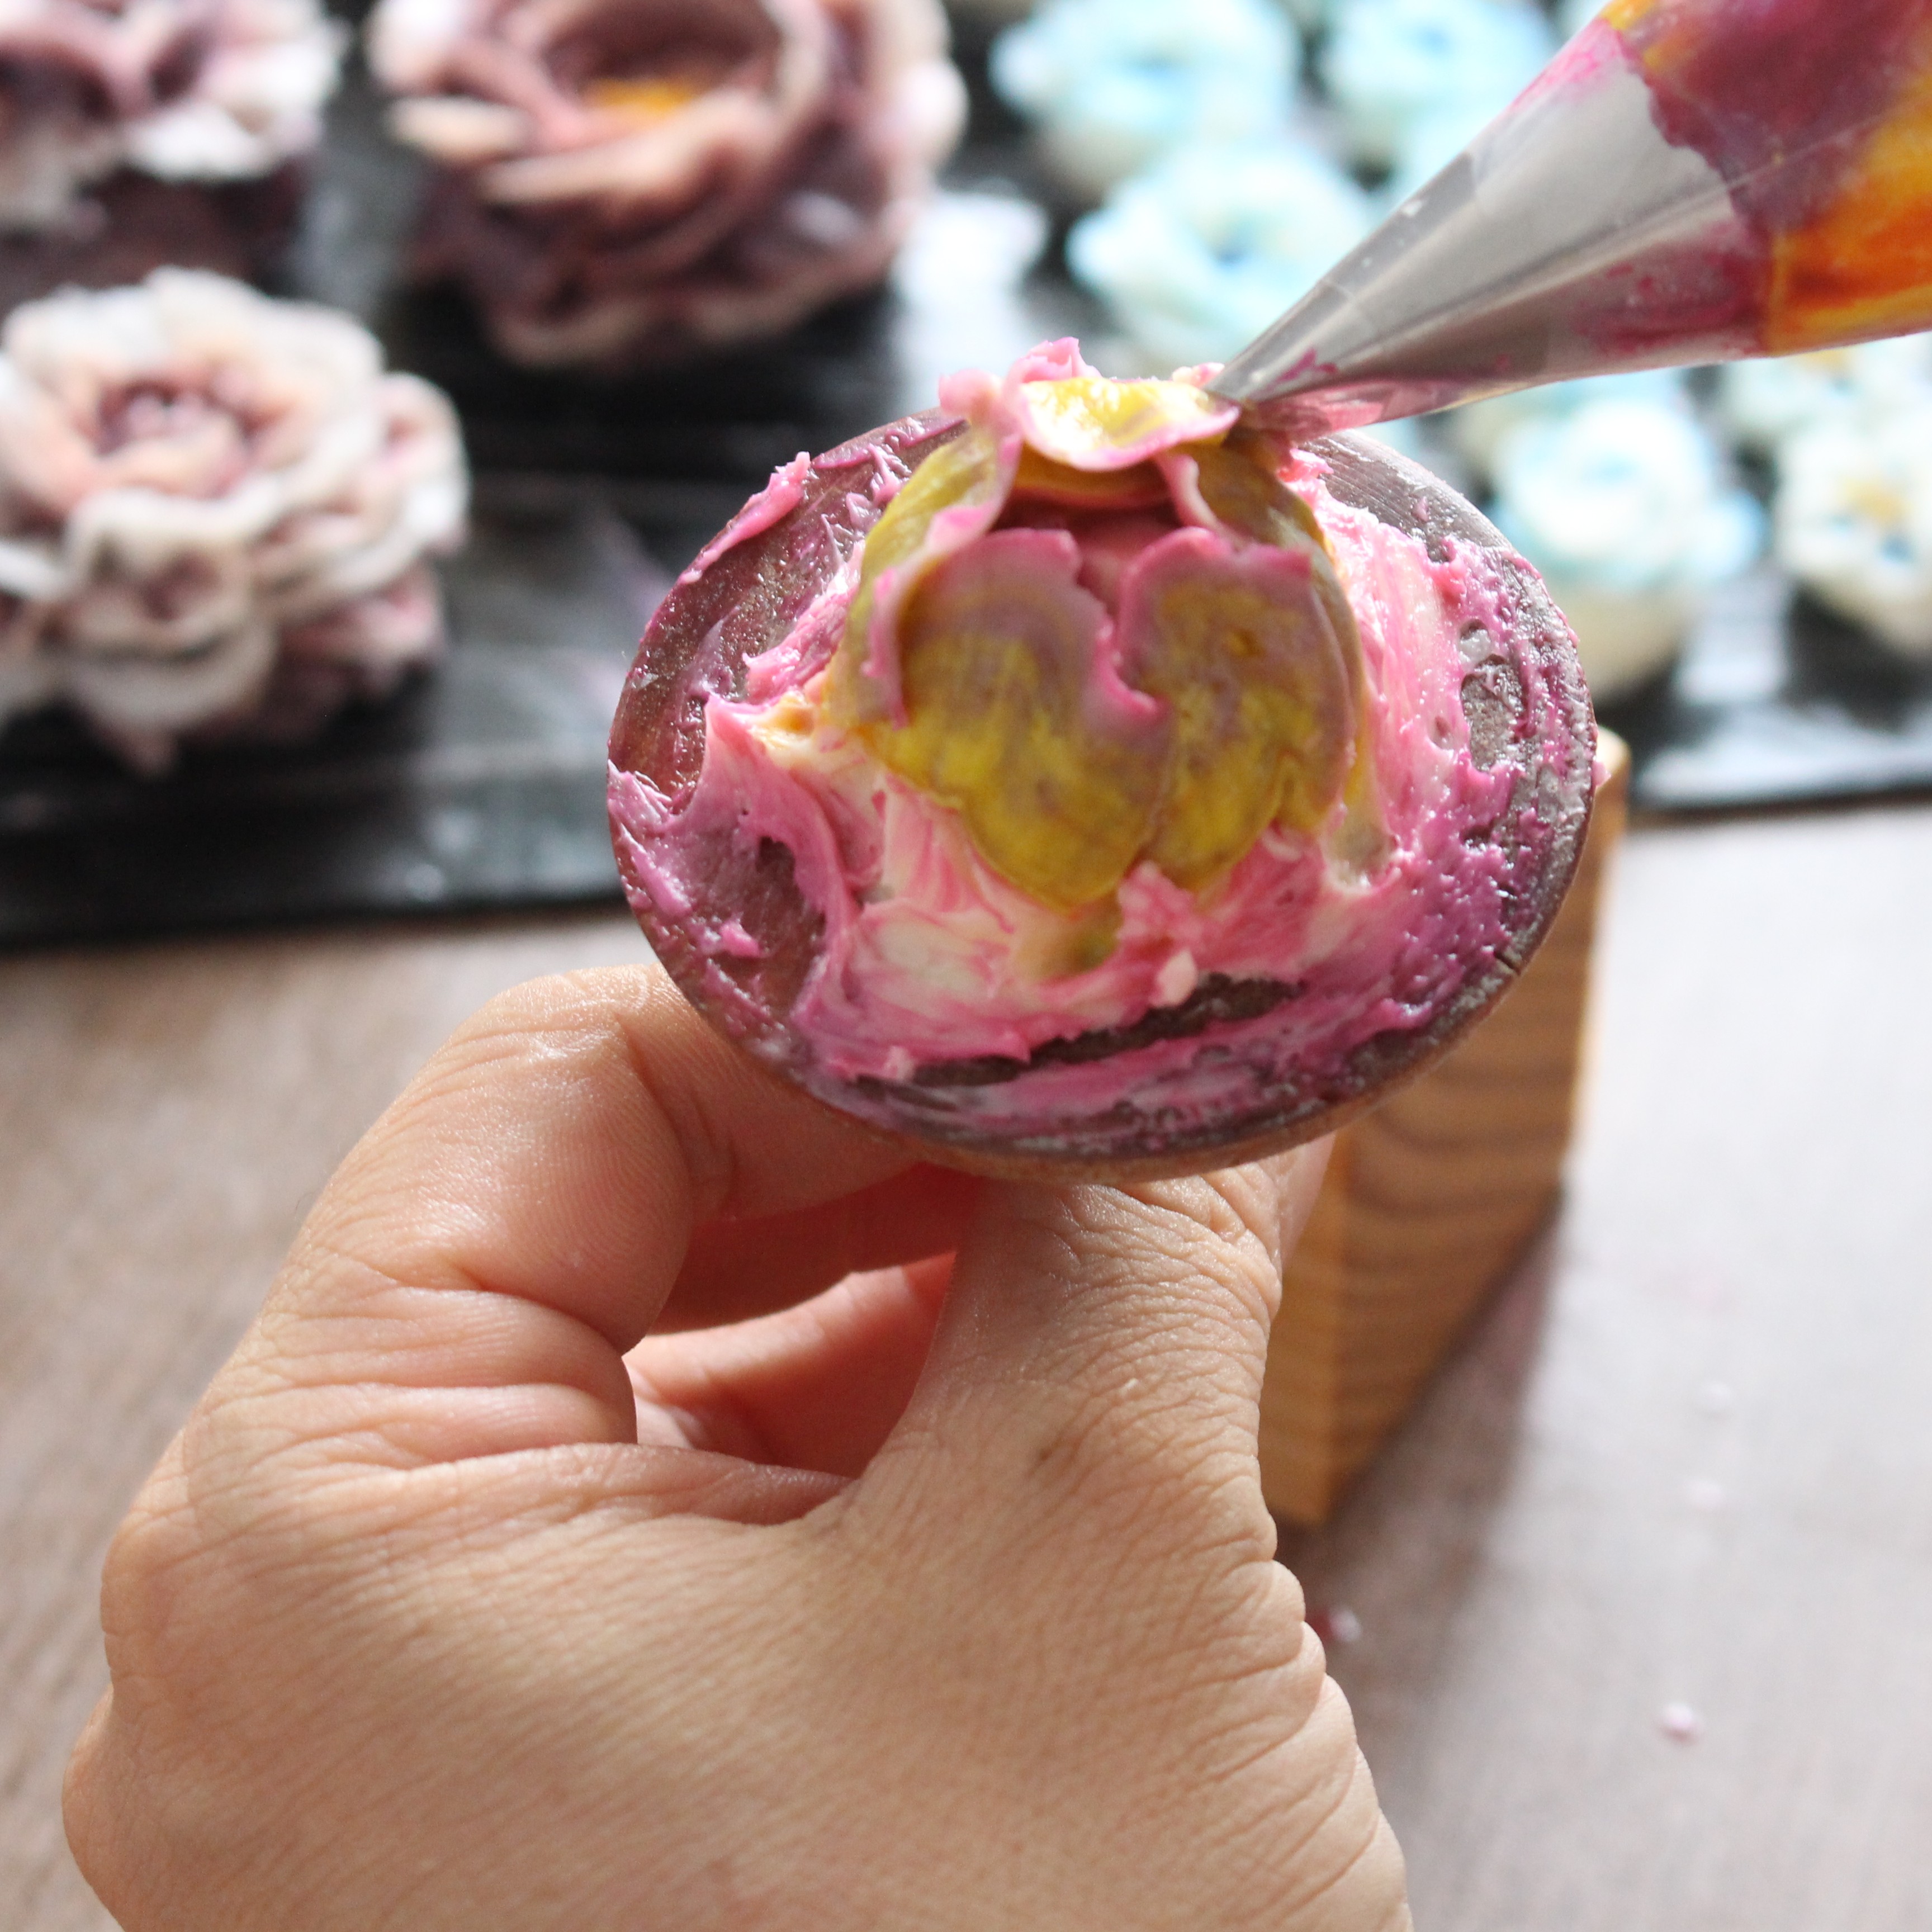
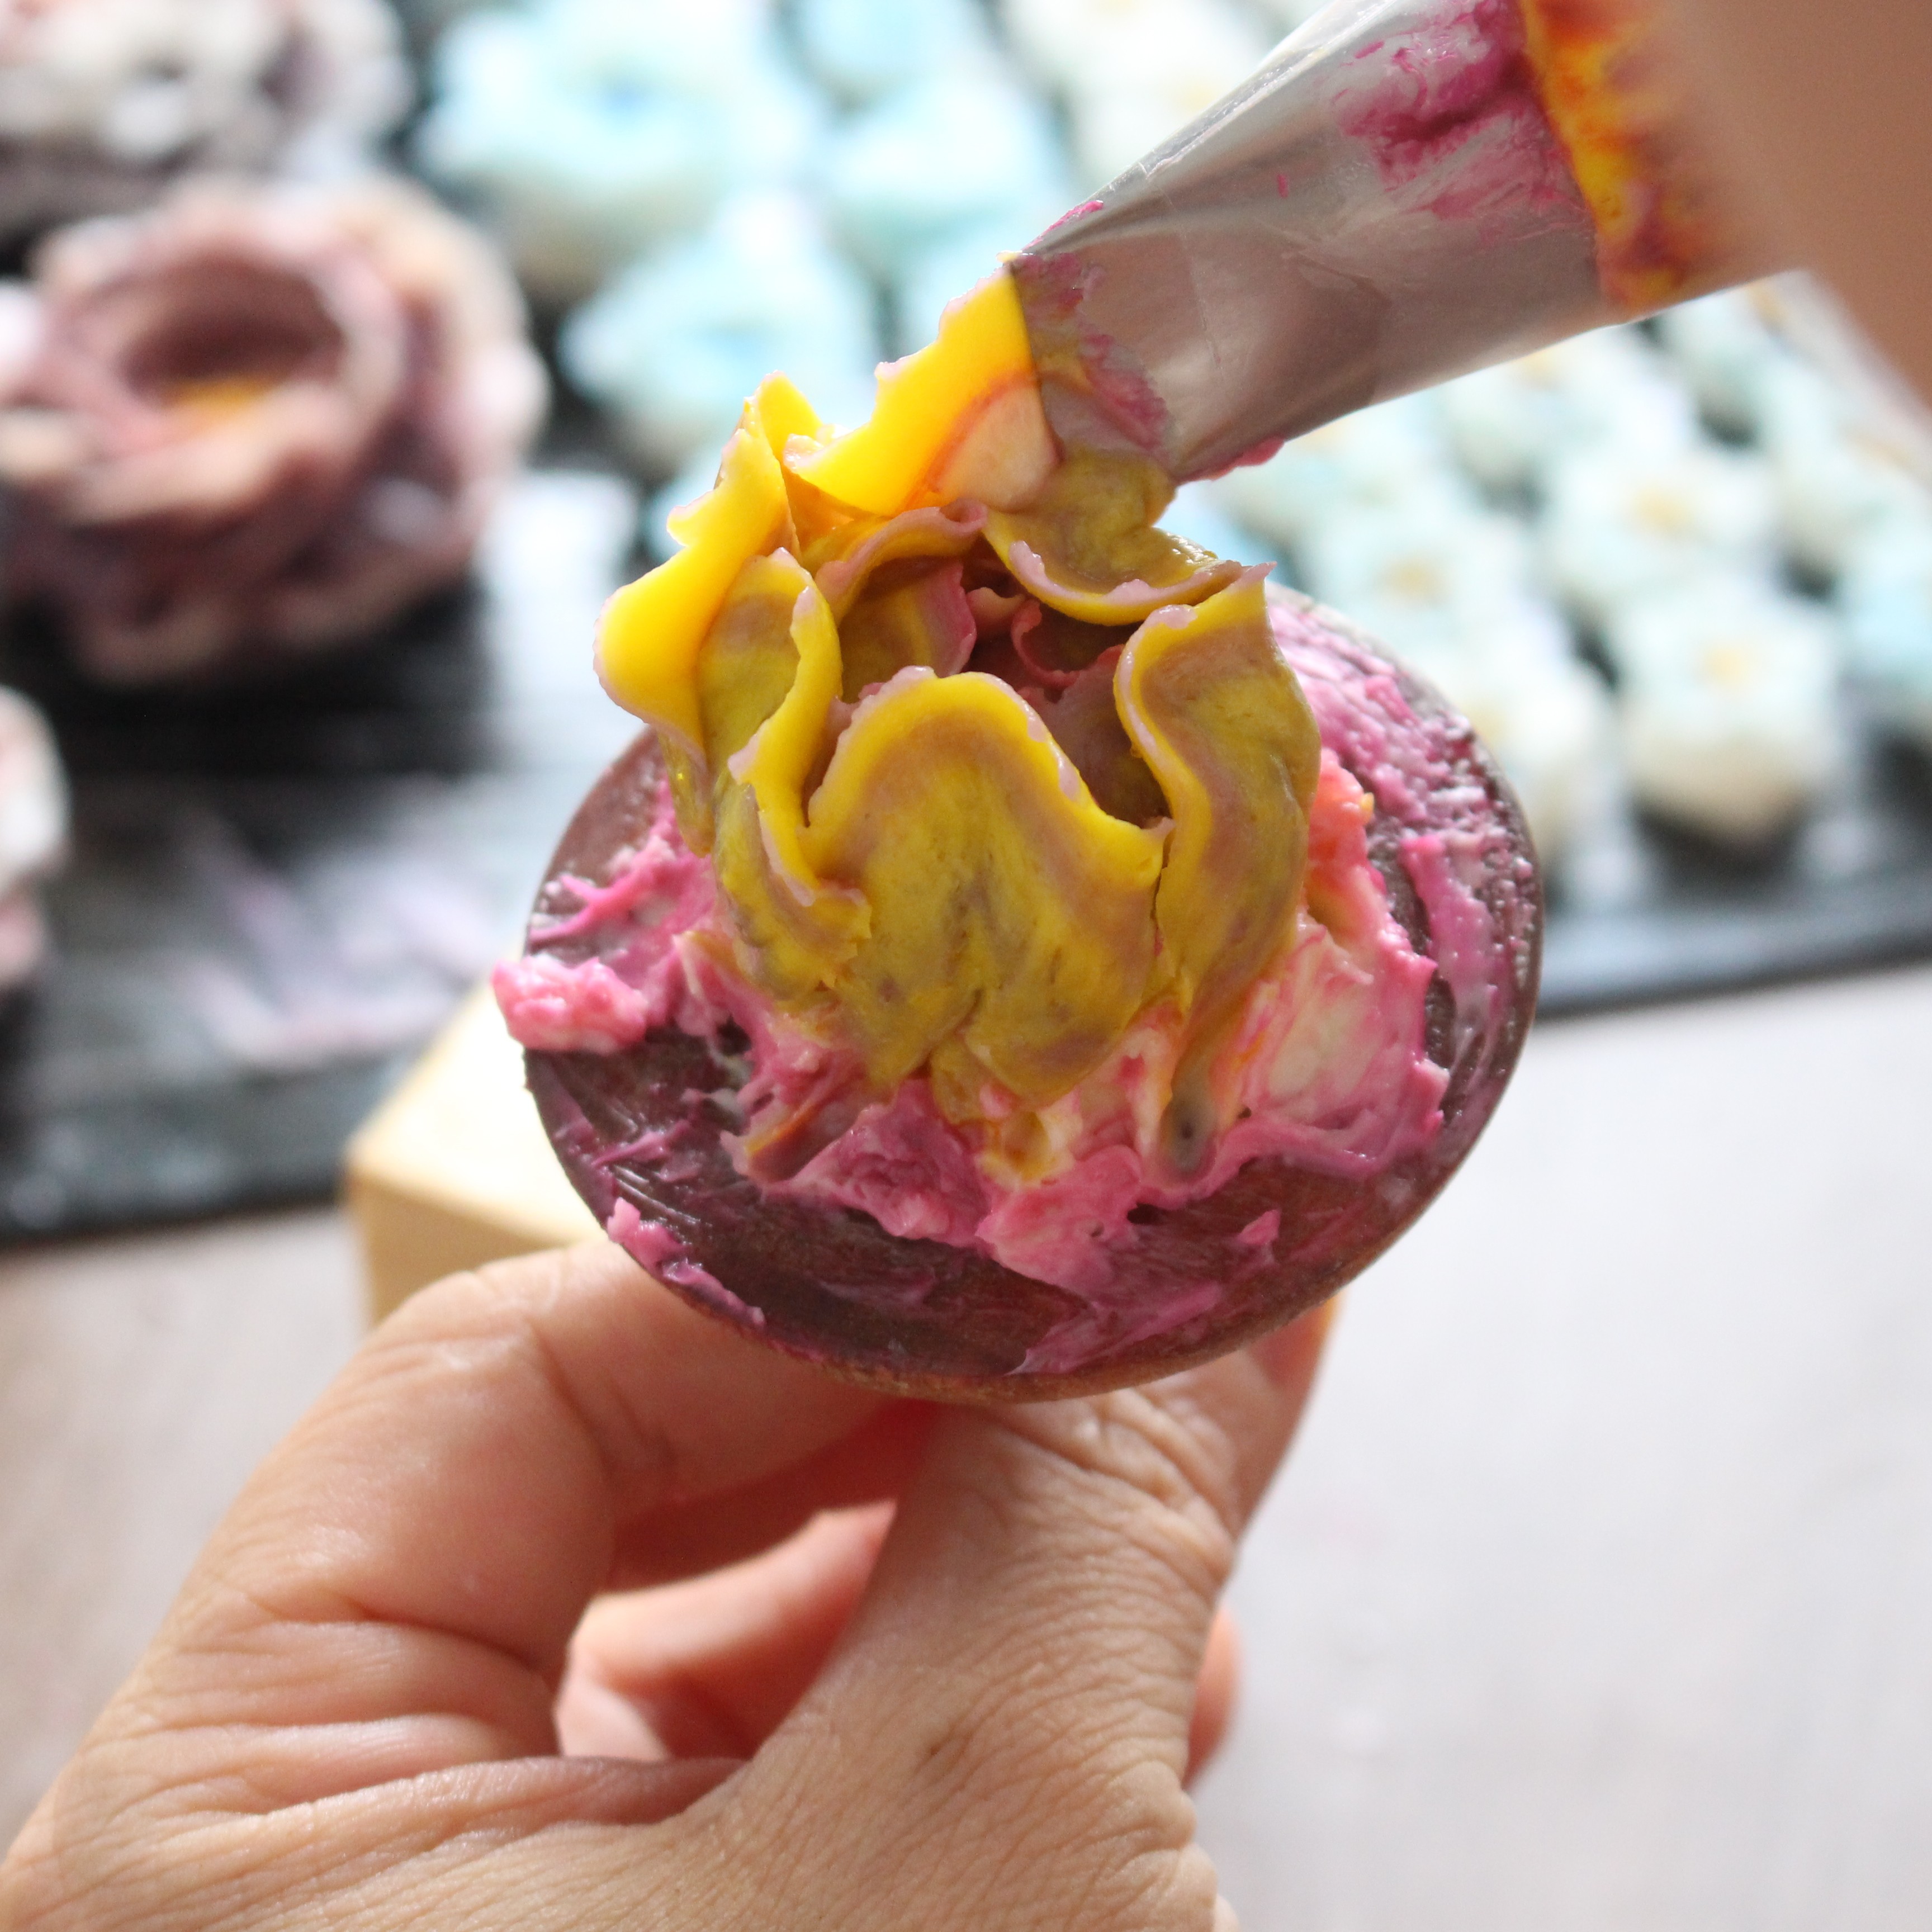
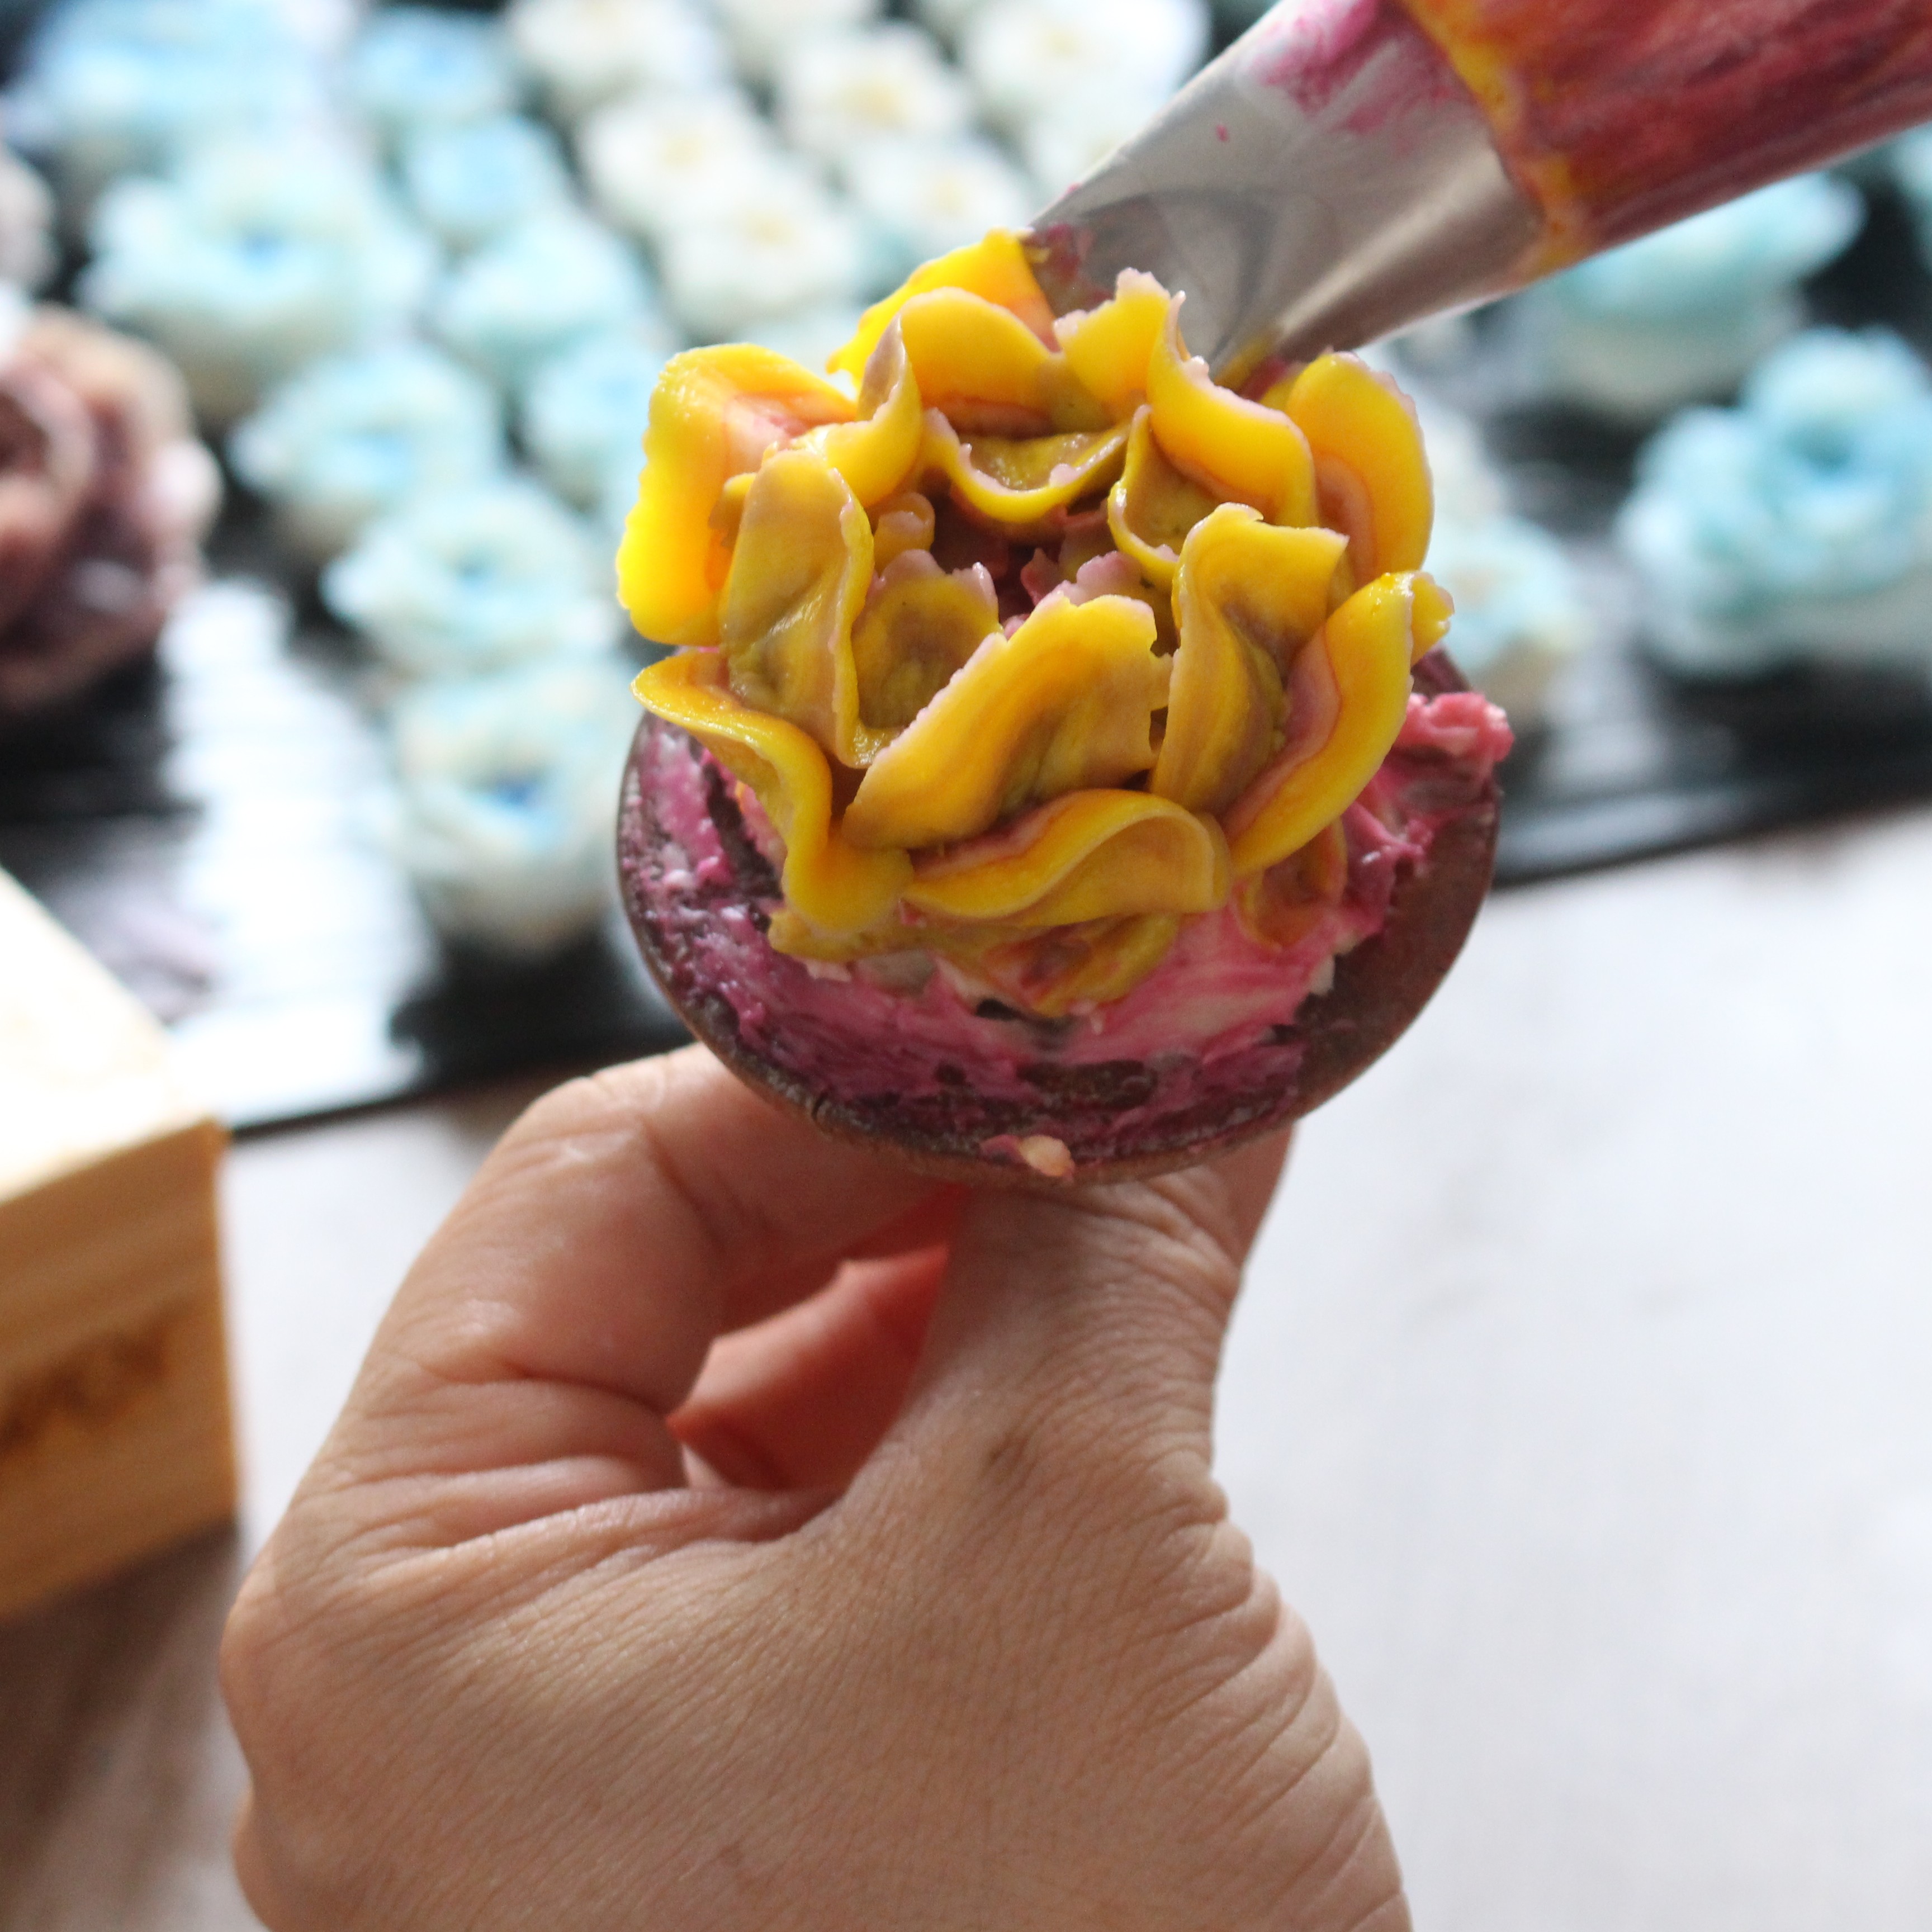
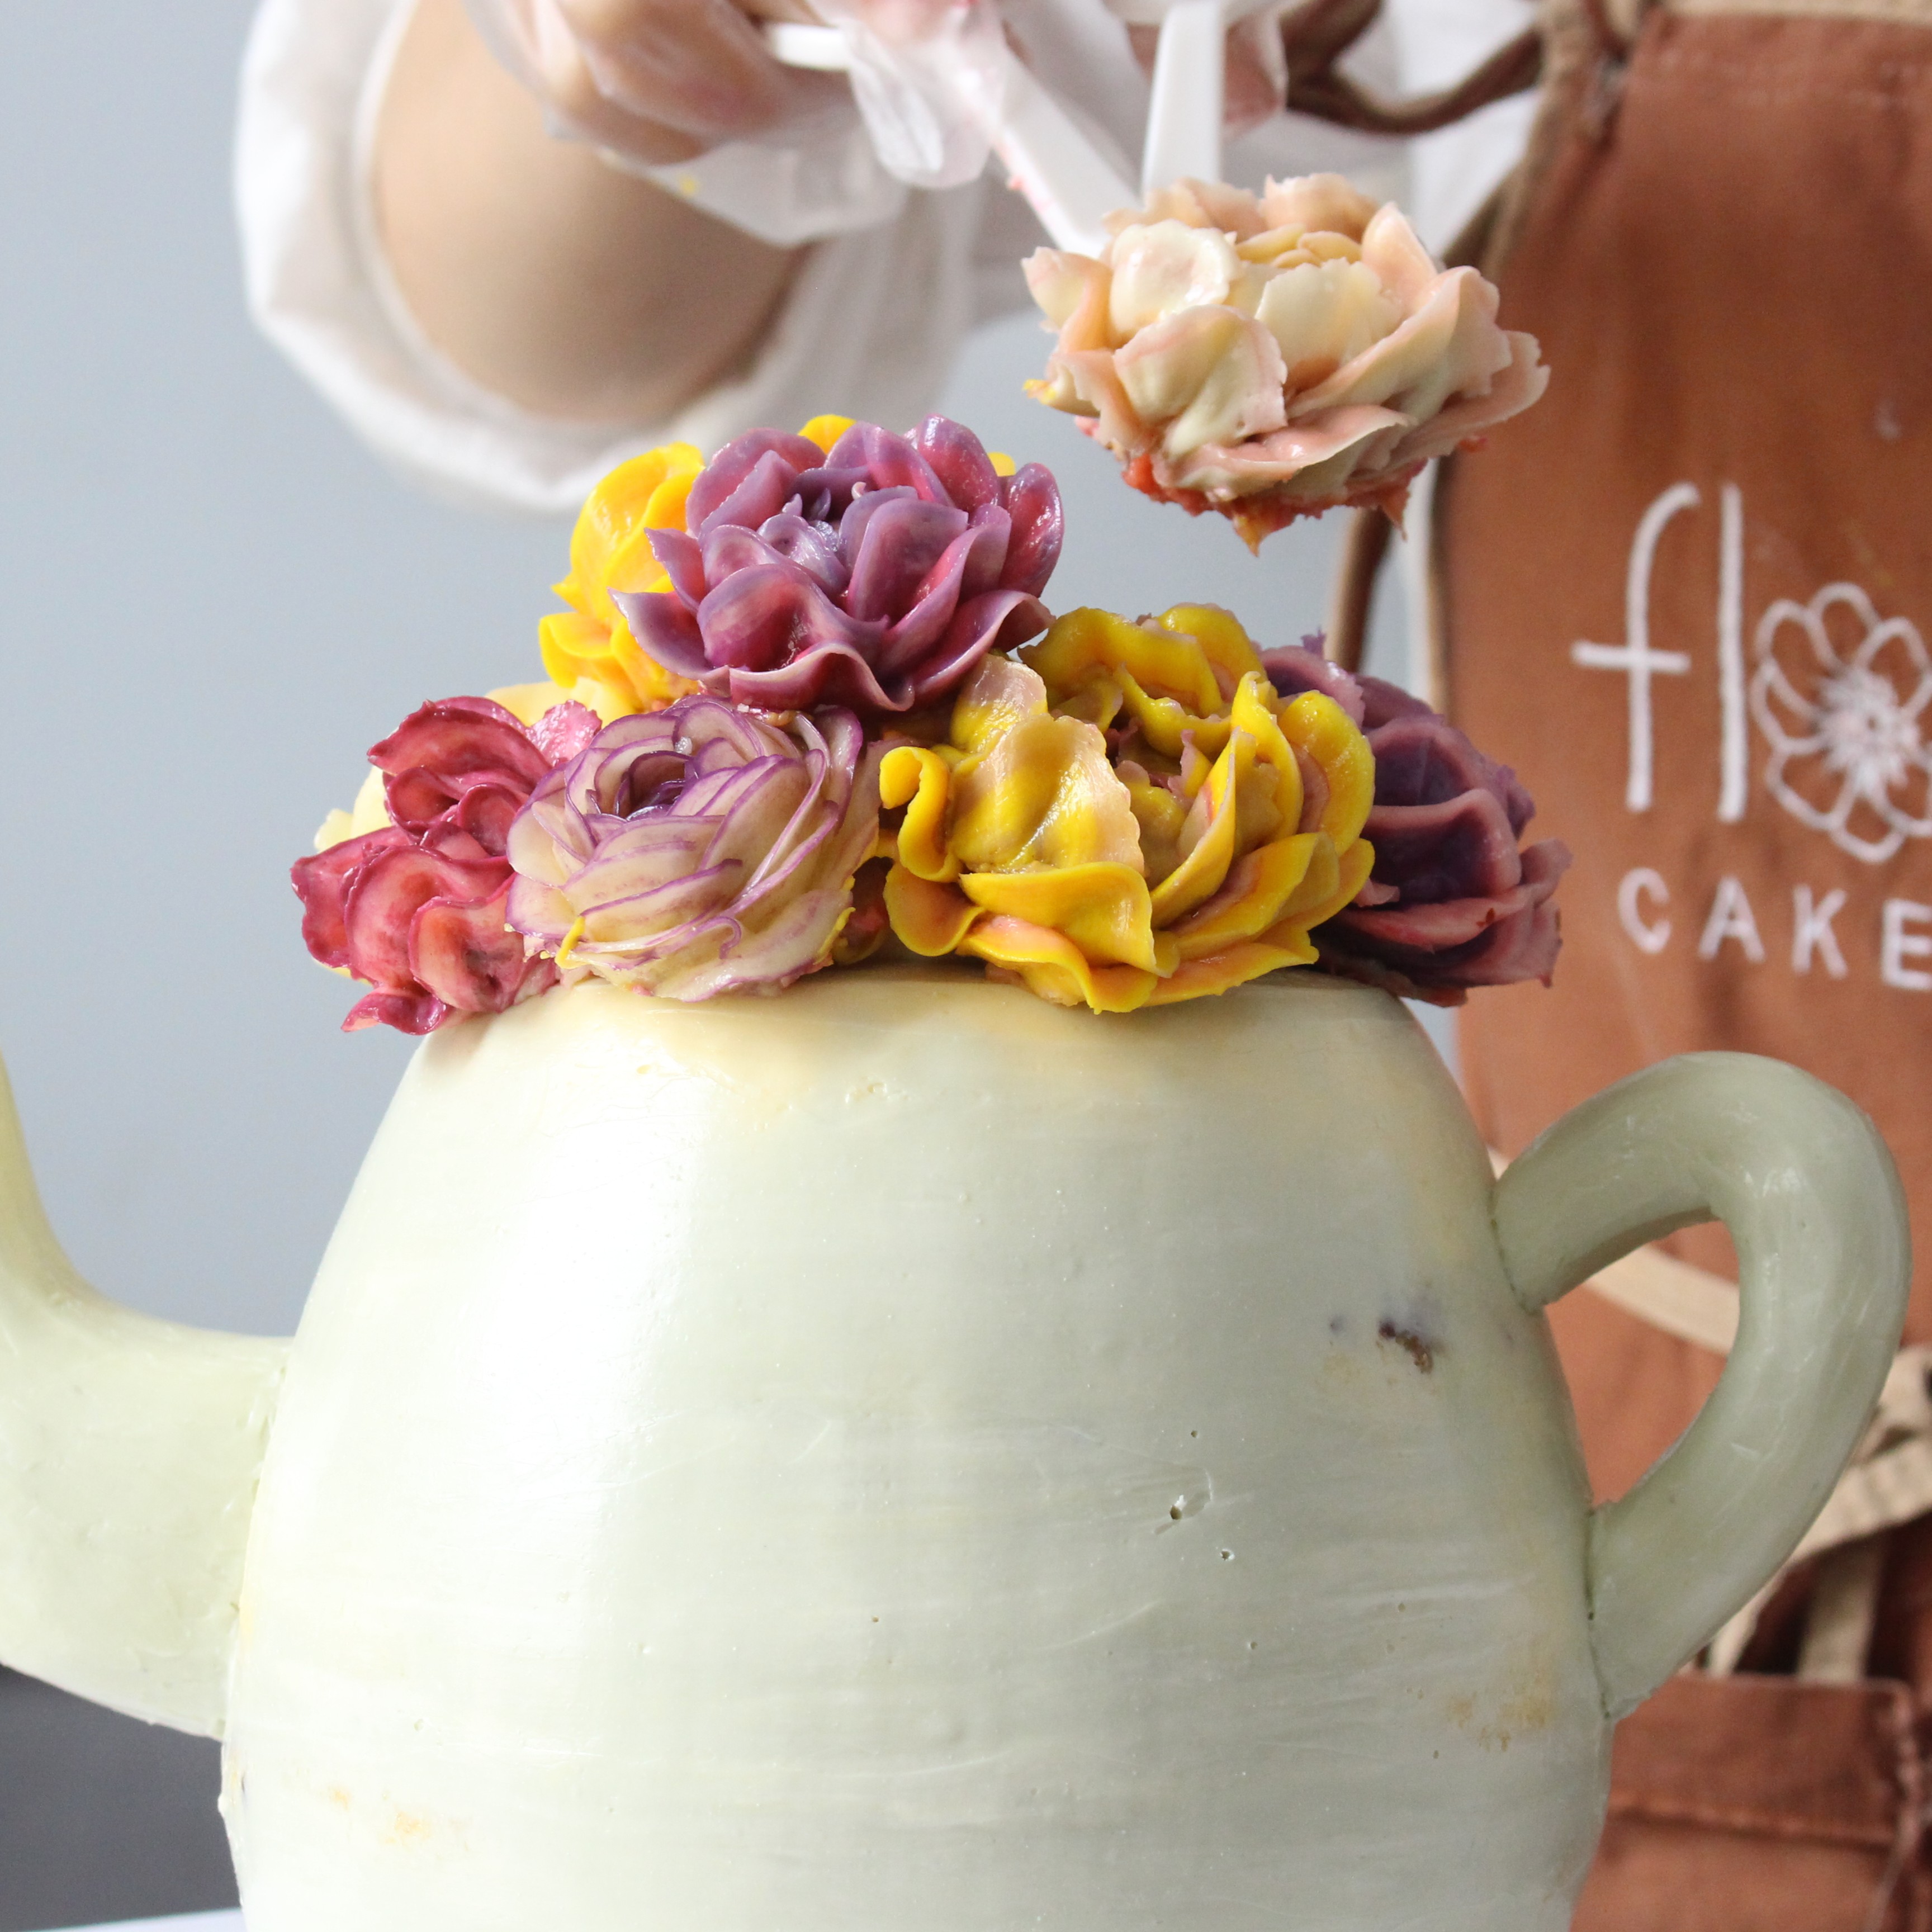
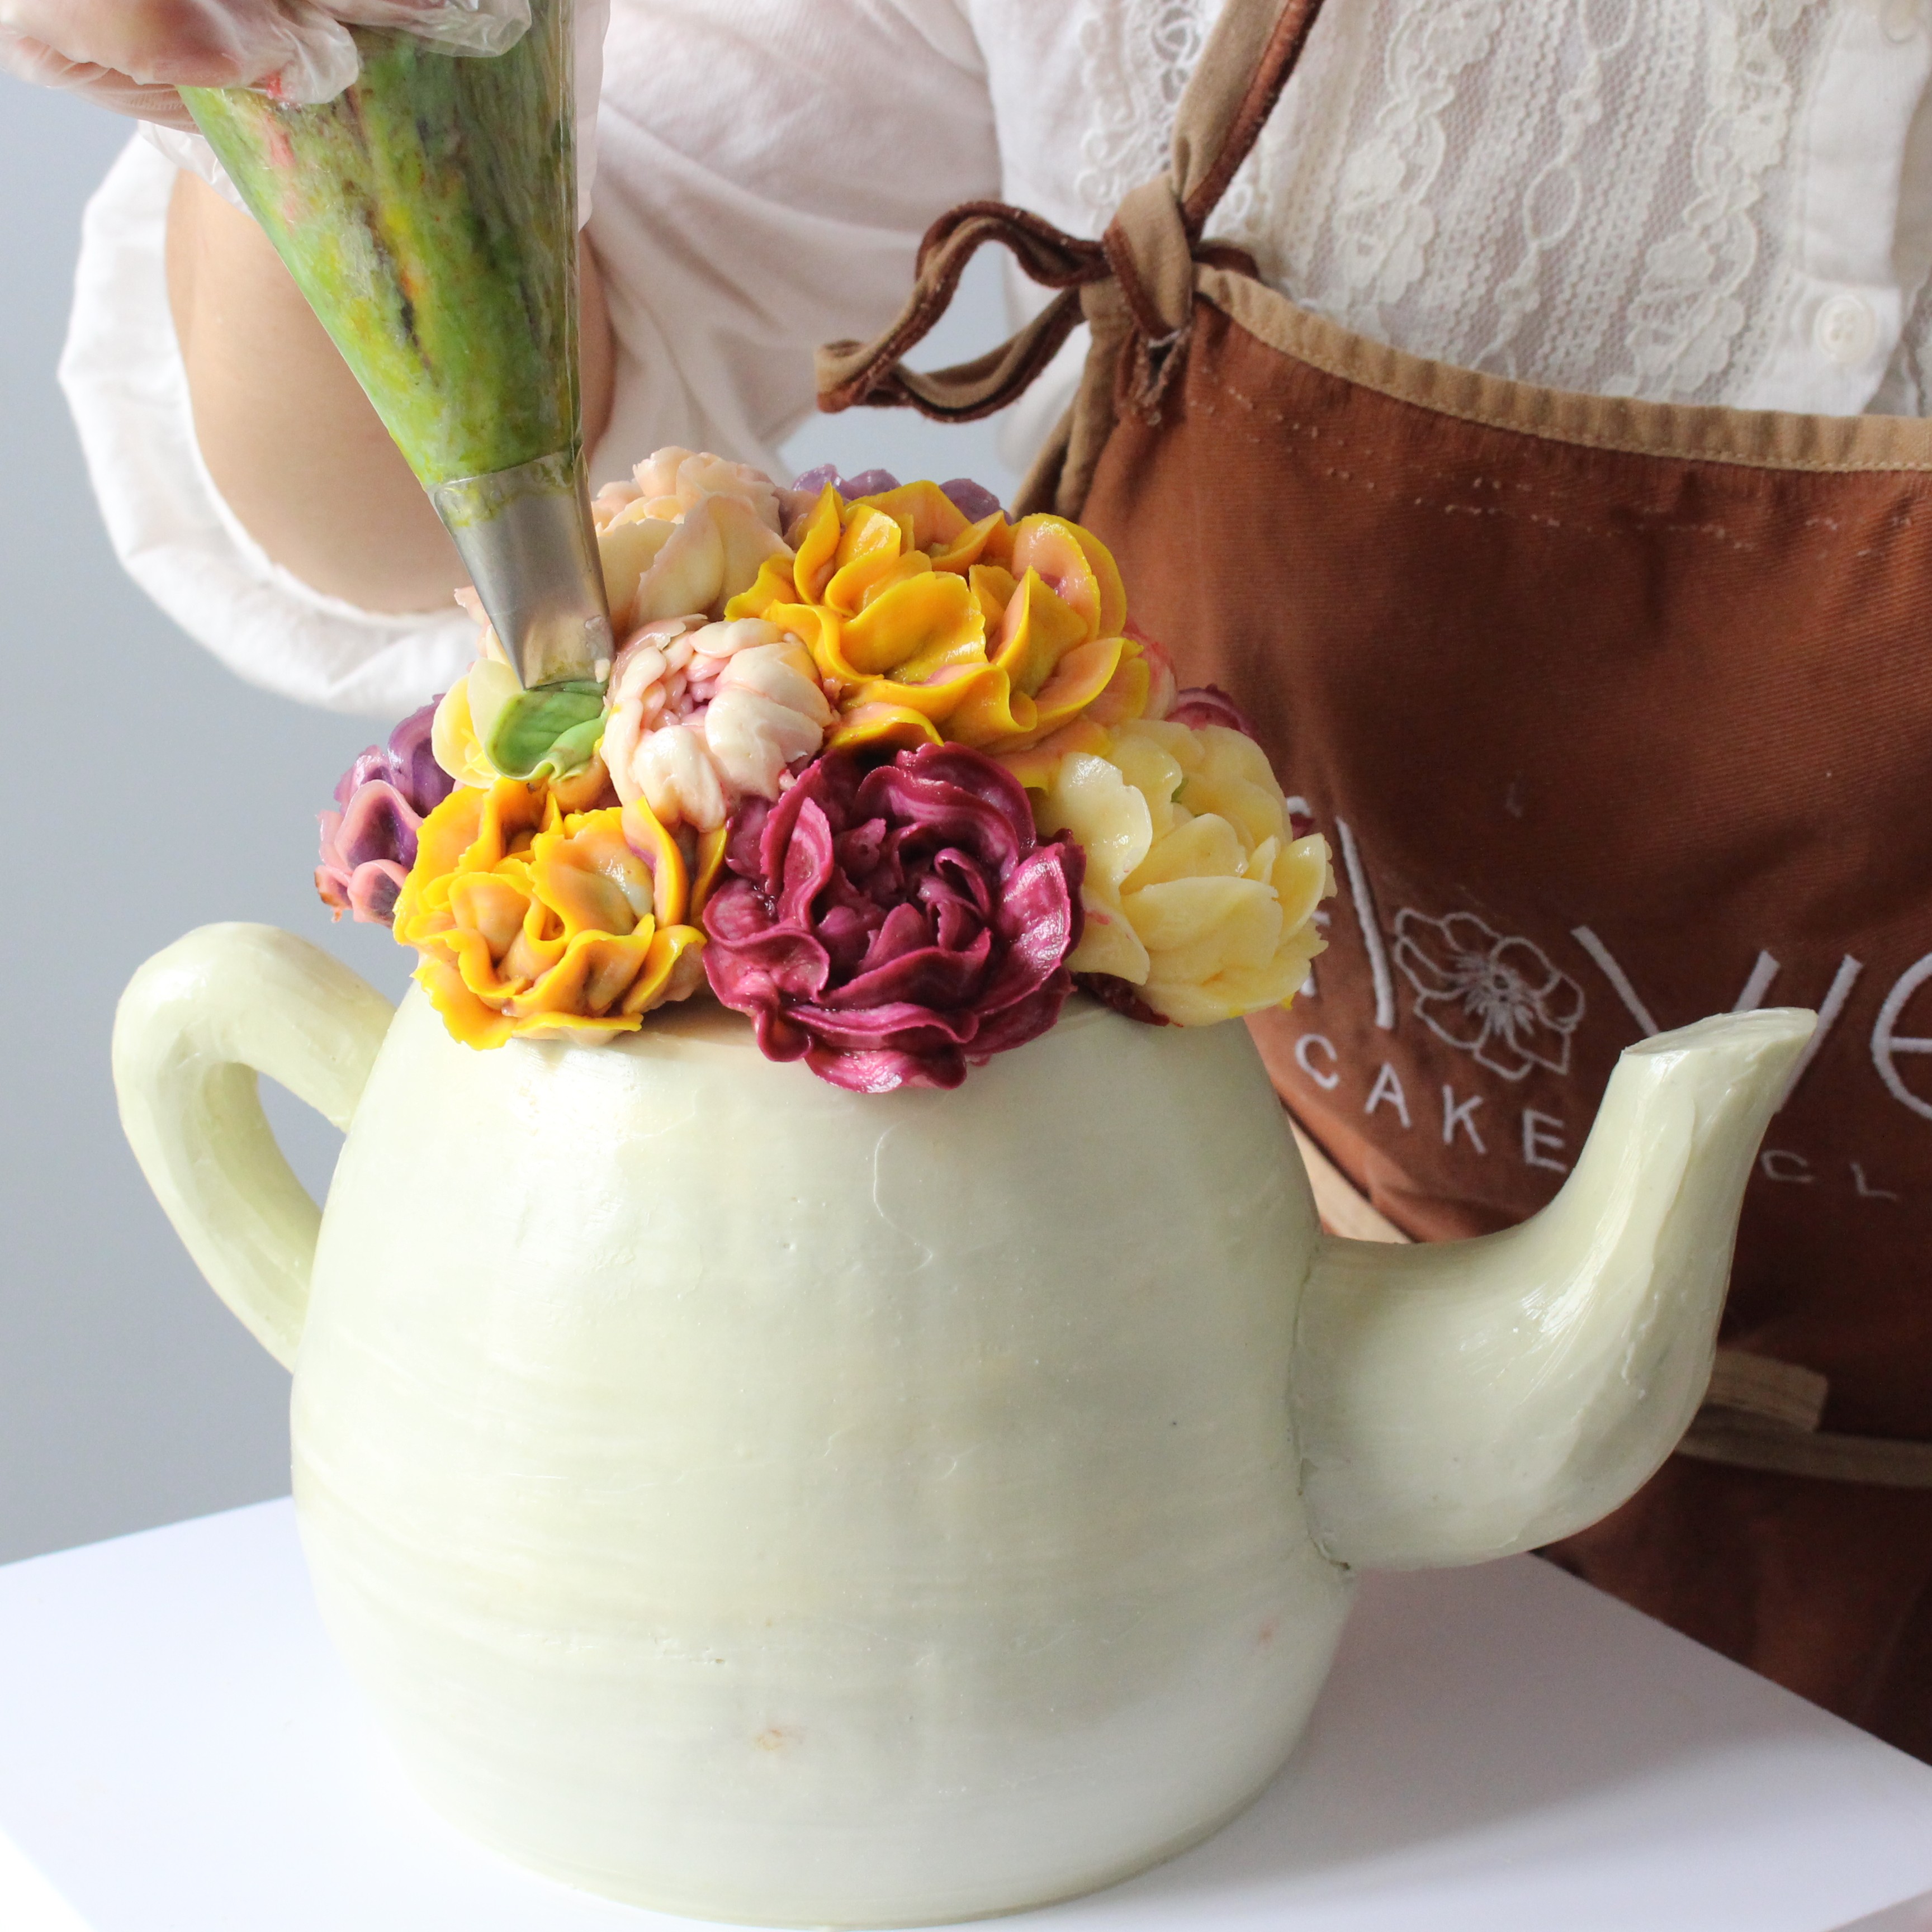
Pipe the Peony
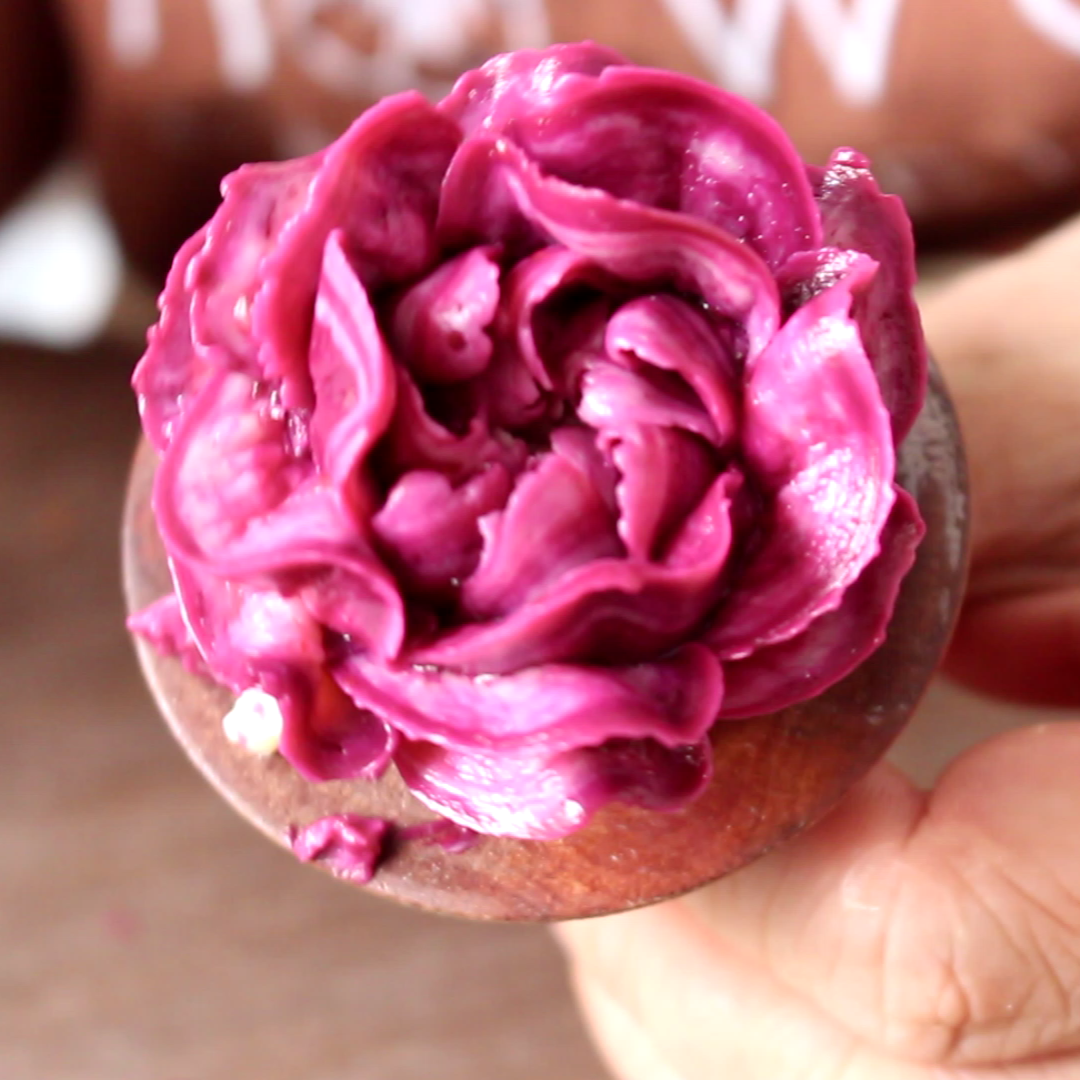
- Using the same #104 tip, pipe a base for the flower onto the nail. Now, using a #123 piping tip and some ochre buttercream, place the tip on the base and pipe an arc-shaped petal while gently turning the flower nail. Continue adding 2 more petals, then begin a new row and add 3 petals.
- Continue piping the next row of petals, making sure they are slightly higher than the previous layer. Apply more pressure to achieve the curve of the petal. Continue in this manner, adding more rows of petals until you have a full flower.
- Pipe several peonies in various colors like violet and pink and place them on the top of the cake in an arrangement. You can pipe a mound of buttercream as a base to give the flowers a nice domed shape.
- Fill a piping bag fitted with a leaf tip with some pale green buttercream and add some leaves between the flowers.
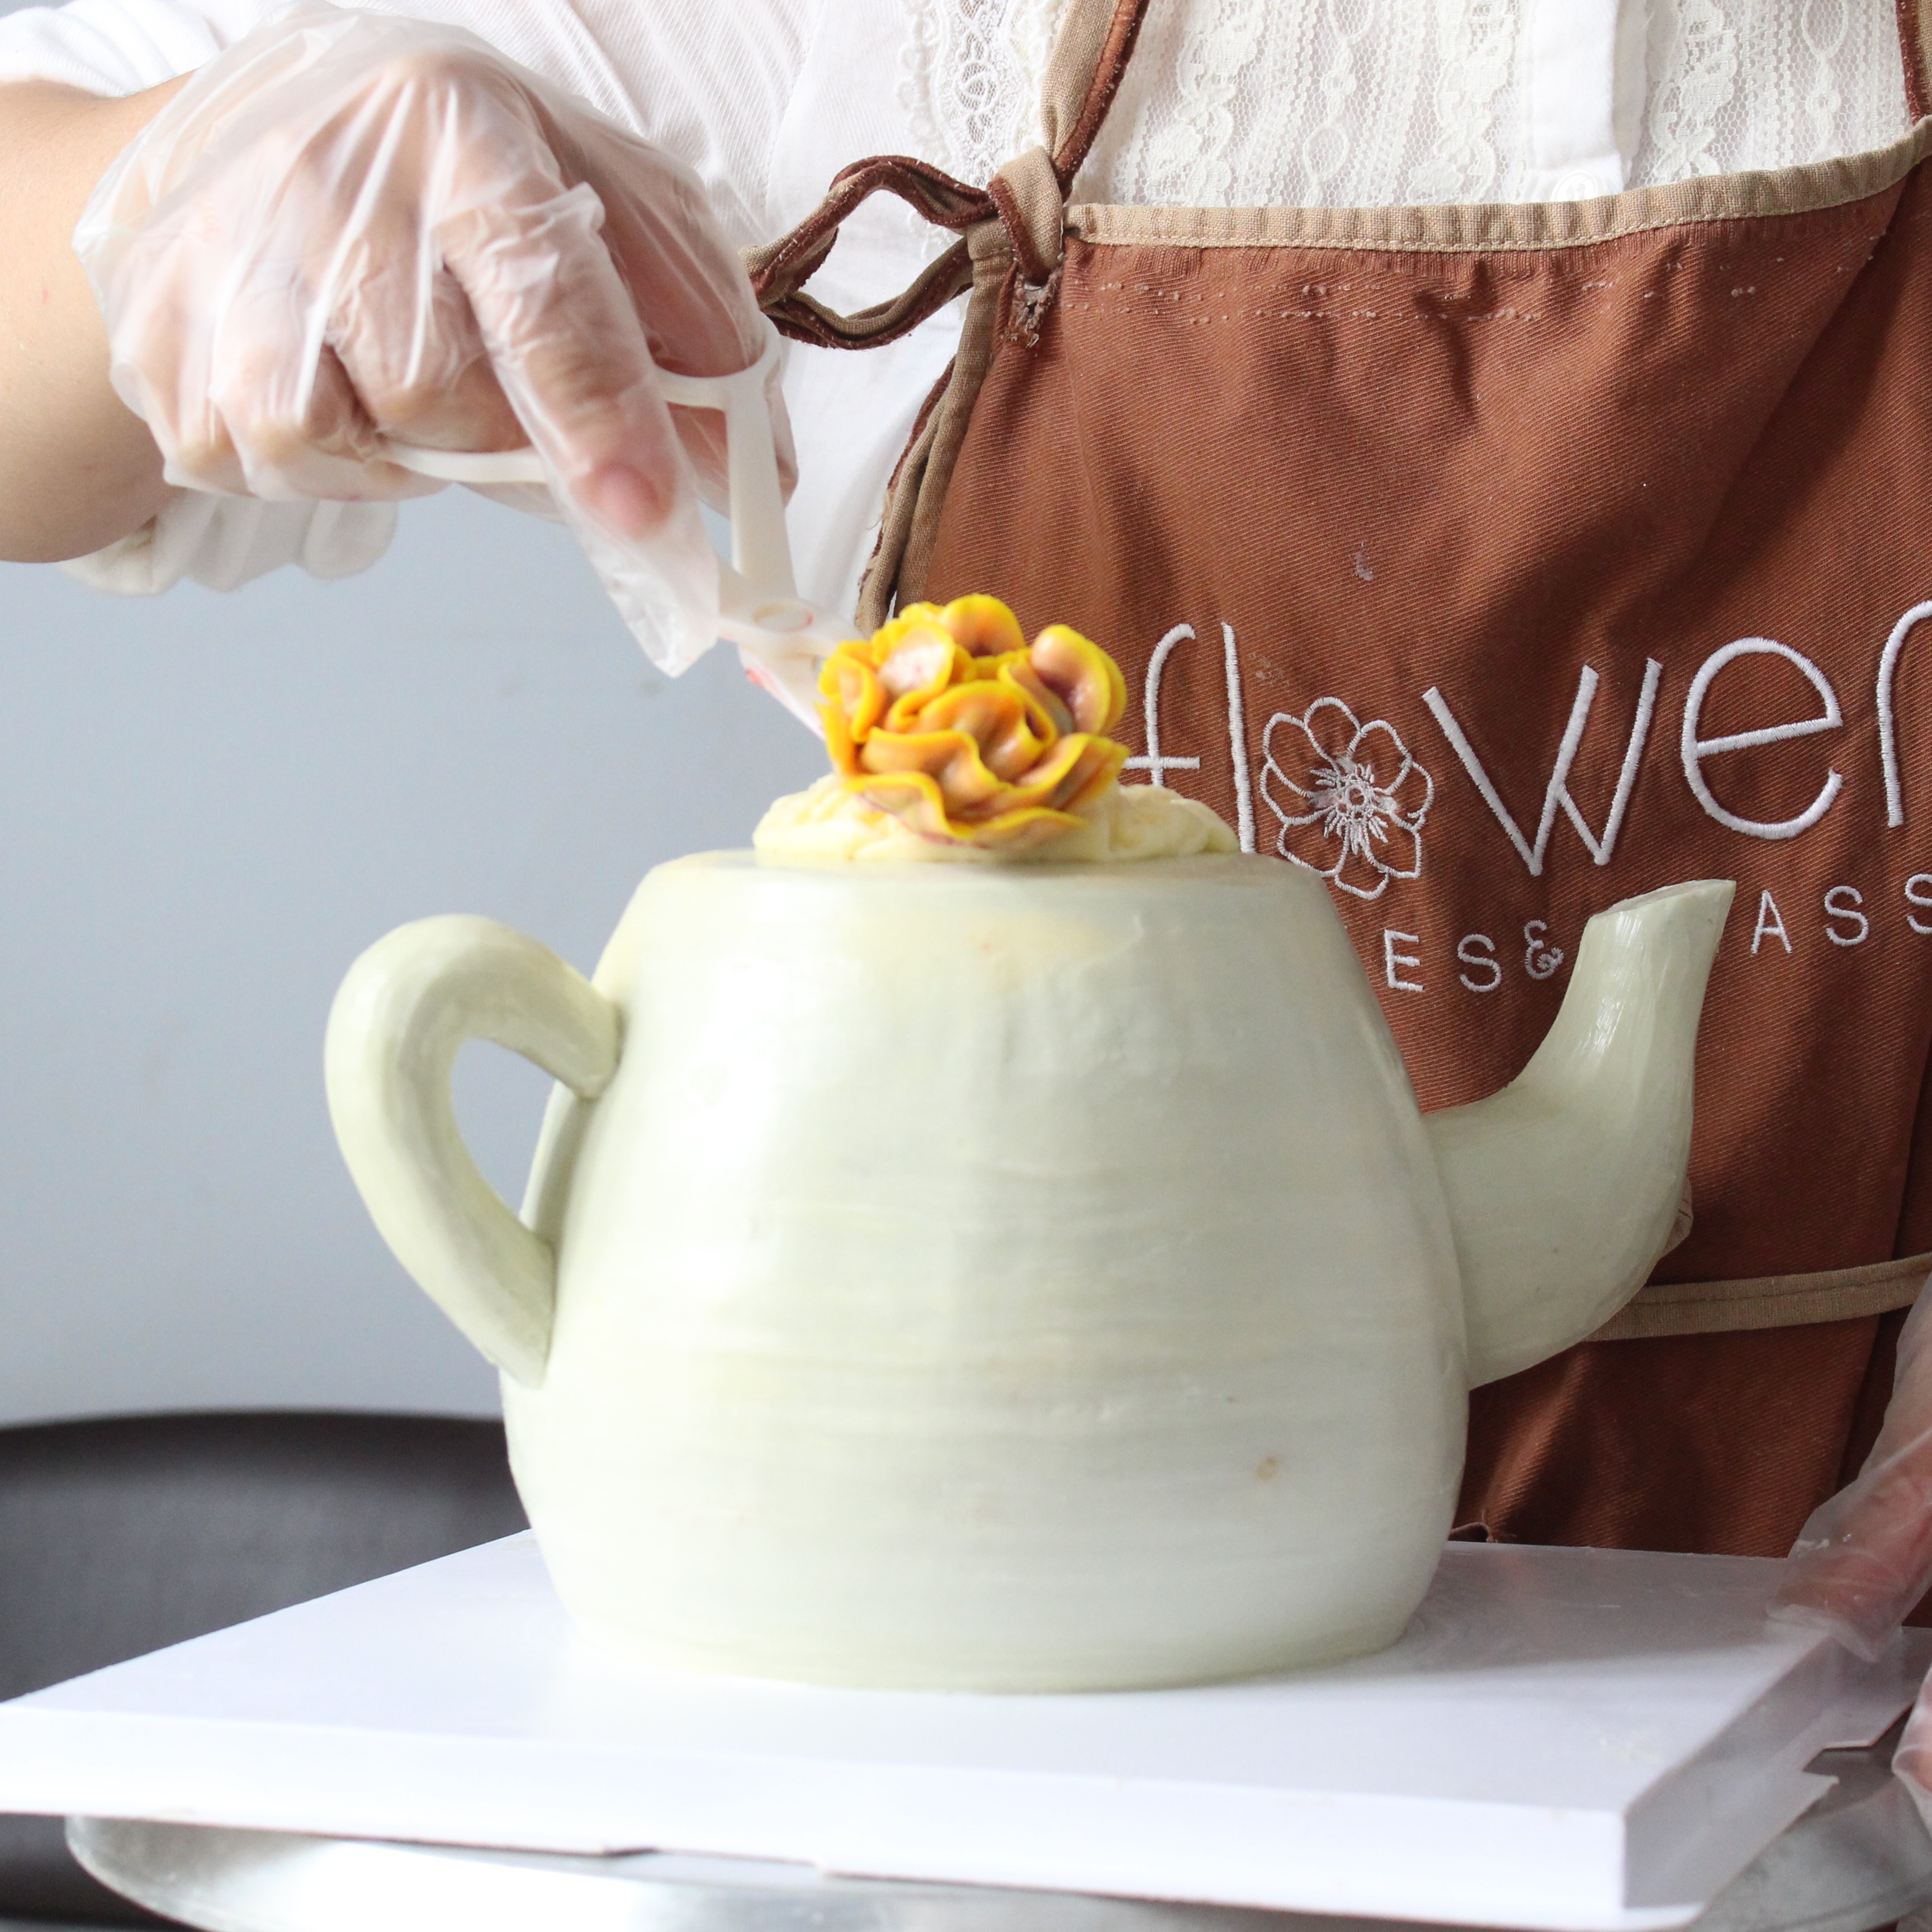
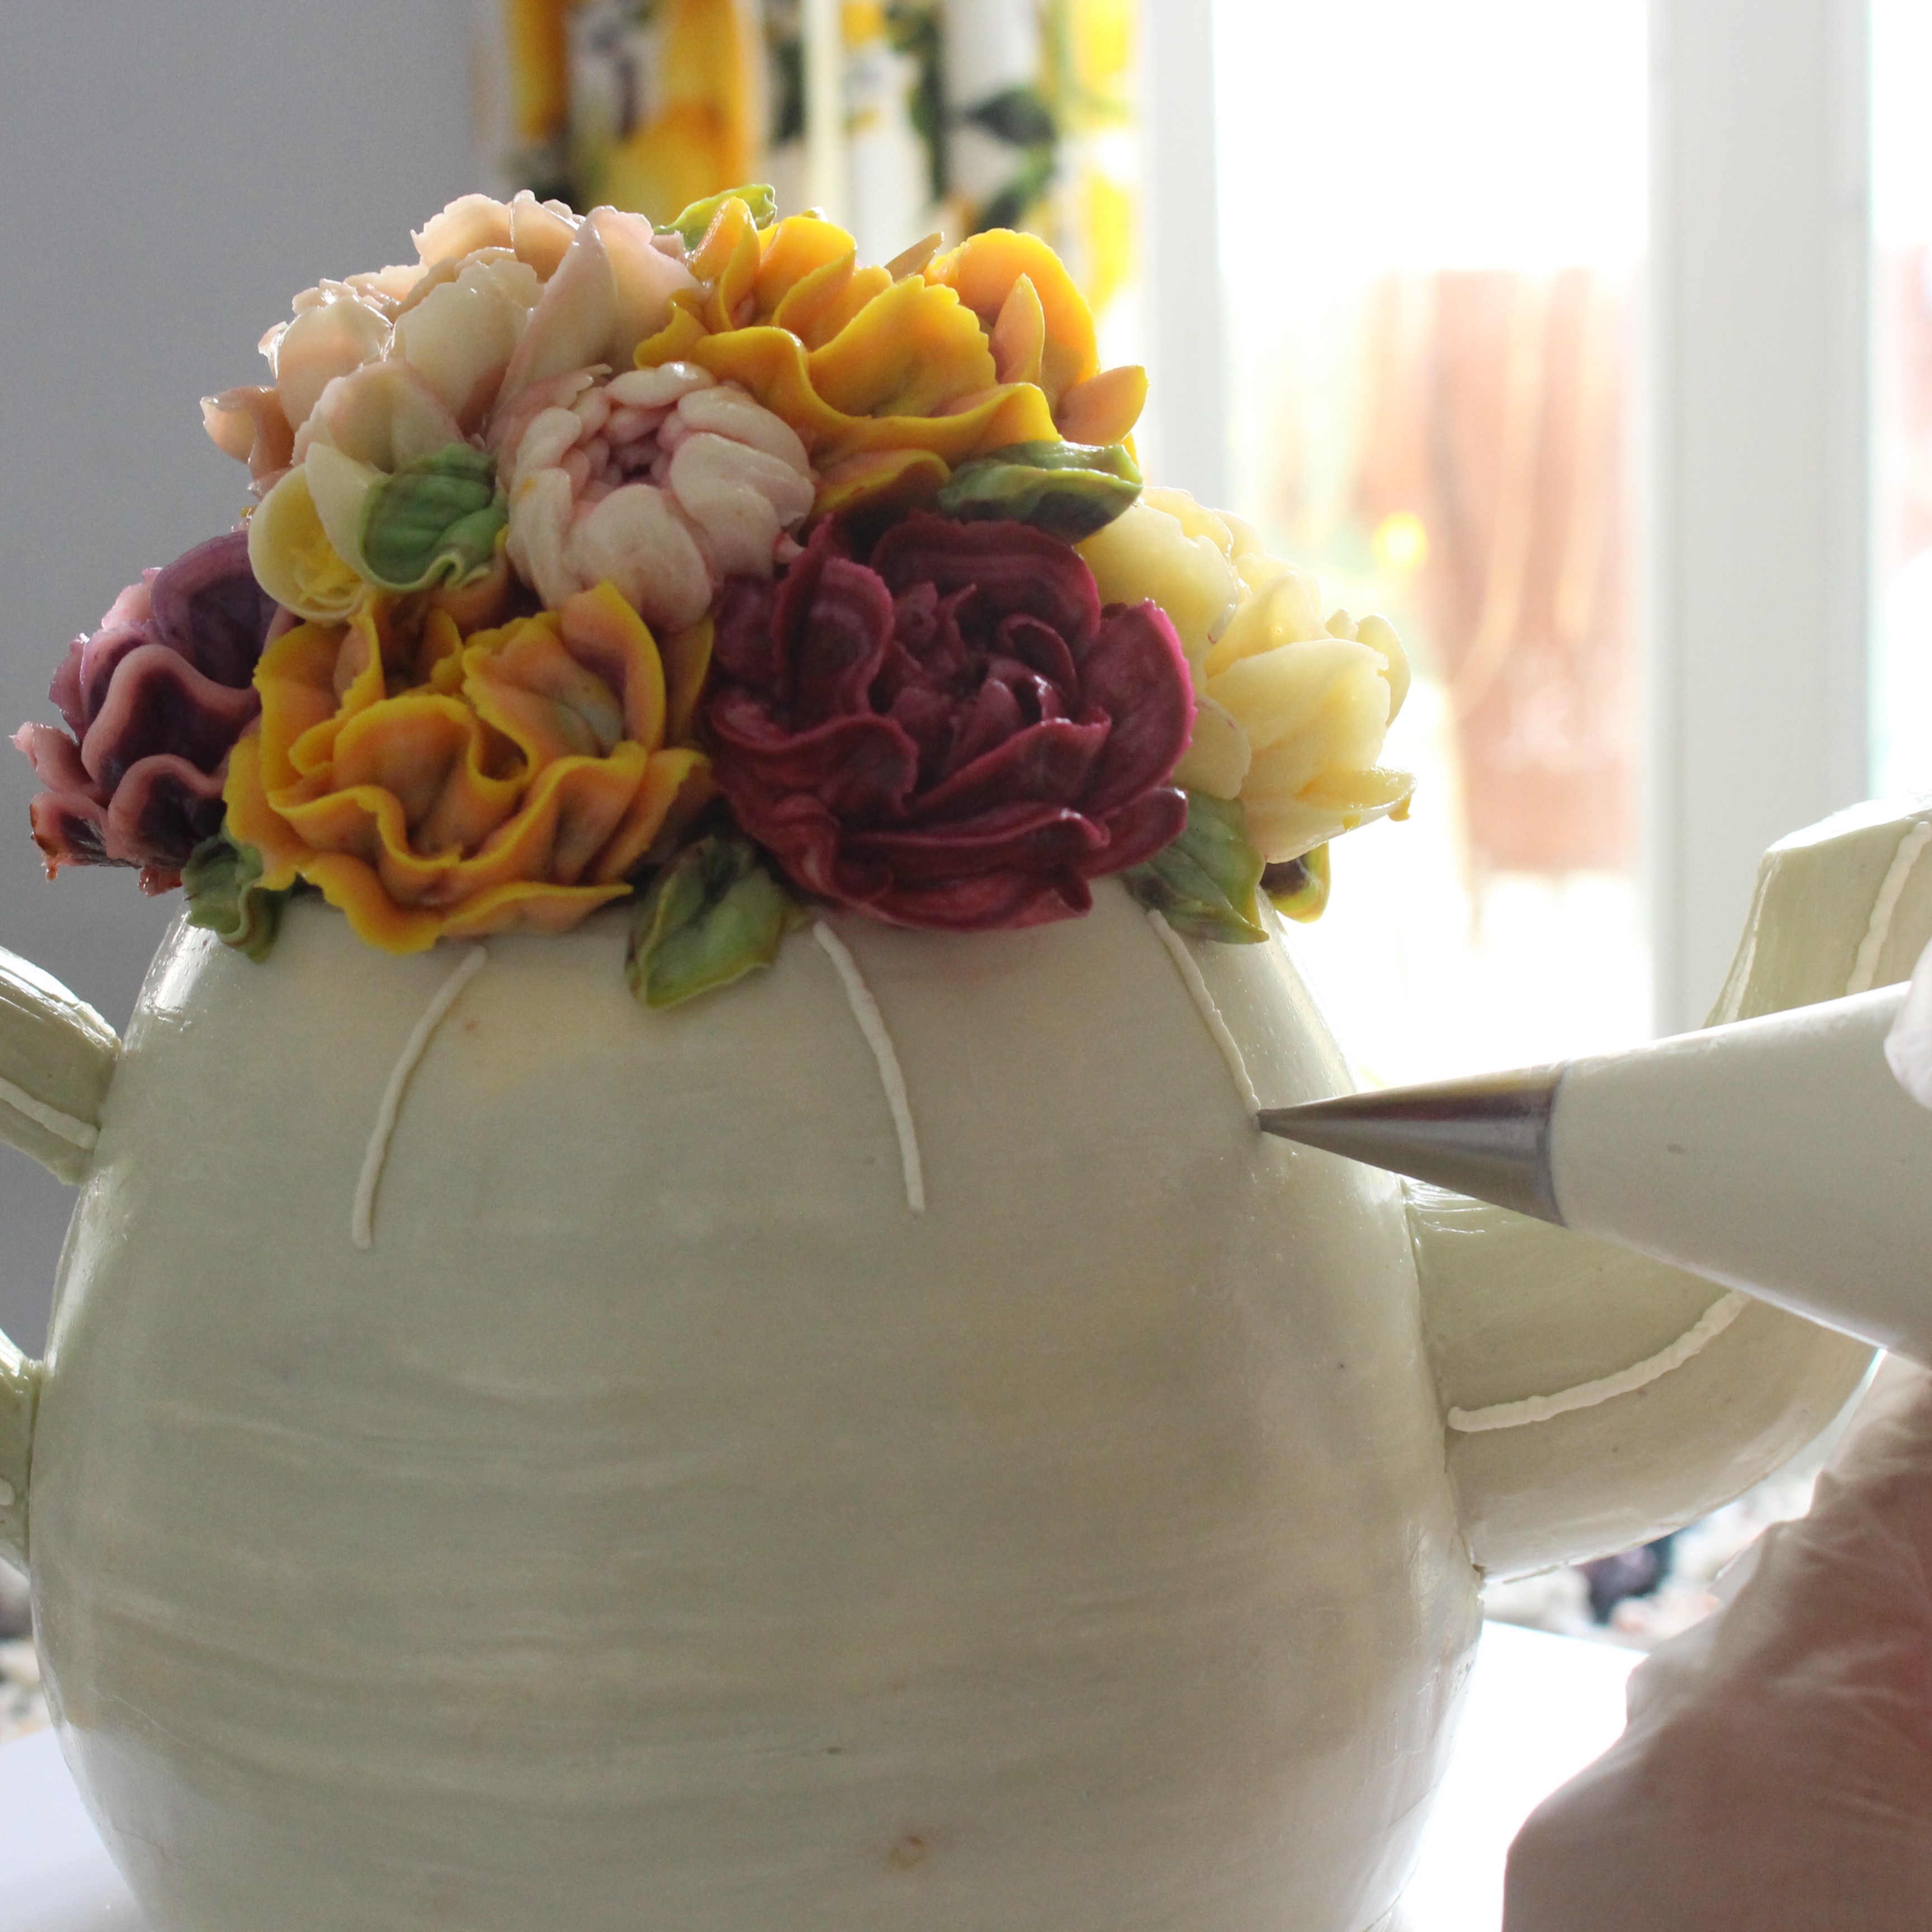
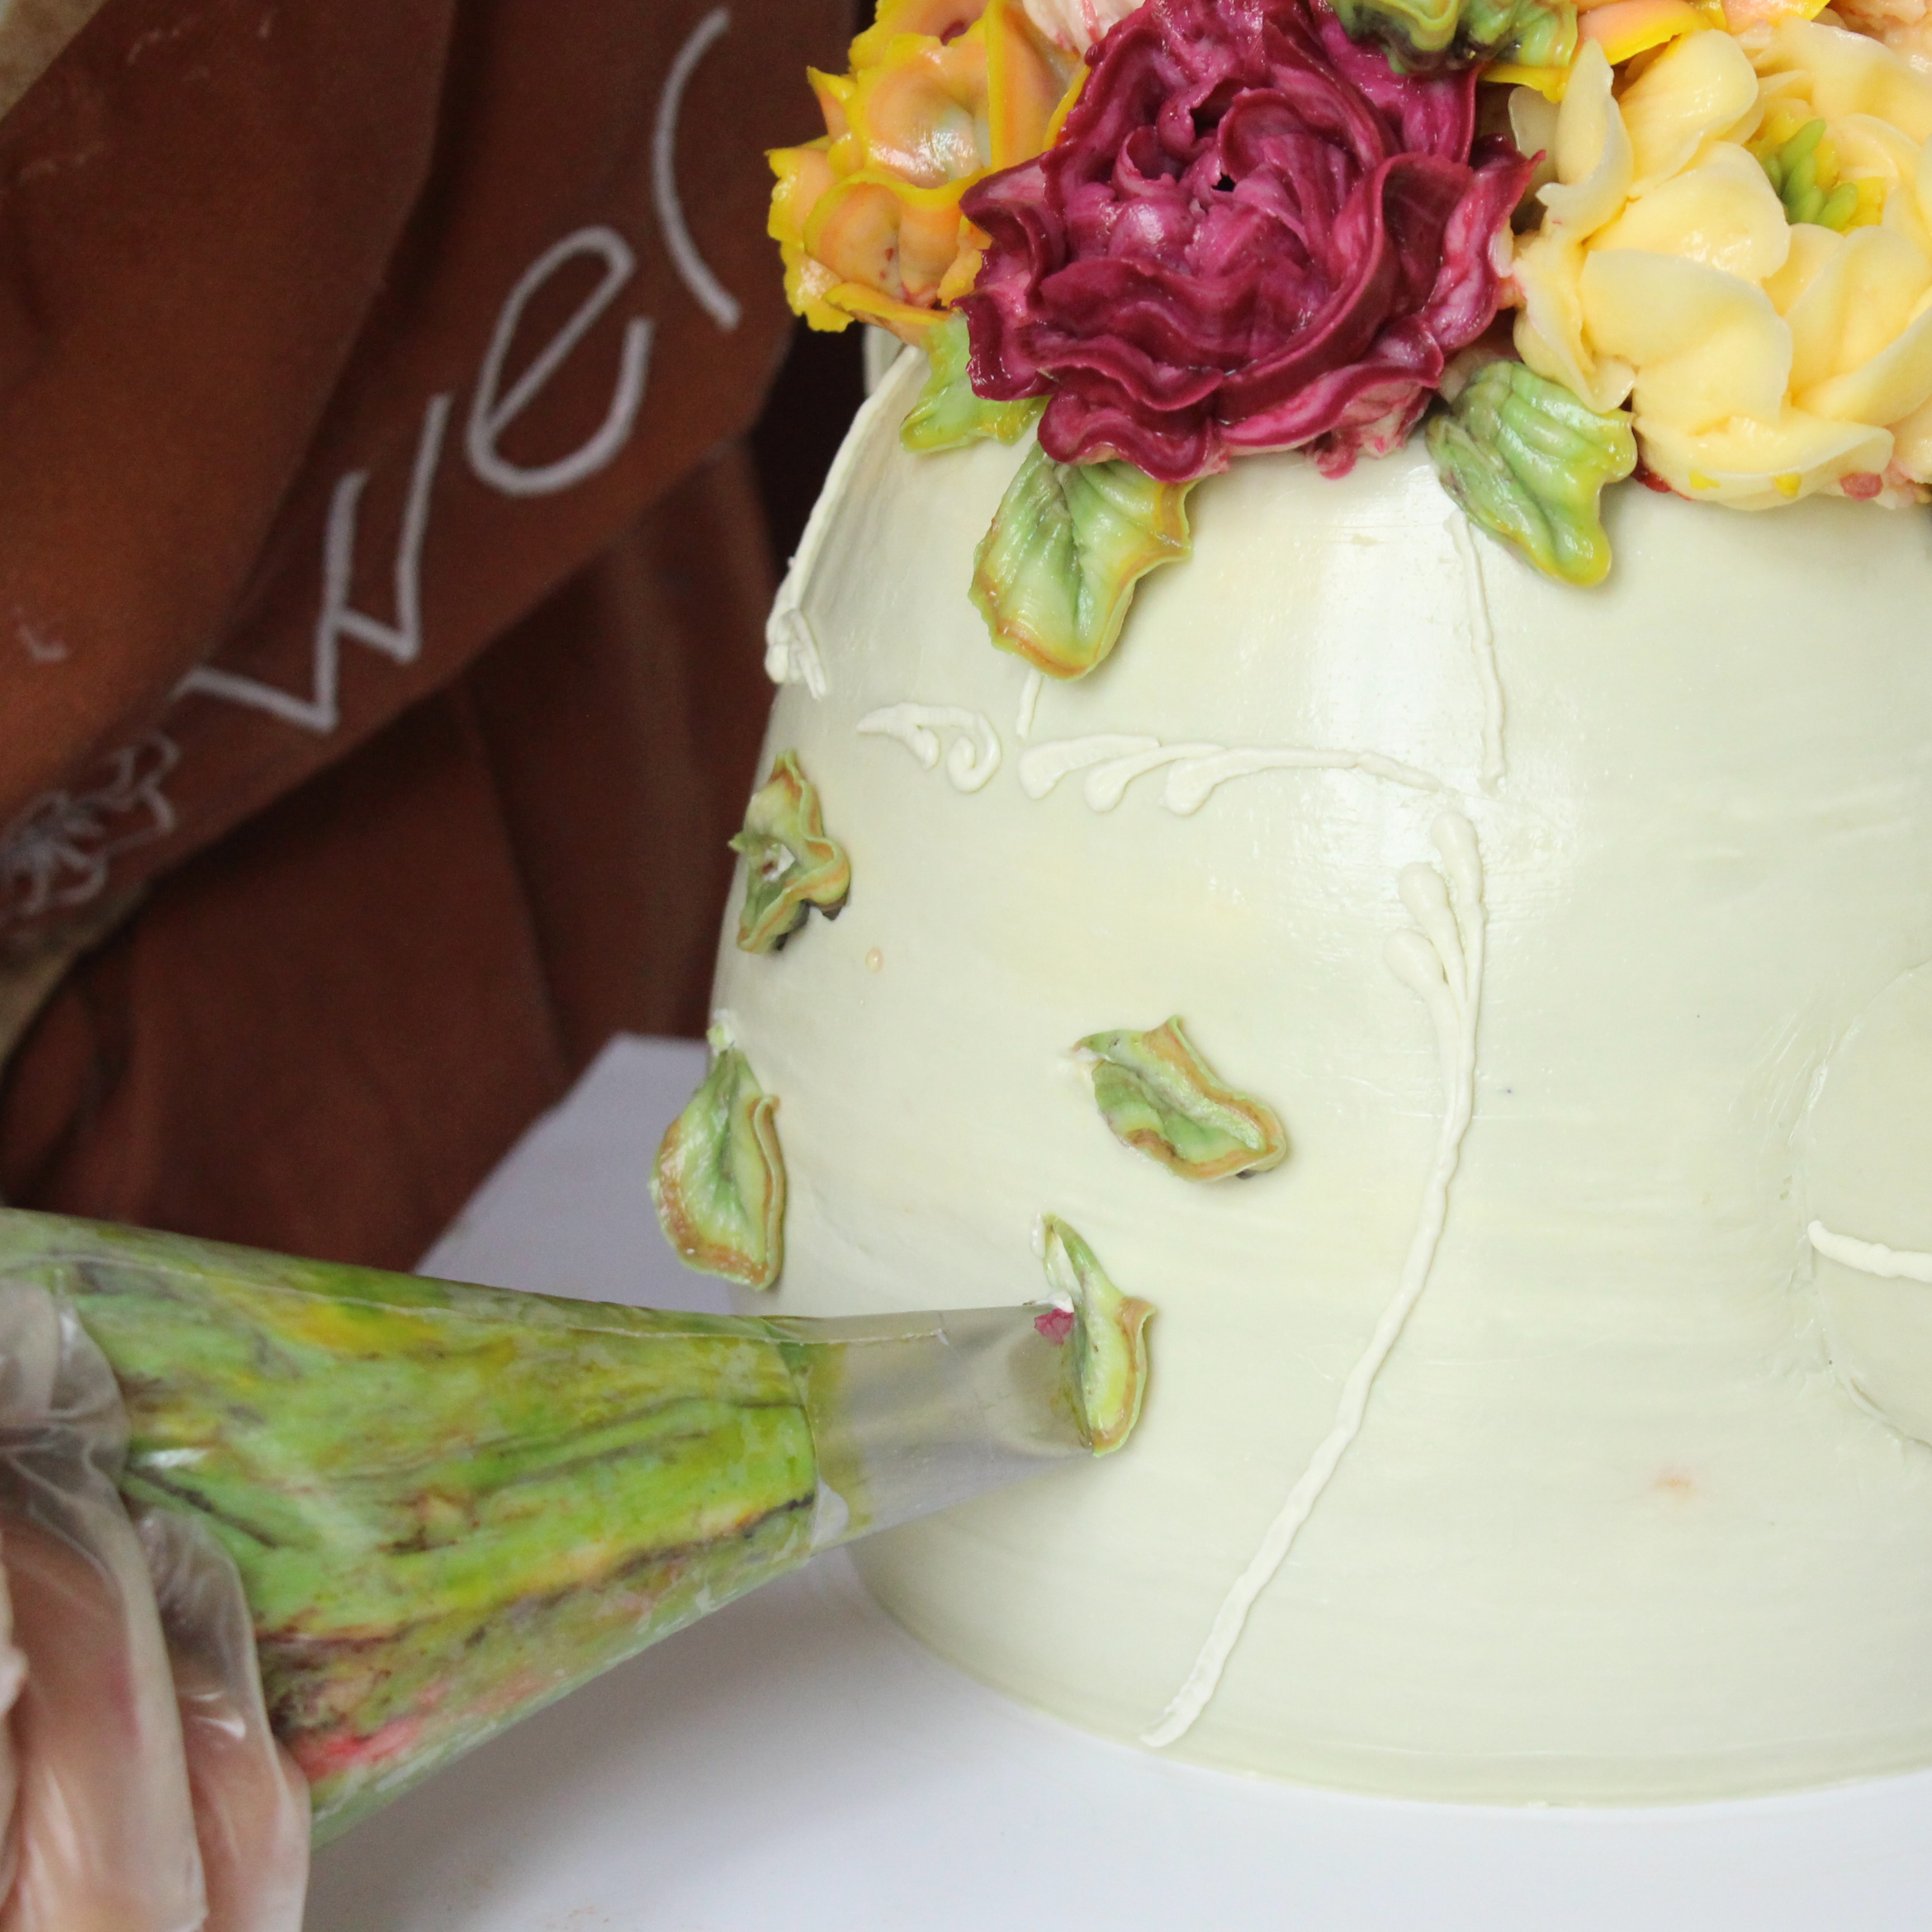
Decorate the Teapot
- Use the #2 round piping tip and some white buttercream to decorate the surface of the teapot with decorative lines.
- Pipe leaves and petals directly onto the cake to add some color and dimension to the teapot.
This tutorial originally appeared in the March/April 2019 issue of American Cake Decorating.

