
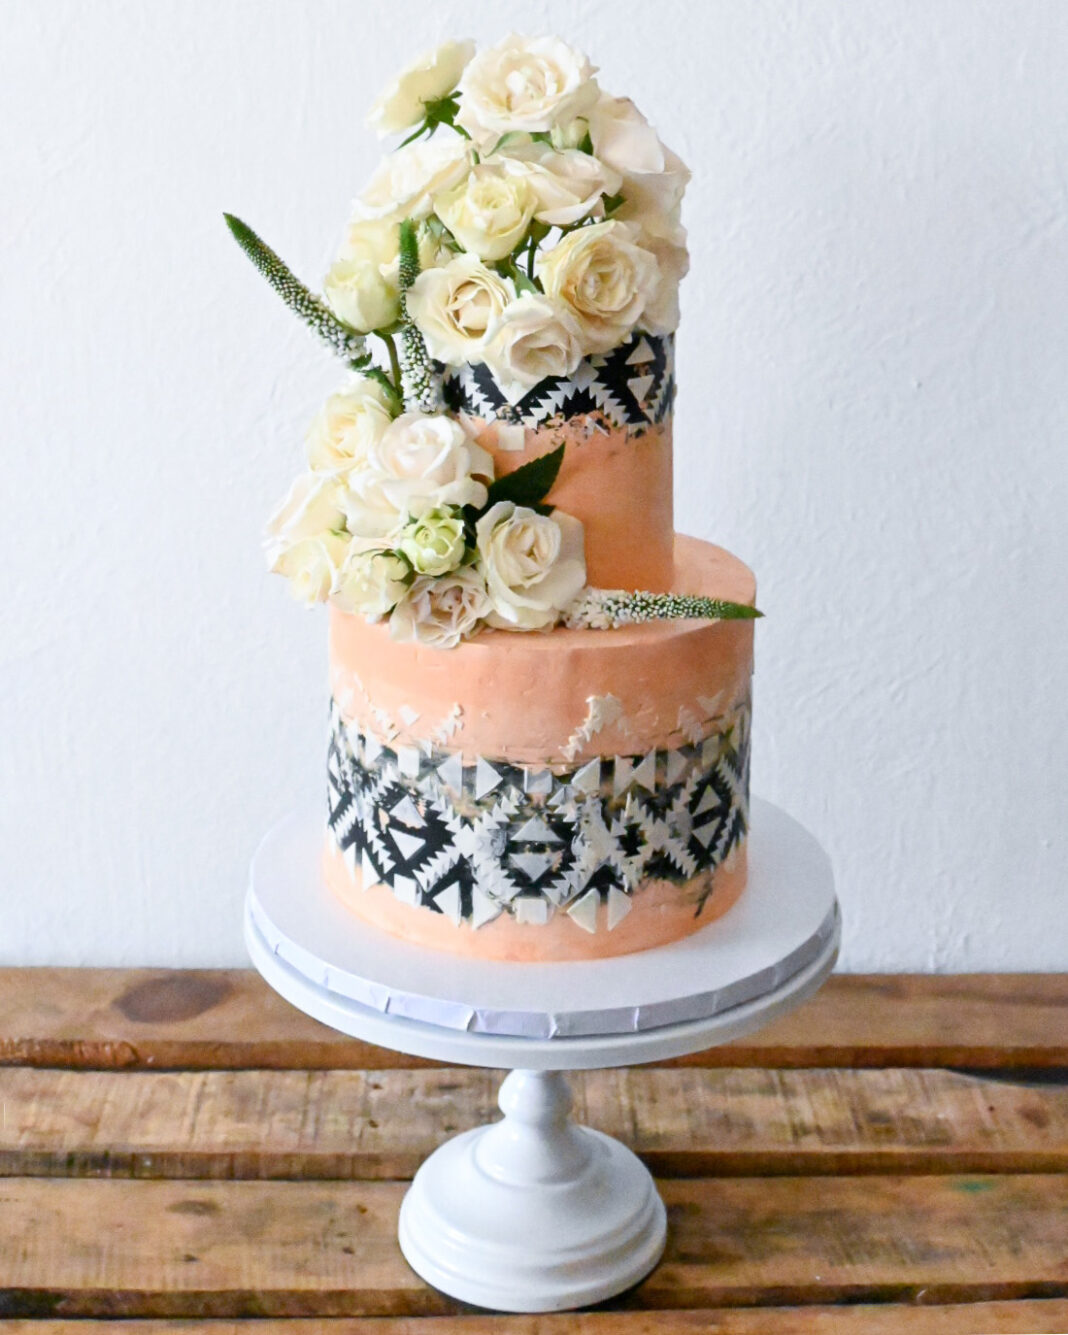
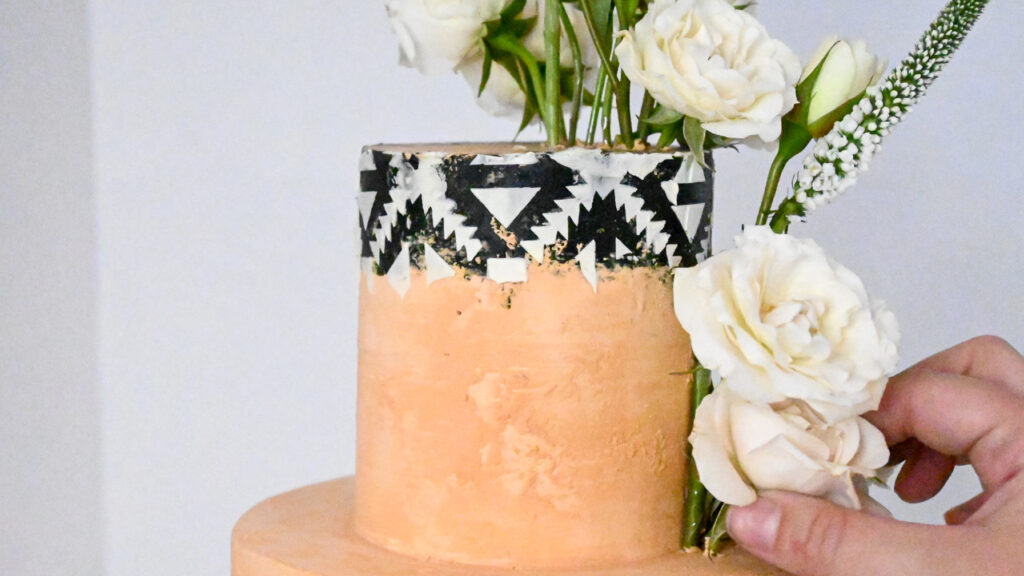
Inspired by the beautiful Native American pottery found throughout New Mexico, this striking terracotta textured cake celebrates the bold geometric patterns and earthy tones that make each handcrafted piece unique. Using textured buttercream, a simple stenciling technique, and fresh flowers, you’ll learn how to recreate the look of traditional terracotta pottery in cake form. Follow this step-by-step tutorial by Ryan Smith to create an elegant, Southwestern-inspired design with dramatic black-and-white details and a natural, handcrafted finish.
Edibles:
- Swiss meringue buttercream
- Food coloring: peach, taupe, chocolate, and black (Colour Mill)
Equipment:
- Paintbrush
- Spatula
- Metal scraper
- Rombos stencil (Cakes by Angela Morrison)
- Sewing pins
- Palette knife
- Acrylic scraper (Ivy & Stone)
- Fresh flowers
- Paper towels
- Floral shears
- Clear floral tape
- Floral wire (optional)
Create the Terracotta Pot Texture
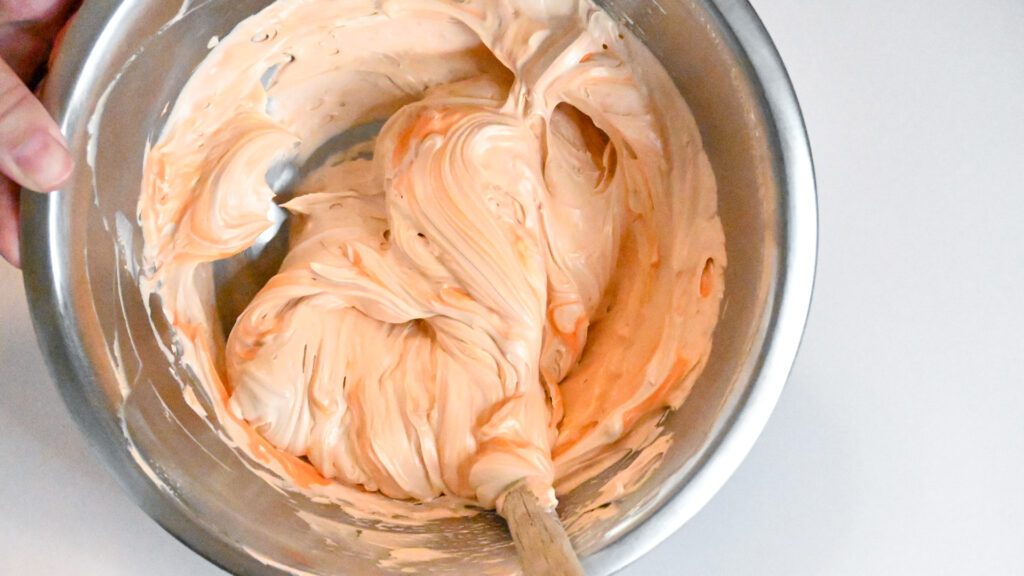
- To create the perfect terracotta color, mix the peach, taupe, and chocolate food coloring together with your buttercream. Add in additional peach for a deeper orange tone, but only add 2 or 3 drops of chocolate. Finish the outside of the cake and freeze it for about 10 minutes to make sure it is cold before applying the texture.
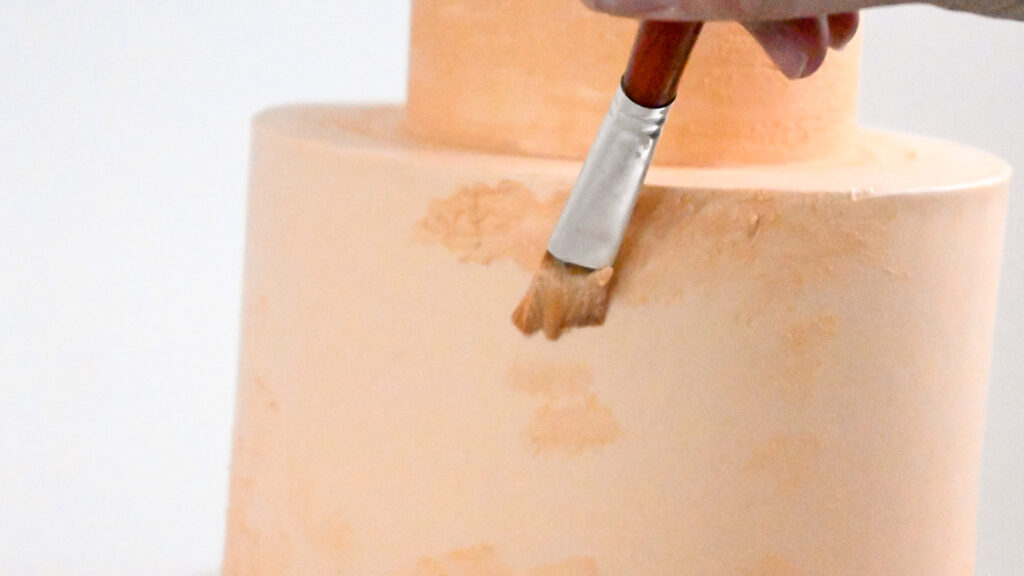
- Dip a wide, soft paintbrush into the same buttercream you used to finish your cake in and begin patting the paintbrush on a cold cake surface. Dab the buttercream on in areas where you want a more visible texture. Don’t be afraid to add movement to your strokes. Allow the cake to firm in the freezer for an additional 10 to 15 minutes.
- Using a spatula, add a horizontal line of black buttercream onto the cake.
- Smooth the black buttercream out with a small metal scraper and allow to firm in the freezer again. Repeat these steps on the other tiers.



Create the Pottery Pattern
Tip: Always use a stencil on a cold, firm cake to avoid pulling the buttercream off.
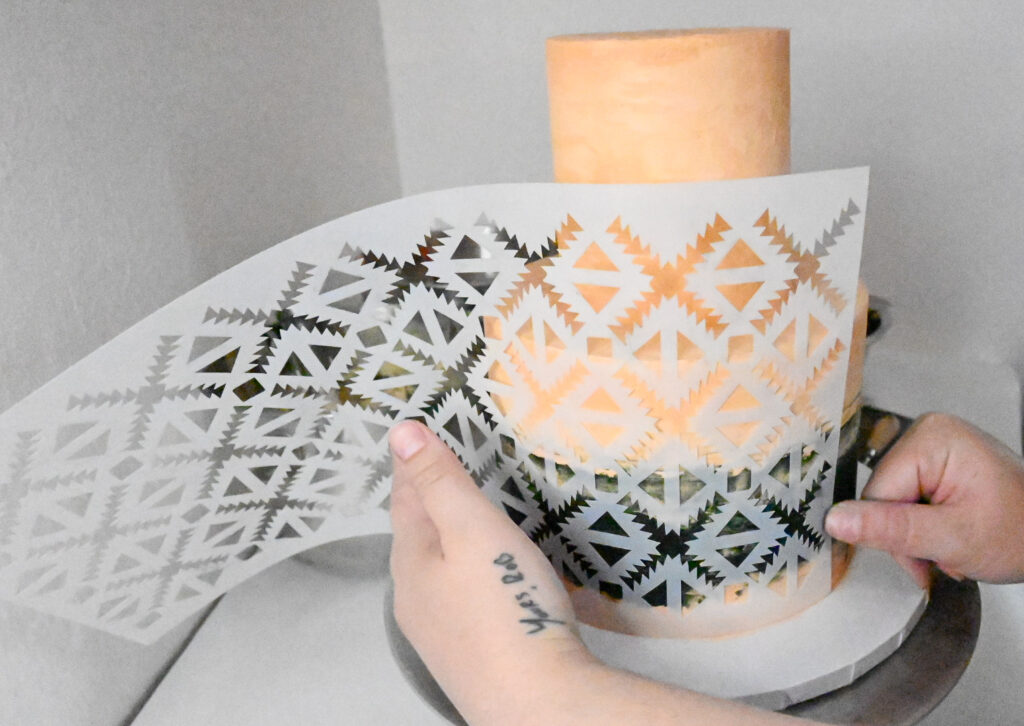
- Pin one side of the stencil into the cake using 1 sewing pin. Using your free hand to guide the stencil around the cake, hold it taut to ensure it lays flat against the cake. Pin the other side into the cake and press the stencil against the cake in places that are not laying flat.
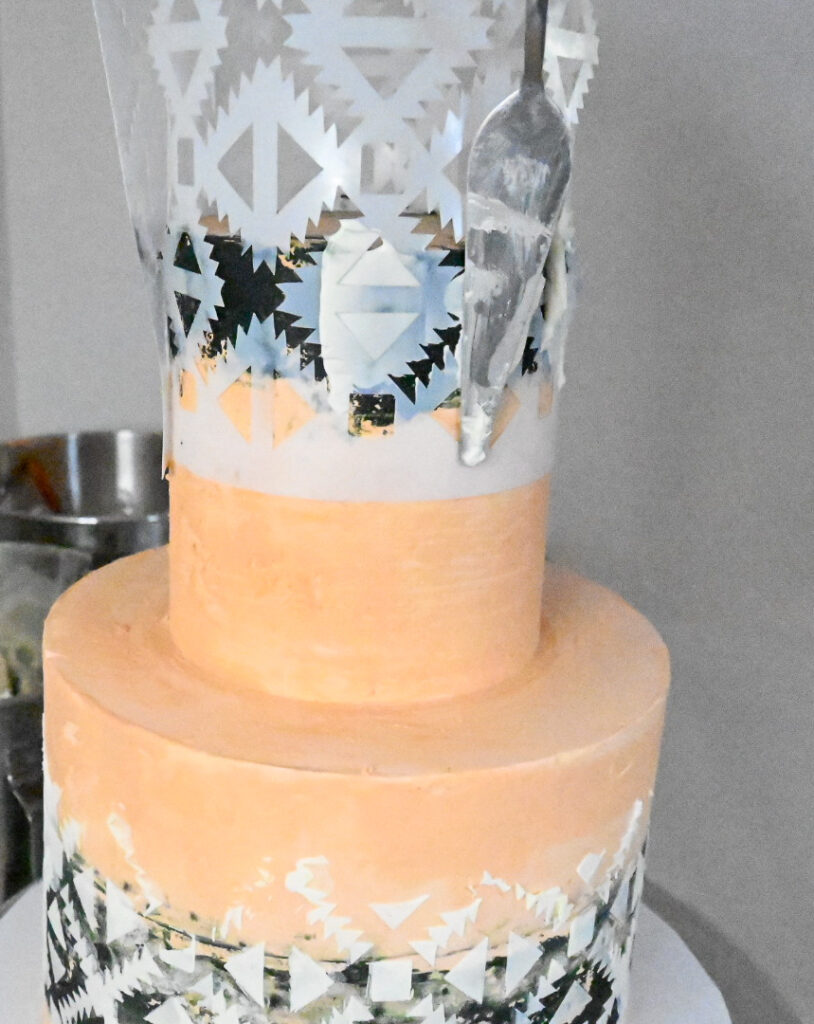
- Using a palette knife, begin applying uncolored buttercream onto the cake evenly. Not every crevice needs to be filled and you can use the palette knife to add buttercream to only places that you want the pattern to show on the cake. Make sure to apply the buttercream in small amounts so that it does not seep underneath the stencil.
- When you have the buttercream applied, use an acrylic scraper to lightly scrape off excess buttercream. You want the layer to be thin and even.
- Take 1 pin out and slowly turn your turntable to pull the stencil off the cake. Unpin the other side and pull the stencil off completely. Repeat the above steps if the stencil does not wrap around the entire cake; however, only pin the stencil to fit the spot you need or you will ruin the pattern on the already finished parts.
- Repeat these steps on the other tiers.


Apply Fresh Flowers to the Terracotta Textured Cake
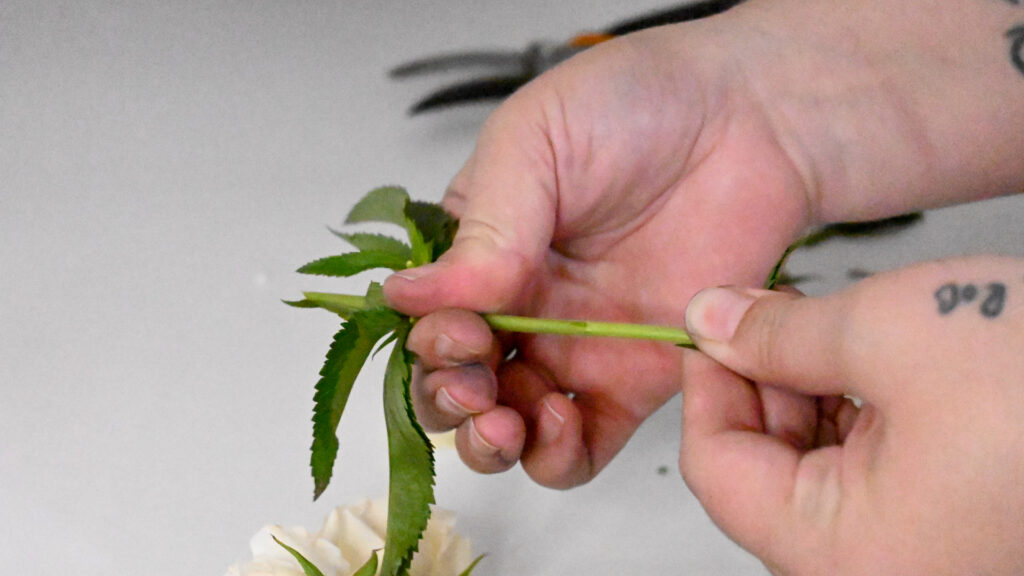
- Pat your flowers dry with a paper towel and trim them to the lengths you want them to be for the cake. Remove any excess leaves from the stems.
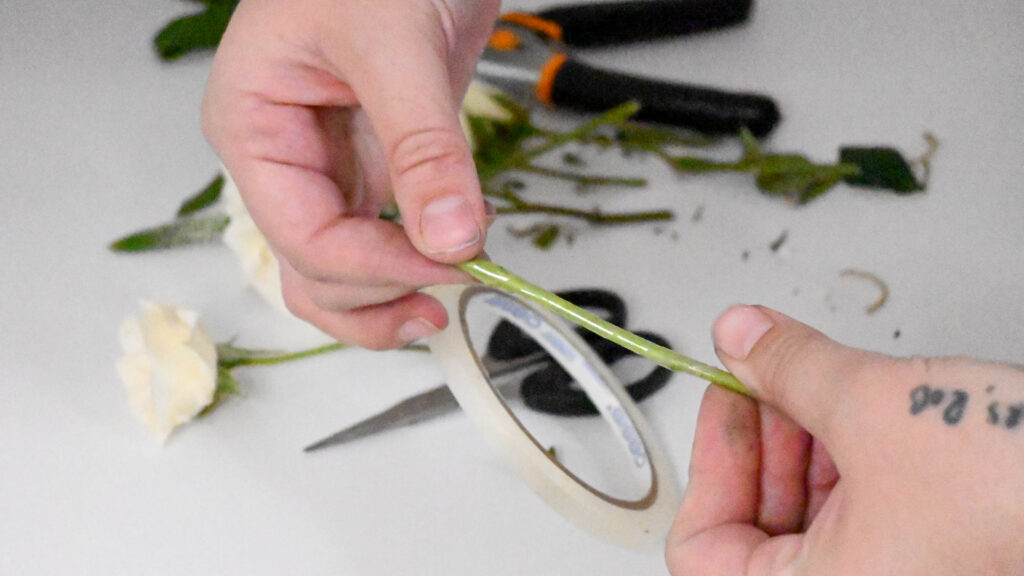
- Begin wrapping clear floral tape around the stem of the flower, starting at the top and working your way to the bottom. Use your thumb and pointer finger to hold the tape onto the stem while spinning the flower with your other hand. You only have to wrap the part of the flower that will be inserted into the cake.
- Begin placing the flowers into the cake by simply pressing them down in. If you need to create a hole, use the end of a thin paintbrush.
- Continue placing the flowers until you are happy with the arrangement. Make sure you turn the cake around to see every angle. Don’t be afraid to add in flowers from the back or pin them onto the side standing up.
Tip: To place flowers standing up straight on the side of a cake, use a small piece of bent floral wire to hold it in place.

This cake originally appeared in the July/August 2021 issue of American Cake Decorating.
For more tutorials with American Cake Decorating, click here!

Ryan Smith
Ryan Smith is the owner and one-woman show of Honey & Salt Cake Design based in the deserts of New Mexico. At the age of 19, she trained under world-renowned chefs, including cake master Colette Peters, at L’Academie de Cuisine and is a classically trained pastry chef. She then continued her training in several cake shops in Maryland and Albuquerque, before taking a break to raise her daughters. At the encouragement of her husband, she started Honey & Salt in March 2019 and never looked back. She focuses on making one-of-a-kind edible works of art, utilizing a variety of skills from hand-painting to sugar flowers. When she’s not making cakes, you can find her watching a TV show about serial killers, studying theology with her husband, or playing outside with her daughters. Wedding Collective NM voted Honey & Salt the “Best Place to Order a Wedding Cake” in 2020 and her work has been featured multiple times in Rocky Mountain Bride and on Brides.com.