


Inspired by the vibrant ceramics and famous lemon groves of Italy’s Amalfi Coast, this Painted Amalfi Coast Cake is both timeless and elegant. Learn how to hand-paint bright lemons, delicate blue pottery-inspired florals, and graceful botanical details using gel food coloring and simple painting techniques. Whether you’re creating a wedding cake, celebration centerpiece, or Mediterranean-inspired design, this step-by-step tutorial by Faria Malik will help you recreate the charm and beauty of the Italian coastline on cake.
Edibles:
- 4-tiered cake, finished in white buttercream
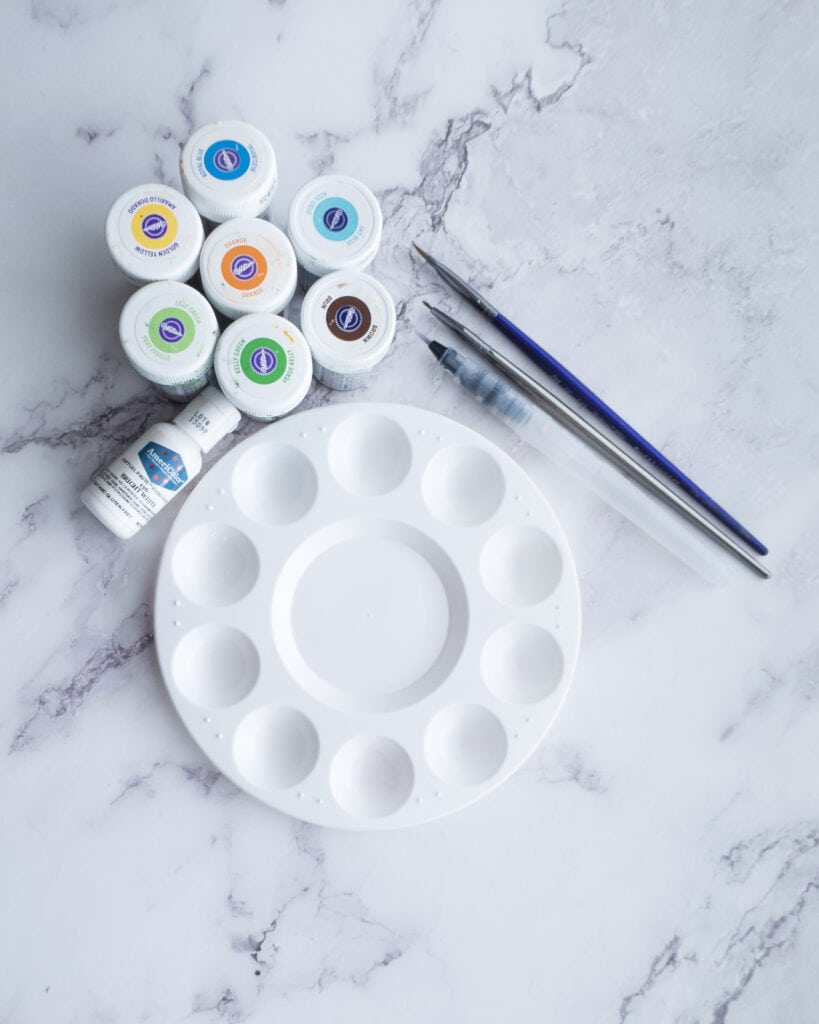
- Gel food coloring: brown, white, yellow, orange, lime green, kelly green, sky blue, and royal blue
Equipment:
- Variety of flat, fine, and round paintbrushes
- Round water brush pen
- Silk floral arrangement
Tip: Make sure that your buttercream is completely chilled and cool to the touch before painting.
Creating the Lemons
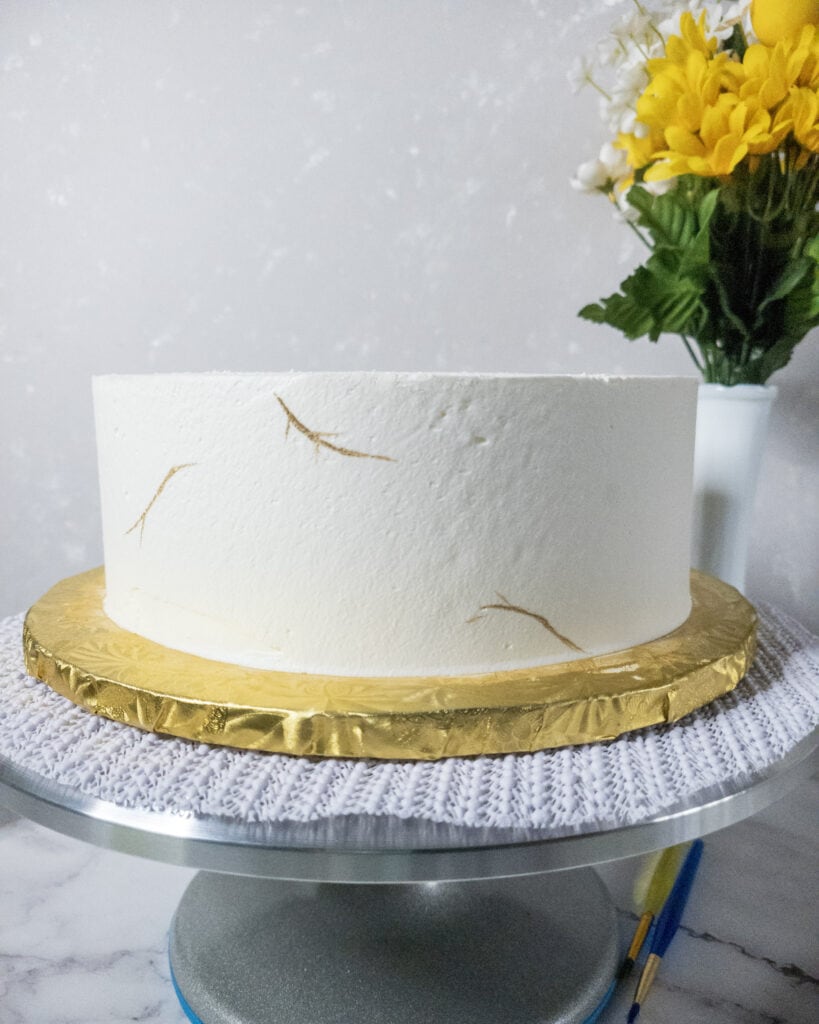
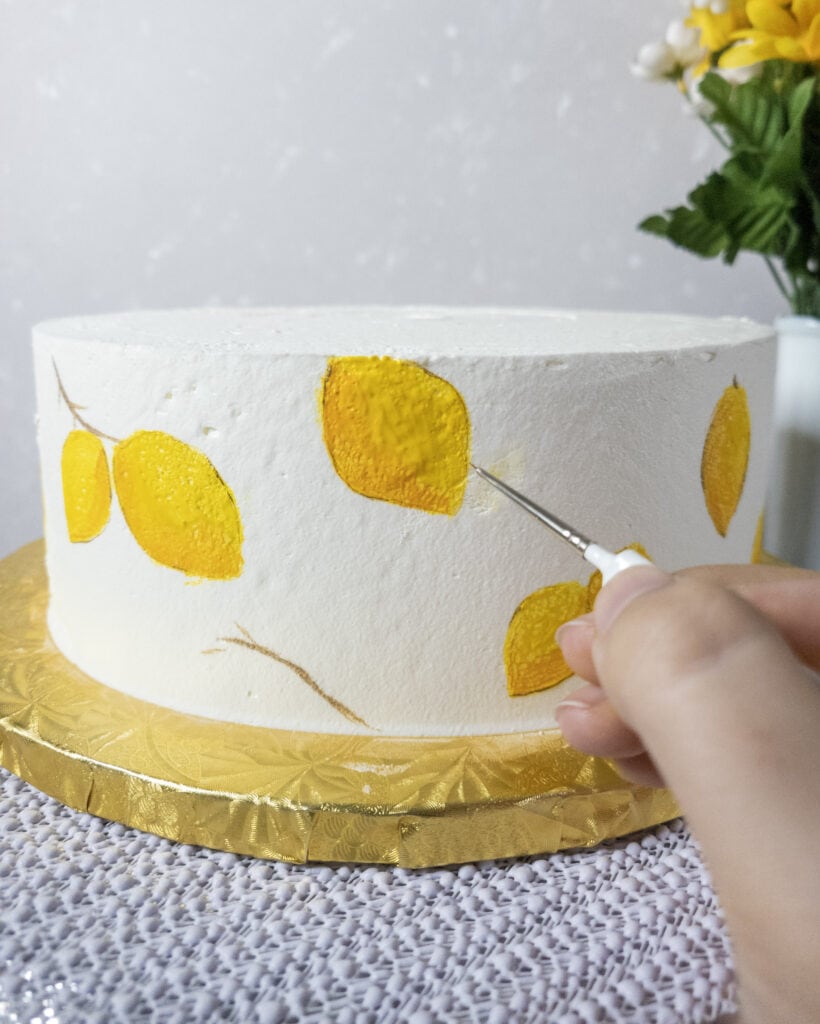
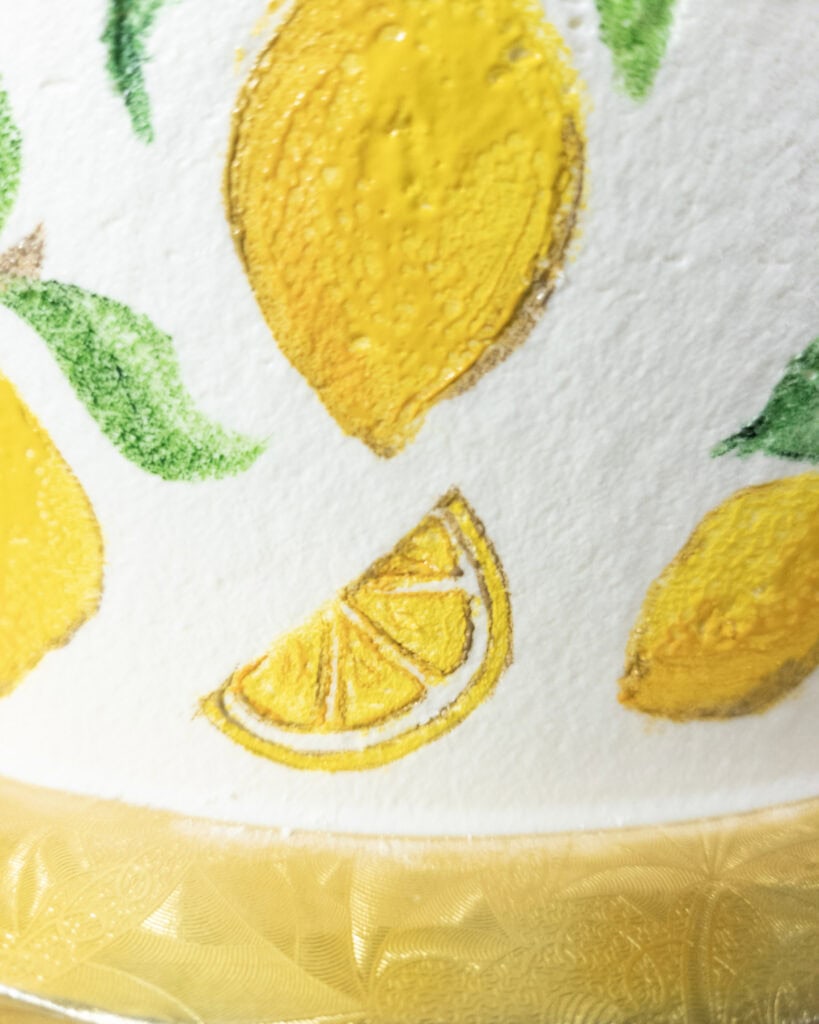
- Dip a flat, angled brush in brown gel food coloring mixed with white and paint thin tapered lines at random intervals around the bottom tier.
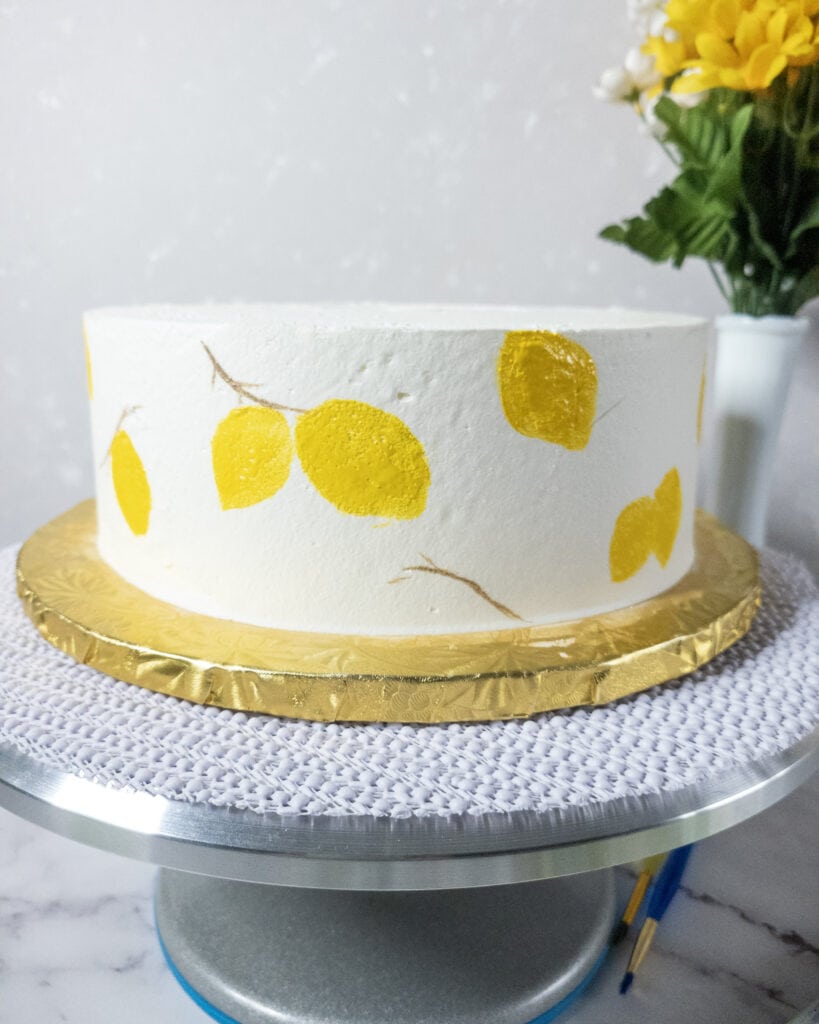
- Mix yellow gel food coloring with white and begin to paint an oval with slightly pointed ends using a flat brush. Point the ends downward, at a diagonal slant, so it looks like the lemons are hanging off the brown branches you painted. Paint more lemons around the sides of the cake. Alternate between 2 lemons clustered together and single lemons.
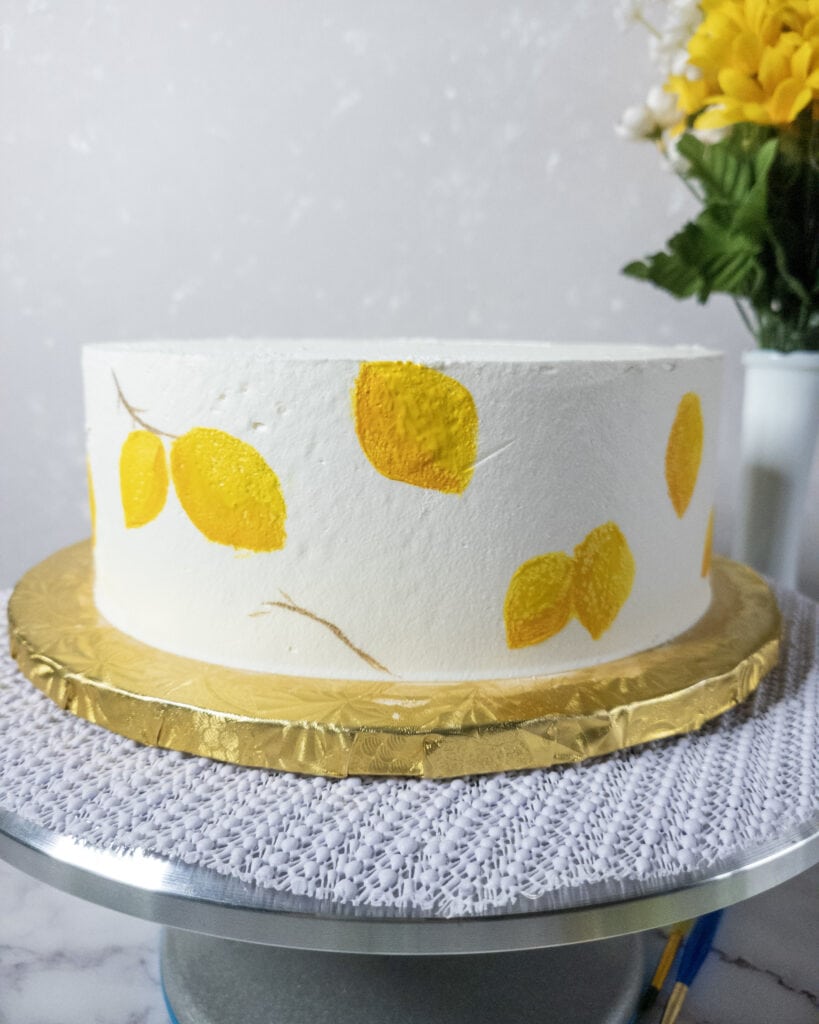
- Dip your brush into some orange gel food coloring mixed with white and brush some of that color onto the bottom edge of each lemon to give more depth.
- Dip a fine-tipped detail brush into some brown gel food coloring and lightly outline your lemons.
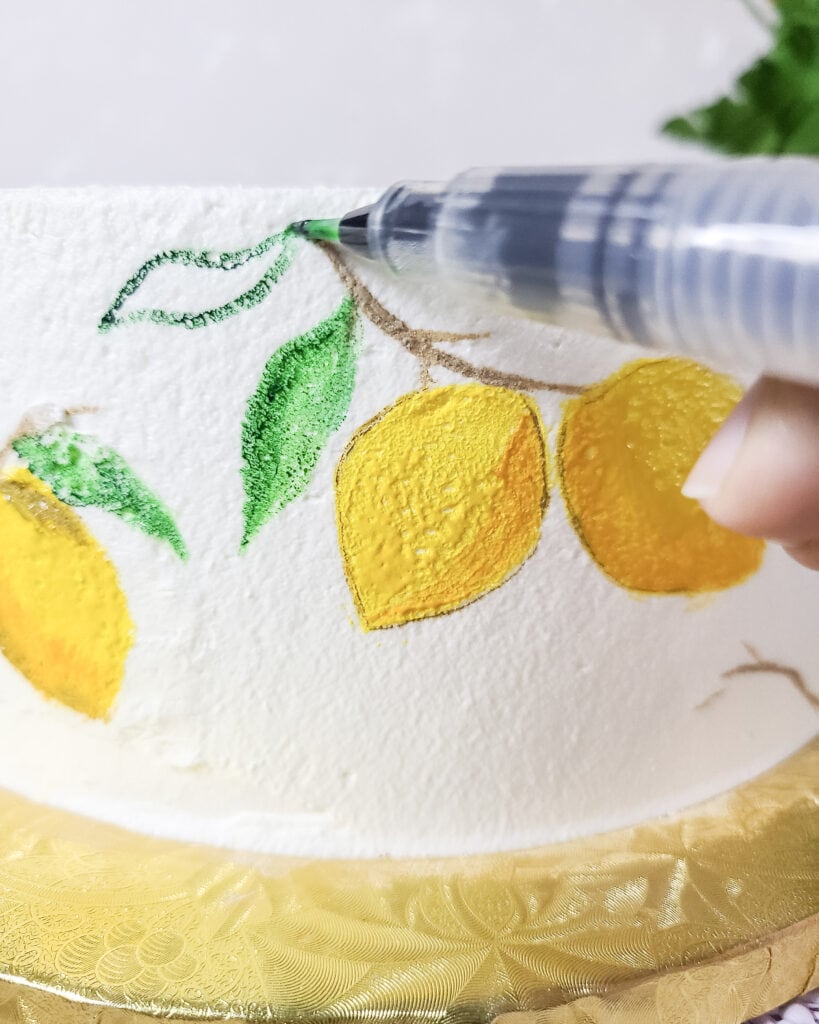
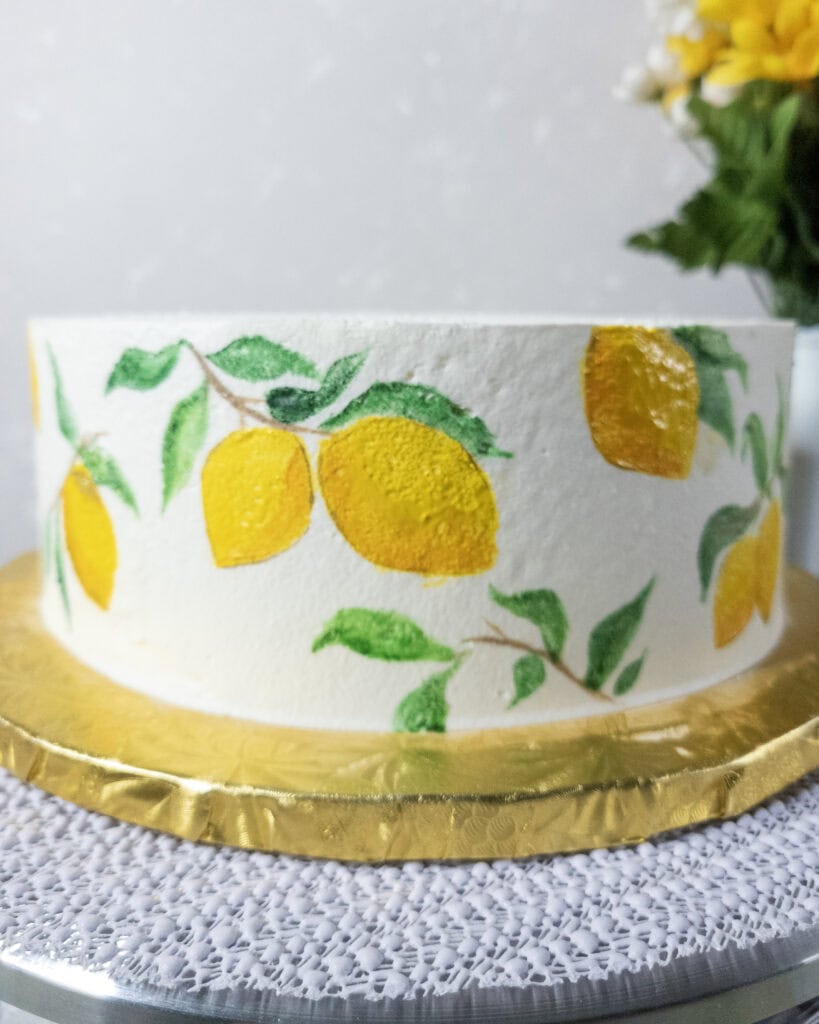
- Take a water brush pen and dip it in some lime green gel food coloring. Paint 2 wavy lines and join the tips together to create a leaf.
- Fill the leaf in. Add leaves at random pointing in all different directions around the lemons you’ve painted. Dip your brush in kelly green gel food coloring and paint a darker line on 1 side of each leaf to add some dimension.
Add the Lemon Slices
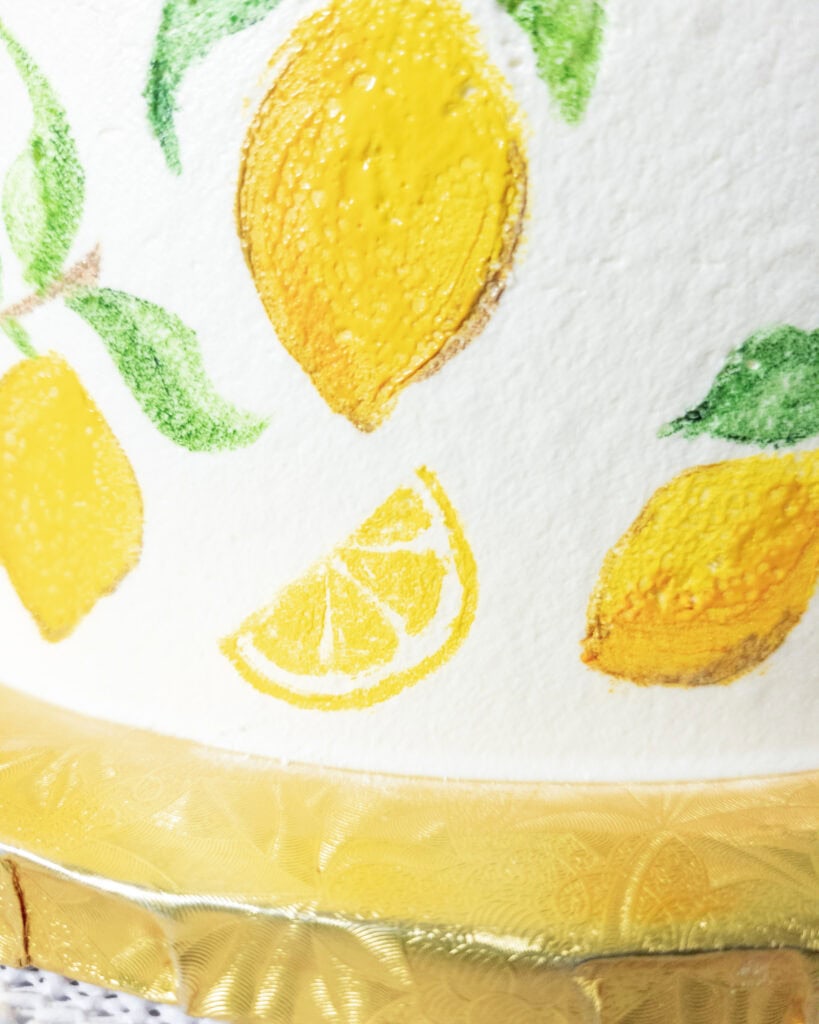
- Using a fine round brush, paint a line in the shape of a semicircle using your yellow-white mix. Then, paint 3 or 4 triangles inside of the semicircle, being careful to leave some empty white space between the semicircle and the other triangles.
- Dip a fine-tipped brush in some brown gel food coloring and outline the triangles and the semicircle. You can paint small tear shapes near the points of each triangle to give the impression of lemon seeds.
Tip: If you notice your buttercream softening, pop it back in the fridge for 10 to 15 minutes before continuing.
Paint the Pottery Flowers
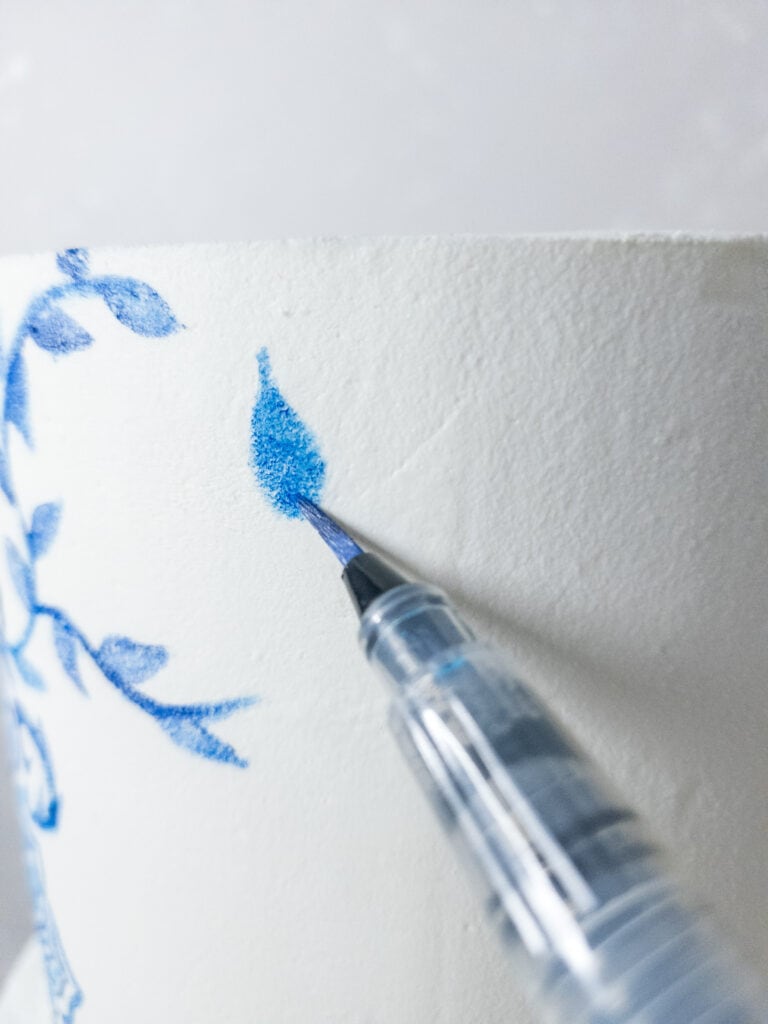
- Dip your water brush pen in some sky blue gel food coloring and paint a leaf shape on the third tier.
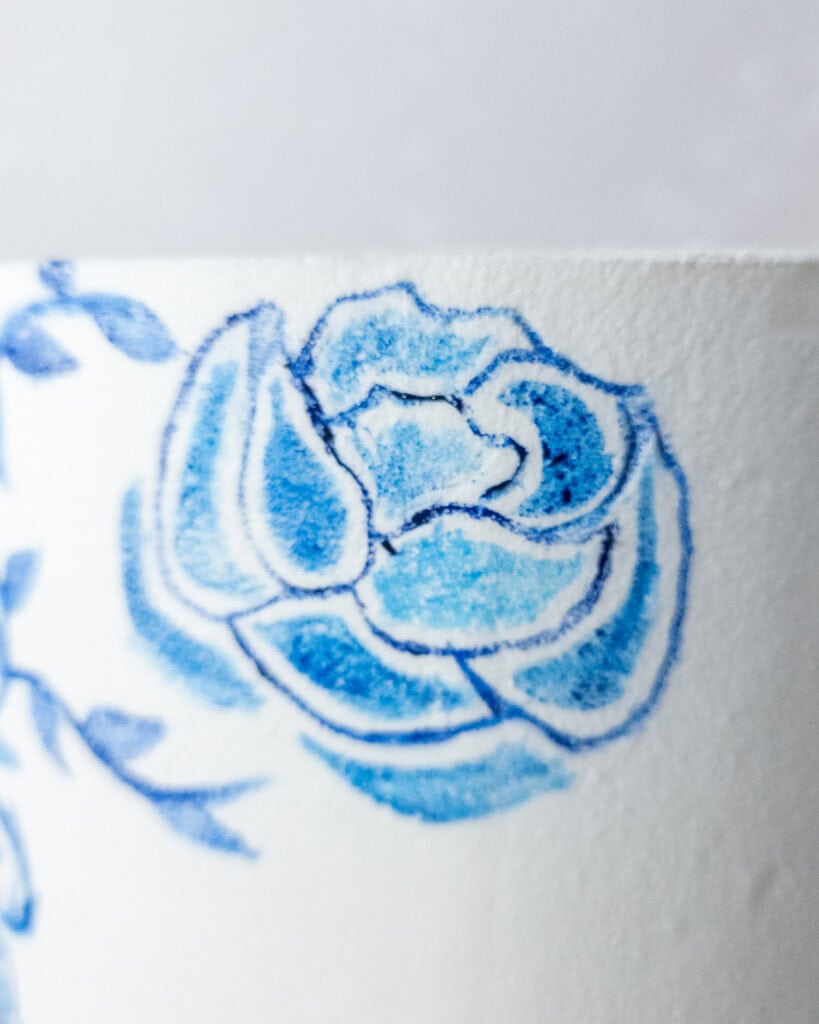
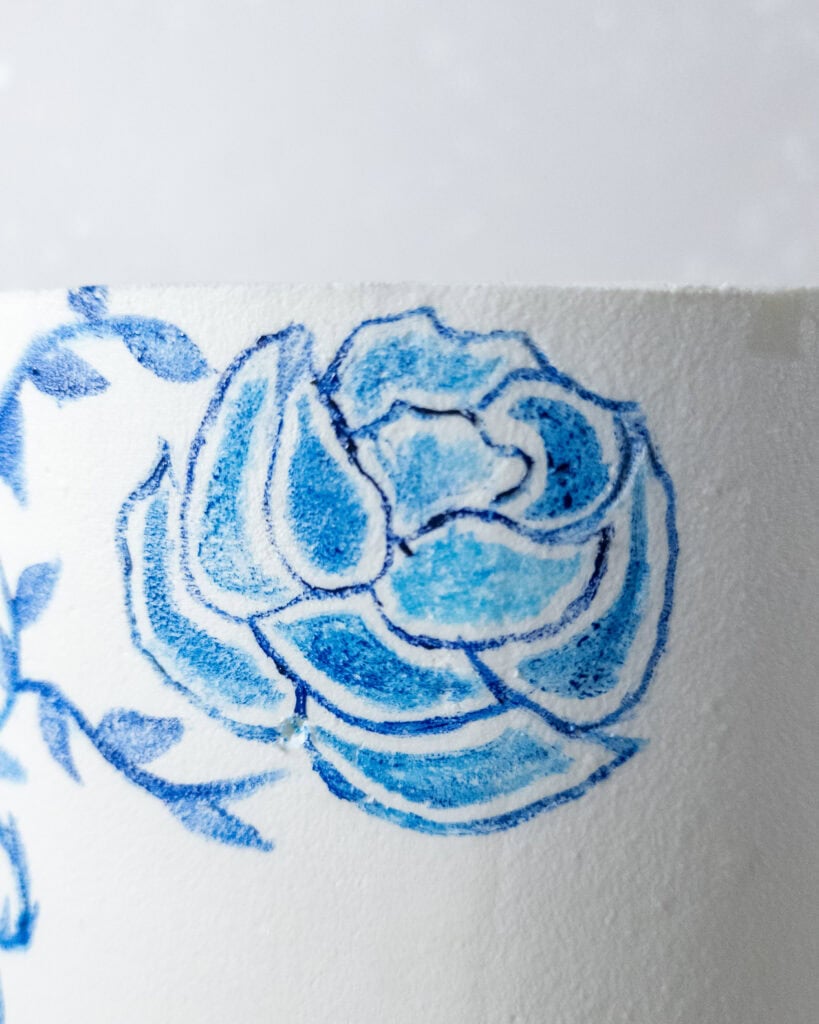
- Take your round detail brush and outline the leaf shape with some royal blue gel food coloring. Then, add another leaf shape pointing in a different direction and outline that too. Repeat to create the flower shape. You can keep the flower small and tight or add more petals to create a larger petal. Paint more flowers at random intervals around the third tier.
Tip: Dilute gel food coloring with water, lemon juice, or extracts if it isn’t thin enough to paint directly onto your cake.


Add Filler Leaves
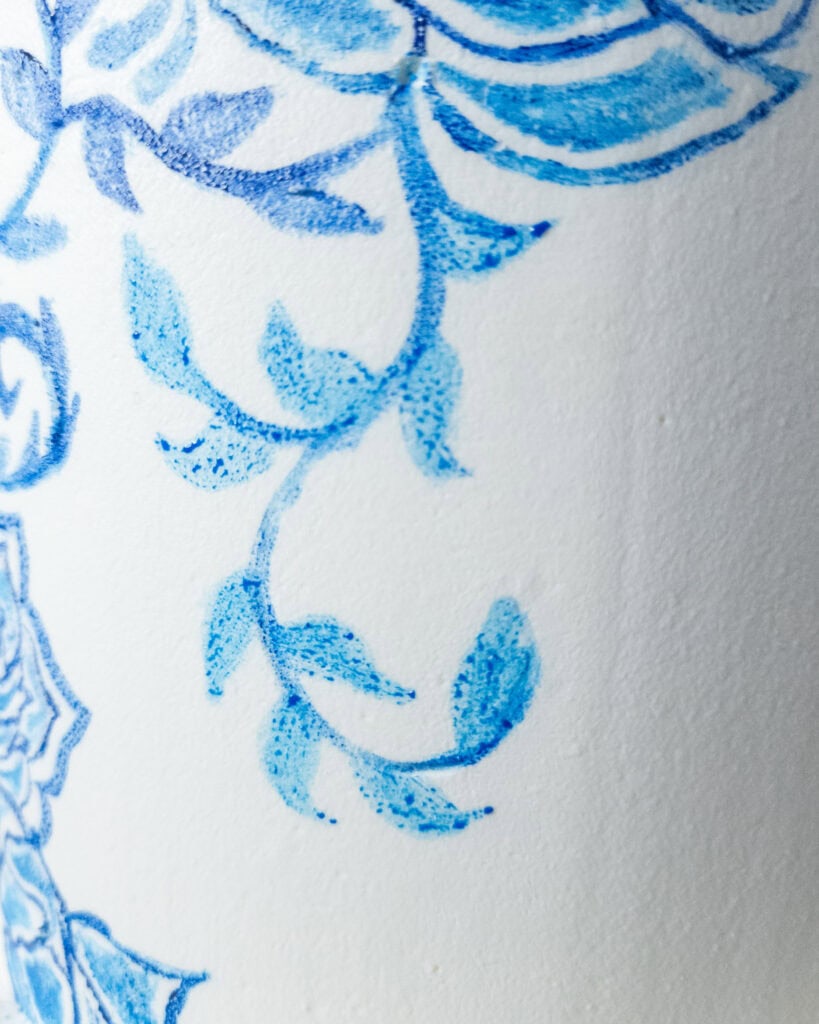
- Using your water brush pen, paint wavy lines in a series of interconnected “C” and “S” shapes for these lines.
- Paint small teardrops with the brush pen at the ends of some of the branches in sky blue gel food coloring. You can use these leaves to fill in empty space around the third tier.

Fill with Fronds
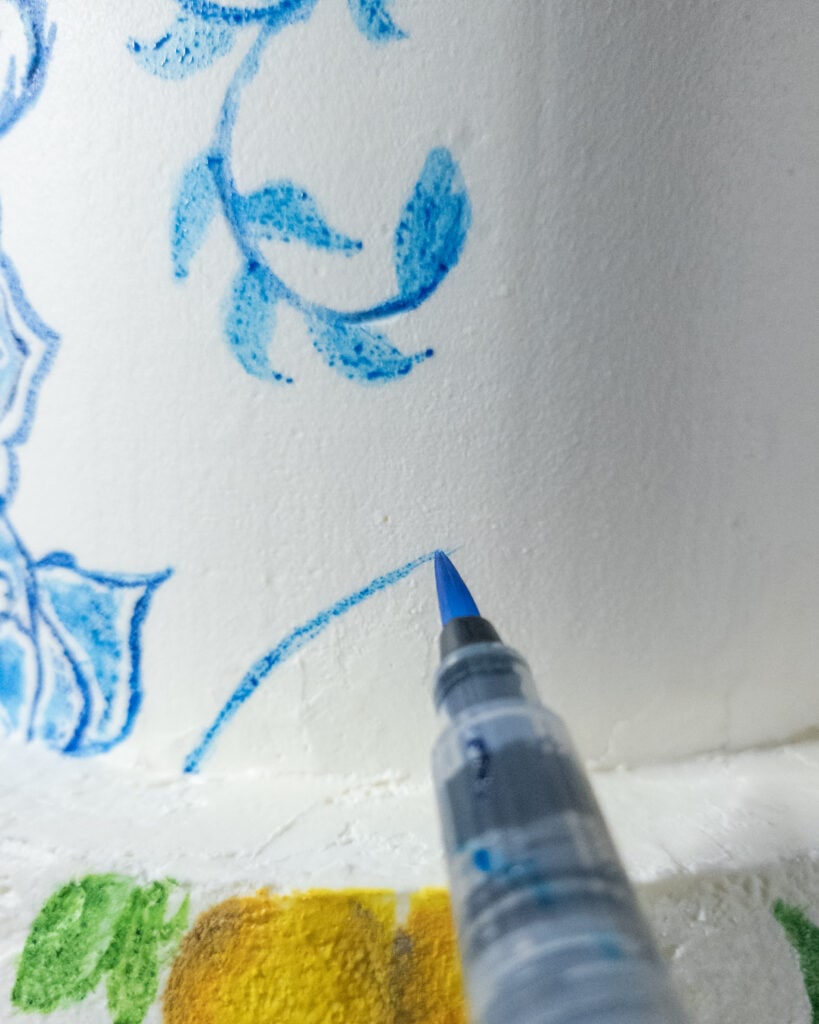
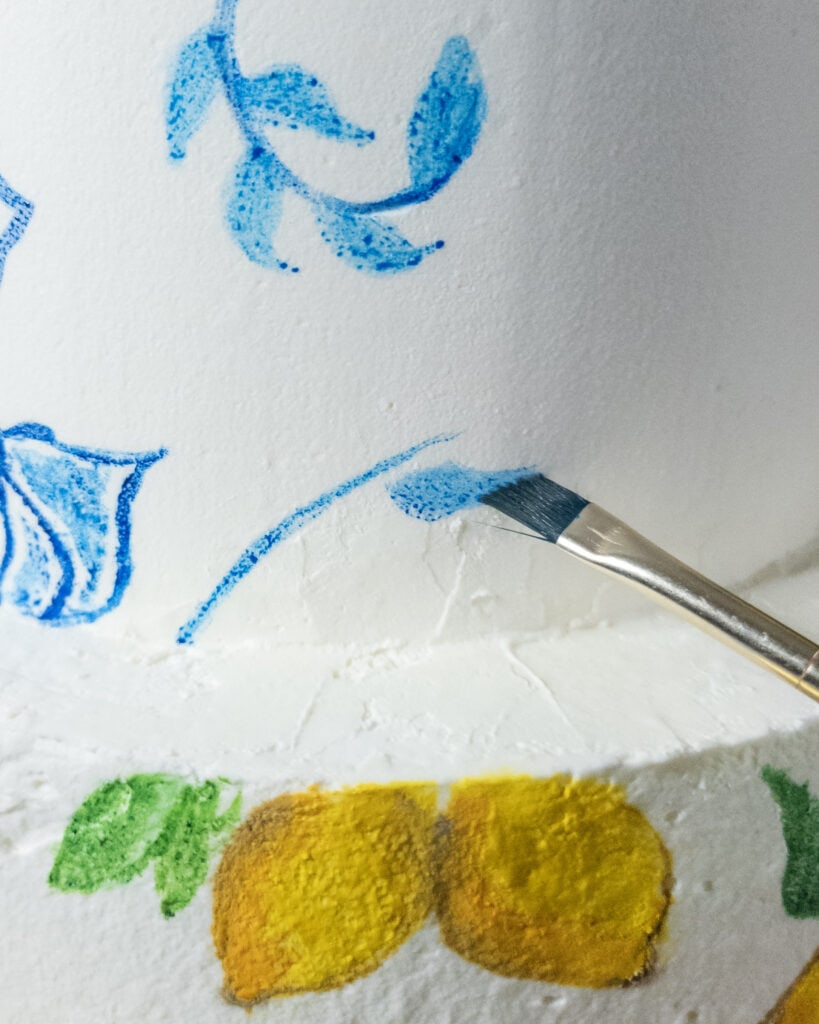
- Paint a tapered line using a water brush pen or a flat angled brush.
- Hold your flat angled brush almost parallel to the cake near the tapered line. Pull your brush away from the tapered line, angling it upward in the direction you’d like the frond to point. Do not press your brush to your buttercream or you may pull the buttercream away. Instead, keep a light, feathery touch as you paint.
- Position your brush on the other side of the tapered line and create a twin leaf opposite the first one.
- Add more leaves under the first 2 on either side of the tapered line. As you get closer to the base of the stem, make each successive leaf slightly longer and slightly more curved. Paint either 6 or 8 leaves.
- Paint a leaf at the tip of the stem to complete the frond. You can use your flat angled brush for this or, if you find it easier, switch to a brush pen.


Add Rounded Leaves
- Create 3 slightly curved tears with the water brush pen.
- Paint 2 more tiers on the other side closely packed in with the first 3.
- Outline the tears with your brush pen to create a cohesive rounded leaf.


Fill in the Tiers
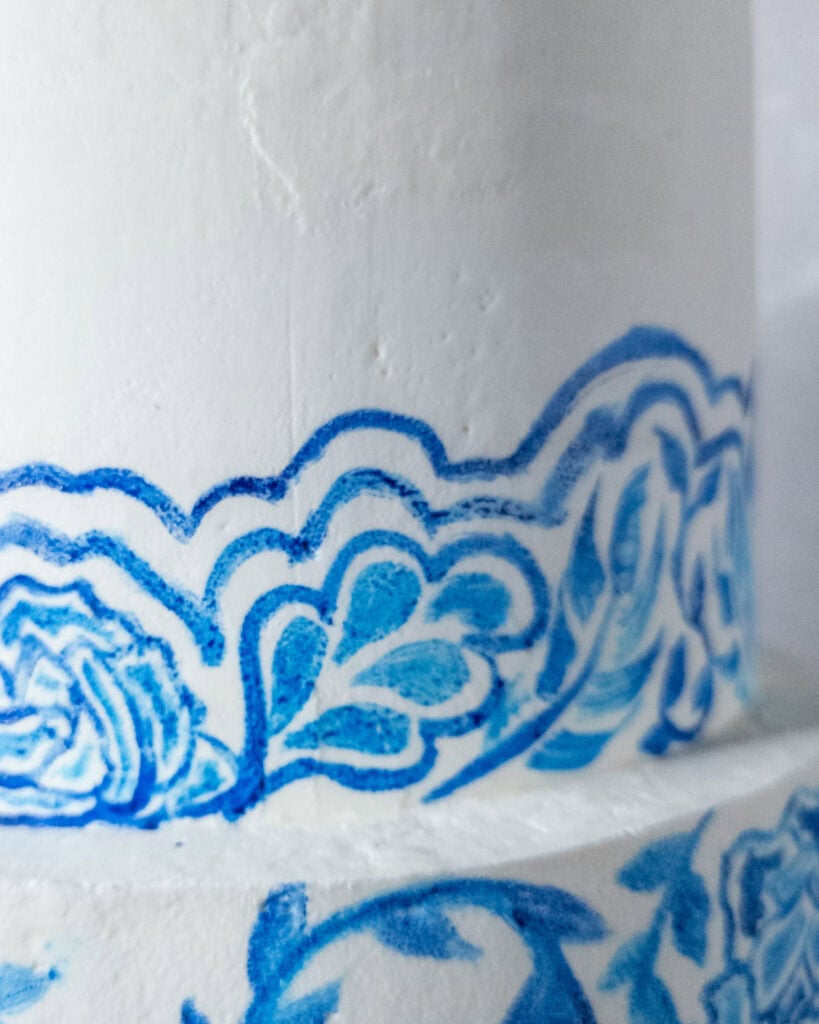
- On the second tier, rather than painting the entire tier, add a single line of motifs where the second and third tier meet. Then, leaving a bit of negative space, paint a blue line above the painted motifs.
- Add a second blue line above the first one to complete the look.

Complete the Painted Amalfi Coast Cake
- Leave the fourth tier plain and add a silk floral arrangement to complete the cake.
This tutorial originally appeared in the July/August 2021 issue of American Cake Decorating.

Faria Malik
Faria Malik, a Muslim baker from Vancouver, Canada, founded The Bookish Bakery after more than a decade of dabbling in cake decorating as a hobby. Frustrated with the need to use alcohol in most edible types of paint, Faria set to developing her own style so she could paint with buttercream without alcohol. Known for her whimsical, eclectic, and vibrant designs, she specializes in cake paintings of every variety. She is especially enchanted by the versatility of buttercream and she adores teaching other cake artists how to create unique designs in her signature style, via online courses, in-person workshops, and the occasional magazine tutorial.