

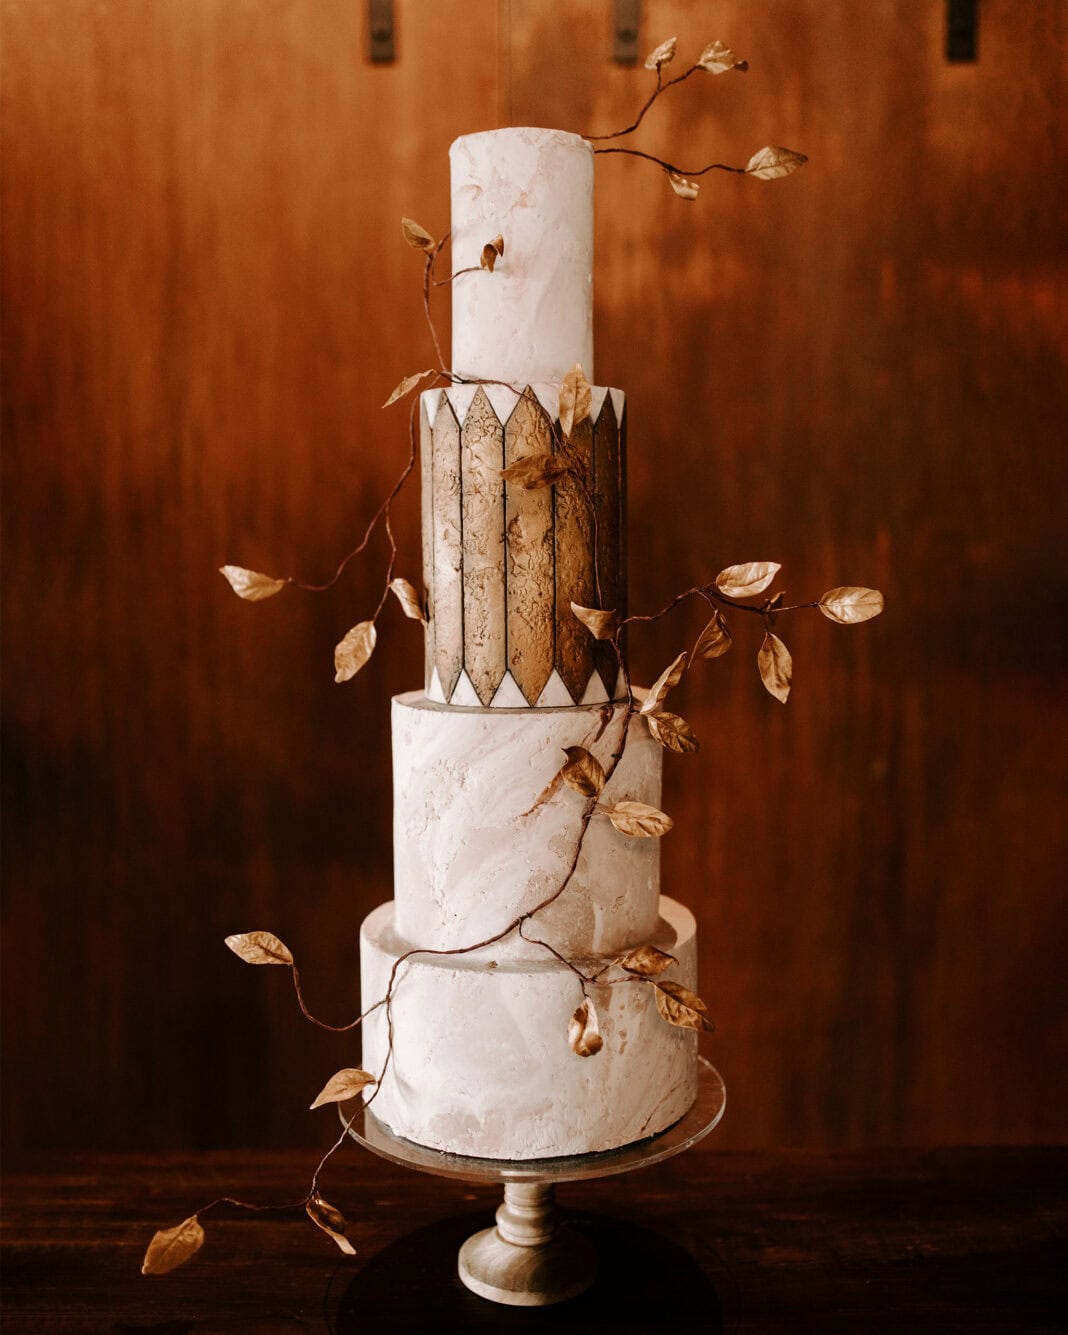
Texture, fine details, and distinctive designs are becoming more and more popular as cake decorating is recognized as an art form, and cake artists are sought after to create cakes as individual as the couples who book them. Over the last few years, I have been experimenting with new ways to use fondant that break away from tradition. The new rules of fondant are that there are none. Case in point: this tarnished gold fondant tiles tutorial.
Metallic colors and texture are very popular among engaged couples who want a break from the traditional white wedding cake. I chose to share this technique because I think it is an amazing way to create that wow factor that looks elegant, artistic, and dramatic. Once you learn this technique, you can easily alter it to create your own unique designs. My top tip to stand out in the wedding cake business right now? Experiment with color, new textures, and create cakes that reflect your personal style as an artist.
Edibles:
- 6-inch double-barrel cake
- Fondant: light brown, white, pink, and brown (Satin Ice)
- Dried fondant pieces
- Water
- Lemon juice or clear alcohol
- Luster dusts: light gold, dark gold, and bronze
- Petal dust: gray
Equipment:
- Ruler
- Cardstock
- Pencil
- Scissors
- Rolling pin
- Texture stamp or other texture tool
- Multi-wheel pastry cutter
- Large knife
- Razor blade or X-Acto knife
- Sponge brush
- Small flat brush
Create a Template for the Tarnished Gold Fondant Tiles
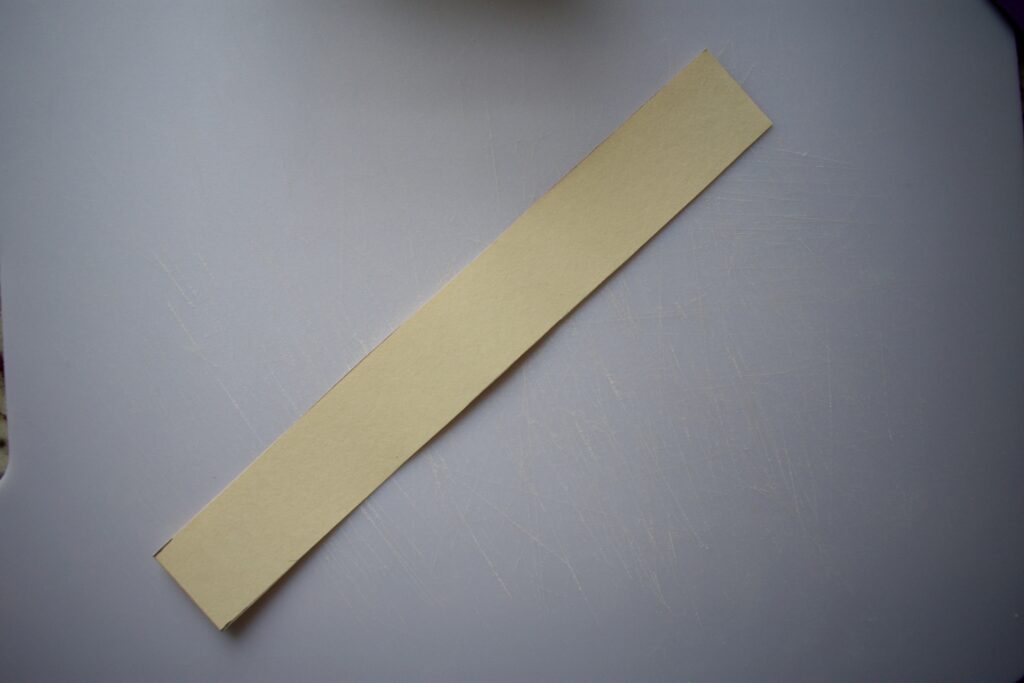
- Use a ruler to measure the height of the cake tier. Use this measurement to create the length of your template on a piece of cardstock. Mark the width of the template at 1¼ inches. Cut out the rectangle strip.
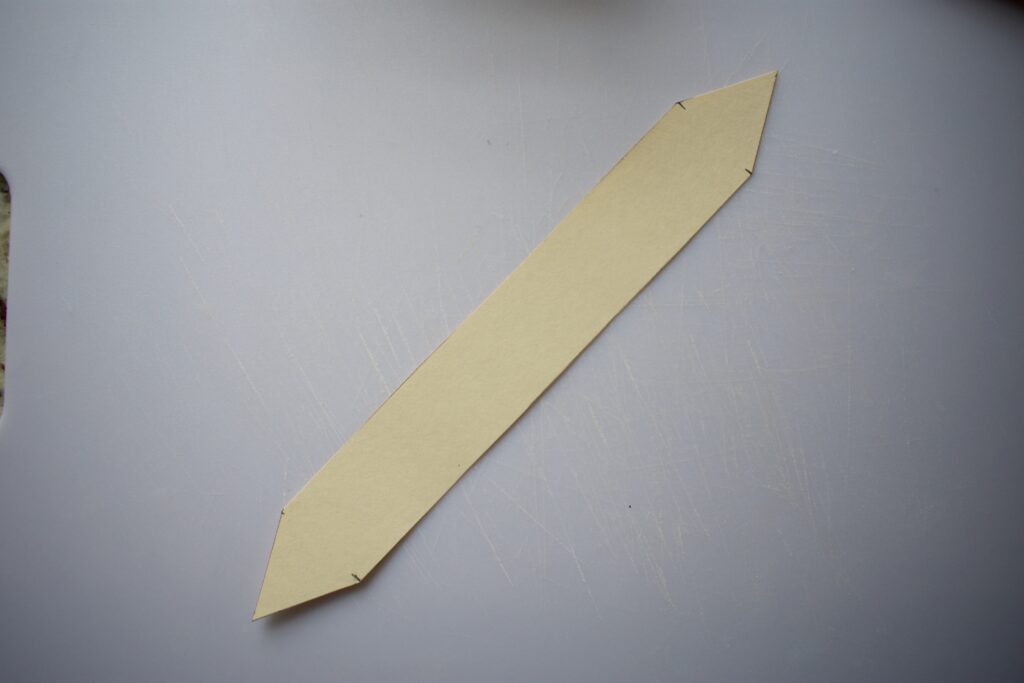
- Mark the center of the top. Mark the sides 1¼ inches down from the top, or the same width you chose. Draw lines to connect the marks and cut.

Cut Out the Fondant Tiles
- Mix your light brown fondant with some pieces of dried fondant. This will help create more texture. Roll out a panel of fondant that is the height and diameter of your cake.
- Add some texture by using a texture stamp, texture mat, or a balled-up piece of aluminum foil. Allow your panel to dry for 10 to 30 minutes.
- Adjust your multi-wheel pastry cutter to the width of your template. Mark but do not cut your panel by lightly rolling your pastry cutter from the bottom of the panel to the top, ensuring you are keeping a straight line. With each new mark, trace the last line you made with the cutter to make sure all the lines are the same.
- Using a large knife, press into the lines you just created to cut the fondant. Do not drag your knife, as this can cause your fondant to pull and stretch, resulting in uneven lines.
- Use your template and a sharp razor blade or X-Acto knife to cut the point.


Place the Fondant Tiles on the Cake
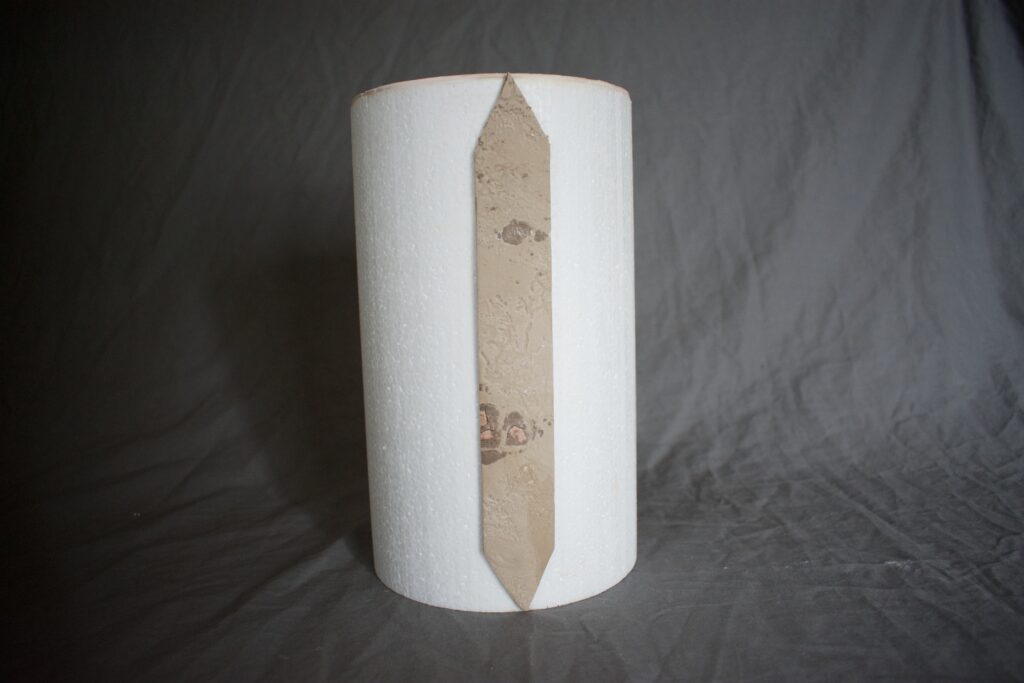
- Adhere your first tile by brushing the back with a bit of water. Ensure your first tile is as straight and level as possible. This will help to keep the rest of your tiles straight.
- Place tiles on either side of your first one, leaving just a tiny space between them. Continue placing tiles all the way around the cake.
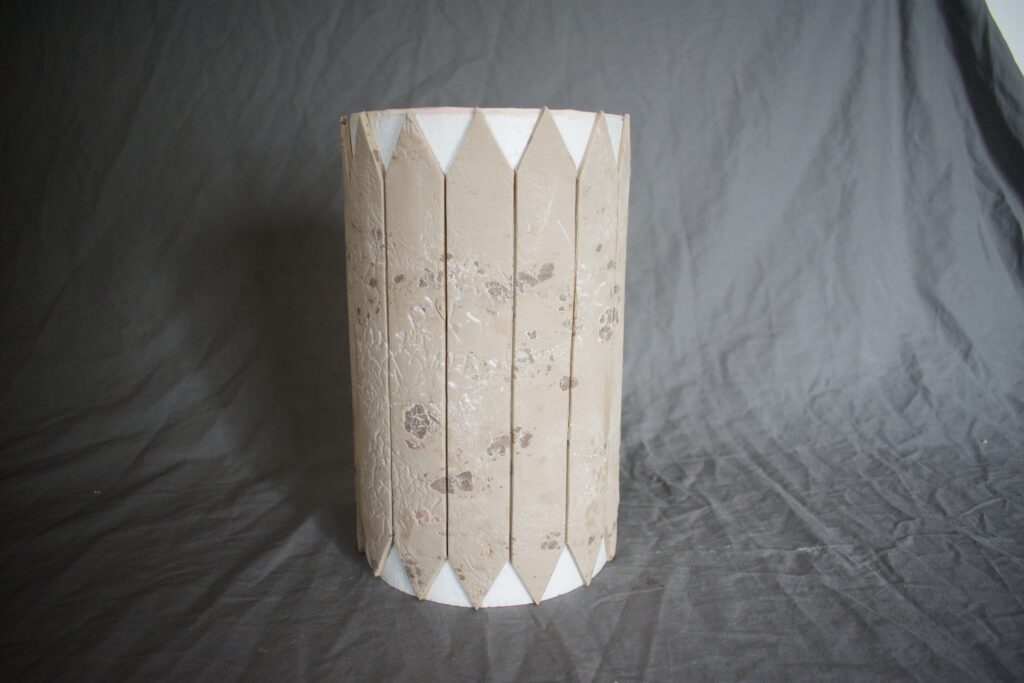
Paint and Tarnish the Fondant Tiles
- Make a paint by mixing luster dust with lemon juice or alcohol. Start with one shade and fill in large sections of the tiles.
- With other shades, fill in other sections.
- Use a sponge brush to blend all the colors together. This is an intuitive artistic process, so have fun blending and layering your paint until you feel happy. Having lots of variation in color will add to the tarnished effect. Aim to have mostly light gold with patches of dark gold and highlights of bronze. Allow your paint to completely dry before moving on to the next step.
- Using gray petal dust and a small flat brush, lightly brush all the crevices where the tiles meet. Just a little petal dust can go a long way, so start with less and layer on more if you feel you need it. Aim to brush the edges of all the tiles.


Finish the Tarnished Gold Fondant Tiles
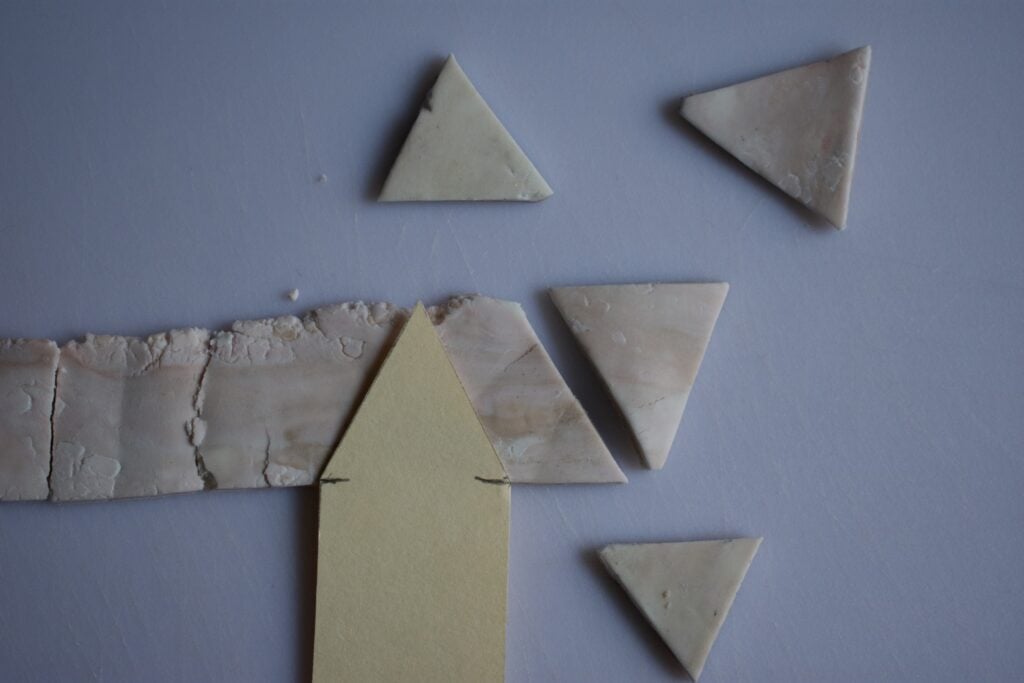
- Roll out a strip of marbled fondant (mixed white, brown, and pink) similar to the top tier of the cake. Ensure it is the same thickness as your tiles. Follow the same drying steps as before.
- Use the end of your template to cut out small triangles to fill in the remaining gaps. It may be necessary to trim each one slightly as you place them. Adhere them by brushing the backs with water.


This tutorial originally appeared in the May/June 2020 issue of American Cake Decorating.

Spencer Trygve Oss
Spencer Trygve Oss is a self-taught cake artist, instructor, and a lifelong
baker. Spencer spent more than a decade in the culinary industry learning
to hone his skills as a baker. Spencer’s truest passion had always been art,
and he found cake decorating as a way to combine his love for design and
baking—thus Spencer Trygve Cakes was born. Spencer has been serving
the Chicago wedding community for many years, has been published
in dozens of wedding publications in print and online, and has received
several awards for his contributions. Spencer’s mission is to continue to
serve the cake-decorating community by inspiring others to create meaningful and authentic art.