

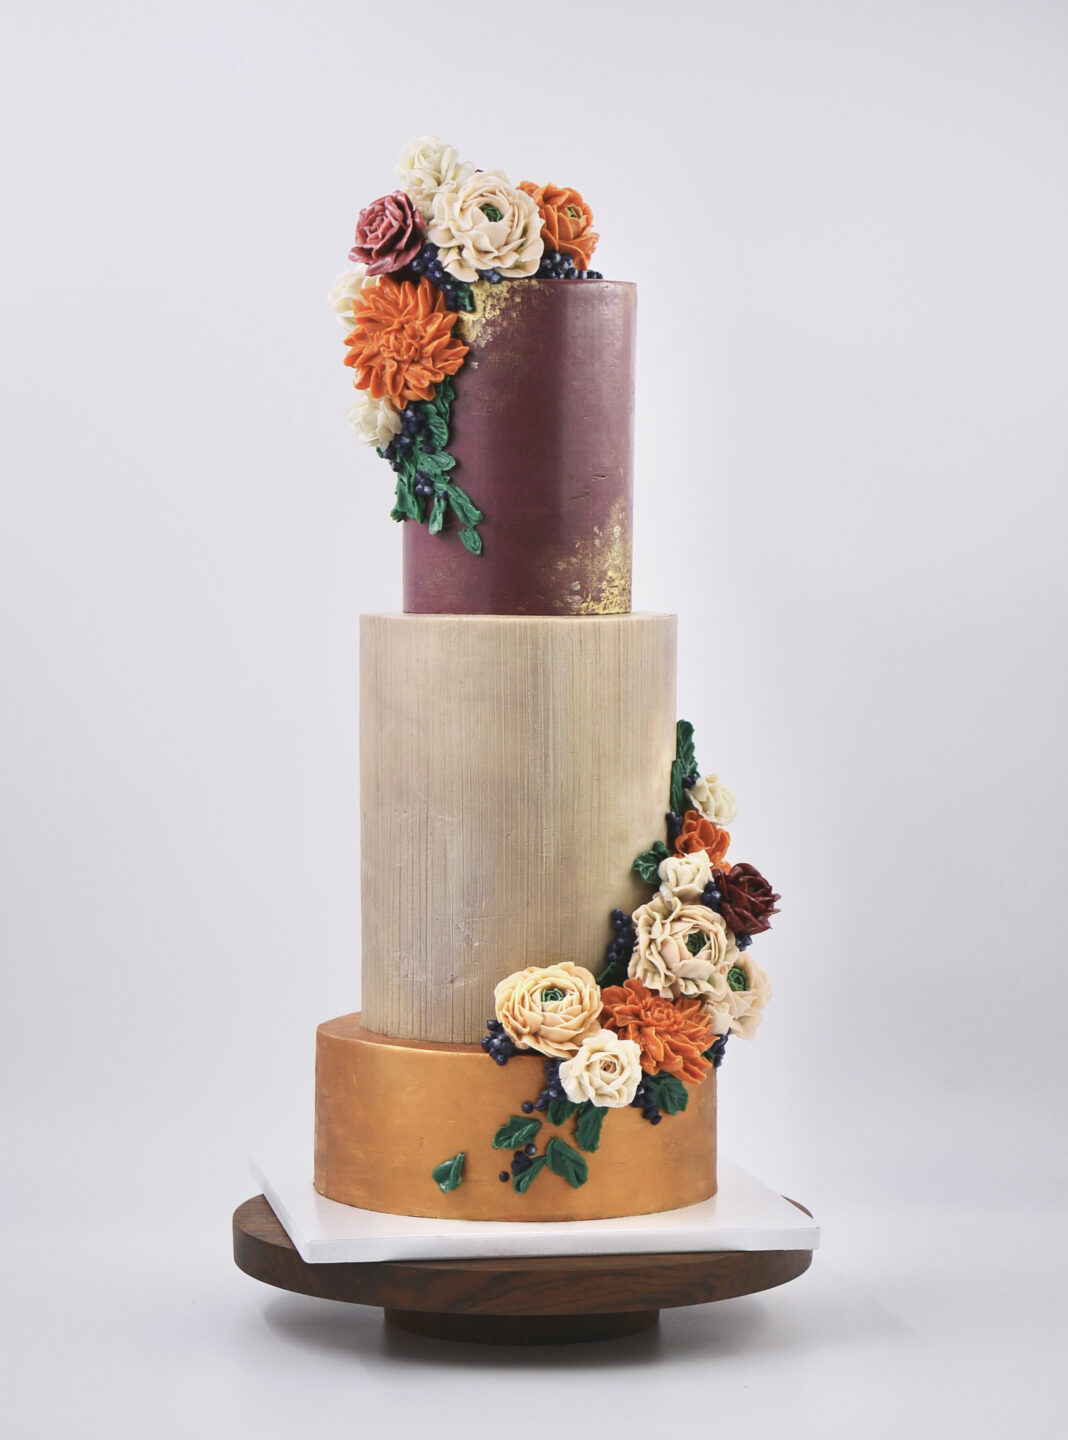
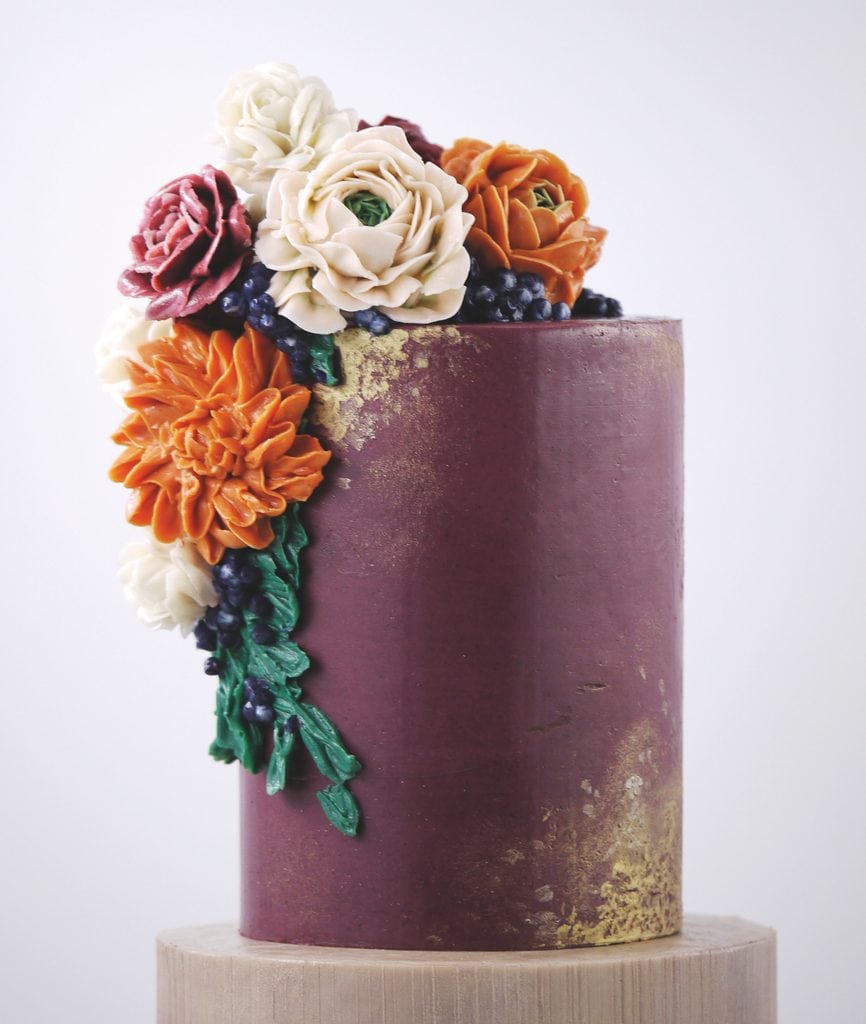
Learn how to make a romantic cake with this fall buttercream flowers tutorial from Linh Tran. Pipe ranunculus and dahlia flowers and attach them in a cascade over a luster-dust-highlighted cake for a perfectly autumnal feel.
Edibles
- 3 cakes: 4 inches, 6 inches, and 8 inches
- Buttercream
- Gel food color: yellow, brown, burgundy, purple, green, pink, orange, and blue
- Luster dust: gold and bronze
- Lemon extract
- Buttercream roses: burgundy and white
Equipment
- Cake turntable
- Tall scraper
- Paint palette
- Paintbrushes
- Piping bags
- Couplers
- Offset spatula
- Piping tips: #8, #59, #101, #104, and #124K
- Scissors
- Parchment-paper squares
- Large flower nail and holder
- Flower scissors
- Lidded container
- Toothpicks
- Paper towels
Coat the Cakes
- Cover the cakes with buttercream as follows: the 8-inch cake in light yellow, the 6-inch cake in light brown, and the 4-inch cake in plum made by mixing burgundy, purple, and brown. Chill the 8-inch and 4-inch cakes in the refrigerator.
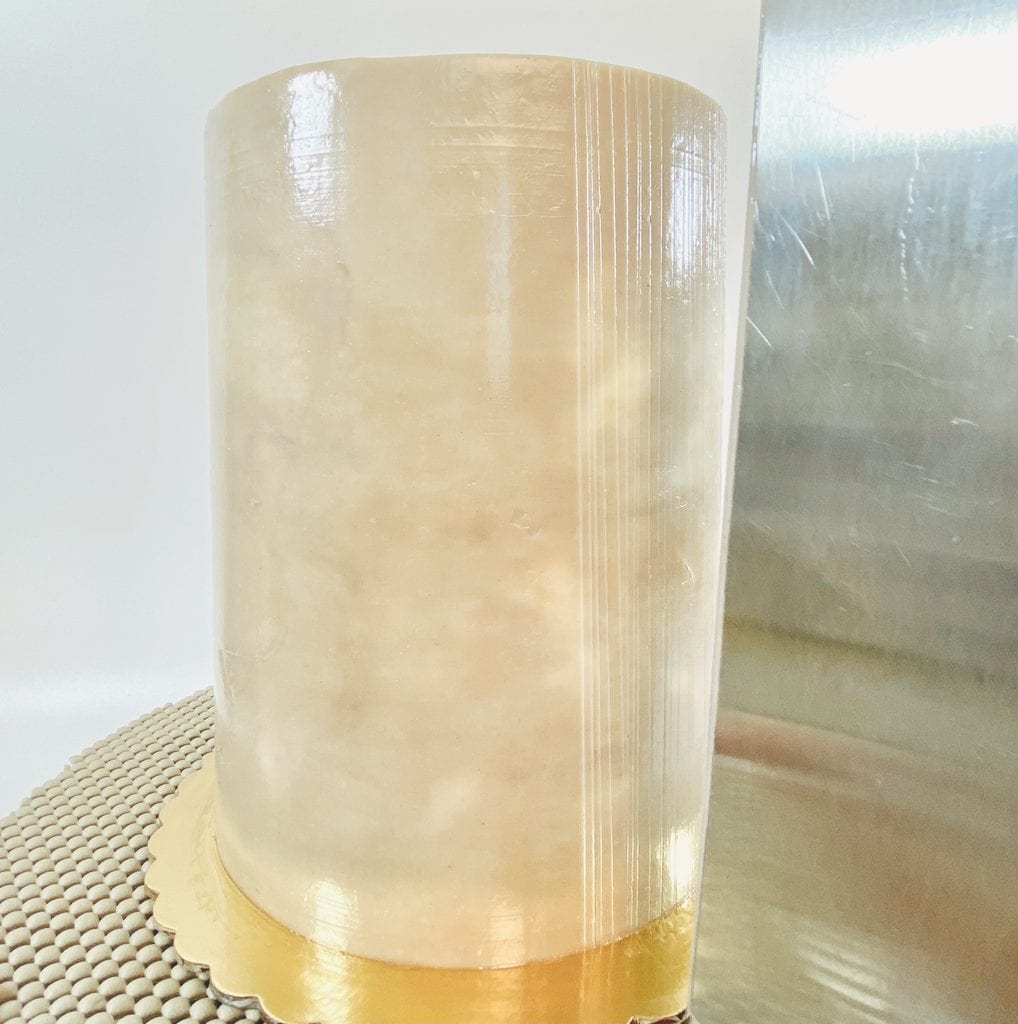
- Take the tall scraper and align it vertically against the 6-inch cake. Then indent slightly, leaving about ¼ to ½ centimeter of spacing. Create these vertical lines all around the cake. Chill the cake in the refrigerator.
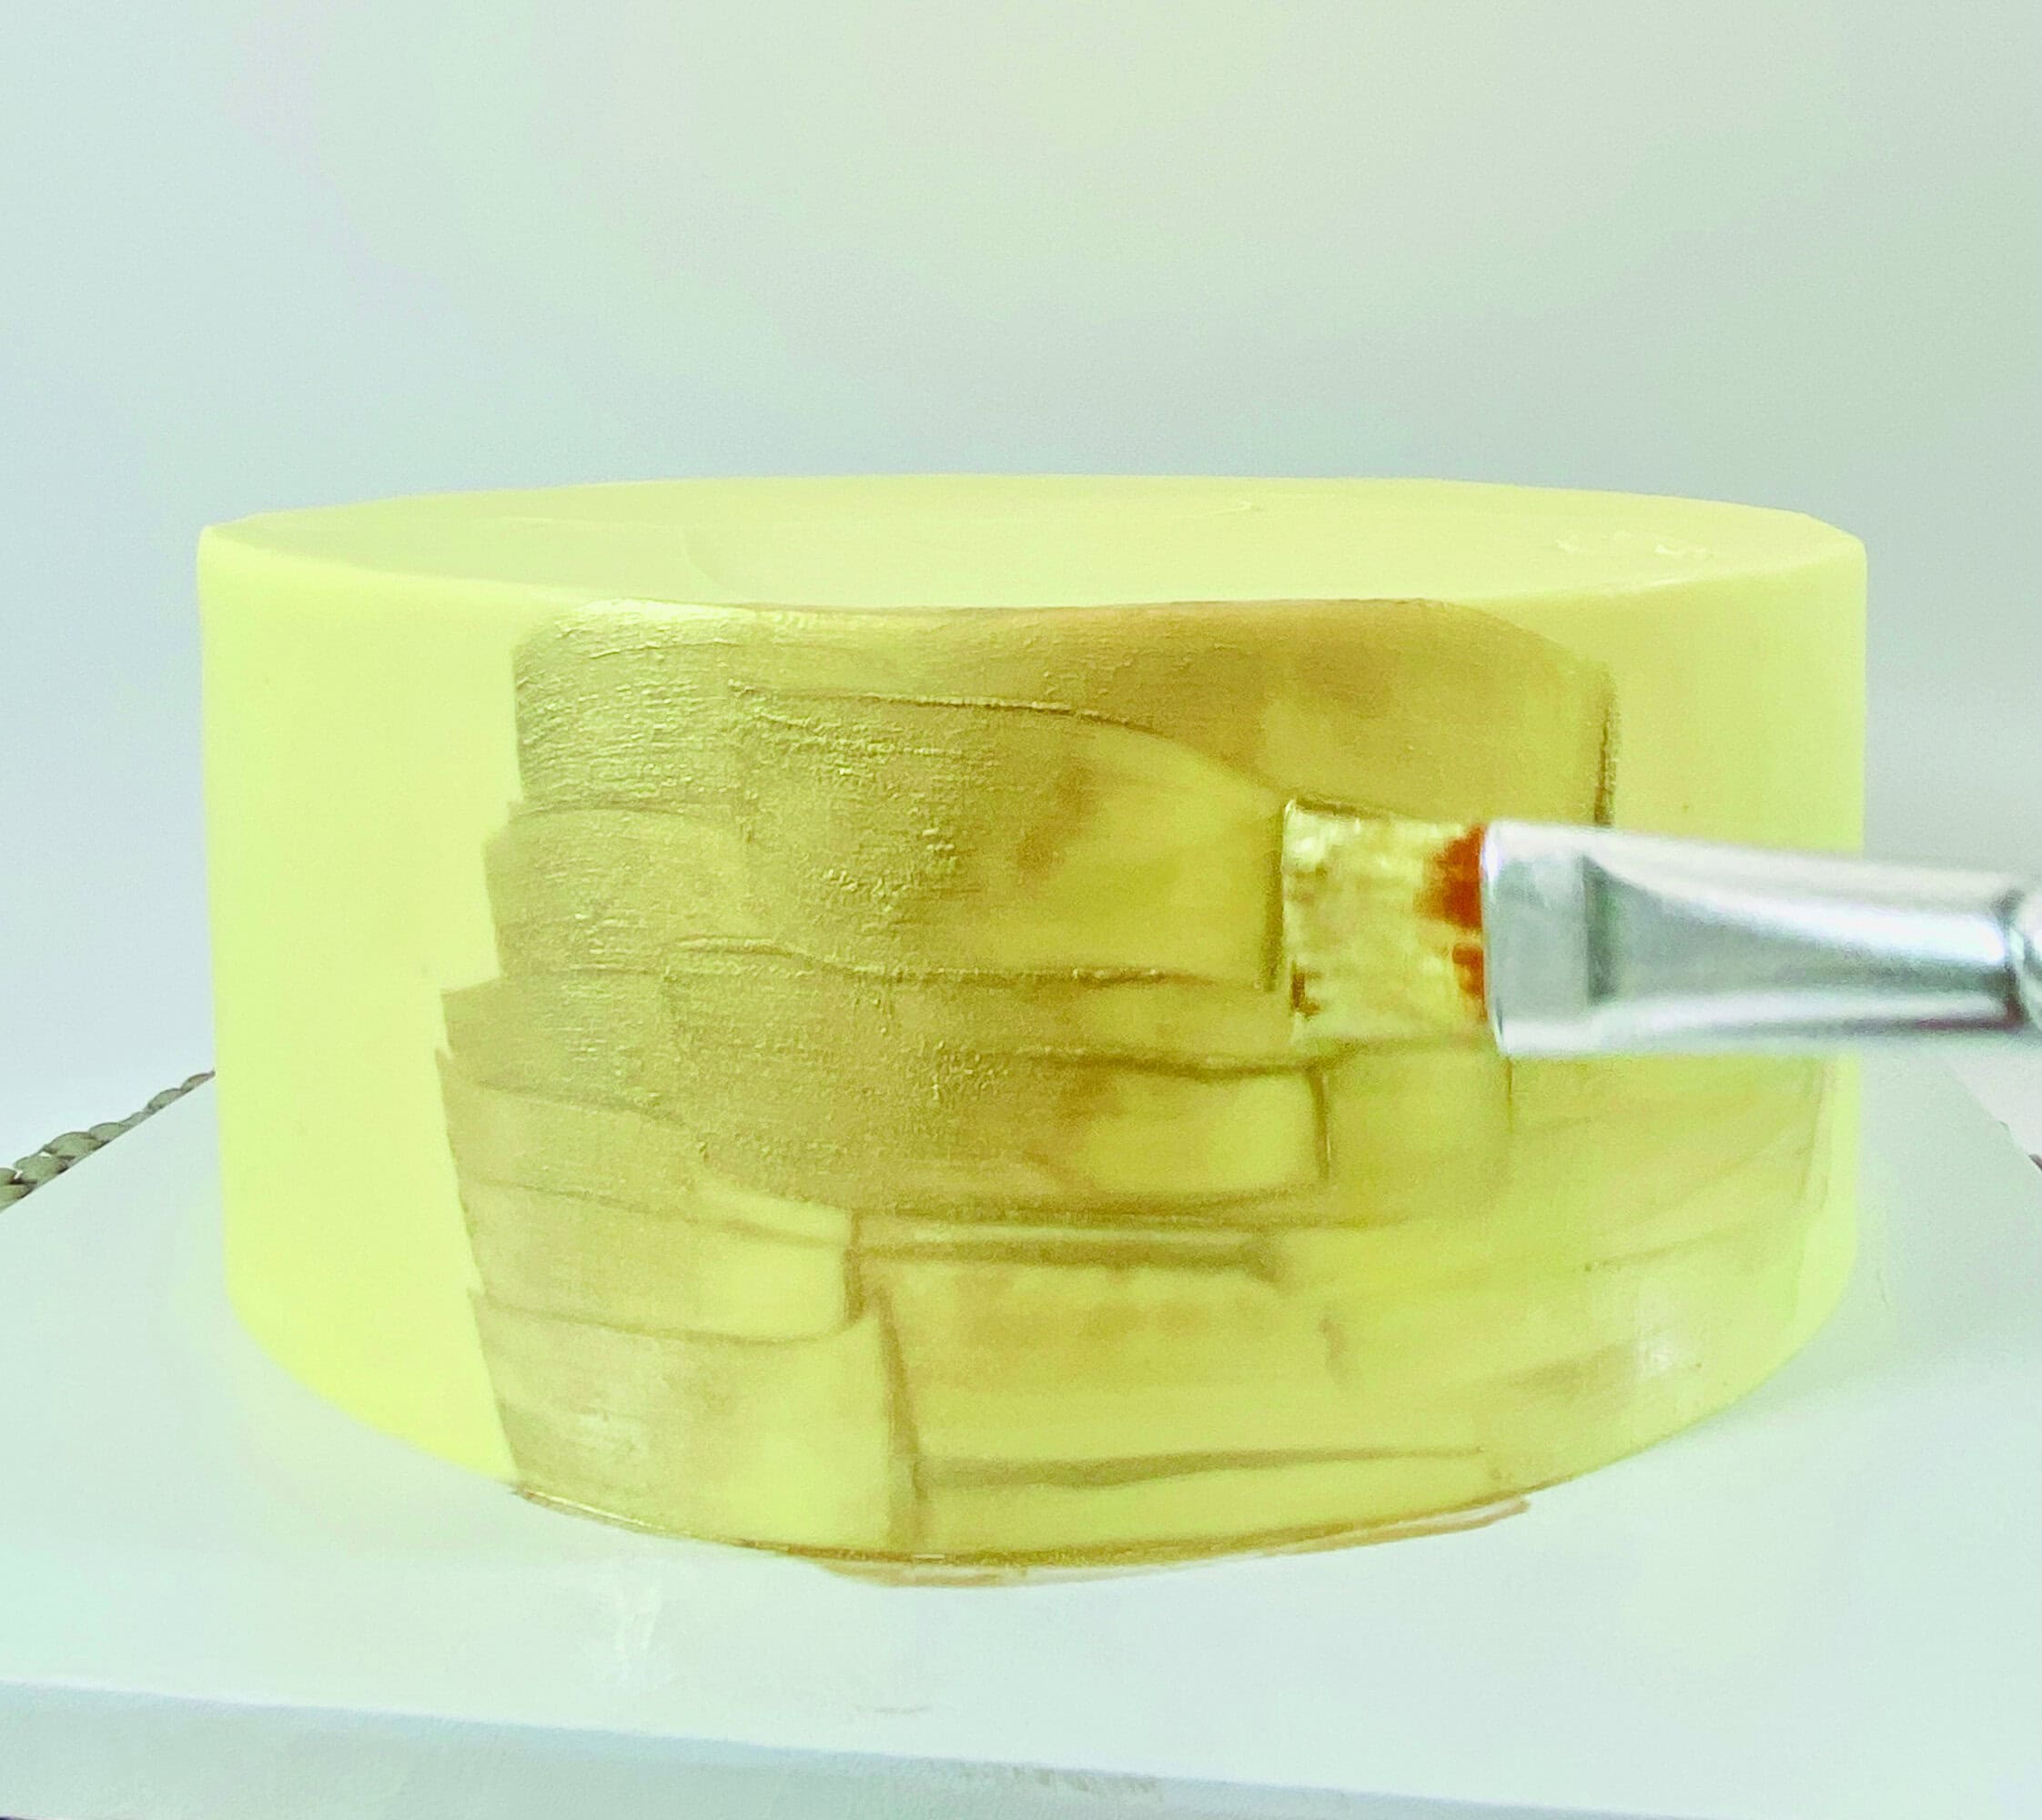
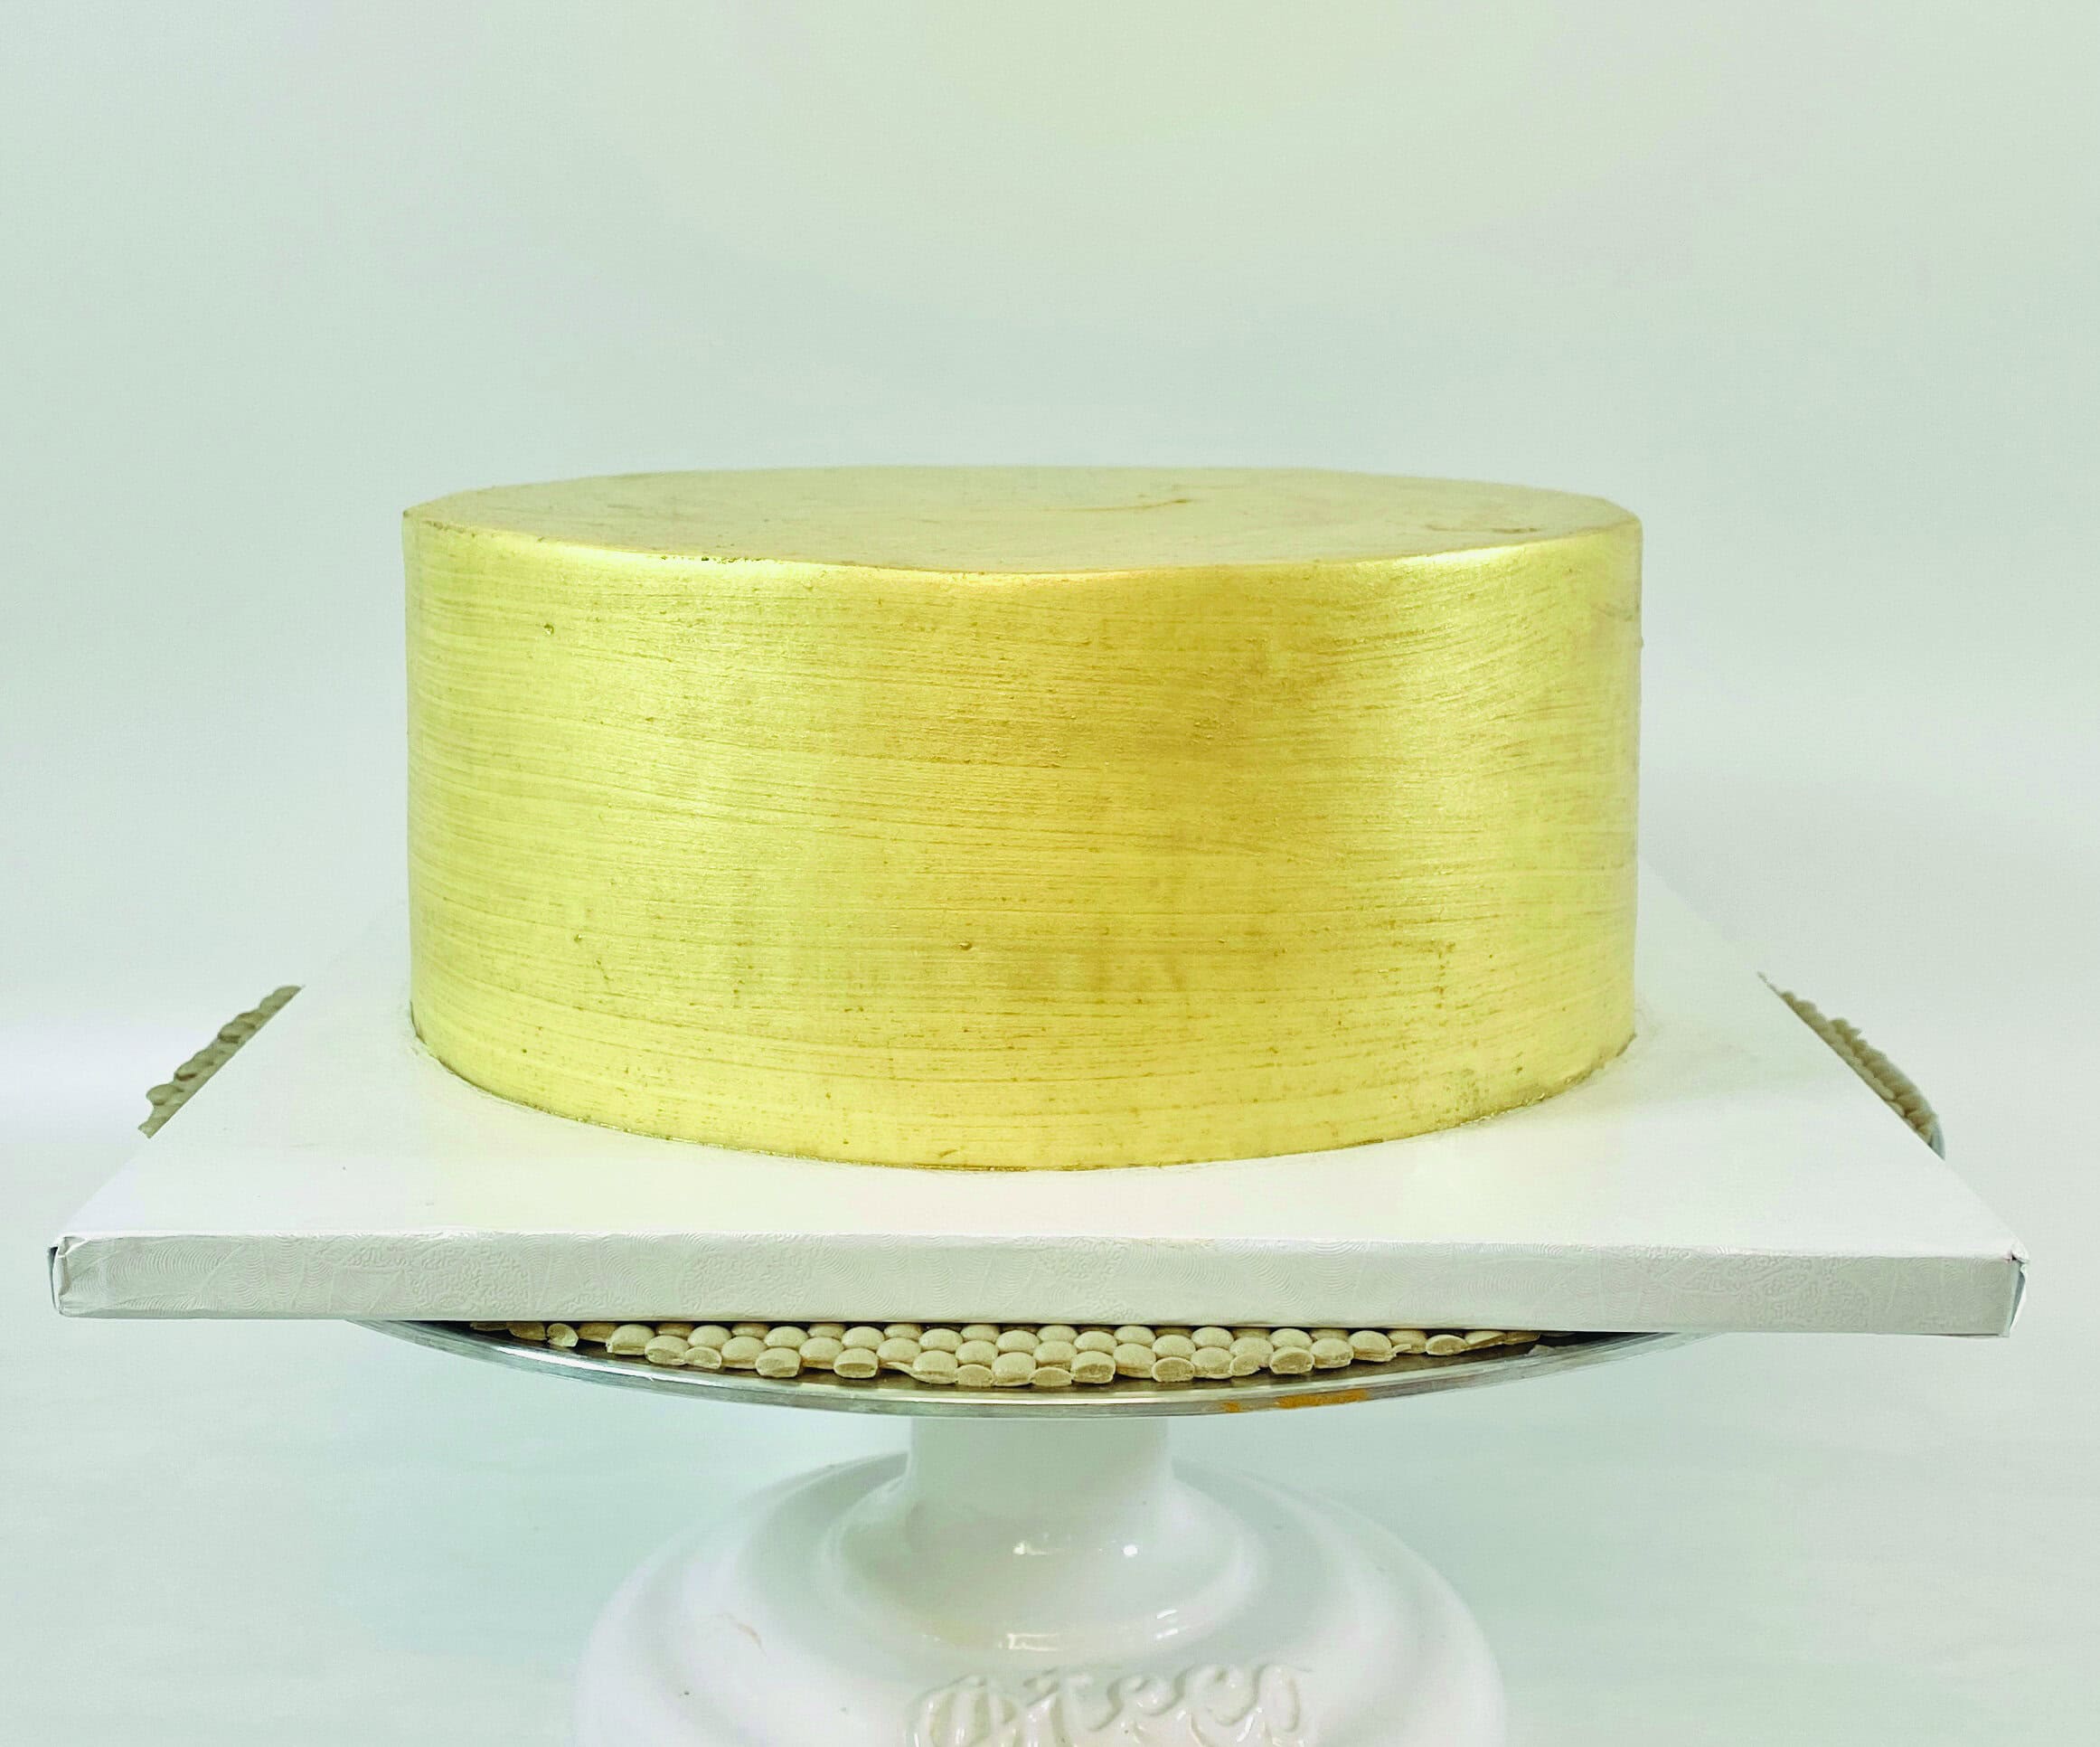
- Mix gold luster dust with a little lemon extract on a paint palette until the mixture is a medium thickness. Paint the gold mixture onto the chilled yellow cake with a flat paintbrush and smooth out any streaks by spinning the turntable a full rotation while holding the brush still. Coat once for the base layer and let dry.
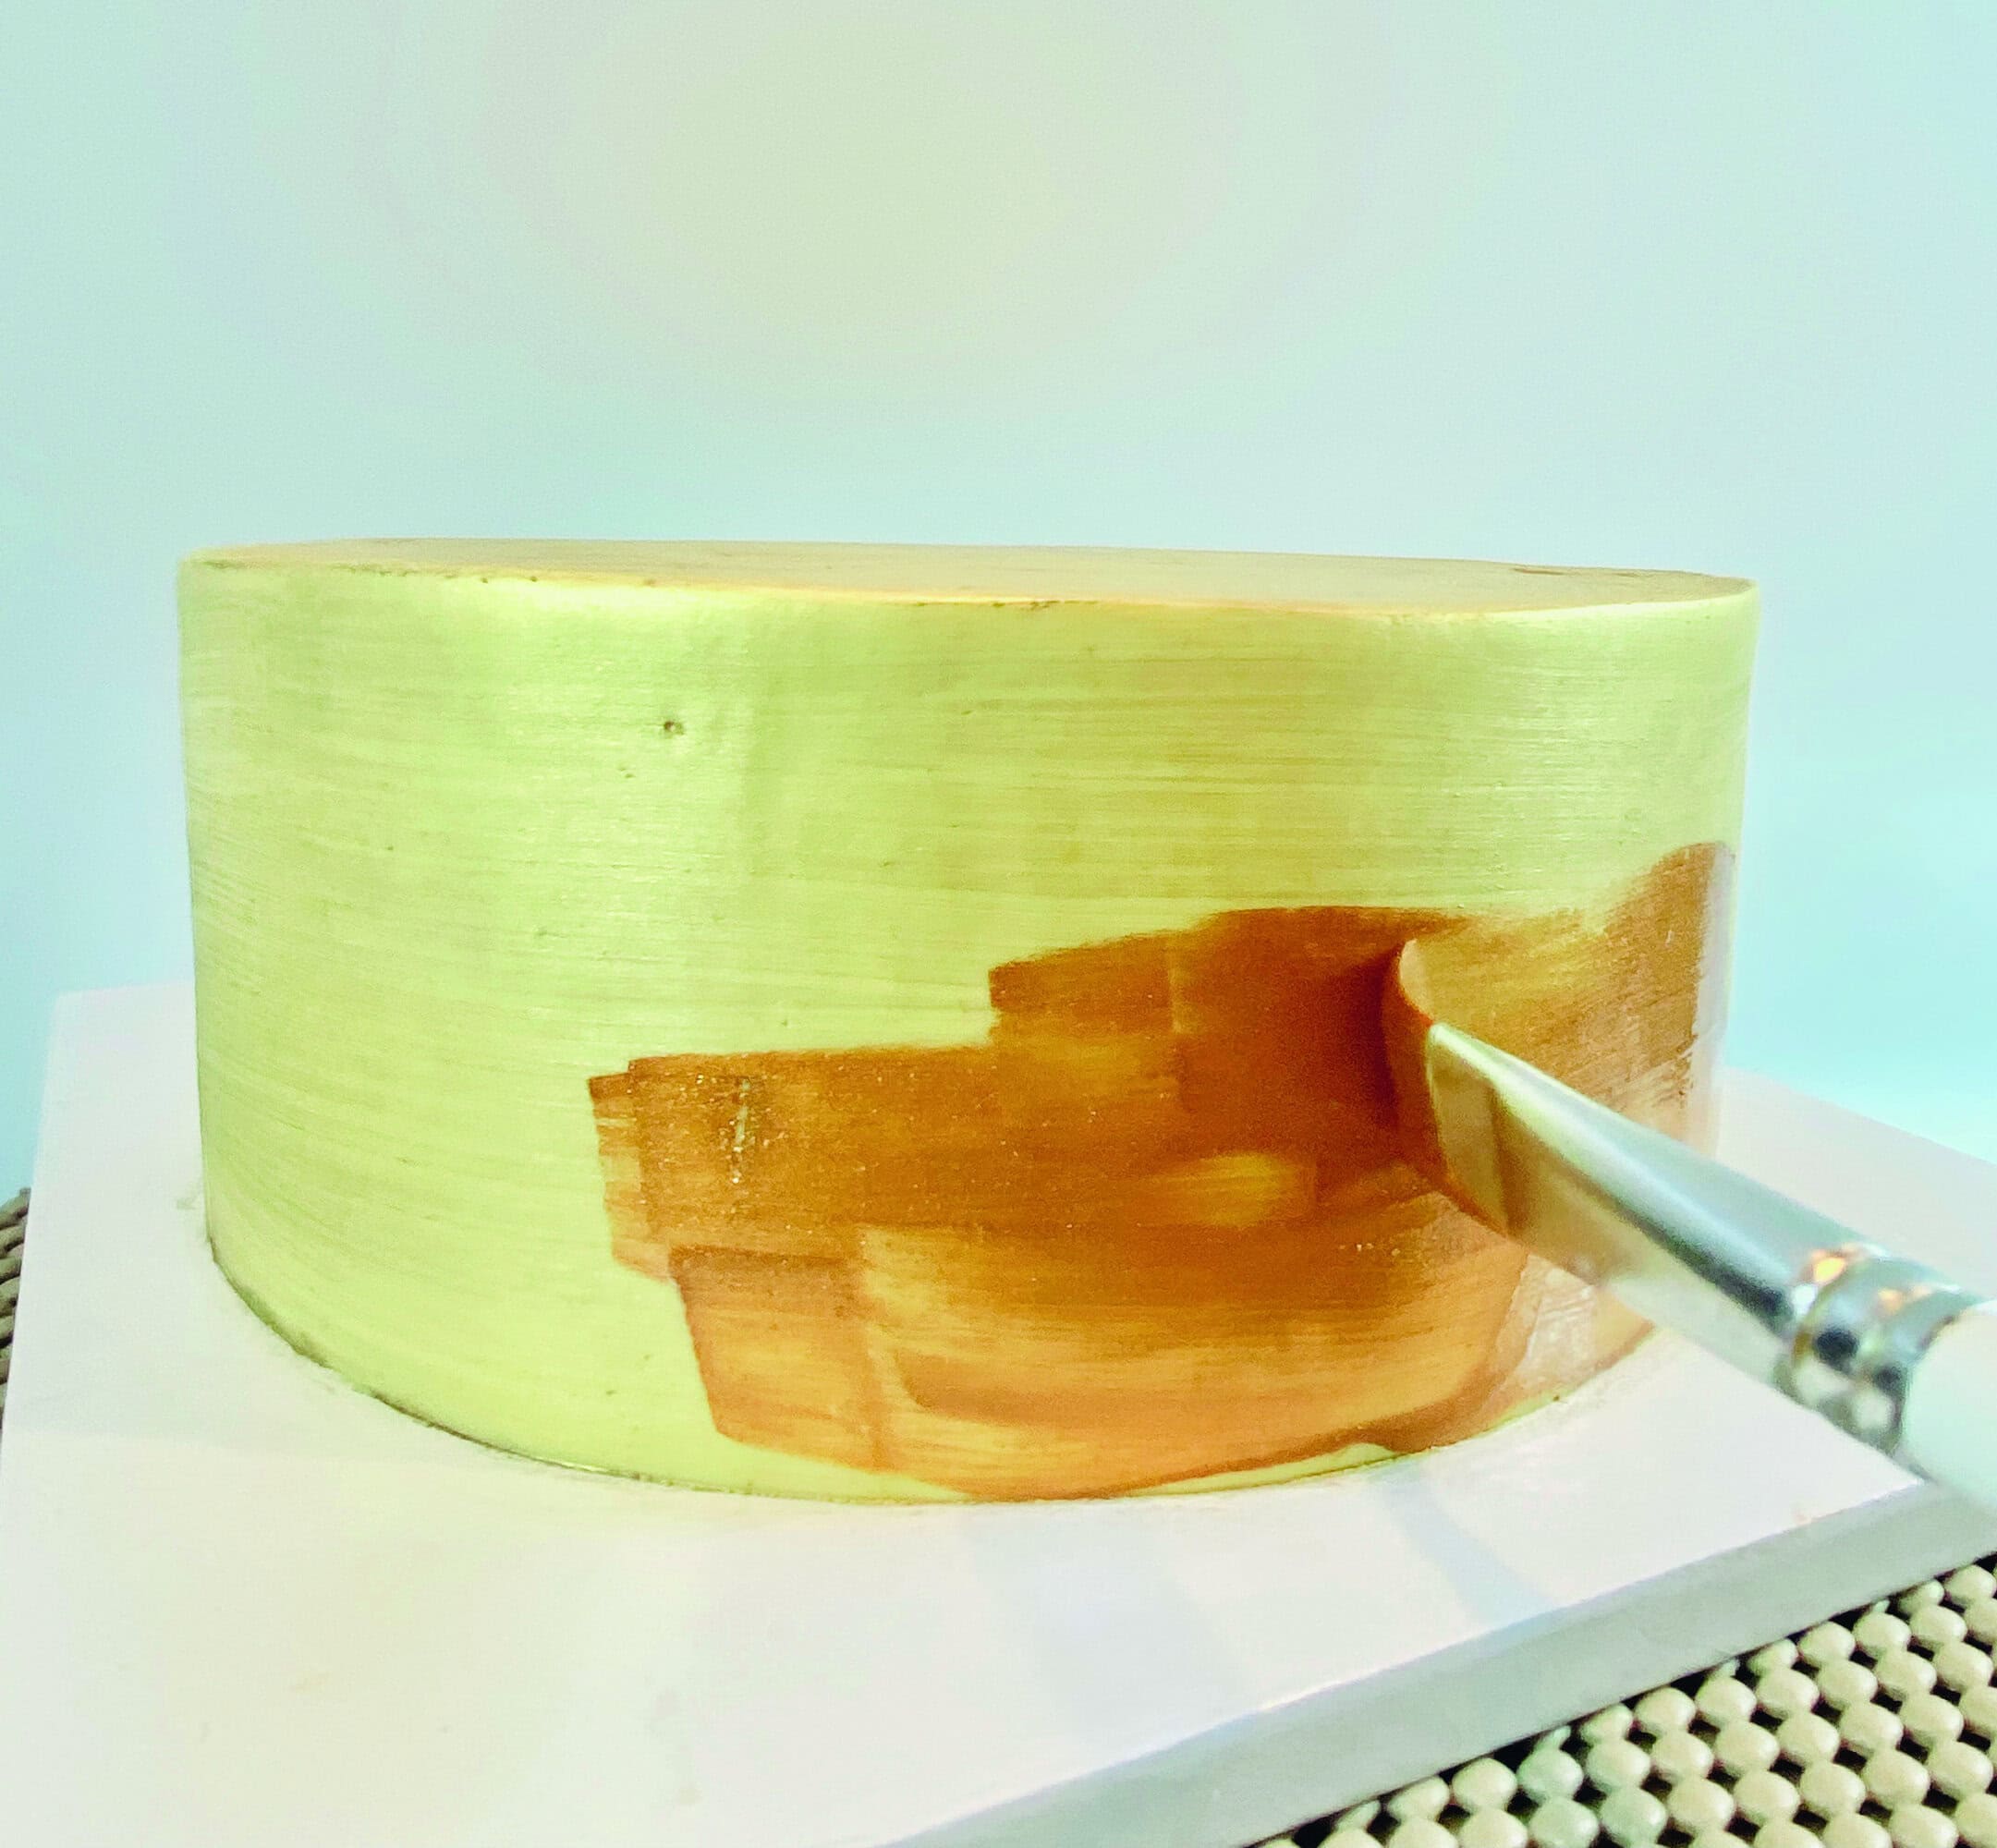
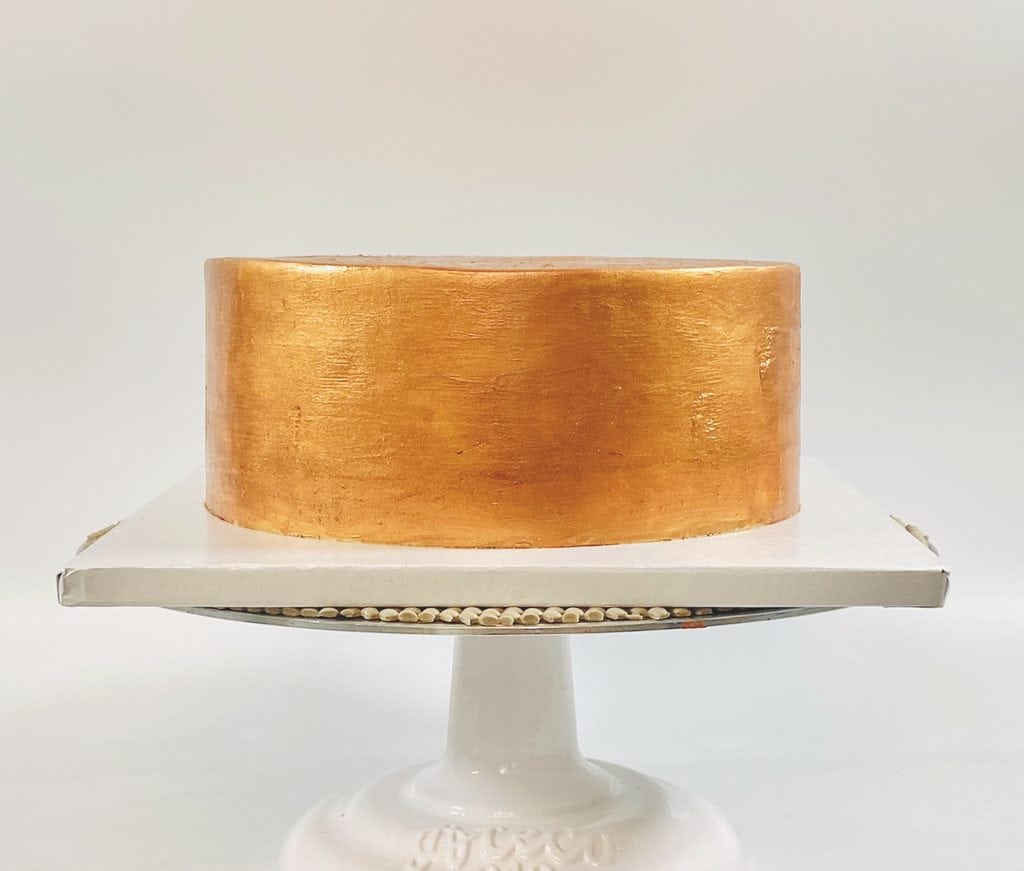
- Mix bronze luster dust with a little lemon extract and paint 2 to 3 coats of the bronze mixture onto the cake, letting each coat dry in between. Smooth out any streaks and chill the cake in the refrigerator.
Prep the Ranunculus Buttercream
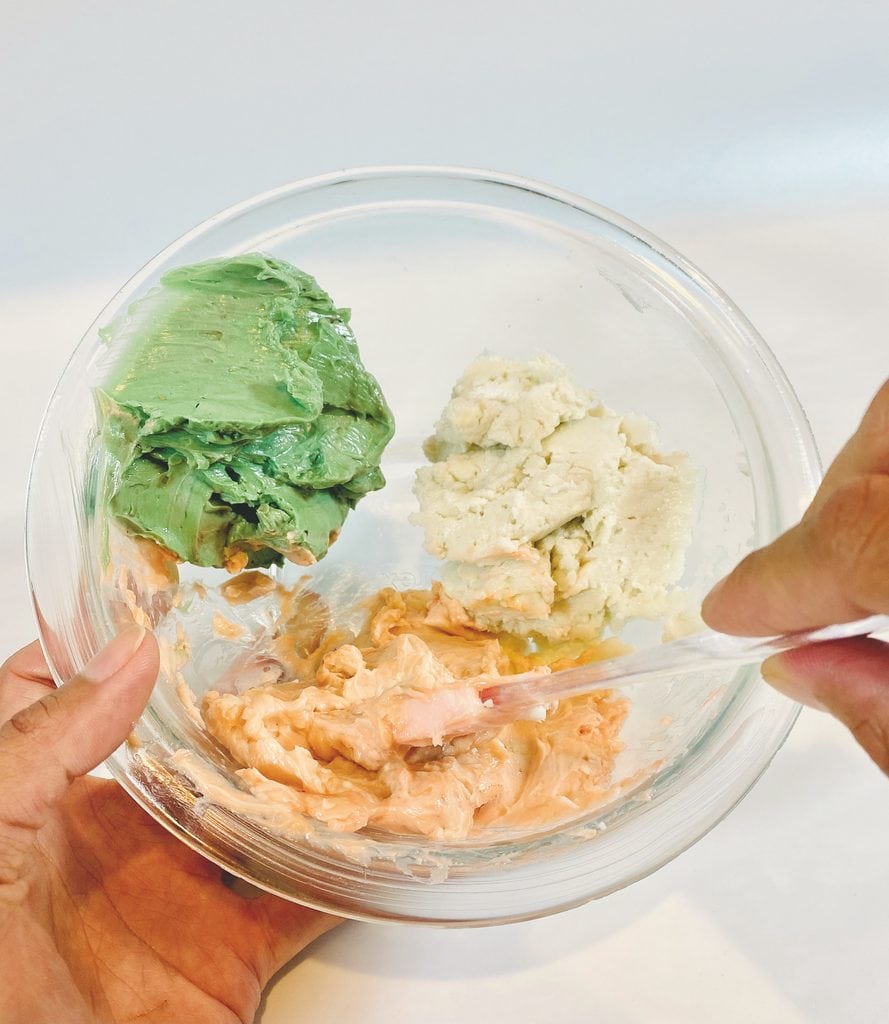
- Prepare light green, light pink, and some white buttercream, enough for 4 flowers.
- Fill a piping bag fitted with a coupler with light green buttercream, leaving a small amount left over.
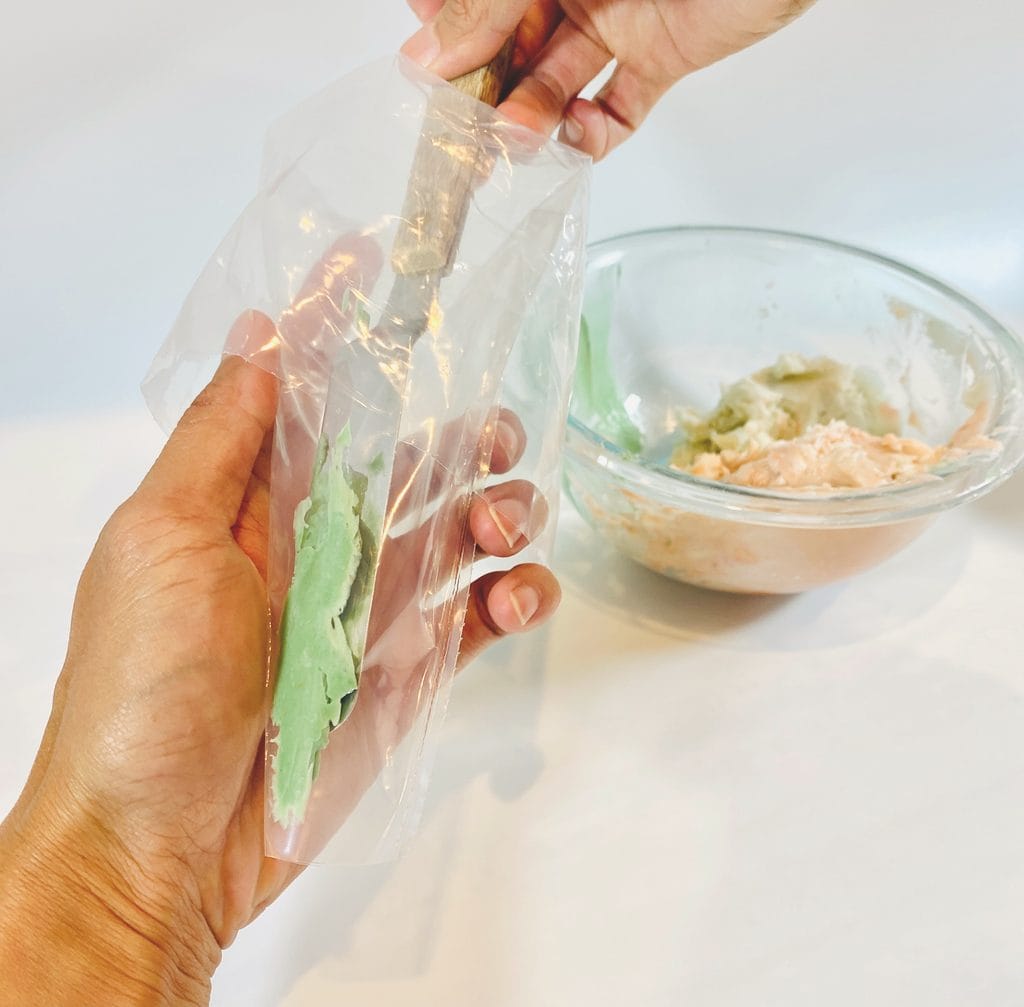
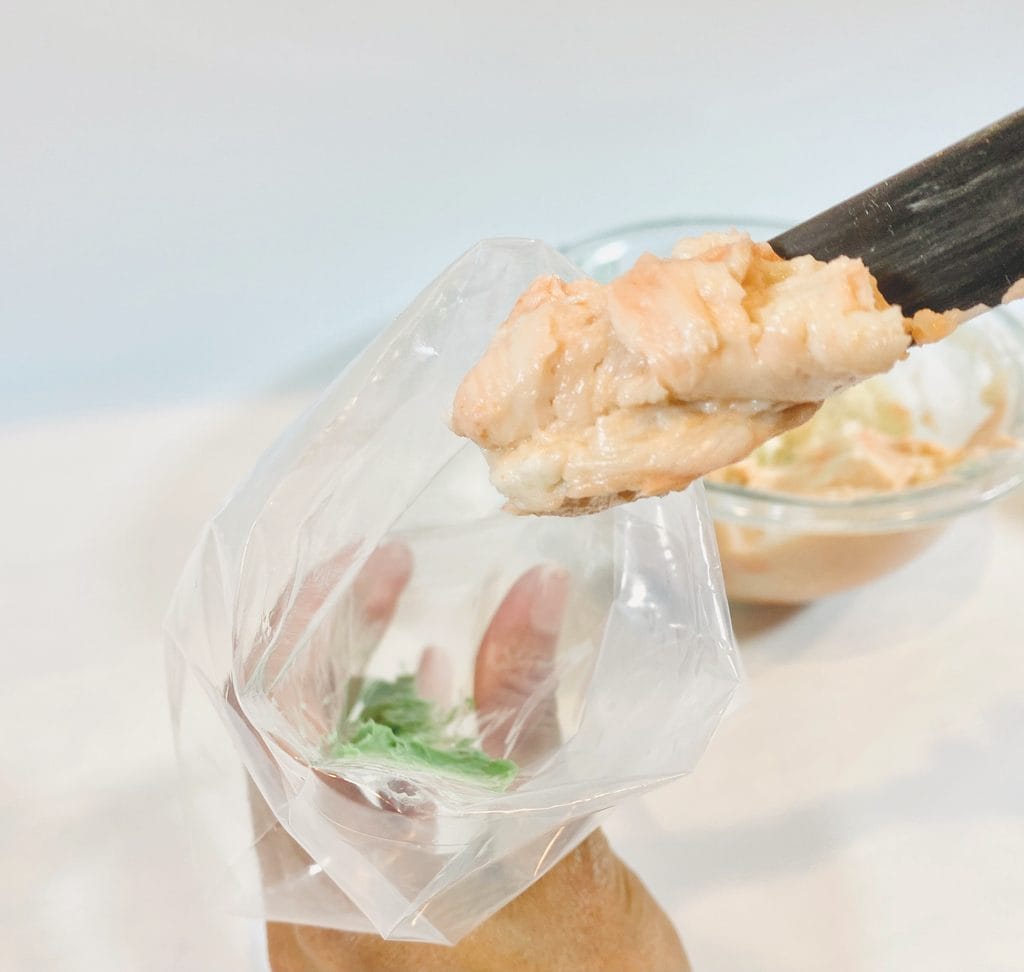
- Take a small offset spatula and streak the side of another piping bag with the light green buttercream. Layer the light pink buttercream on top of the green in the same piping bag, and then the white buttercream on top of the pink.
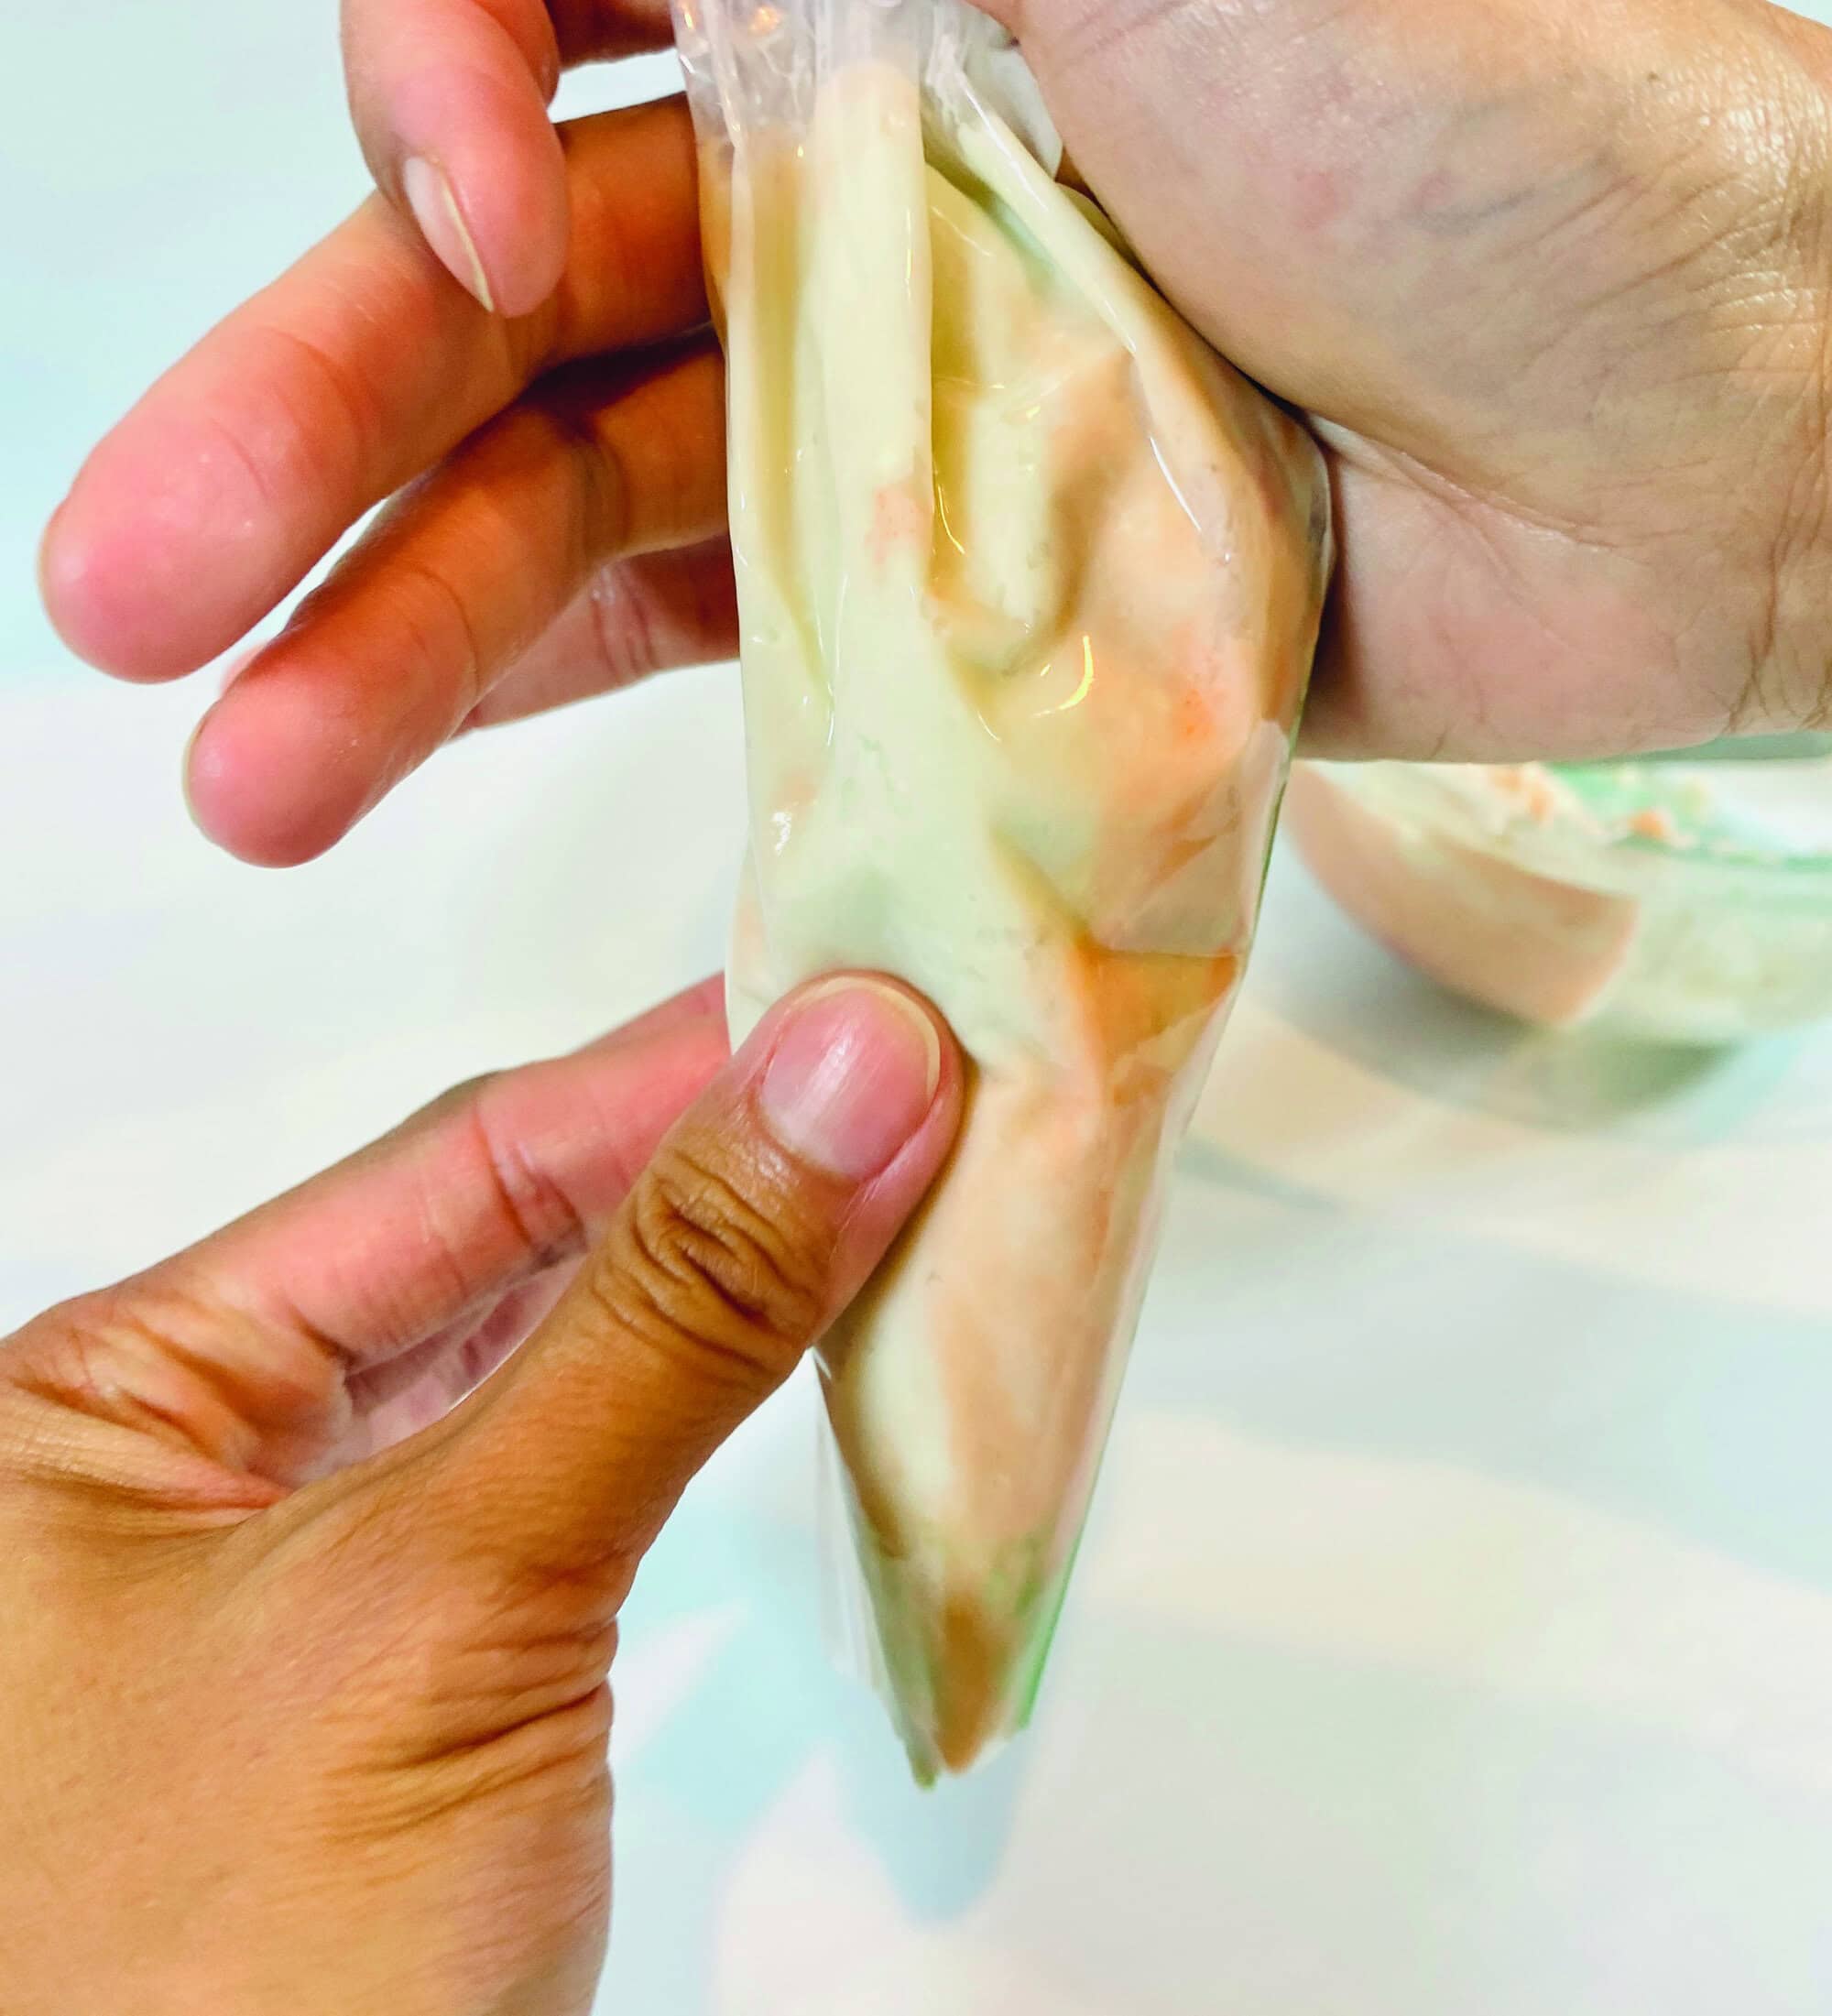
- Gently massage the bag so the pink and white colors blend together.
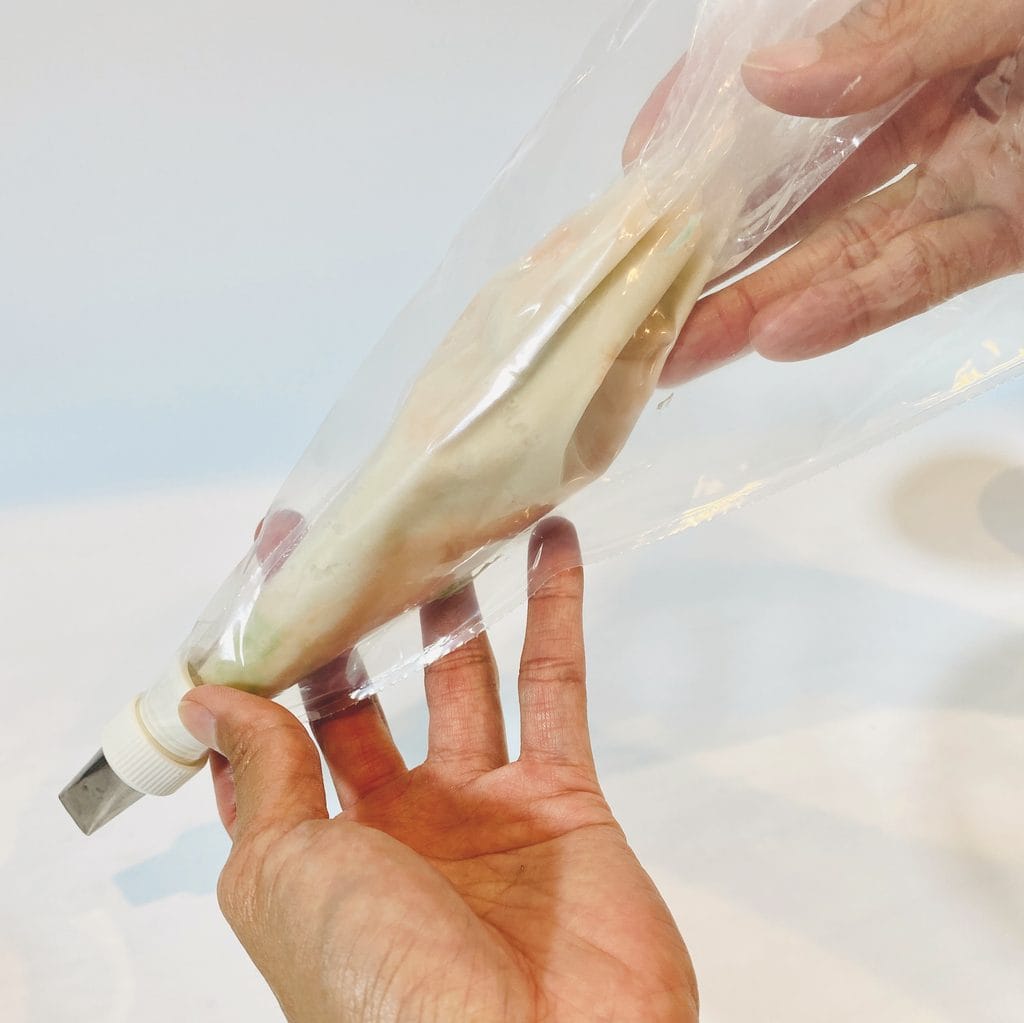
- Insert this bag into an empty piping bag fitted with a coupler and a #104 piping tip, with the thicker edge of the tip aligned with the green. Layering colors creates a more realistic flower.
Tip: The double bag makes it easy to swap with another piping bag color. Doubling the bag also helps prevent melting the buttercream from the heat of your hands.
Pipe the Ranunculus Flowers
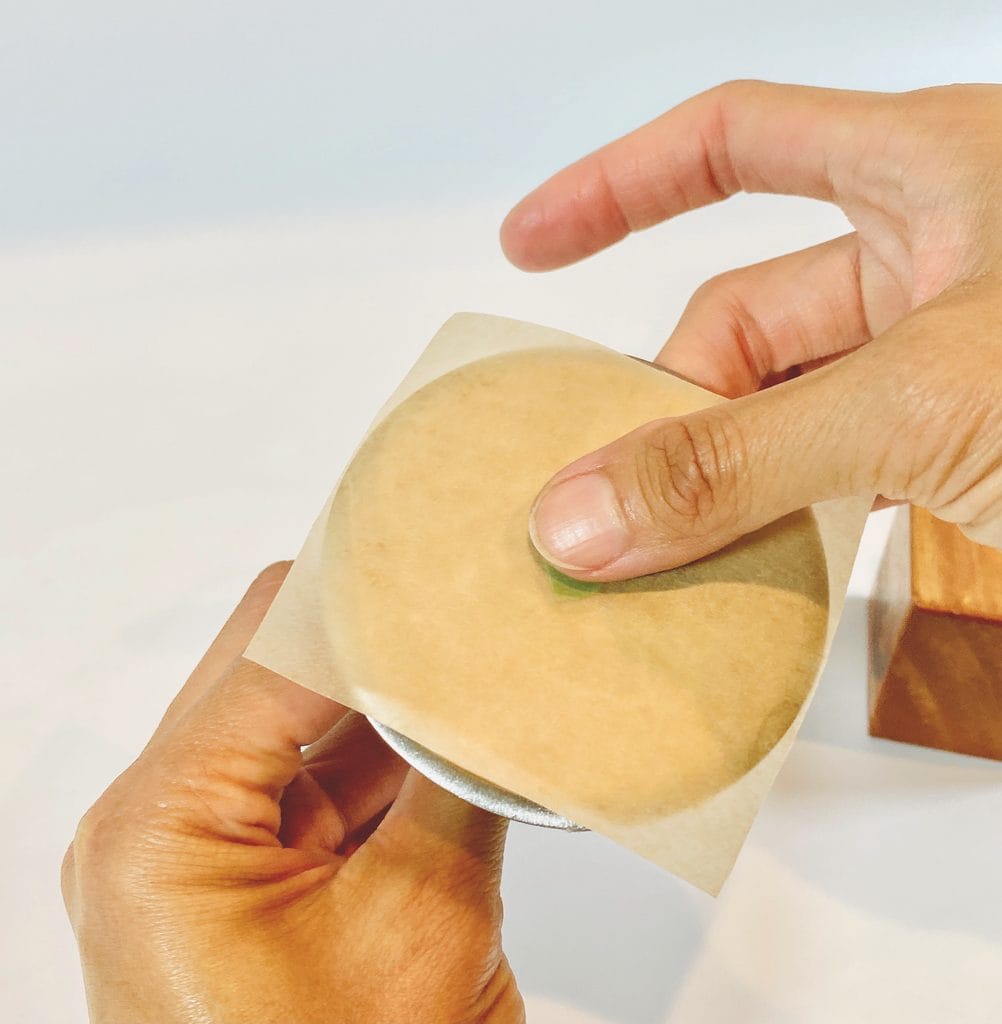
- Cut parchment squares and attach 1 to a large flower nail with a small dot of buttercream.
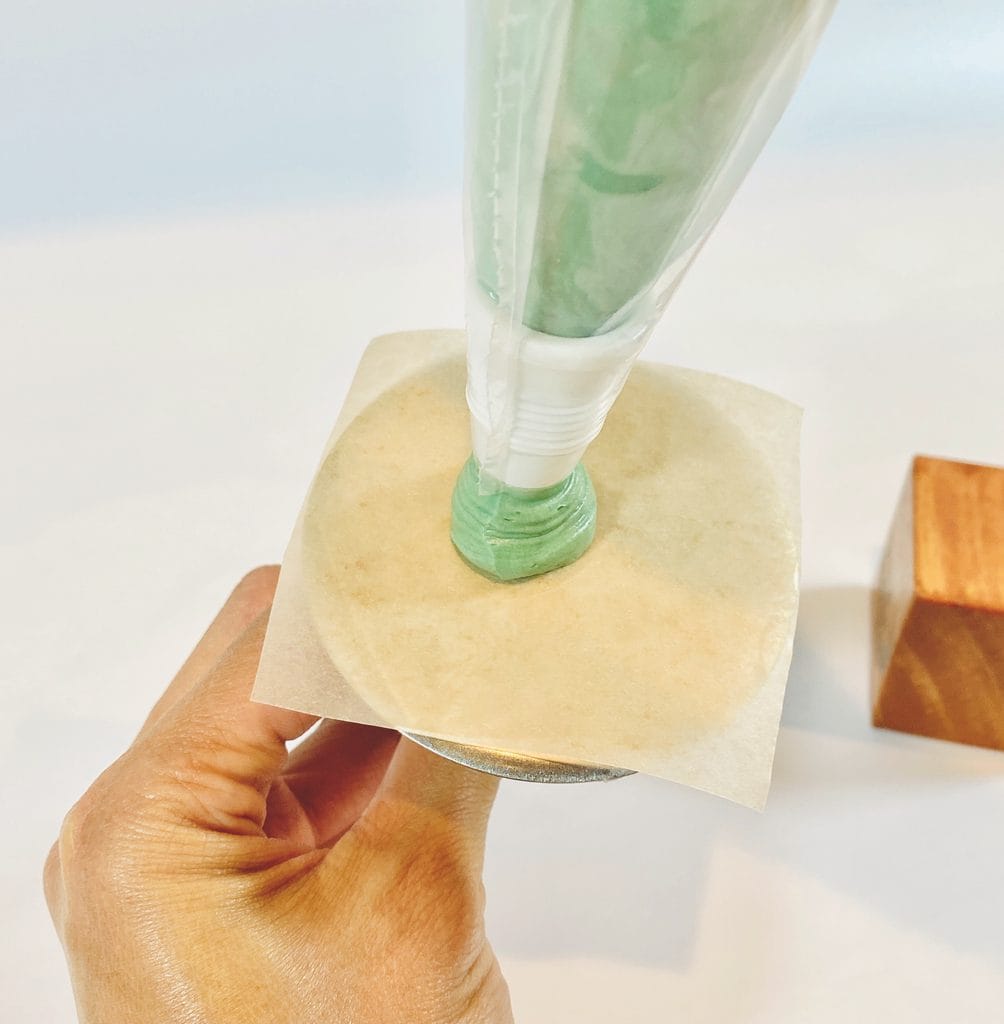
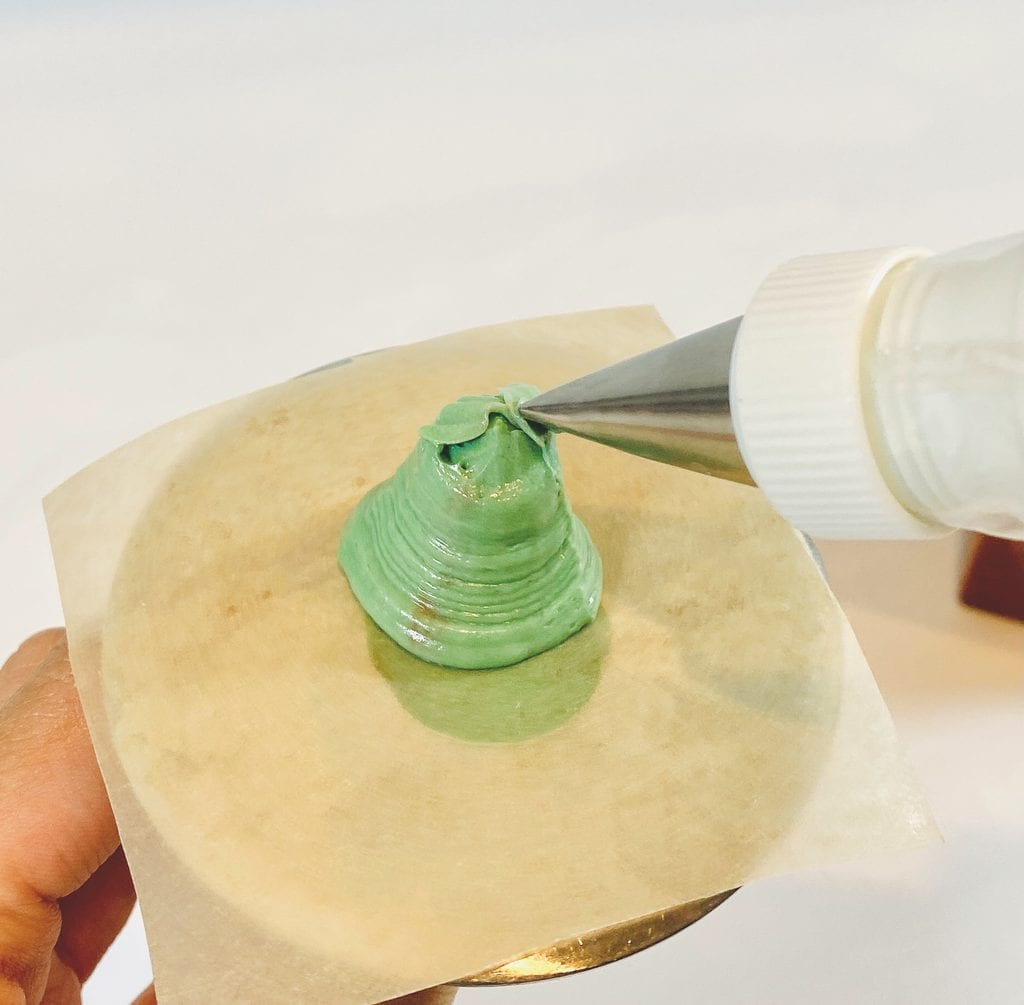
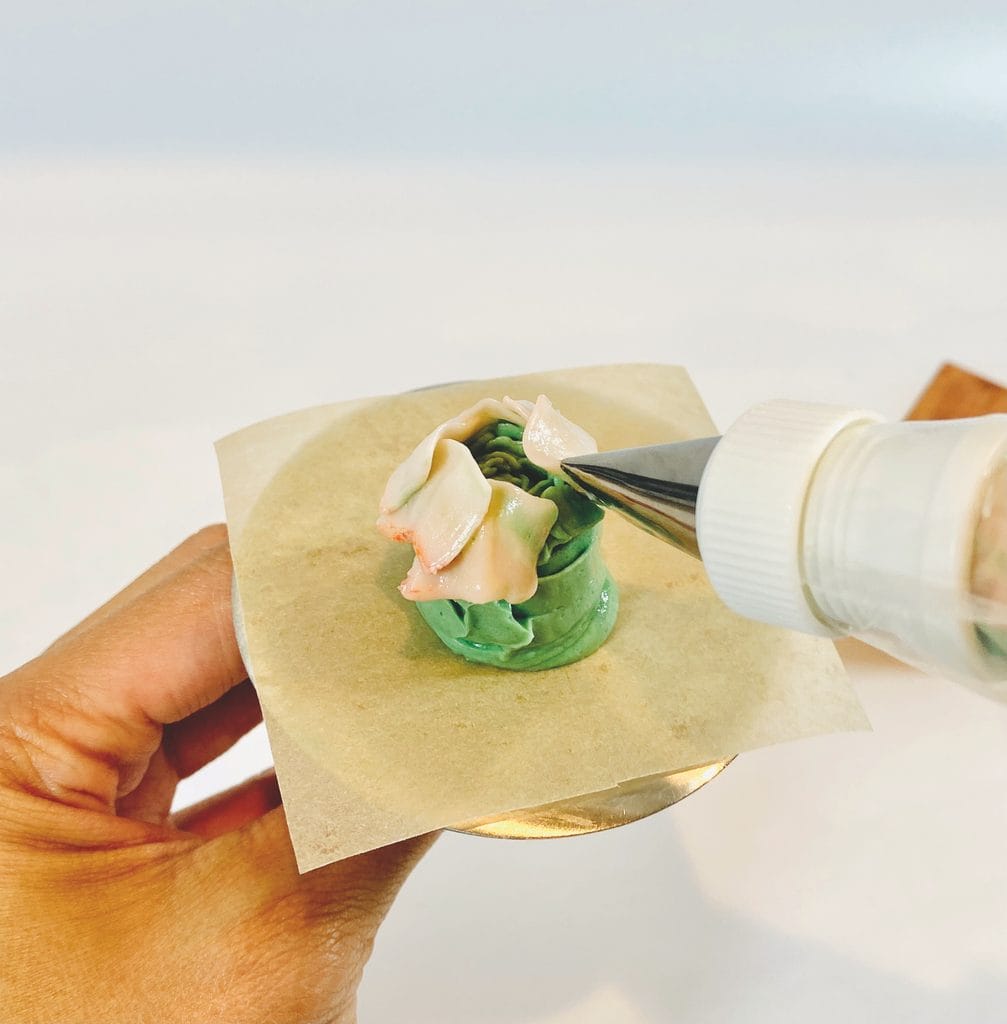
- Pipe a tall mound with light green buttercream to create a base.
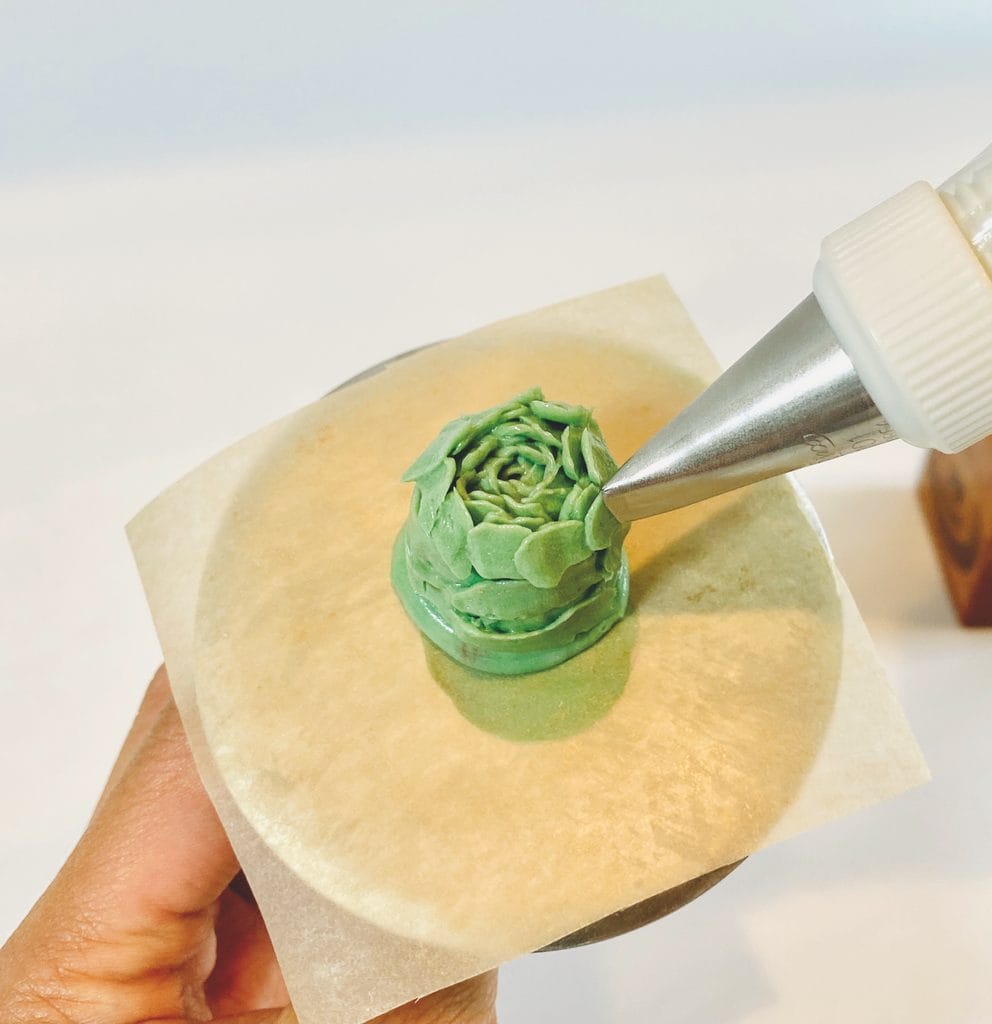
- Attach a #101 piping tip to the coupler to create the inner petals. To create small overlapping petals to cover the base, position the piping tip with the smaller end of the tip facing inward, while rotating the nail in the opposite direction as the piping direction.
- Create about 5 to 6 layers, slowly angling out the piping tip to a straight position. Add more buttercream around the base for stability, if needed.
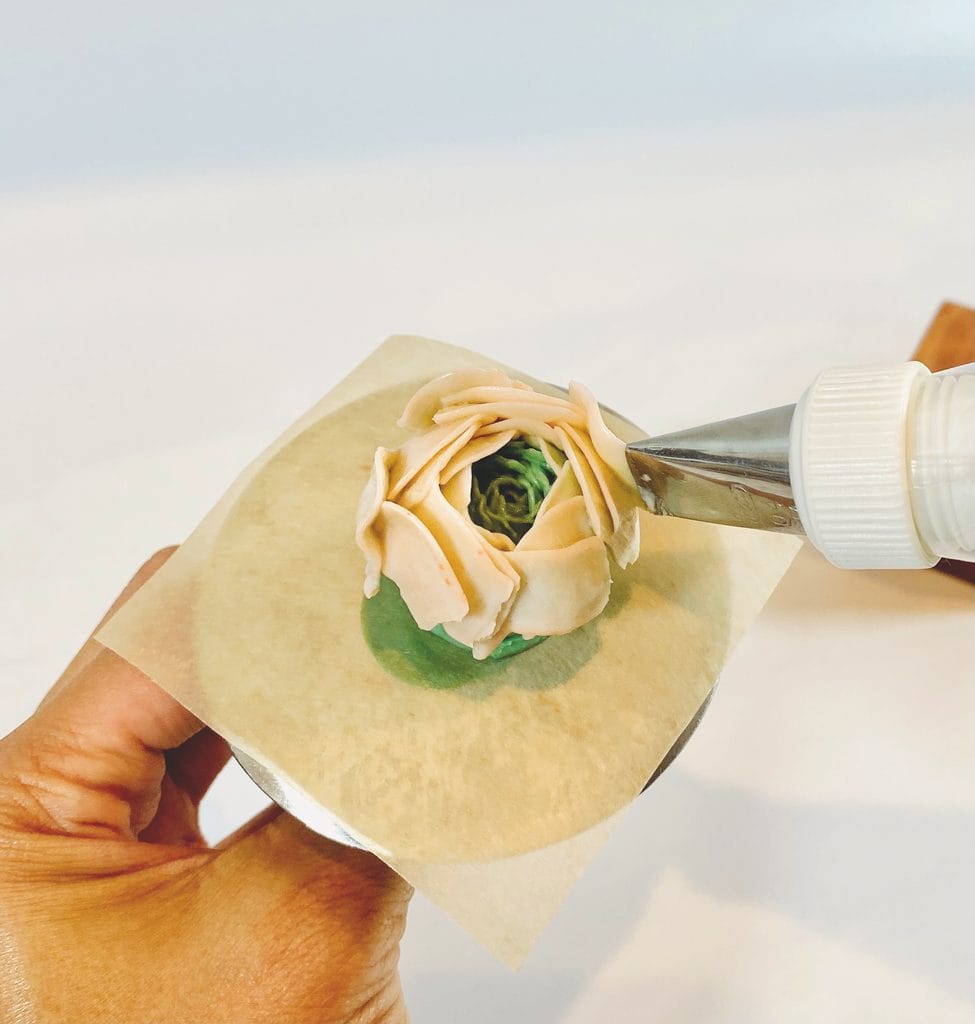
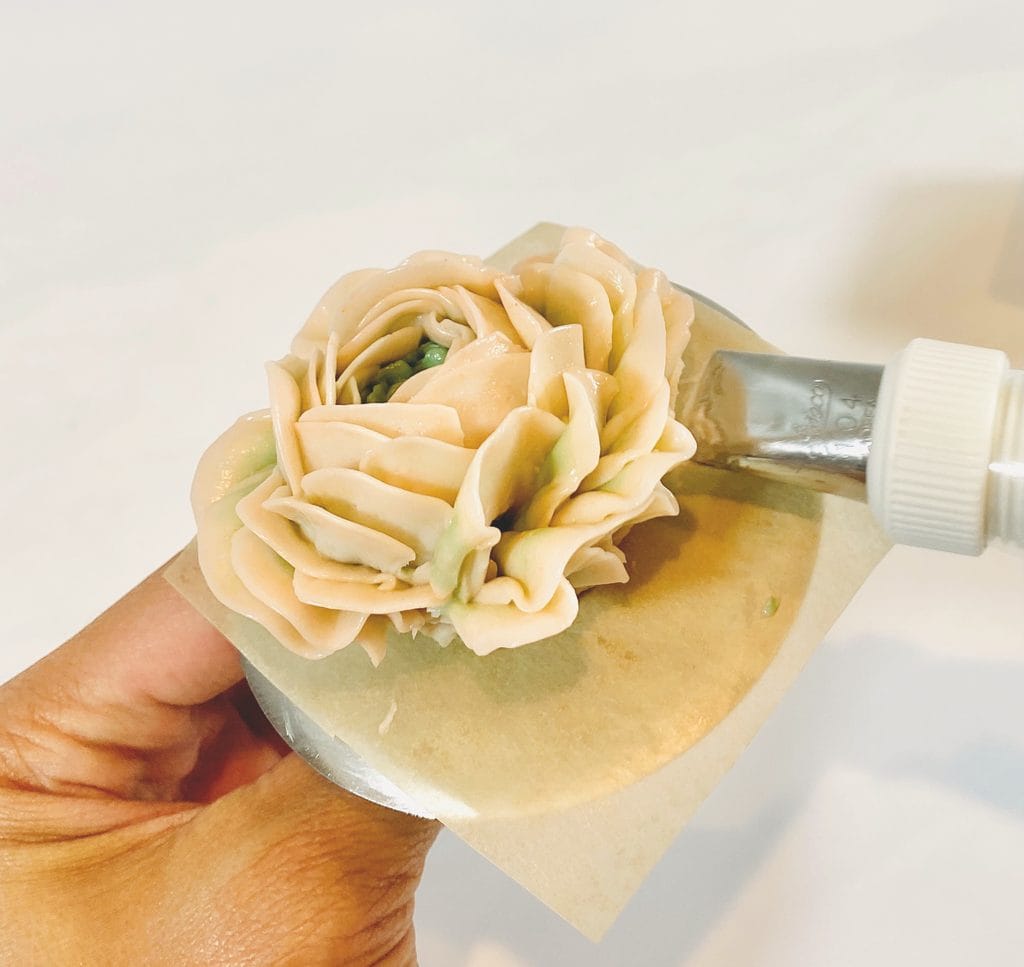
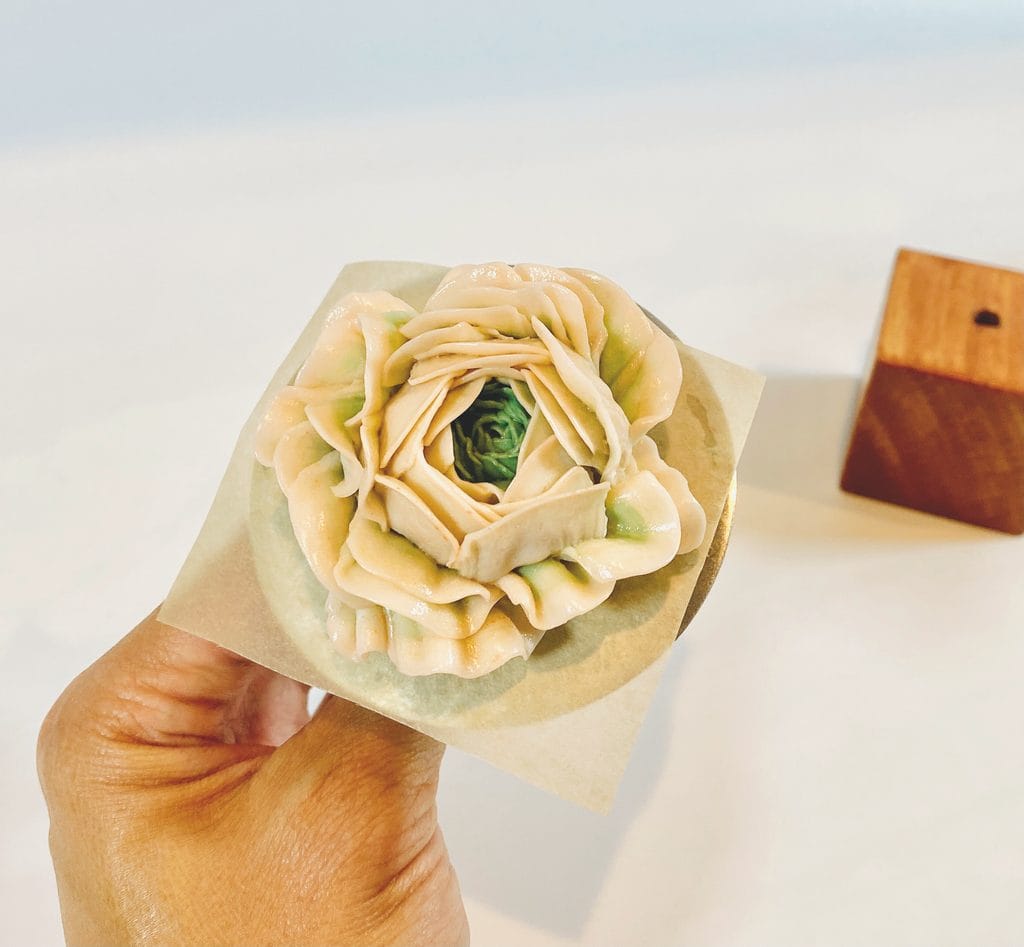
- Similarly, with the pink buttercream piping bag fitted with a #104 piping tip, create larger outer petals covering some of the green inner petals. Make 1 layer.
- For the second layer, double up on the outer petals.
- For the third layer, pipe single overlapping petals again.
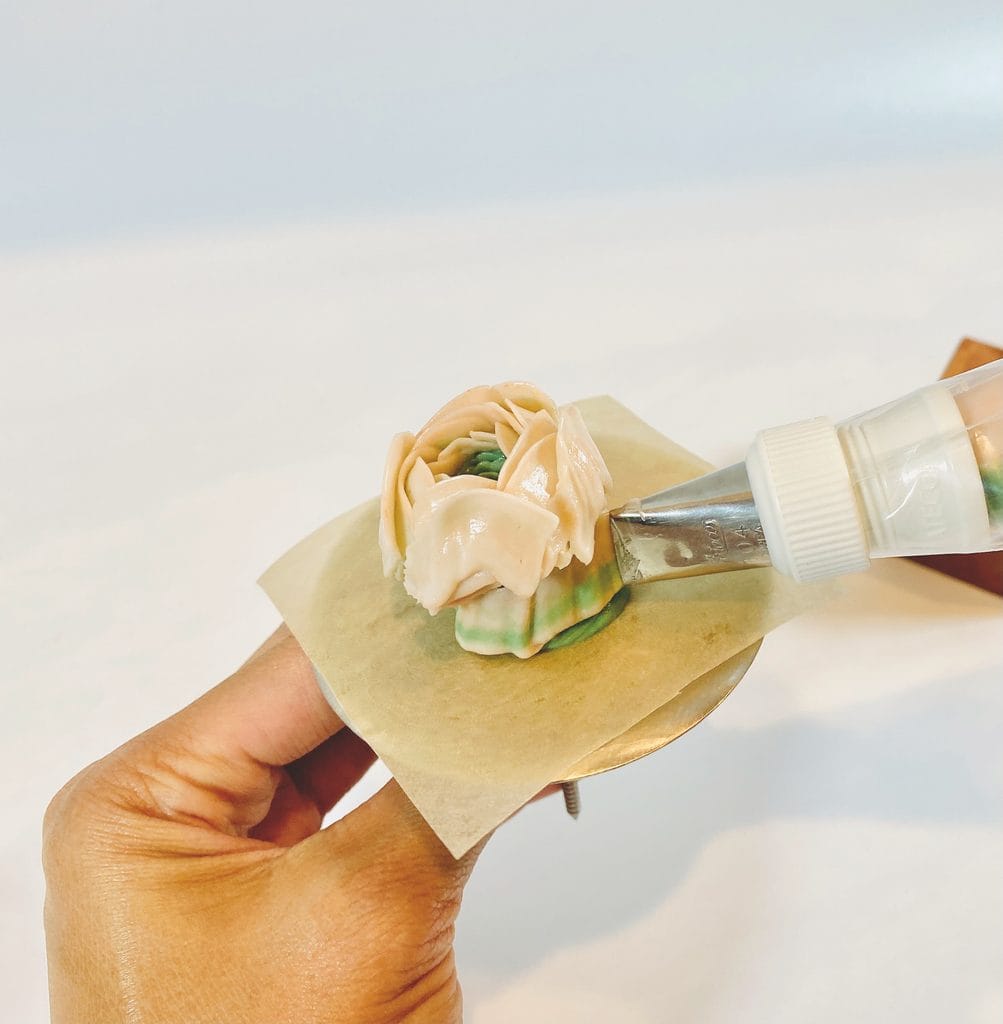
- For the fourth layer, focusing on one corner of the flower, pipe multiple overlapping layers to create a staircase effect going lower down the base of the flower.
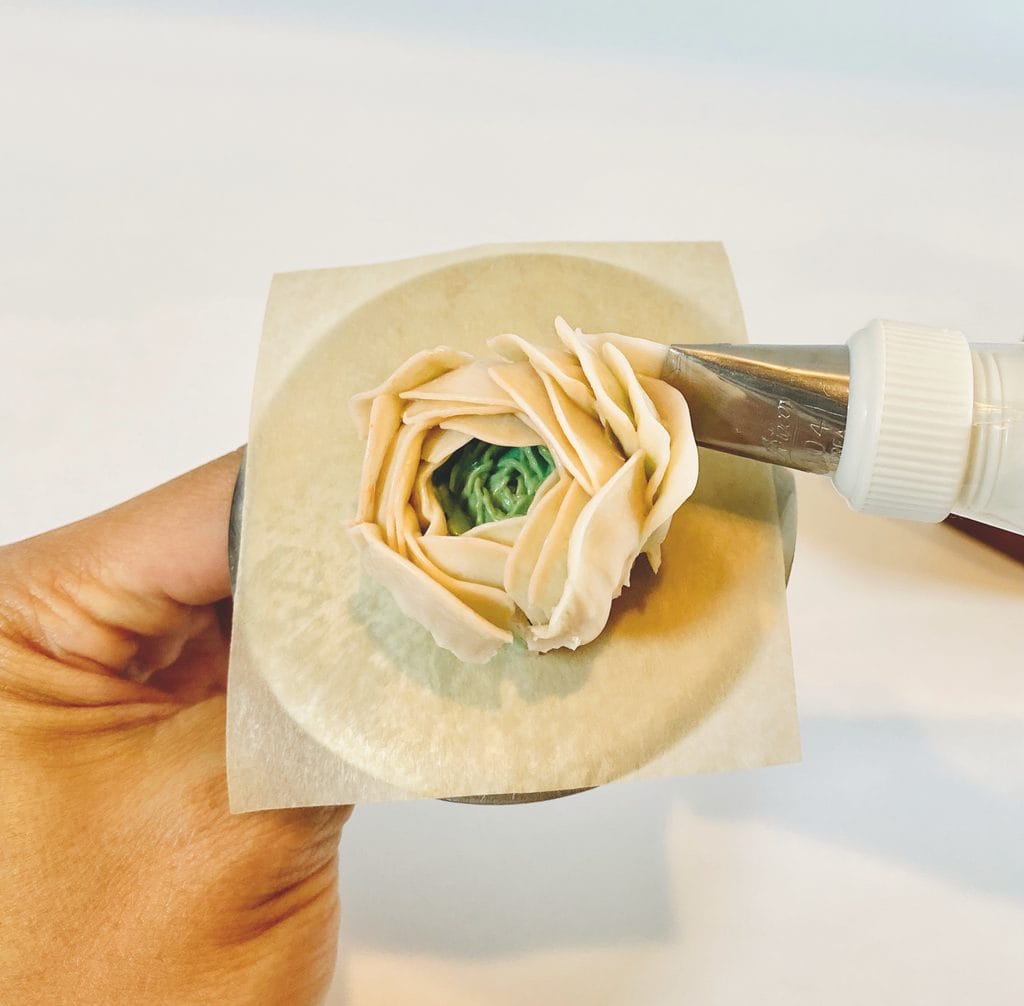
- Continue the same all around the flower, randomizing petals and angling the piping tip more outward as you get lower down the base.
Tip: The ranunculus petals are piped more straight than arched.
Pipe the Dahlia Flowers
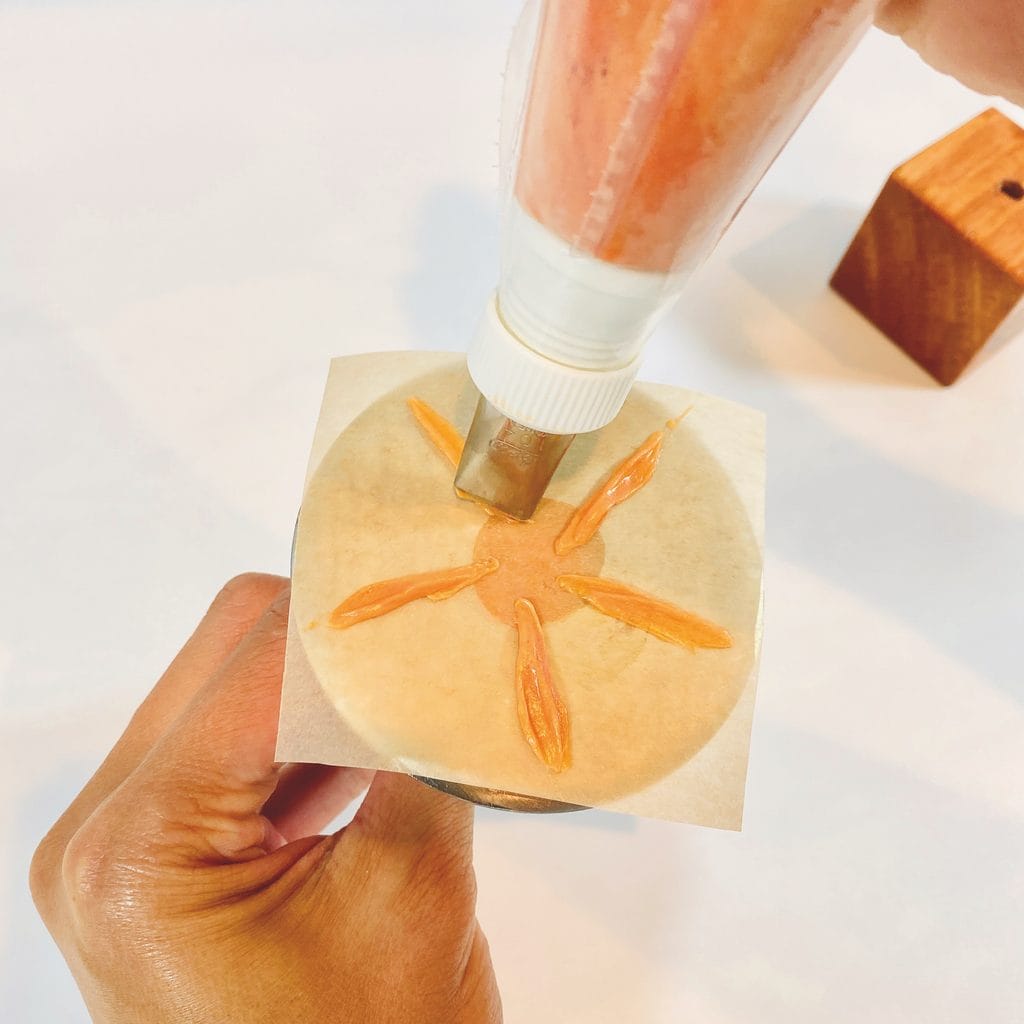
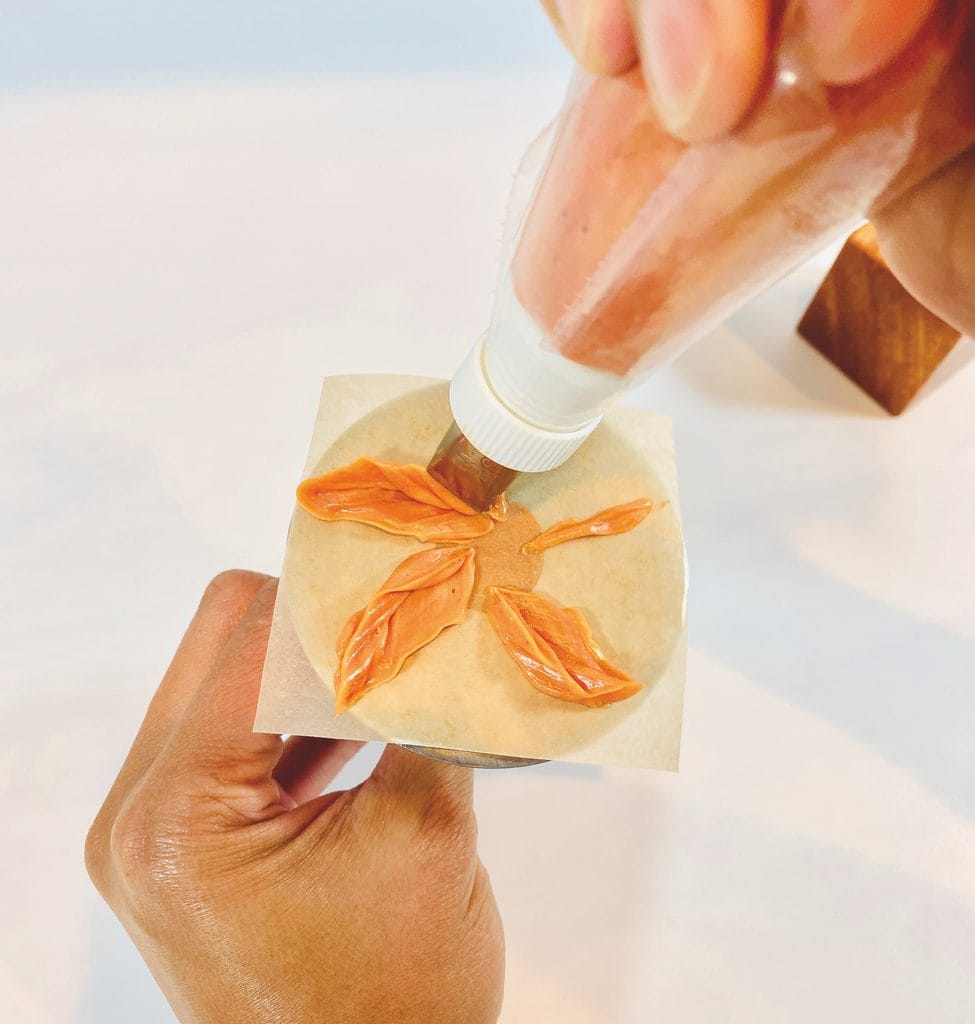
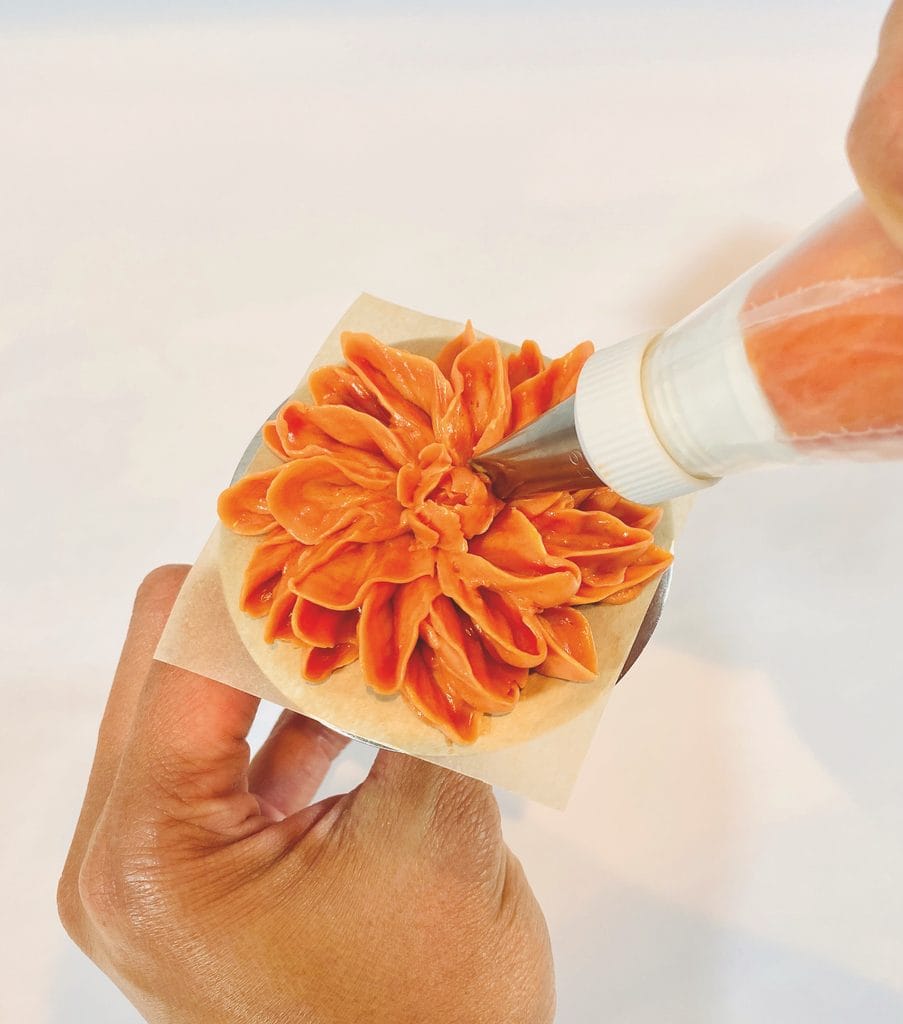
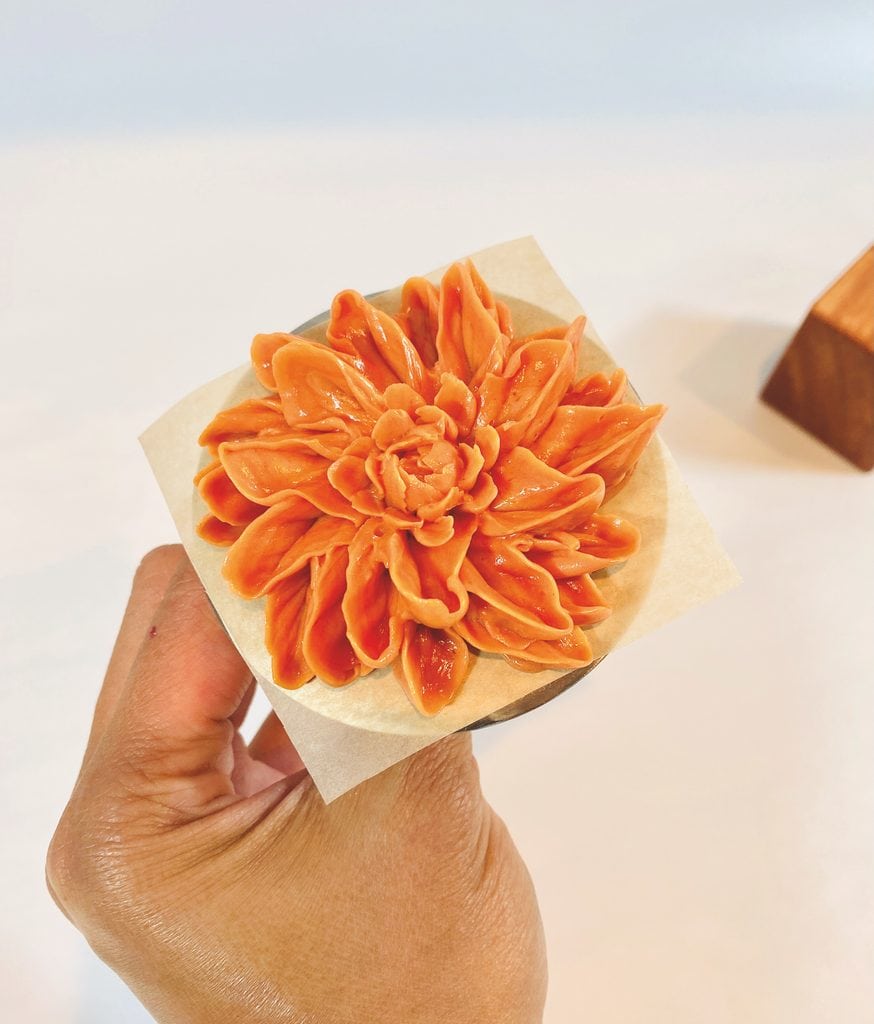
- Mix orange buttercream and fill a piping bag. Using a #104 piping tip, section off a parchment square into 5 equal parts.
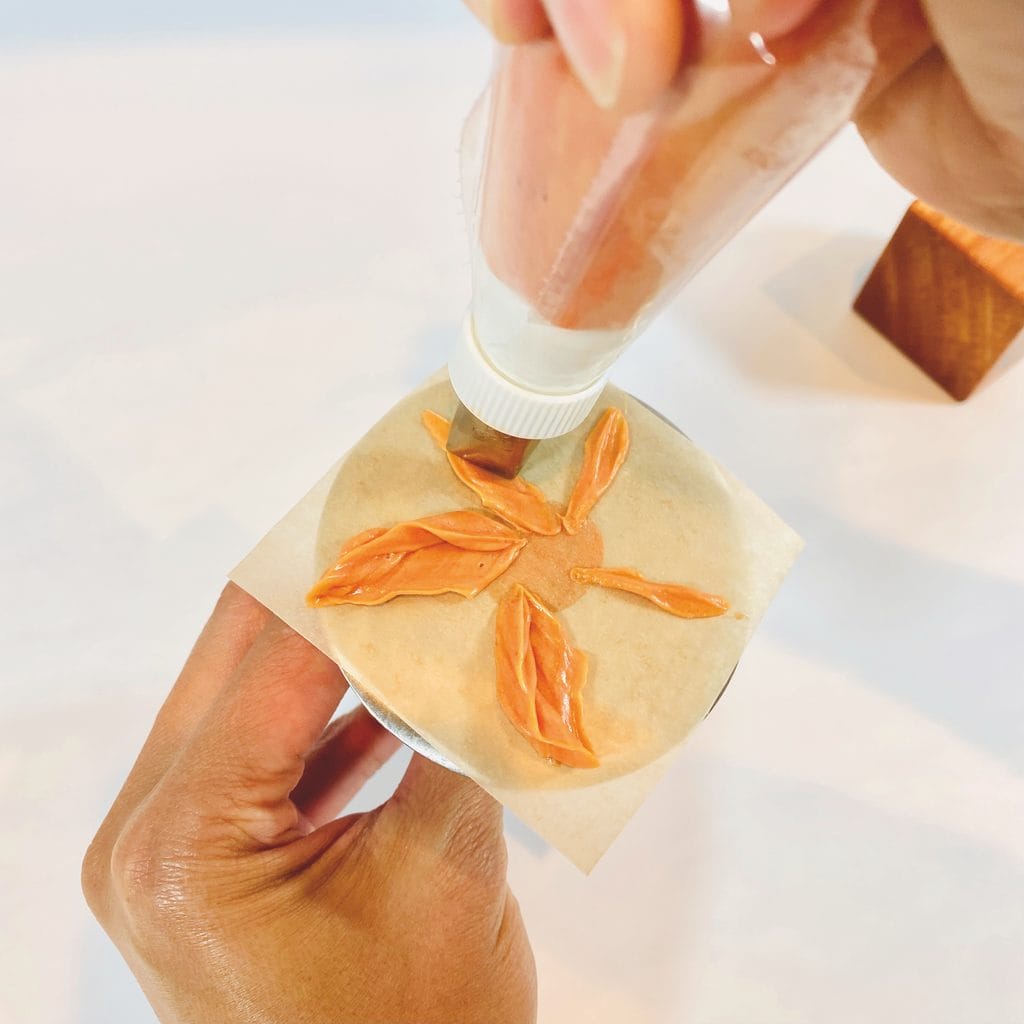
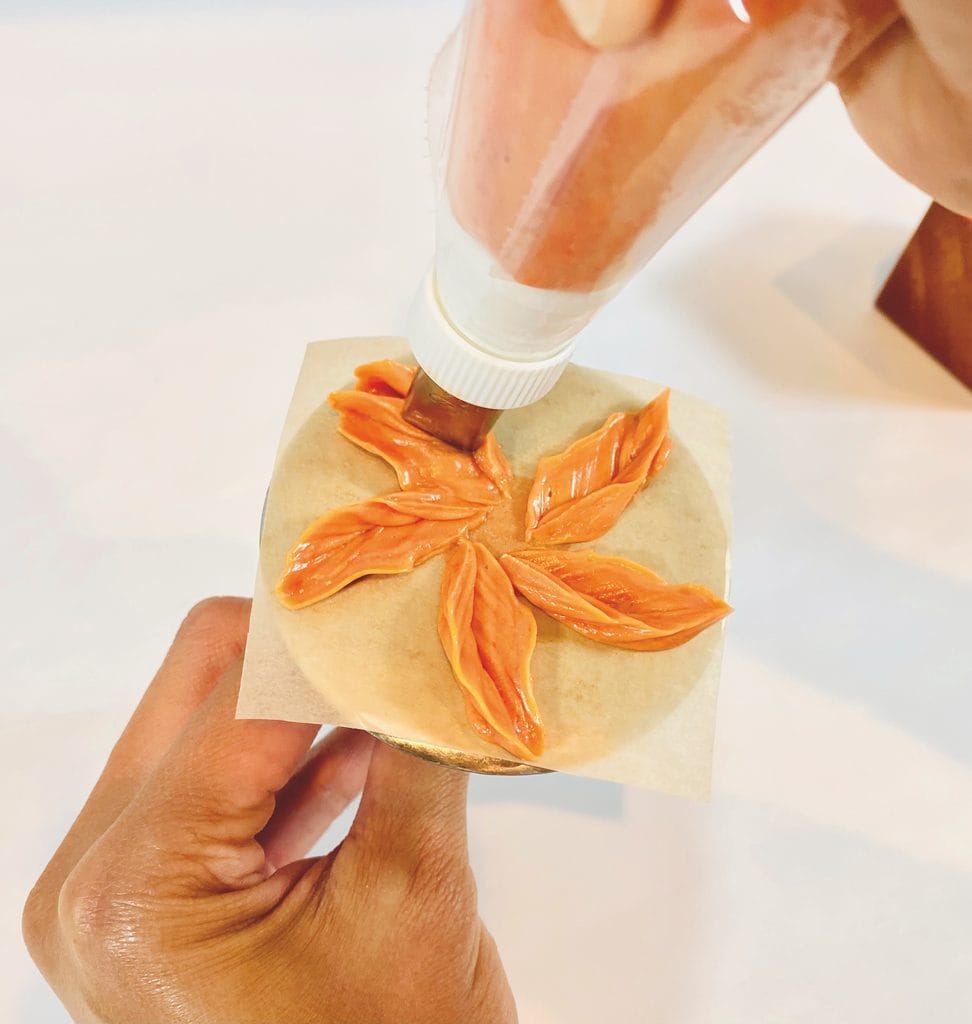
- Pipe a leaf shape on each section marker, starting at the base of the leaf at about a 45-degree angle and straightening to 90 degrees at the top of the leaf, then arching back downward to complete the other side of the leaf.
- Pipe more leaf shapes in between the gaps to create the first layer.
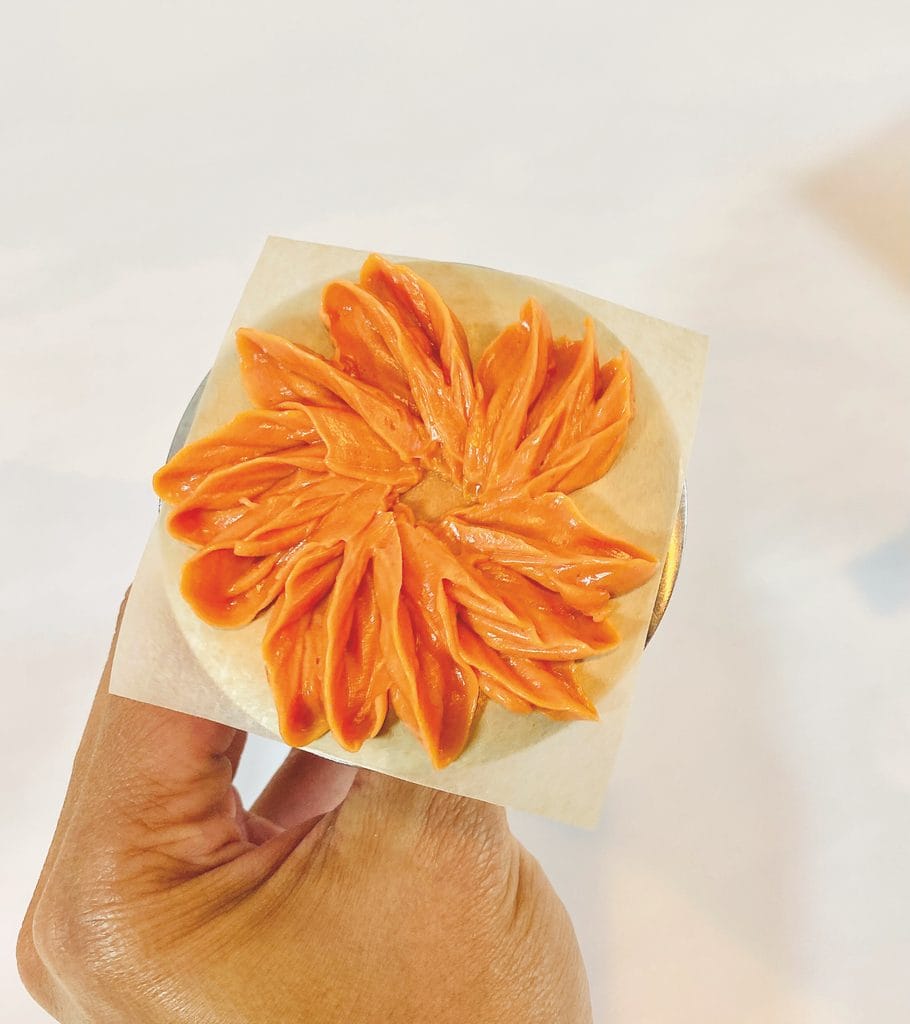
- Pipe a second layer overlapping the first layer of petals.
- Create a third layer similarly.
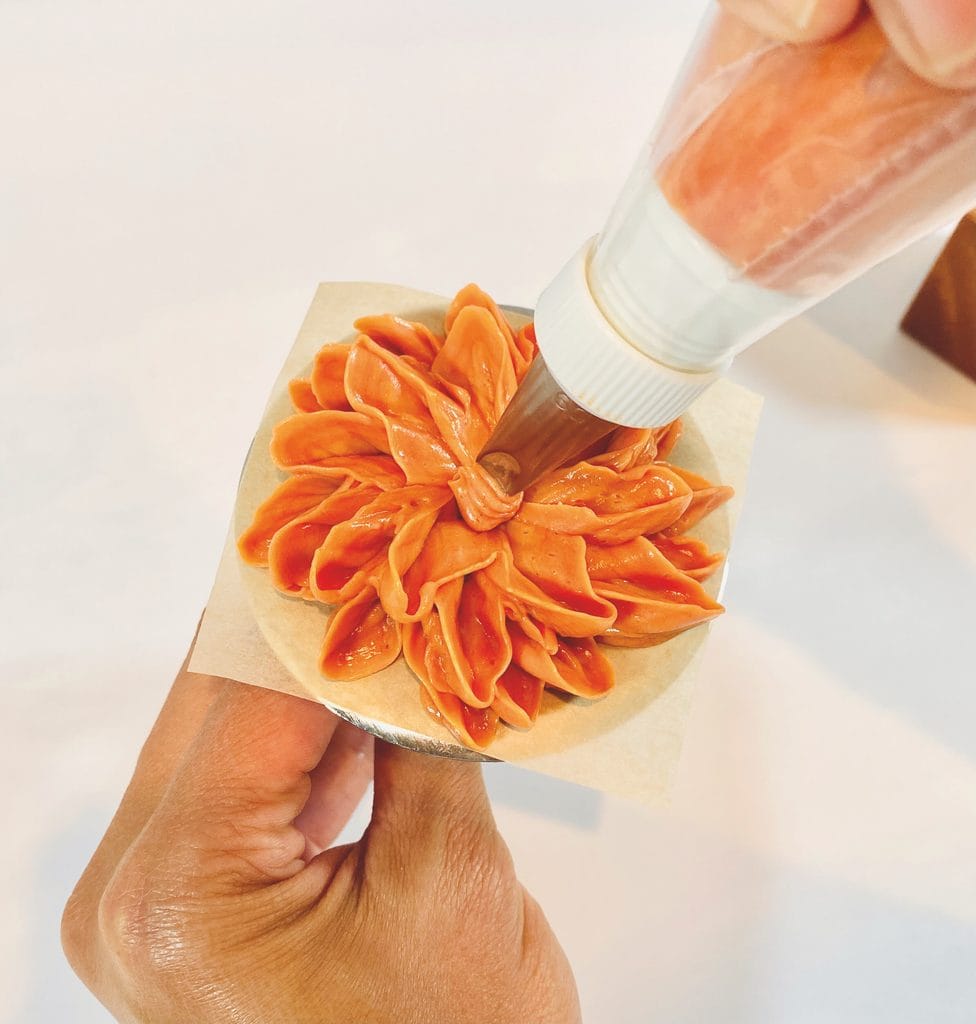
- Change to a #59 piping tip. Pipe a small mound in the center and cover with 1 layer of small petals directly over the mound.
- Create a second and third outer layer of small standing petals. Flowers can be lifted off the nail with flower scissors and into a shallow container with a lid. Chill or freeze all flowers for easier placement onto the cake.
Add the Finishing Details to the Fall Buttercream Flowers
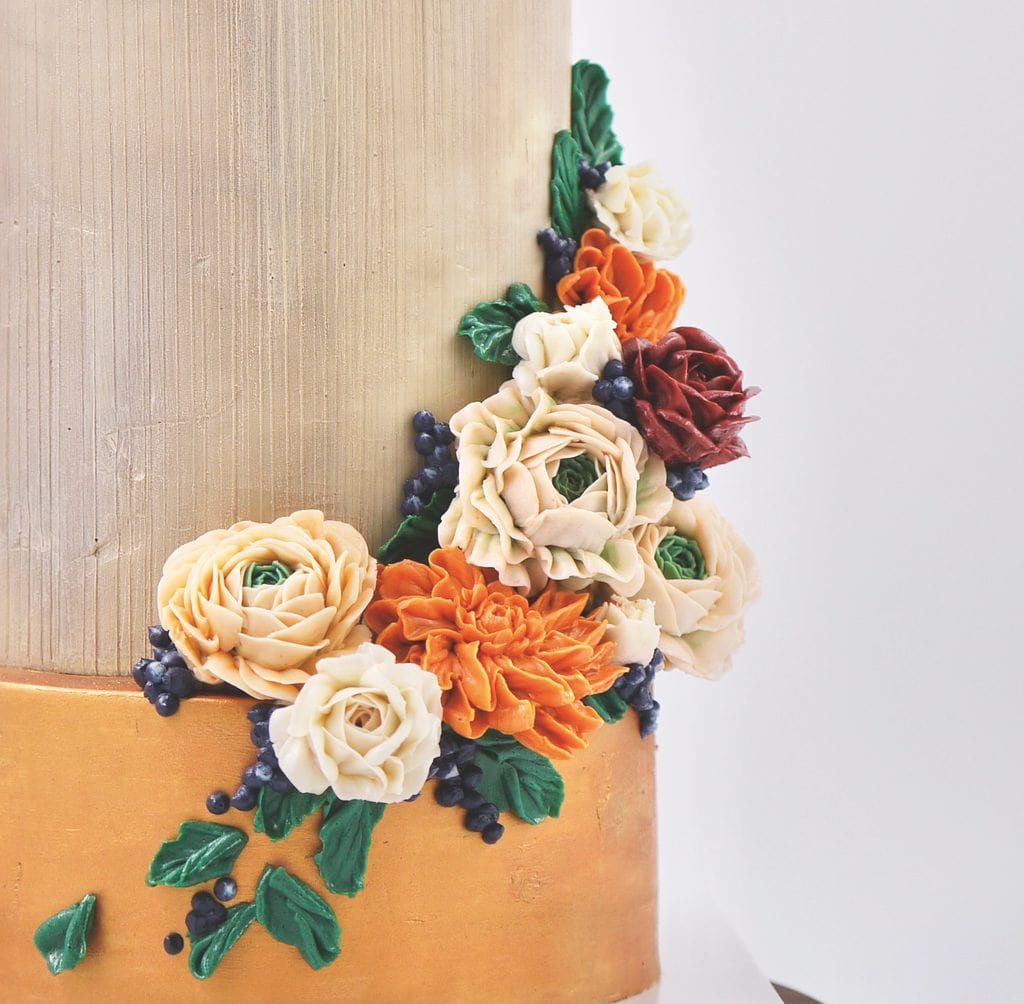
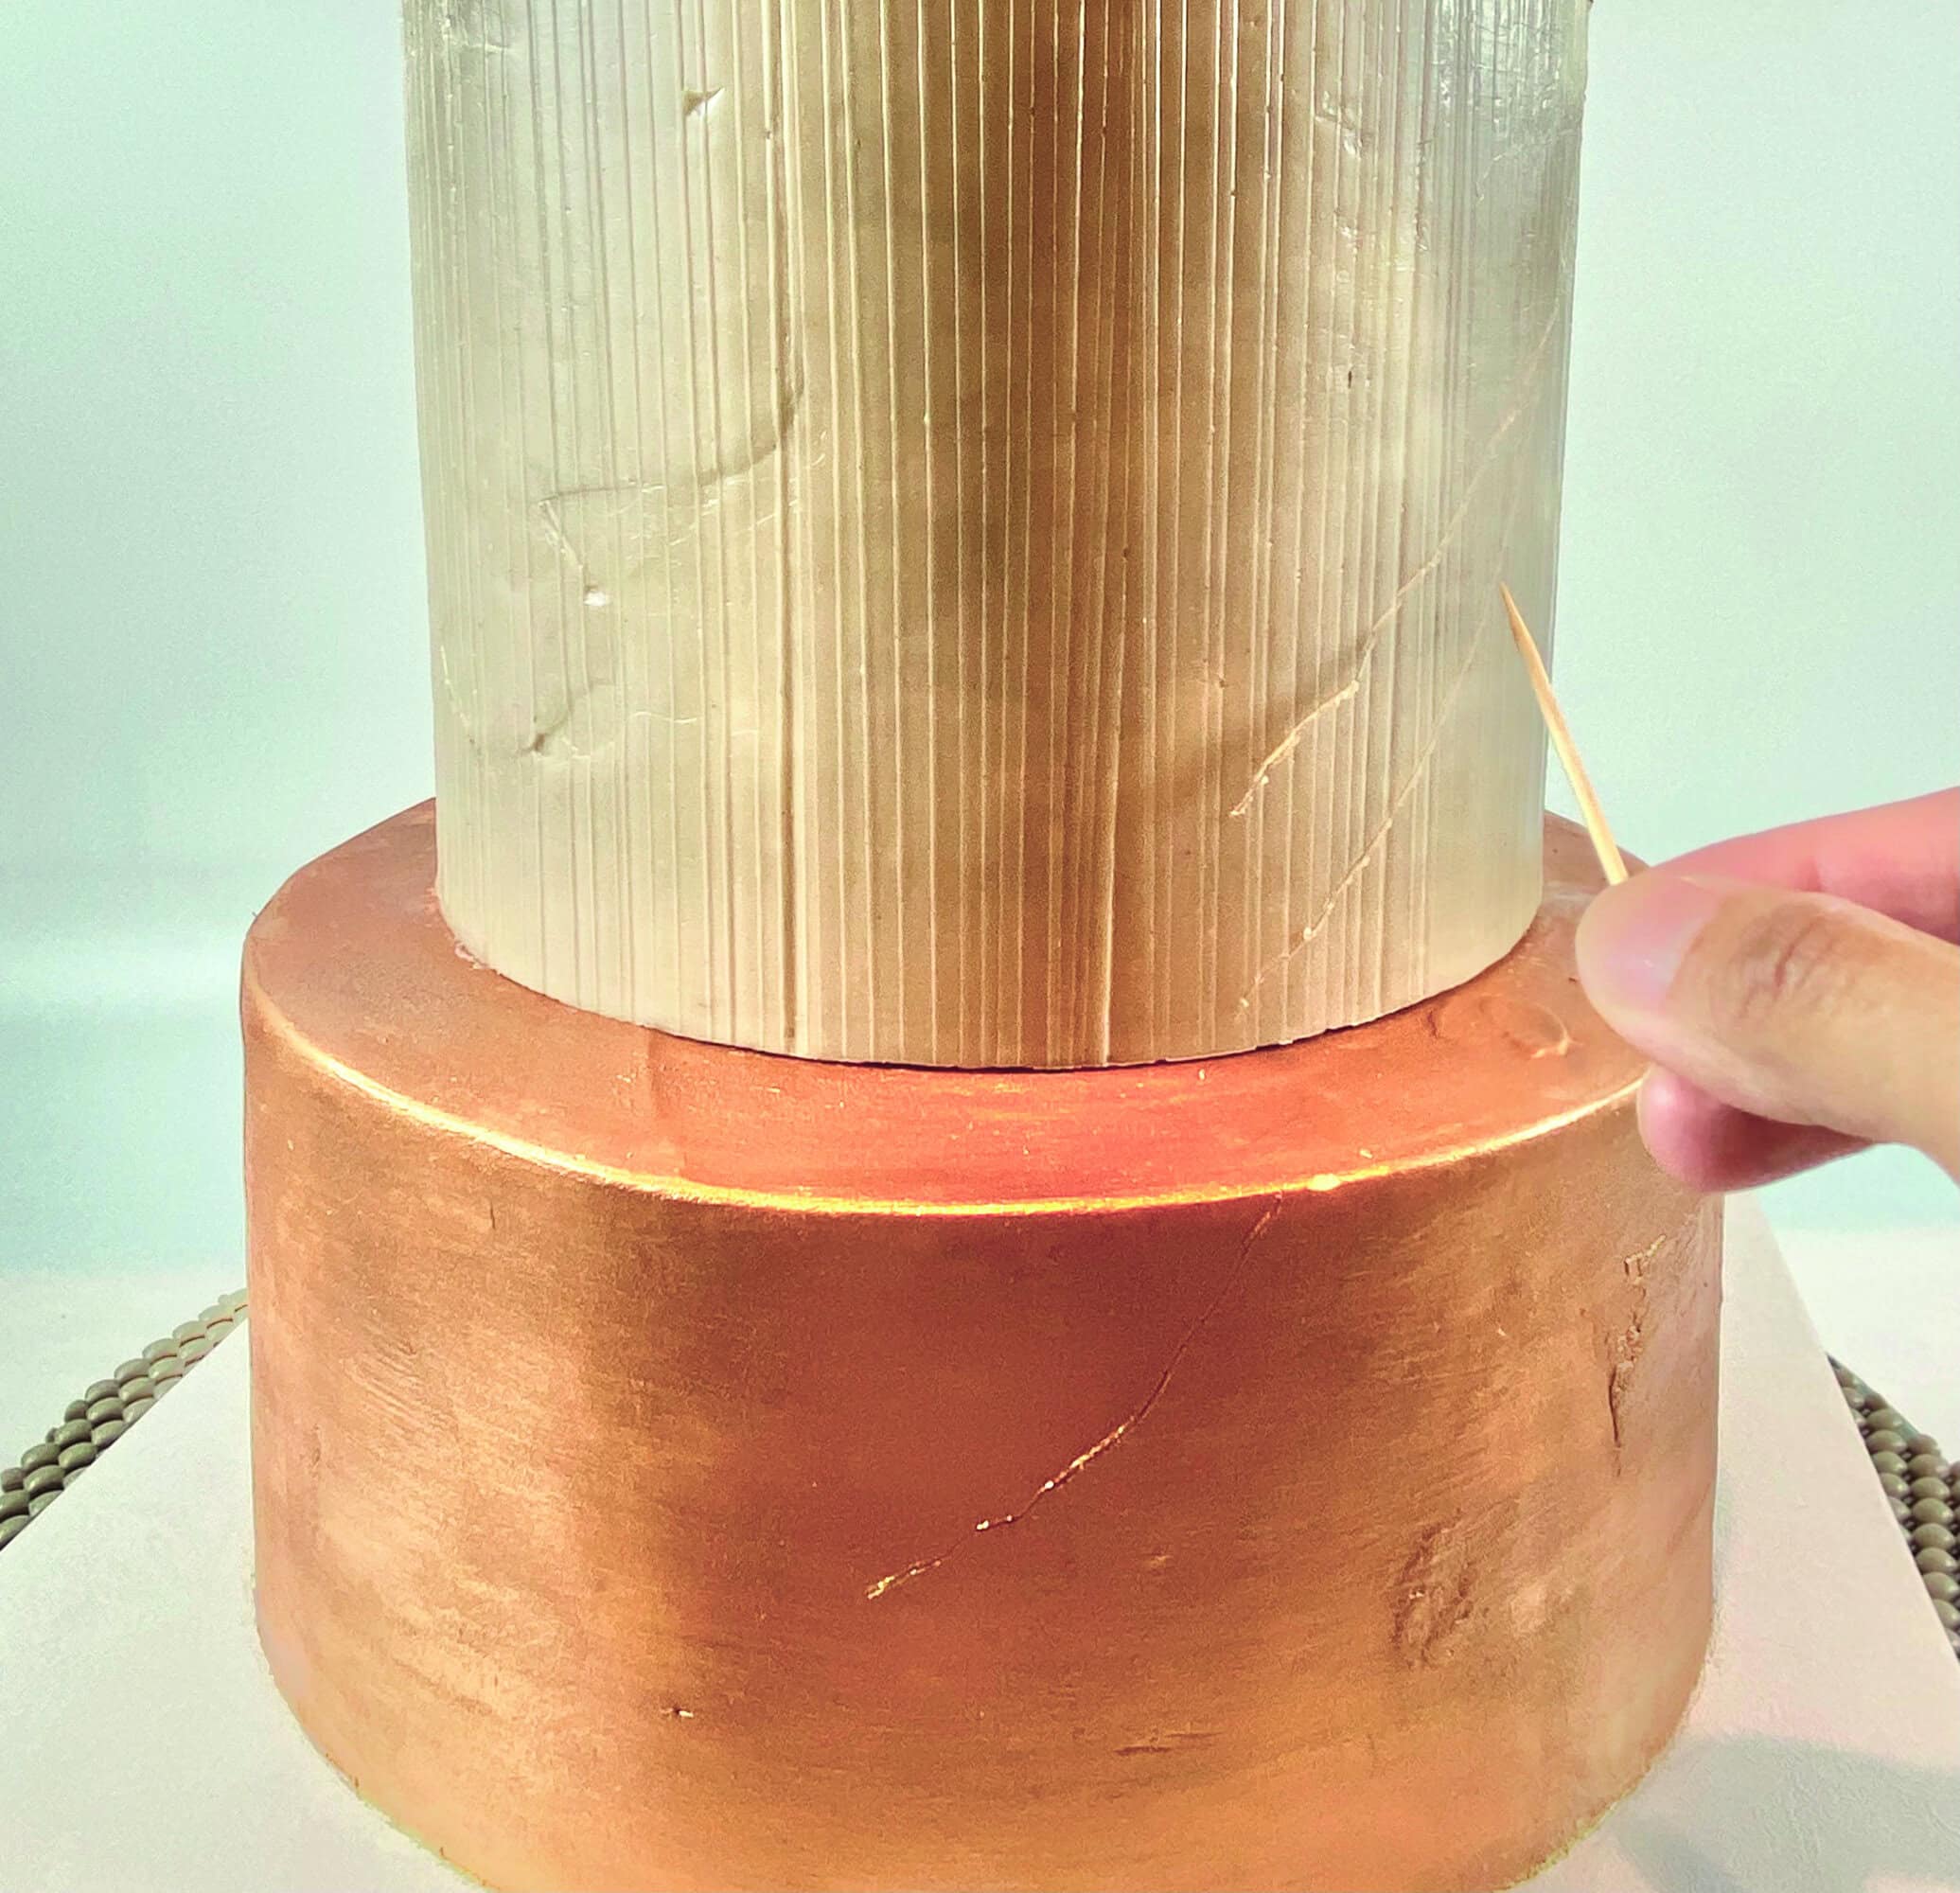
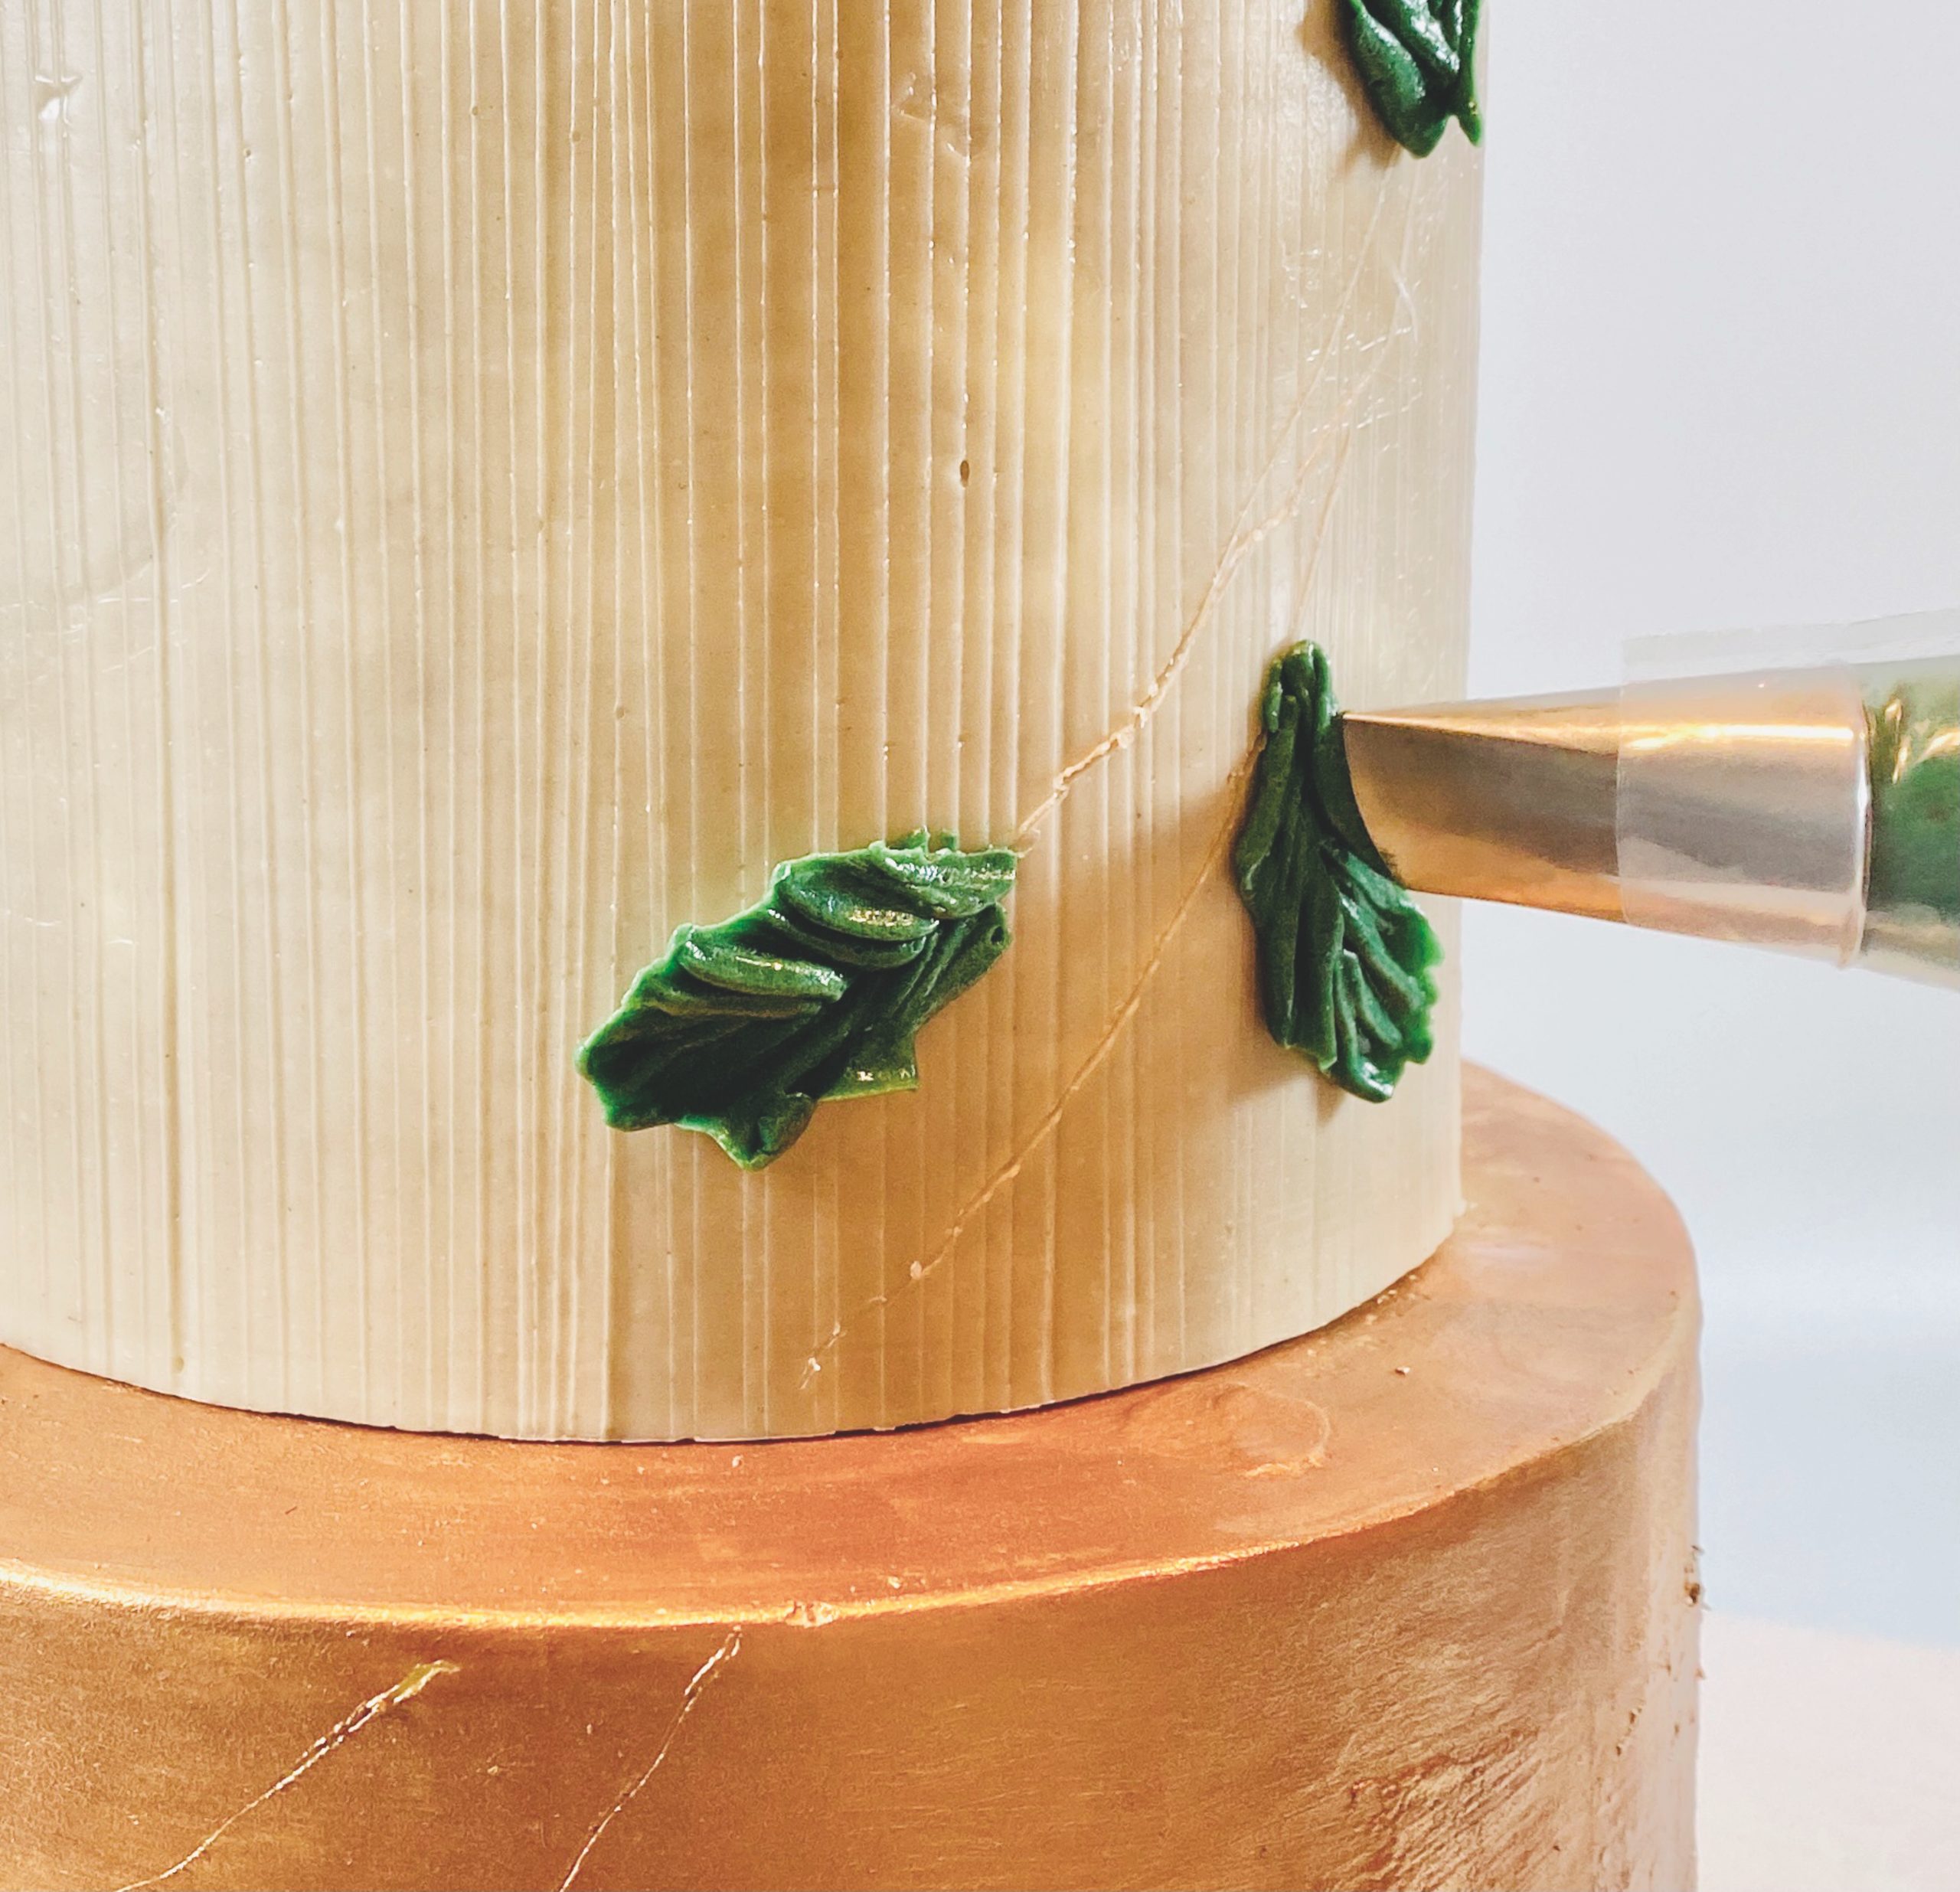
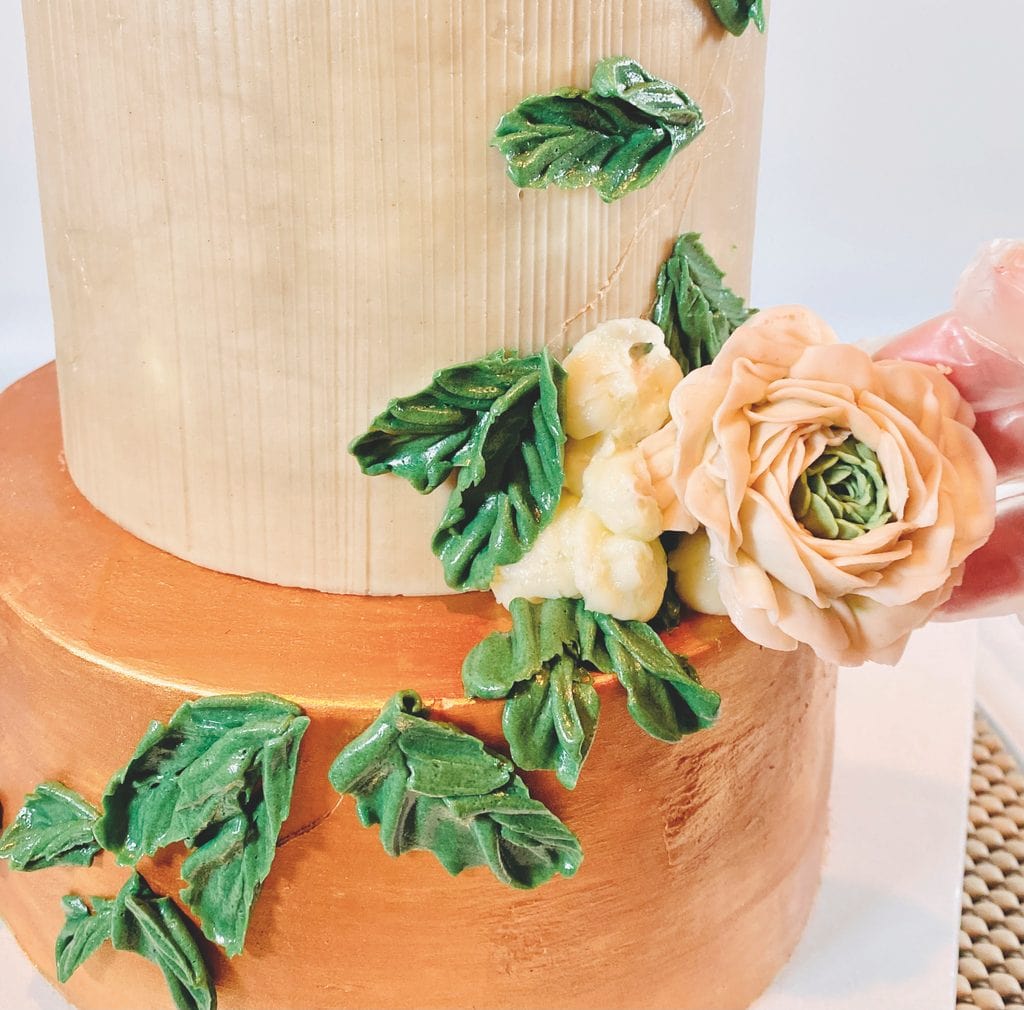
- Stack the chilled cakes. With a toothpick, score curved lines to guide where the falling leaves will be piped onto the cake (on the top left of the top tier and the bottom right of middle and bottom tiers). Leave a gap in between the lines to make room for flower placement.
- Fill a piping bag with green buttercream fitted with a #124K piping tip. Pipe multiple leaves in a downward motion to create a cascade effect.
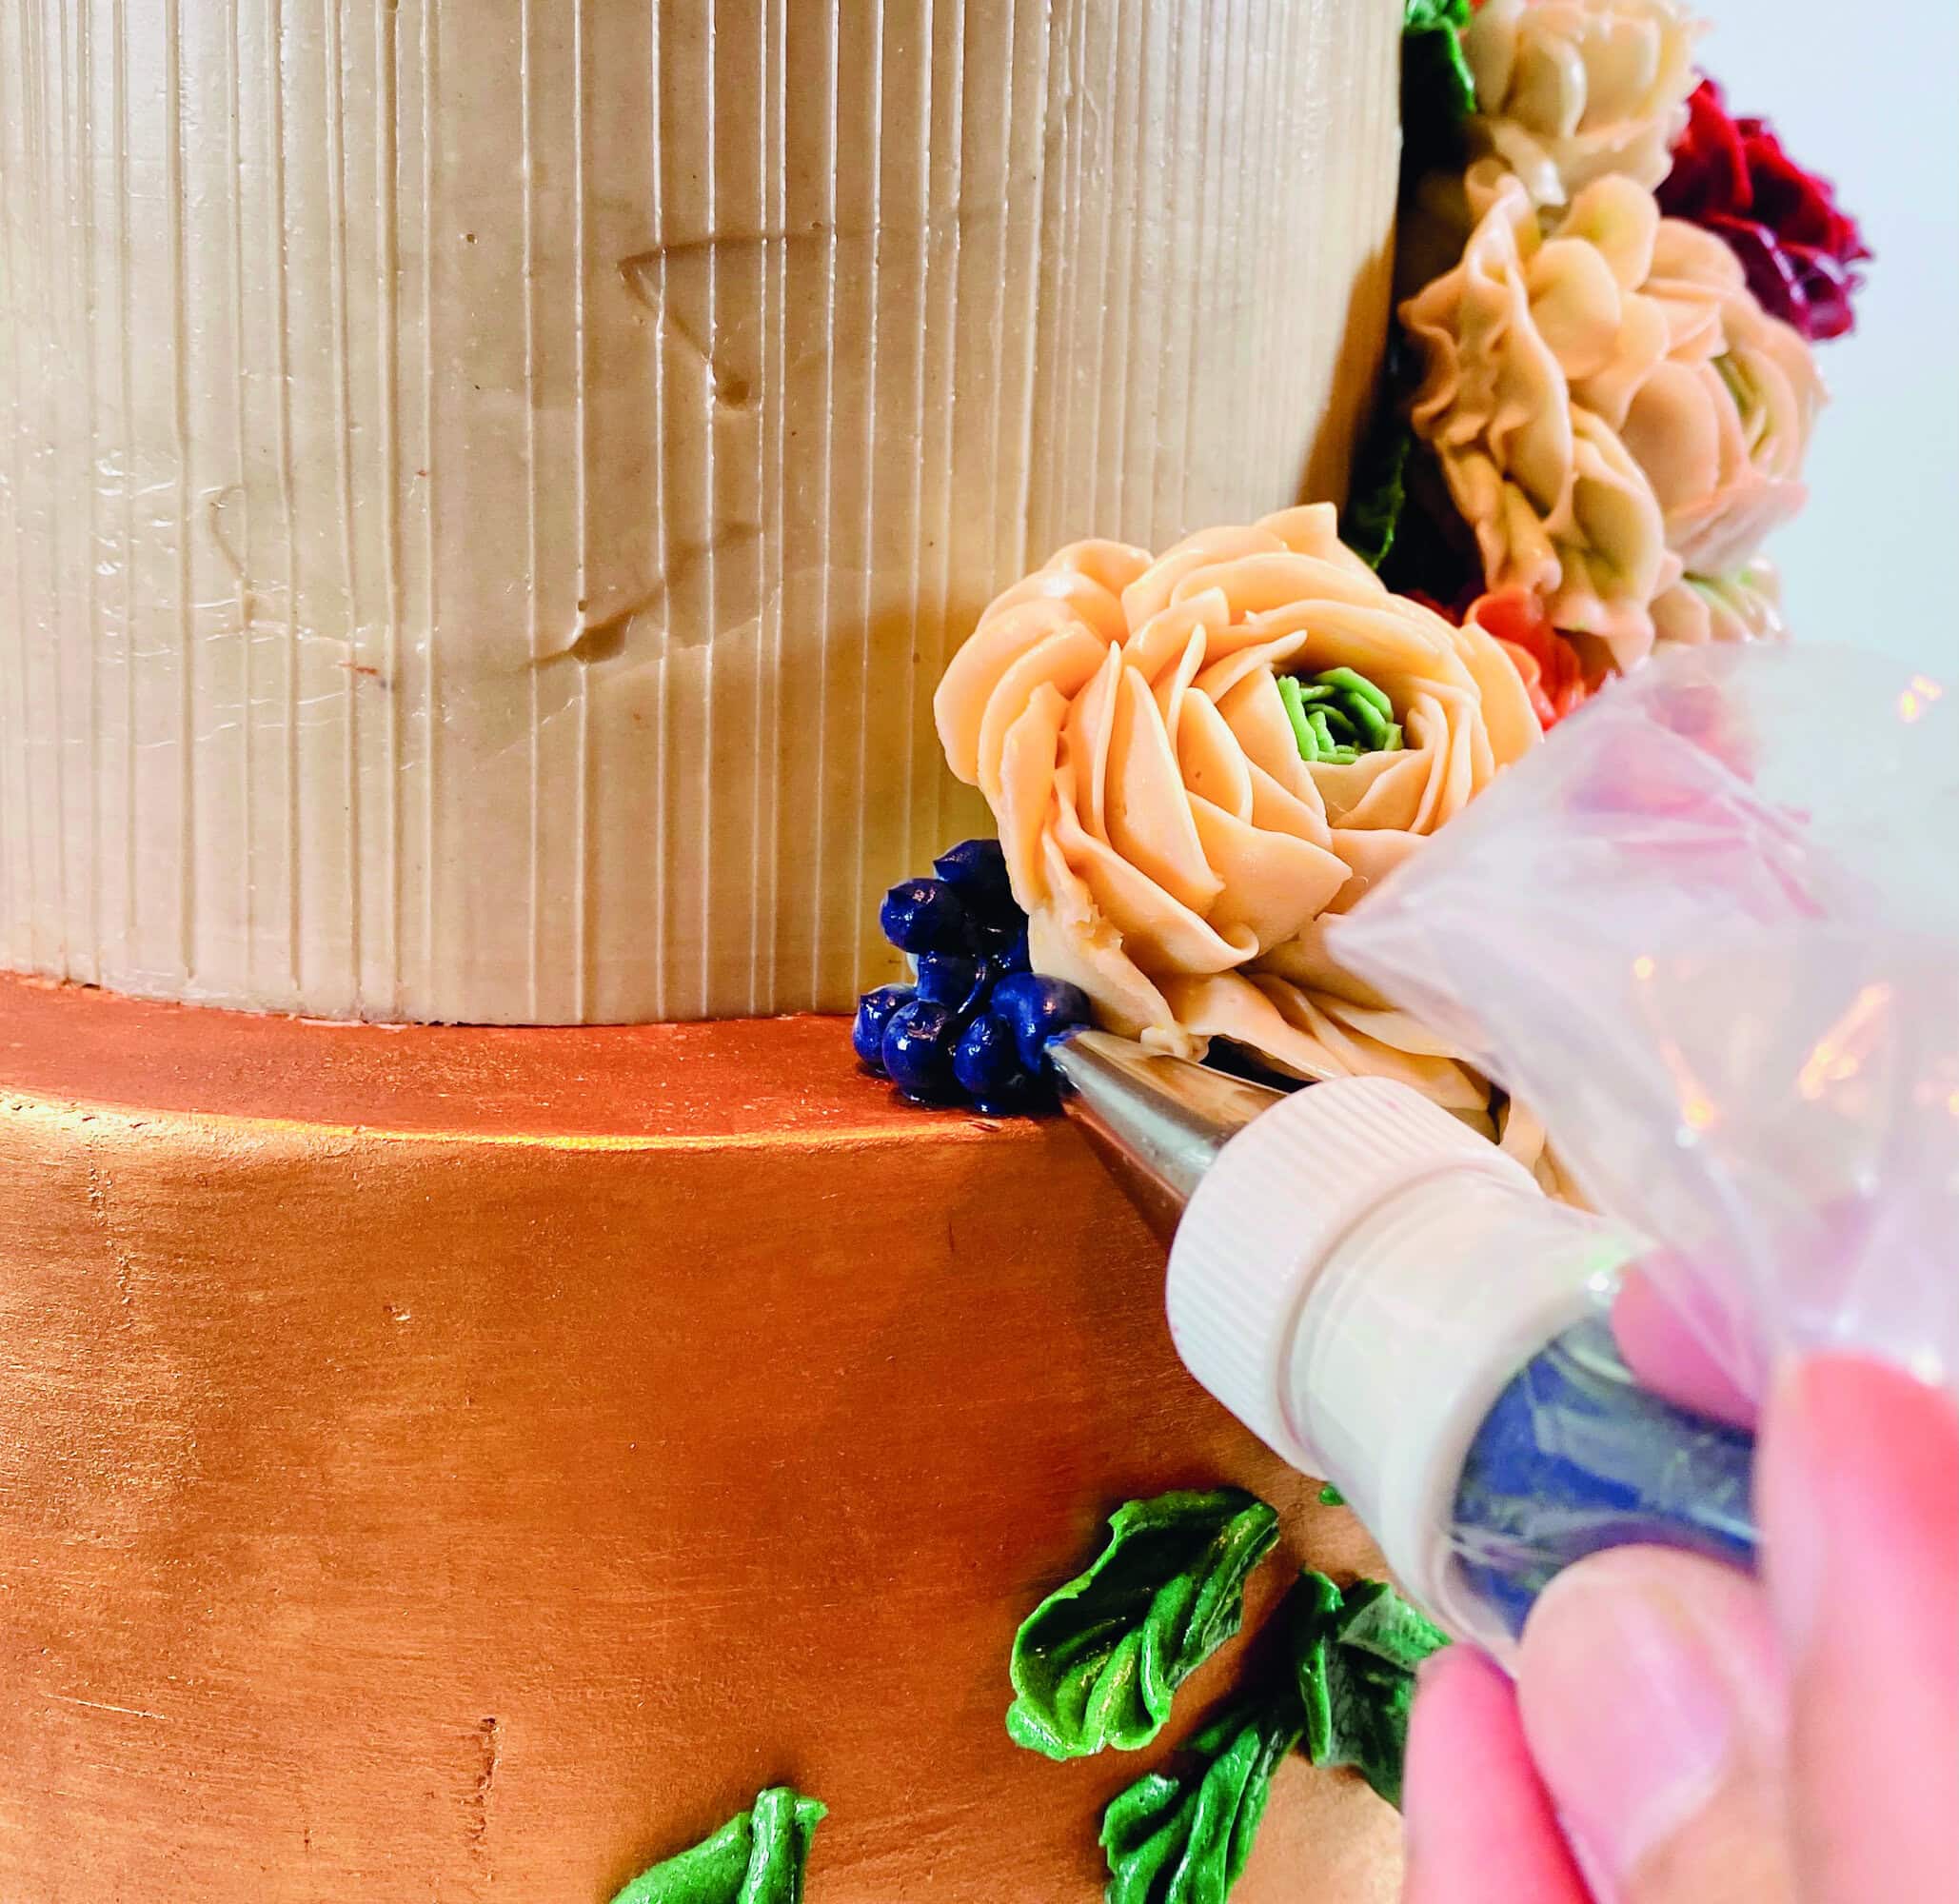
- Attach chilled flowers to the cake using a generous amount of white buttercream in a piping bag fitted with a coupler. Position mixed flowers at opposing ends of the cake and in between the leaves. Touch up any smeared buttercream and rough edges on florals and leaves gently with a toothpick.
- Fill a piping bag fitted with a #8 piping tip with small amount of dark blue buttercream and pipe clusters of blueberries to fill in gaps and to cover any underlying white buttercream.
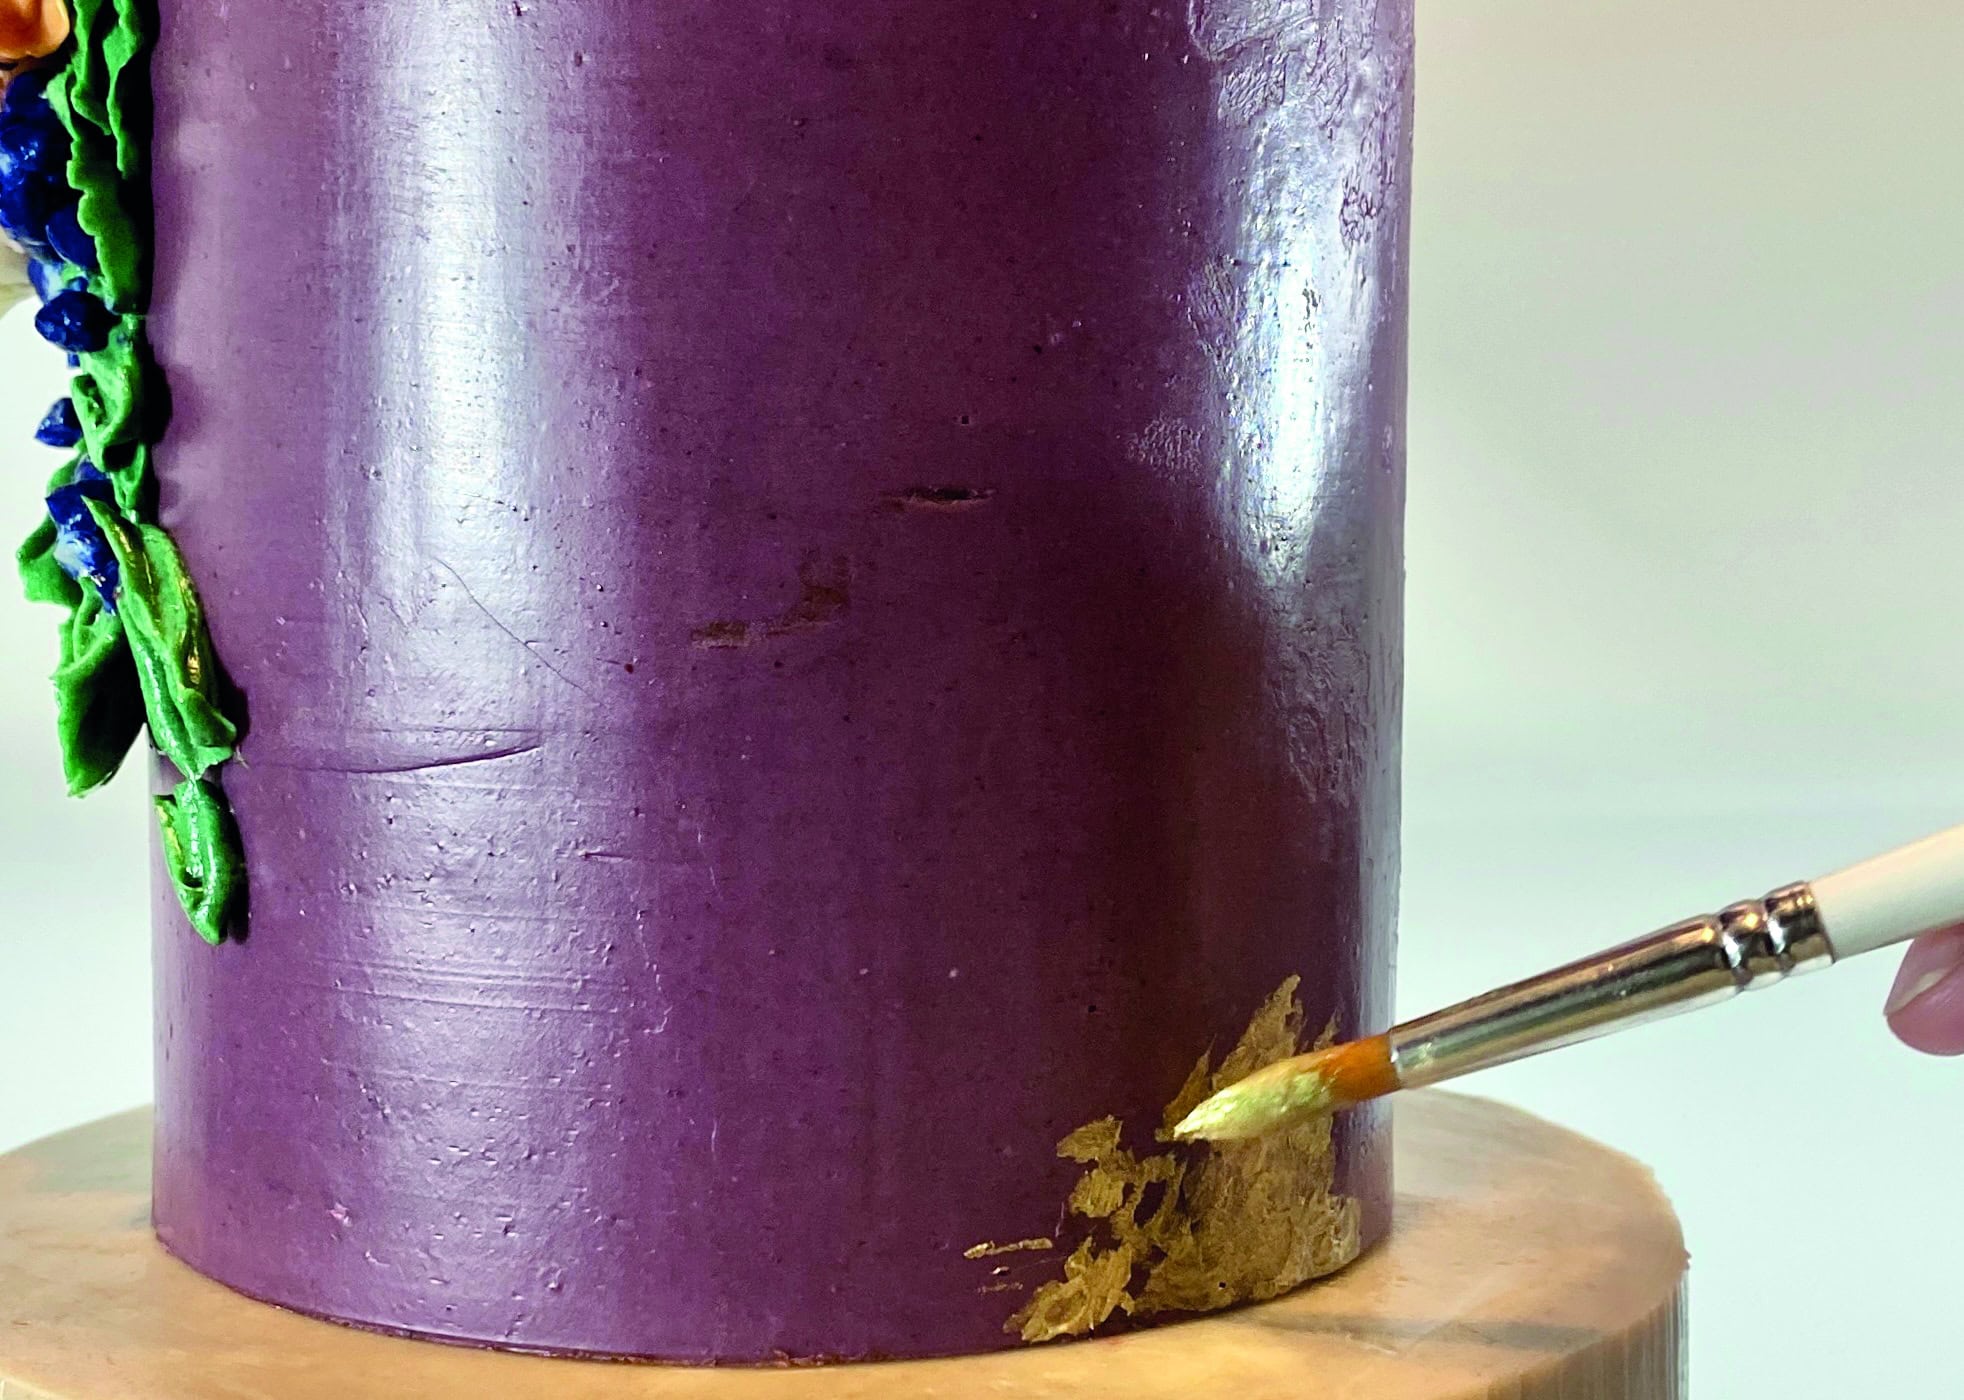
- With the gold luster dust mix, paint the opposing corners of the top tier with a round paintbrush using a dabbing motion to add texture. Use a paper towel to gently remove any excess.
This tutorial originally appeared in the September/October 2021 issue of American Cake Decorating magazine.

Linh Tran
Linh Tran is a self-taught cake artist based in the San Francisco Bay Area from Orinda, California. Her passion for cake design began in 2014, coinciding with the birth of her daughter, Nana. Being surrounded by nature, Linh is constantly inspired—particularly by florals—which is seen throughout her work with buttercream. In addition to creating bespoke designs, Linh also offers tutorials to local clients. Piping buttercream florals brings her so much joy and serenity, for which she is happy to share these techniques with others.