

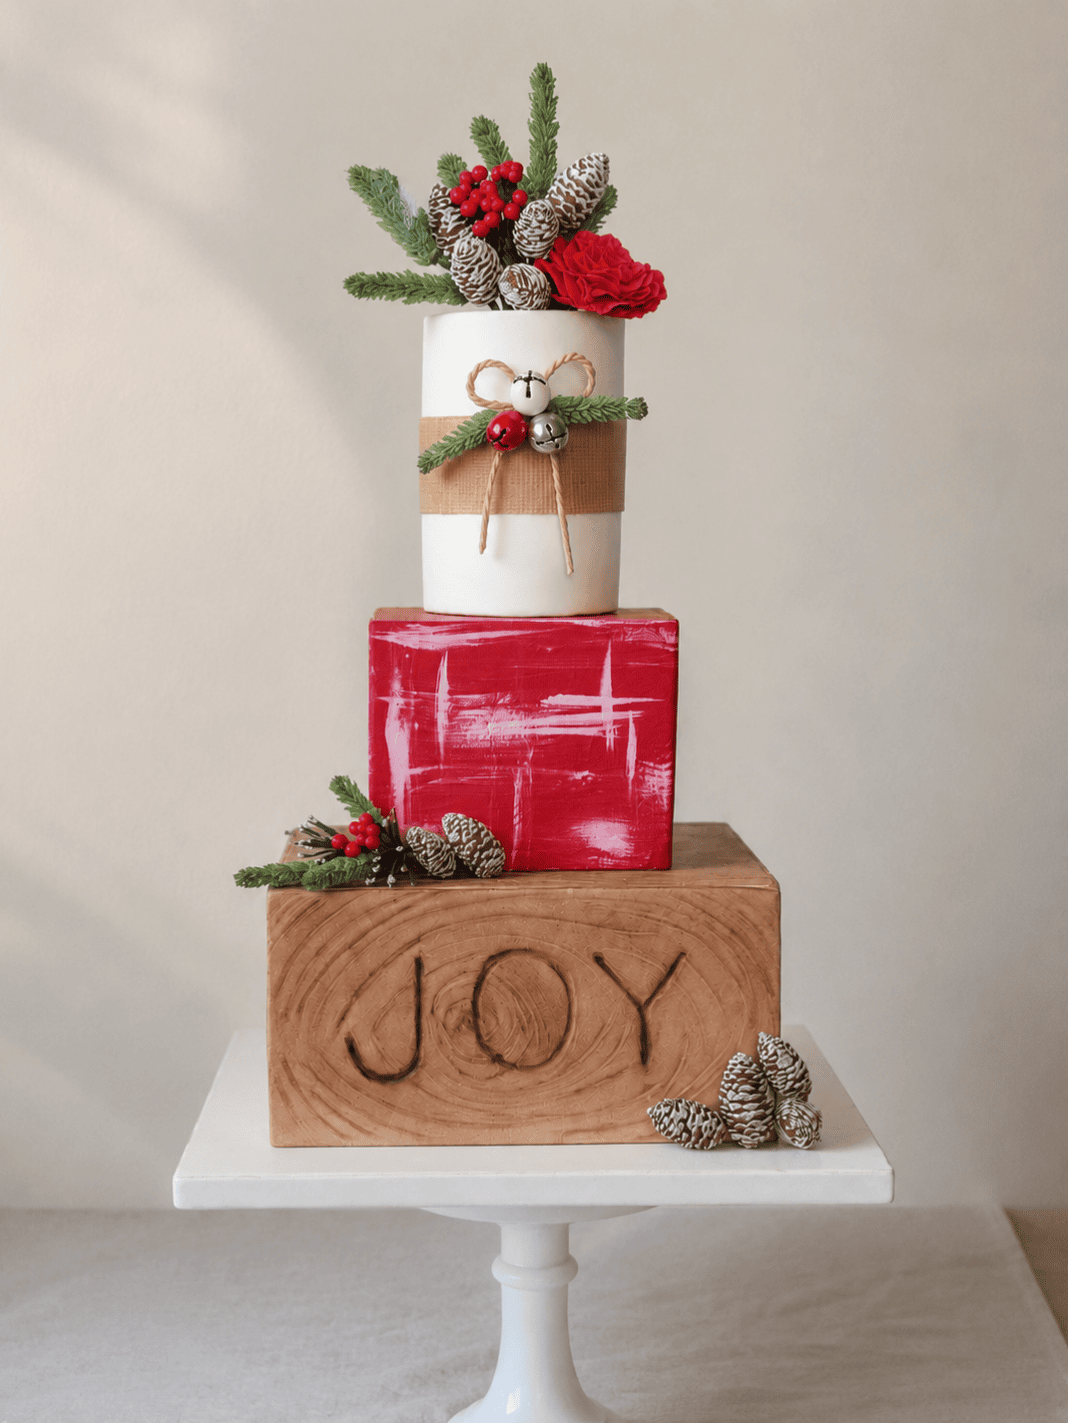
Bring the beauty of nature to your cake designs! A realistic wood grain finish adds warmth, texture, and rustic charm to any cake, making it perfect for holiday celebrations and special occasions. With a few simple tools and decorating techniques, you’ll be able to create engraved details and lifelike wood texture with ease. In this tutorial with American Cake Decorating, learn how to make a stunning fondant wood grain cake design by Ana Peck.
Edibles:
- Light brown fondant
- Brown petal dust
Equipment:
- Rolling pin
- Metal edge ruler
- Dresden tool
- Wax paper
- Large round brush
- Cosmetic sponge
- Small flat brush
Make the Fondant Wood Grain Cake
- Roll light brown fondant to ⅛-inch thickness.
- Using the metal edge ruler, cut fondant panels to cover each side of the cake and the top.
- For the front-facing panel, use the Dresden tool to freehand the letters, applying medium pressure. The letters don’t have to be perfect for this rustic look.
- Use the narrower side of the Dresden tool to create the wood grain look. Start with a center circle and expand in a radial pattern to each side of the fondant panel.


- After the wood grain pattern is complete, apply the fondant panel to the cake. If any wood grain definition is lost after applying to the cake, use the Dresden tool to go over the indentations as needed.
- The remainder of the fondant panels are created with wood grain texture technique only.
- Let the fondant dry before applying petal dust to the surface.
- Place brown petal dust on a piece of wax paper.
- Use a large round brush to dust the entire fondant surface.
- Remove any excess, undesired dust using a cosmetic sponge.
- Use a small flat brush to dust inside the indentation of each letter and the wood grain indentations to create depth.


Want the rest of the fondant wood grain cake tutorial? Check out the November/December 2022 issue of ACD.