


Modern buttercream cakes don’t need flowers to make a statement. Erin Gardner shows how layering stenciled leaves in varying shades of green creates this botanical buttercream leaf stencil cake that’s both elegant and surprisingly easy to achieve. Inspired by the growing popularity of foliage-forward wedding décor, this technique uses buttercream stencils to add texture, depth, and movement without relying on piped florals or wafer paper.
Instead of traditional blooms, overlapping botanical stencils create a contemporary look that’s clean, artistic, and full of dimension. The layered shades of green add depth and visual interest while keeping the overall design refined and versatile. Follow this step-by-step tutorial to learn Erin’s buttercream stenciling technique and create a modern leaf cake that’s perfect for weddings, birthdays, and any celebration calling for a fresh, elegant design.
Edibles:
- 3 tiers of cake, crumb-coated and chilled
- Buttercream: gray, white, leaf green, and forest green
- Shortening
Equipment:
- Piping bags
- Bench scraper
- Leaf stencils
- Offset spatulas
Prepare the Cakes
- Set the bottom tier on a turntable. Fill one piping bag with gray buttercream and the other with plain (white or ivory). Snip the tips off the bags, leaving quarter-size openings.
- Pipe horizontal lines of buttercream slowly and carefully, alternating colors, all the way around the cake.
- Hold the bench scraper blade vertically against the side of the cake. Smooth the stripes by holding the scraper still while the turntable spins. Clean the scraper frequently to keep the stripes as crisp as possible. Repeat until your cake is #smoothenough.
- Knock down any buttercream sticking up over the top of the cake using an offset spatula, just as you would when finishing a cake with one color of buttercream.


Erin notes: Finish the top two cakes with a layer of gray buttercream. Place all the cakes in the fridge to chill before stenciling, for at least an hour and up to overnight.
Prepare the Leaf Stencils
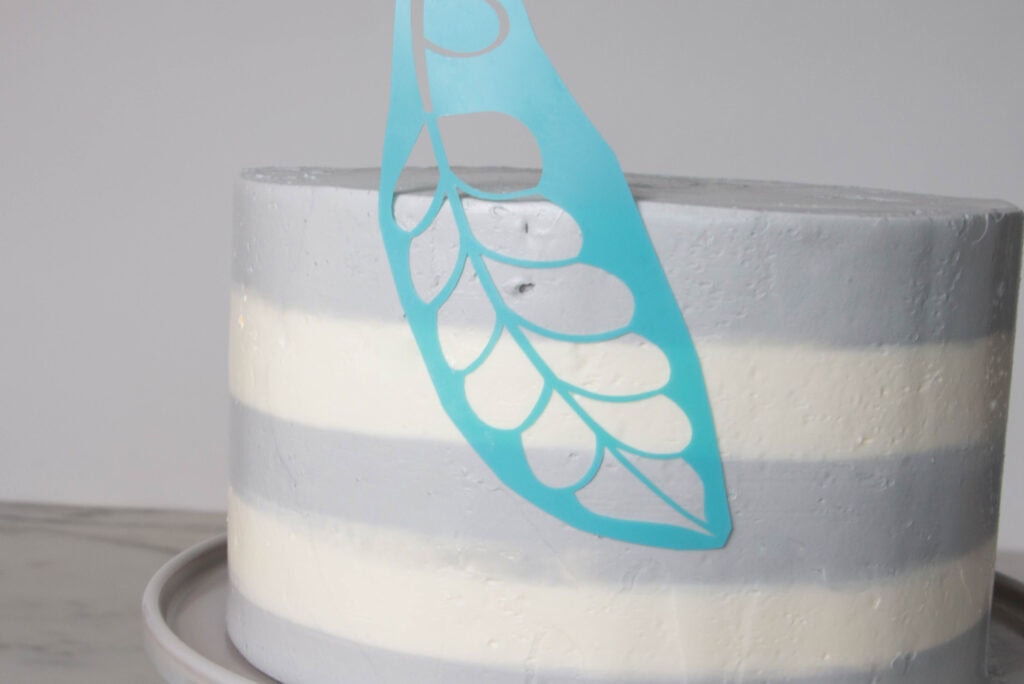
- The stencils I purchased came as large sheets with a few different-sized leaves on each. To make life easier, cut the stencil to separate the leaves as shown.
- Use the tip of your finger to spread a whisper-thin layer of shortening on the back of each stencil. The shortening will help the stencil stick to the chilled cake while also helping it to release without smudging the buttercream. Keep a damp dish towel or stack of paper towels nearby to wipe the stencil clean between each leaf.


Stencil the Leaves
- Gently press the greased side of one of the leaf stencils onto the side of the bottom tier, making sure it is fully adhered to the cake.
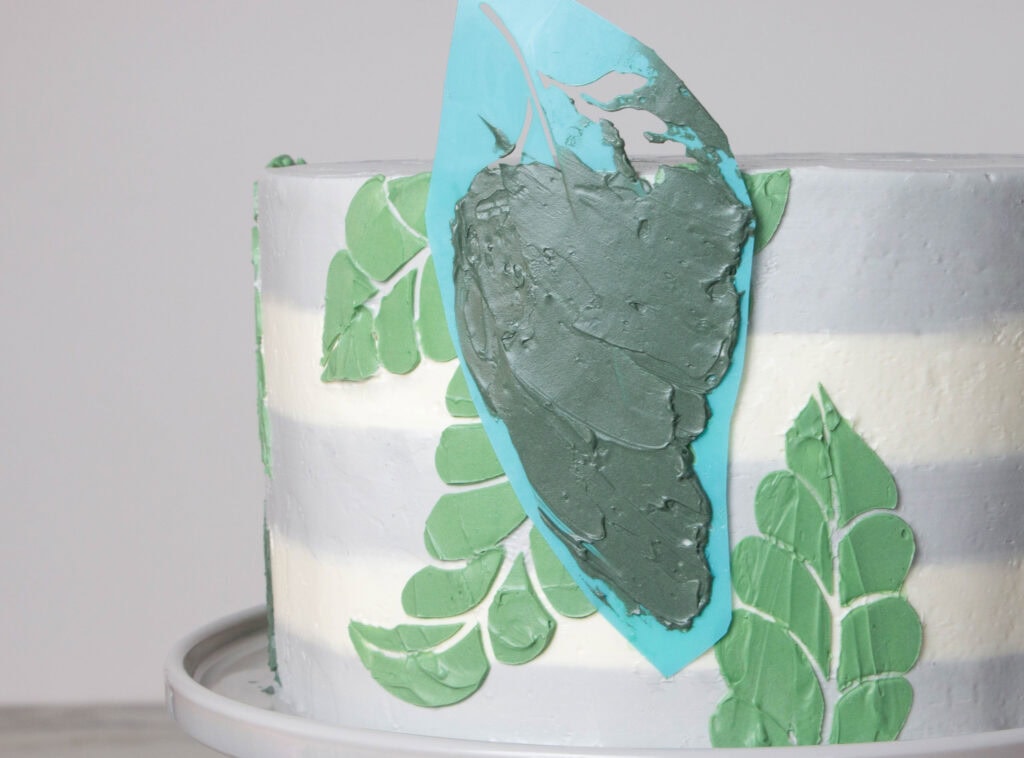
- Use an offset spatula to spread the leaf green buttercream over the stencil.
- To achieve perfectly smooth stenciled buttercream, use a flexible piece of acetate instead of an icing spatula for the final few passes. The thin layer of buttercream you spread over the stencil will set up very quickly due to the temperature of the cold cake below. Carefully peel the stencil away from the cake while the buttercream is still soft. If you allow it to harden, removing the stencil will cause it to crack or lift from the cake.
- Wipe off any excess buttercream from the stencil, then repeat the process on the rest of the cake and the other two cakes. Pop the cakes back in the fridge to ensure the first layer of leaves is completely firm before moving on, 15–20 minutes.


Repeat the Process
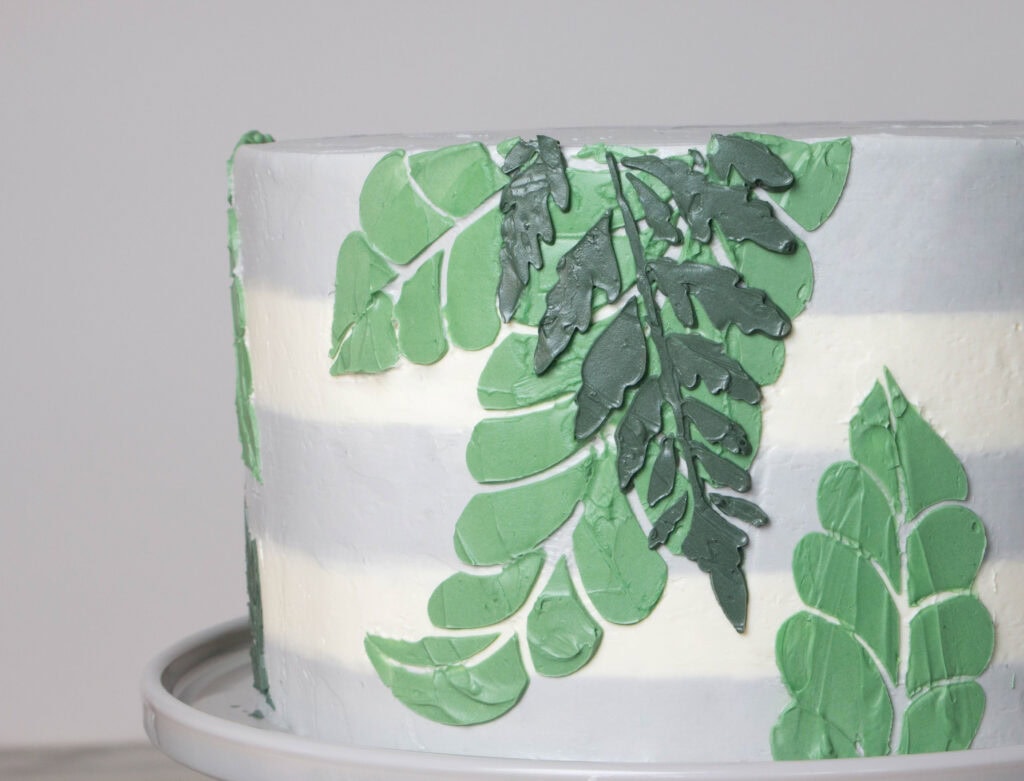
- Repeat the same stenciling process with the second leaf shape and darker shade of green buttercream. Apply the stencil so that it overlaps some of the first layer of leaves. Quickly return the cake to the fridge if any of the first layer of leaves begin to soften.

Stack the Cakes
- Stack the cakes and line the leaves up so that they appear to flow over the edges of the cakes. Use the tip of an icing spatula to drag lines between the leaves on the solid gray tiers.


Erin’s Top Stenciling Tips:
- I found that with these stencils, the standard spatula worked best with the rounded leaves and the pointed spatula worked better with the more detailed ferns.
- If you accidentally smear buttercream outside of the stencil, don’t stress it! If the cake is still very cold, just carefully scrape away the buttercream with the tip of a sharp knife. If the buttercream has softened, pop it back in the fridge and allow the cake and smudge to firm back up before lifting away the unwanted buttercream.
- To stencil the bottom edge of a cake, slide it to the side of the turntable and stick the stencil on so it hangs over the turntable’s lip.
- Any kind of buttercream can be used with this process. My personal preference is Swiss meringue buttercream (SMBC), because it’s super firm when cold.
This tutorial originally appeared in the July/August 2018 issue of American Cake Decorating.
Erin Gardner
Erin Gardner is a self-taught pastry chef, author, cake-design instructor, wife, mom, and self-described occasional unicorn. After taking an inspiring sugar-flower class in NYC, she decided it was time to strike out on her own. In 2009, she opened Wild Orchid Baking Co. in New Hampshire. Erin has competed on, and won, Food Network’s Sweet Genius, and received nods from both Martha Stewart Weddings and Brides magazine as one of the top wedding-cake pros in the country. After the birth of her second child, Erin made the big decision to move on from Wild Orchid Baking Co. and launch her website, Erin Bakes, where she draws on her fine pastry skills, modern cake-design aesthetic, and overall kitchen MacGyver-ness to create easy, accessible, and delicious recipes and cake-decorating projects.